2011 FORD F350 warning light
[x] Cancel search: warning lightPage 281 of 449
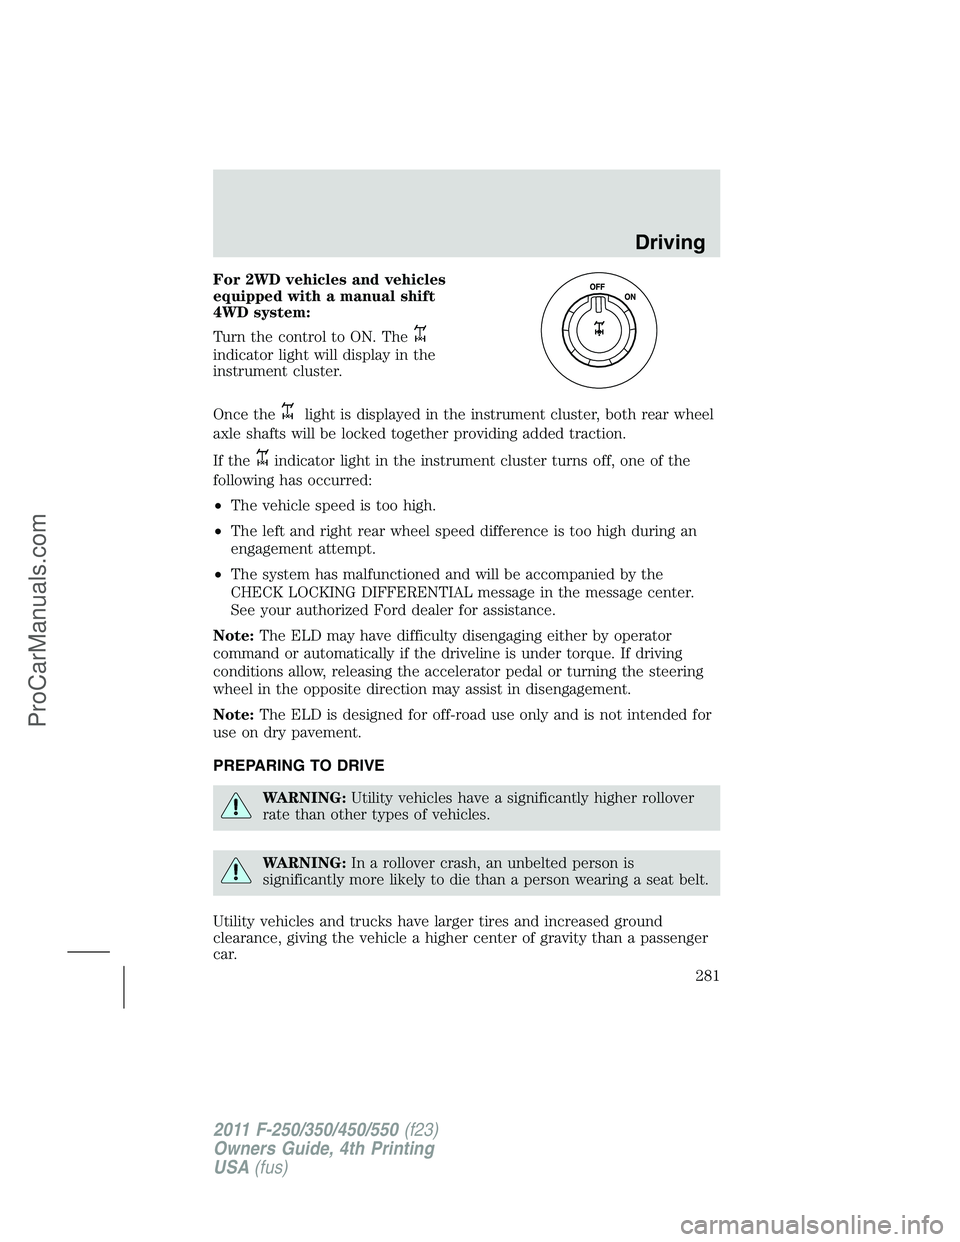
For 2WD vehicles and vehicles
equipped with a manual shift
4WD system:
Turn the control to ON. The
indicator light will display in the
instrument cluster.
Once the
light is displayed in the instrument cluster, both rear wheel
axle shafts will be locked together providing added traction.
If the
indicator light in the instrument cluster turns off, one of the
following has occurred:
•The vehicle speed is too high.
•The left and right rear wheel speed difference is too high during an
engagement attempt.
•The system has malfunctioned and will be accompanied by the
CHECK LOCKING DIFFERENTIAL message in the message center.
See your authorized Ford dealer for assistance.
Note:The ELD may have difficulty disengaging either by operator
command or automatically if the driveline is under torque. If driving
conditions allow, releasing the accelerator pedal or turning the steering
wheel in the opposite direction may assist in disengagement.
Note:The ELD is designed for off-road use only and is not intended for
use on dry pavement.
PREPARING TO DRIVE
WARNING:Utility vehicles have a significantly higher rollover
rate than other types of vehicles.
WARNING:In a rollover crash, an unbelted person is
significantly more likely to die than a person wearing a seat belt.
Utility vehicles and trucks have larger tires and increased ground
clearance, giving the vehicle a higher center of gravity than a passenger
car.
Driving
281
2011 F-250/350/450/550(f23)
Owners Guide, 4th Printing
USA(fus)
ProCarManuals.com
Page 283 of 449
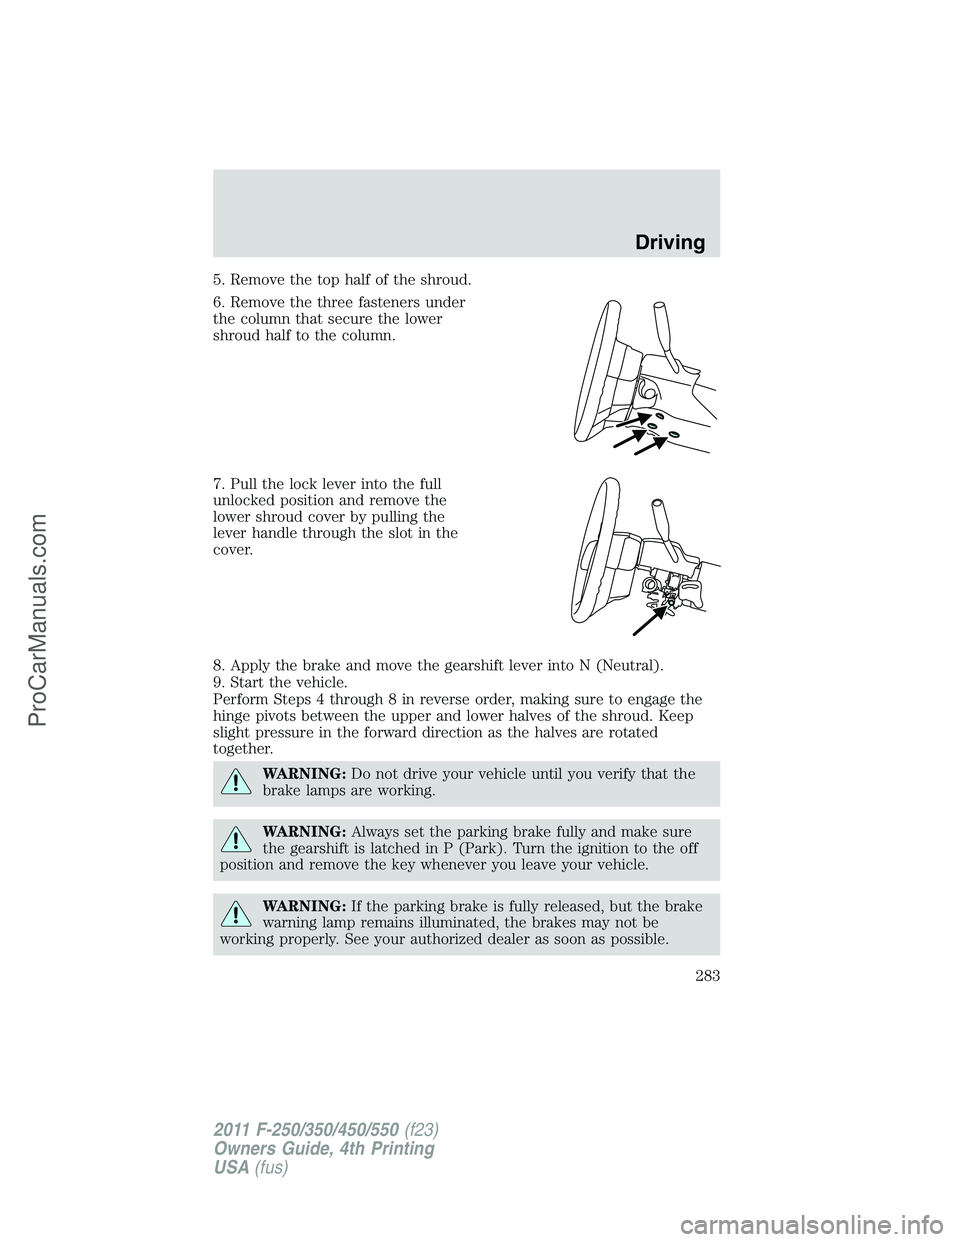
5. Remove the top half of the shroud.
6. Remove the three fasteners under
the column that secure the lower
shroud half to the column.
7. Pull the lock lever into the full
unlocked position and remove the
lower shroud cover by pulling the
lever handle through the slot in the
cover.
8. Apply the brake and move the gearshift lever into N (Neutral).
9. Start the vehicle.
Perform Steps 4 through 8 in reverse order, making sure to engage the
hinge pivots between the upper and lower halves of the shroud. Keep
slight pressure in the forward direction as the halves are rotated
together.
WARNING:Do not drive your vehicle until you verify that the
brake lamps are working.
WARNING:Always set the parking brake fully and make sure
the gearshift is latched in P (Park). Turn the ignition to the off
position and remove the key whenever you leave your vehicle.
WARNING:If the parking brake is fully released, but the brake
warning lamp remains illuminated, the brakes may not be
working properly. See your authorized dealer as soon as possible.
Driving
283
2011 F-250/350/450/550(f23)
Owners Guide, 4th Printing
USA(fus)
ProCarManuals.com
Page 284 of 449

AUTOMATIC TRANSMISSION OPERATION
Understanding the shift positions of the 5–speed automatic
transmission (if equipped)
This vehicle is equipped with an adaptive transmission shift strategy.
Adaptive transmission shift strategy offers the optimal transmission
operation and shift quality. When the vehicle’s battery has been
disconnected for any type of service or repair, the transmission will need
to relearn the normal shift strategy parameters, much like having to reset
your radio stations when your vehicle battery has been disconnected.
The adaptive transmission shift strategy allows the transmission to
relearn these operating parameters. This learning process could take
several transmission upshifts and downshifts; during this learning
process, slightly firmer shifts may occur. After this learning process,
normal shift feel and shift scheduling will resume.
P (Park)
This position locks the transmission and prevents the rear wheels from
turning.
To put your vehicle in gear:
•Start the engine
•Press the brake pedal
•Move the gearshift lever into the desired gear
To put your vehicle in P (Park):
•Come to a complete stop
•Move the gearshift lever and securely latch it in P (Park)
WARNING:Always set the parking brake fully and make sure
the gearshift is latched in P (Park). Turn the ignition to the off
position and remove the key whenever you leave your vehicle.
R (Reverse)
With the gearshift lever in R (Reverse), the vehicle will move backward.
Always come to a complete stop before shifting into and out of R
(Reverse).
Driving
284
2011 F-250/350/450/550(f23)
Owners Guide, 4th Printing
USA(fus)
ProCarManuals.com
Page 285 of 449
N (Neutral)
With the gearshift lever in N (Neutral), the vehicle can be started and is
free to roll. Hold the brake pedal down while in this position.
D (Overdrive) with Tow/Haul Off
D (Overdrive) with tow/haul off is the normal driving position for the
best fuel economy. The overdrive function allows automatic upshifts and
downshifts through gears one through five.
D (Overdrive) with Tow/Haul On
The tow/haul feature improves transmission operation when towing a
trailer or a heavy load. All transmission gear ranges are available when
using tow/haul.
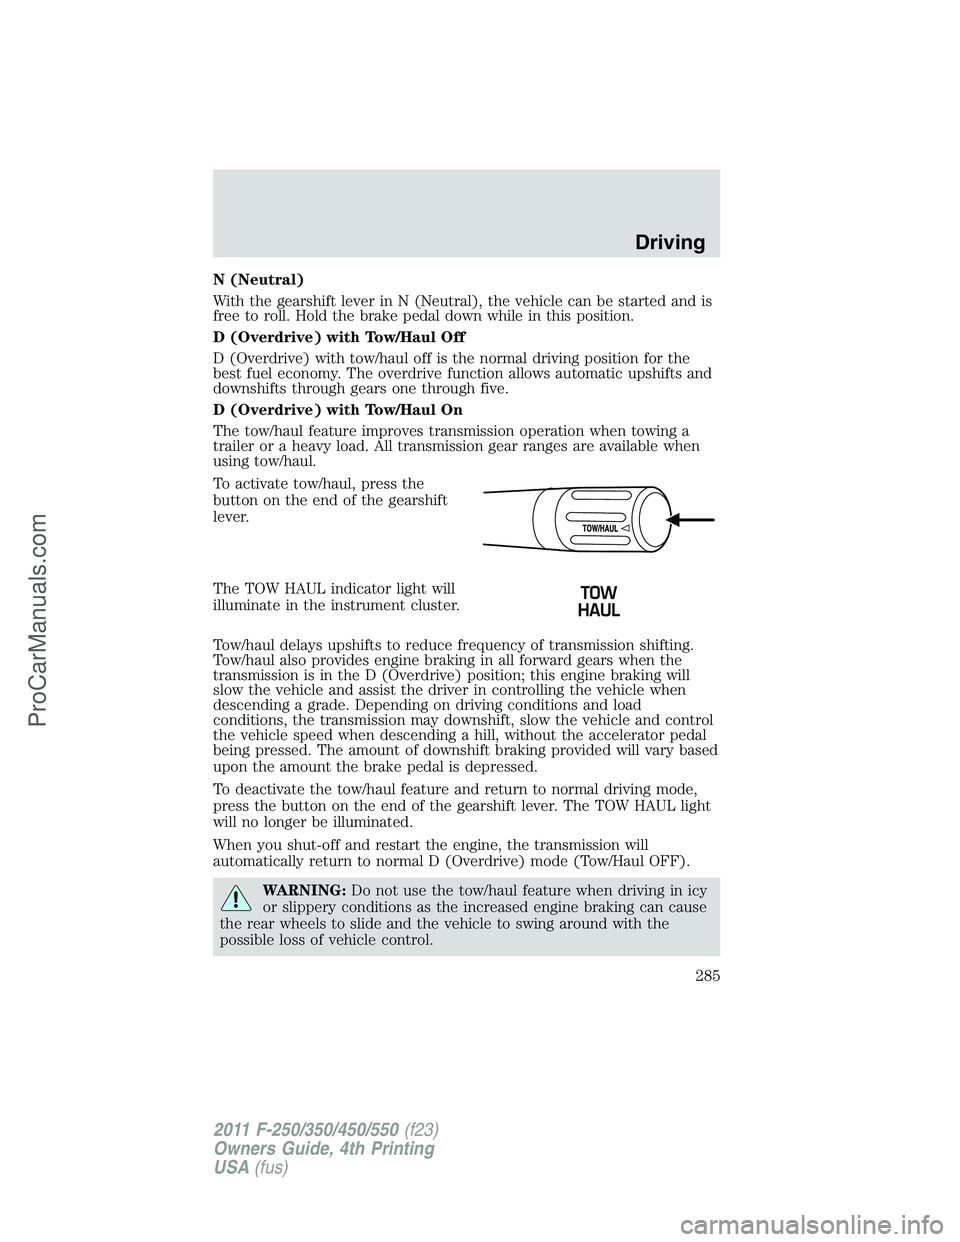
To activate tow/haul, press the
button on the end of the gearshift
lever.
The TOW HAUL indicator light will
illuminate in the instrument cluster.
Tow/haul delays upshifts to reduce frequency of transmission shifting.
Tow/haul also provides engine braking in all forward gears when the
transmission is in the D (Overdrive) position; this engine braking will
slow the vehicle and assist the driver in controlling the vehicle when
descending a grade. Depending on driving conditions and load
conditions, the transmission may downshift, slow the vehicle and control
the vehicle speed when descending a hill, without the accelerator pedal
being pressed. The amount of downshift braking provided will vary based
upon the amount the brake pedal is depressed.
To deactivate the tow/haul feature and return to normal driving mode,
press the button on the end of the gearshift lever. The TOW HAUL light
will no longer be illuminated.
When you shut-off and restart the engine, the transmission will
automatically return to normal D (Overdrive) mode (Tow/Haul OFF).
WARNING:Do not use the tow/haul feature when driving in icy
or slippery conditions as the increased engine braking can cause
the rear wheels to slide and the vehicle to swing around with the
possible loss of vehicle control.
Driving
285
2011 F-250/350/450/550(f23)
Owners Guide, 4th Printing
USA(fus)
ProCarManuals.com
Page 288 of 449
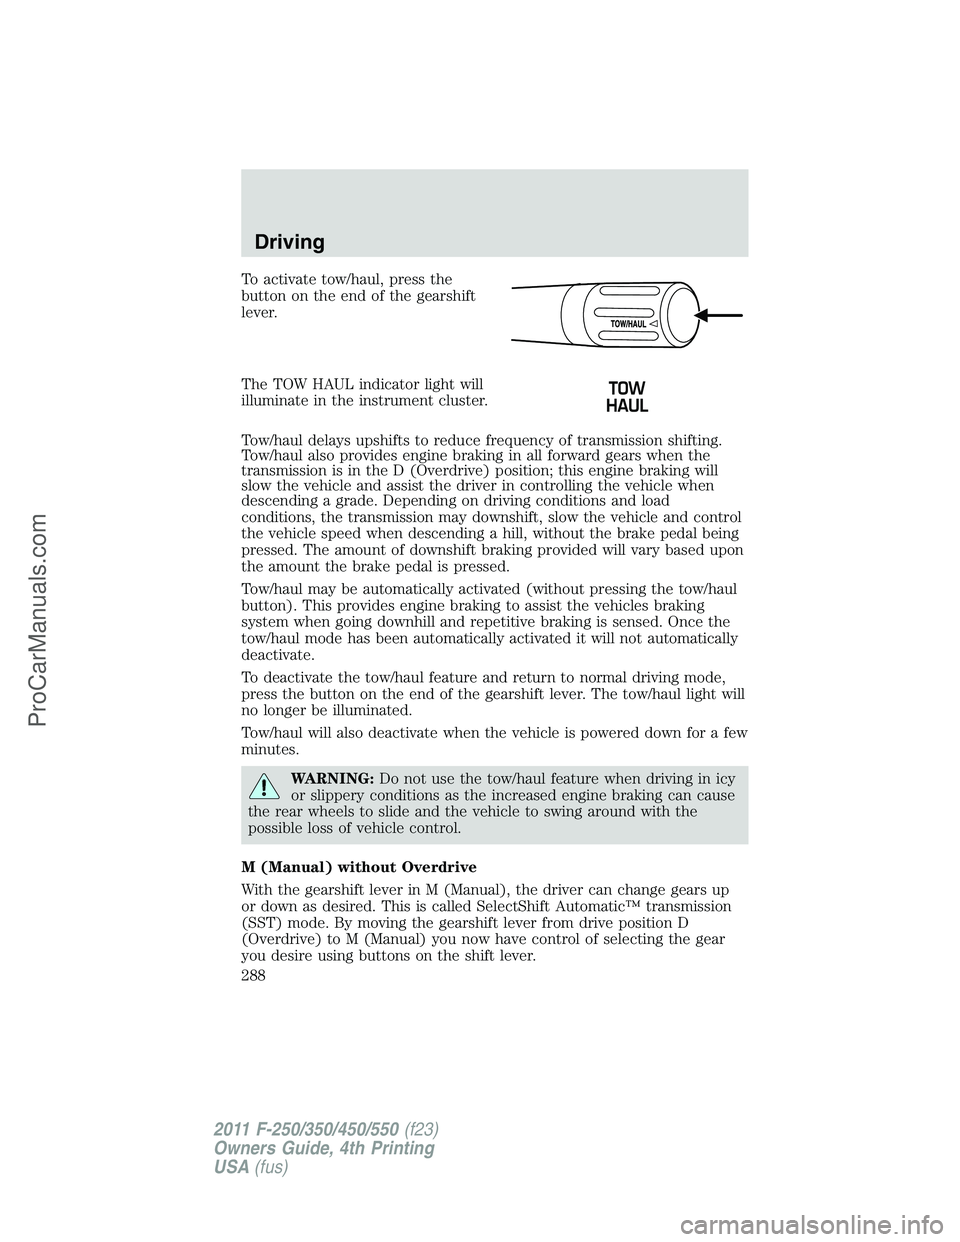
To activate tow/haul, press the
button on the end of the gearshift
lever.
The TOW HAUL indicator light will
illuminate in the instrument cluster.
Tow/haul delays upshifts to reduce frequency of transmission shifting.
Tow/haul also provides engine braking in all forward gears when the
transmission is in the D (Overdrive) position; this engine braking will
slow the vehicle and assist the driver in controlling the vehicle when
descending a grade. Depending on driving conditions and load
conditions, the transmission may downshift, slow the vehicle and control
the vehicle speed when descending a hill, without the brake pedal being
pressed. The amount of downshift braking provided will vary based upon
the amount the brake pedal is pressed.
Tow/haul may be automatically activated (without pressing the tow/haul
button). This provides engine braking to assist the vehicles braking
system when going downhill and repetitive braking is sensed. Once the
tow/haul mode has been automatically activated it will not automatically
deactivate.
To deactivate the tow/haul feature and return to normal driving mode,
press the button on the end of the gearshift lever. The tow/haul light will
no longer be illuminated.
Tow/haul will also deactivate when the vehicle is powered down for a few
minutes.
WARNING:Do not use the tow/haul feature when driving in icy
or slippery conditions as the increased engine braking can cause
the rear wheels to slide and the vehicle to swing around with the
possible loss of vehicle control.
M (Manual) without Overdrive
With the gearshift lever in M (Manual), the driver can change gears up
or down as desired. This is called SelectShift Automatic™ transmission
(SST) mode. By moving the gearshift lever from drive position D
(Overdrive) to M (Manual) you now have control of selecting the gear
you desire using buttons on the shift lever.
Driving
288
2011 F-250/350/450/550(f23)
Owners Guide, 4th Printing
USA(fus)
ProCarManuals.com
Page 291 of 449

Hill start assist (HSA)
The hill start assist feature makes it easier to pull away when the vehicle
is on a slope without the need to use the parking brake. When the hill
start assist feature is active, the vehicle will remain stationary on the
slope for up to two seconds after you release the brake pedal. During
this time, you have time to move your foot from the brake to the
accelerator pedal and pull away. The brakes are released automatically
once the engine has developed sufficient drive to prevent the vehicle
from rolling down the slope. This is an advantage when pulling away on a
slope; for example from a car park ramp, traffic lights or when reversing
uphill into a parking space.
WARNING:The hill start assist feature does not replace the
parking brake. When you leave the vehicle, always apply the
parking brake and select first or reverse gear.
Using hill start assist
The hill start assist feature is activated automatically when the vehicle is
stopped on a slope greater than five degrees. The hill start assist feature
operates with the vehicle facing downhill if reverse gear is selected. The
hill start assist feature will not operate if the parking brake is activated.
WARNING:You must remain in the vehicle once you have
activated the hill start assist feature.
Activating hill start assist
1. Press the brake pedal to bring the vehicle to a complete standstill.
Keep the brake pedal pressed.
2. If the sensors detect that the vehicle is on a slope, the hill start assist
feature will be activated automatically.
3. When you remove your foot from the brake pedal, the vehicle will
remain on the slope without rolling away for approximately up to two
seconds. This hold time will automatically be extended if you are in the
process of driving off.
4. Drive off in the normal manner. The brakes will be released
automatically.
WARNING:If the engine is revved excessively, or if a
malfunction is detected when the hill start assist feature is
active, the hill start assist feature will be deactivated.
Driving
291
2011 F-250/350/450/550(f23)
Owners Guide, 4th Printing
USA(fus)
ProCarManuals.com
Page 292 of 449
If your vehicle gets stuck in mud or snow
If your vehicle gets stuck in mud or snow, it may be rocked out by
shifting between forward and reverse gears, stopping between shifts in a
steady pattern. Press lightly on the accelerator in each gear.
Do not rock the vehicle if the engine is not at normal operating
temperature or damage to the transmission may occur.
Do not rock the vehicle for more than a minute or damage to the
transmission and tires may occur, or the engine may overheat.
REVERSE SENSING SYSTEM (IF EQUIPPED)
The reverse sensing system (RSS) sounds a tone to warn the driver of
obstacles near the rear bumper when the R (Reverse) is selected and the
vehicle is moving at speeds less than 3 mph (5 km/h). The system is not
effective at speeds above 3 mph (5 km/h) and may not detect certain
angular or moving objects.
WARNING:To help avoid personal injury, please read and
understand the limitations of the reverse sensing system as
contained in this section. Reverse sensing is only an aid for some
(generally large and fixed) objects when moving in reverse on a flat
surface at “parking speeds”. Inclement weather may also affect the
function of the RSS; this may include reduced performance or a false
activation.
WARNING:To help avoid personal injury, always use caution
when in reverse and when using the RSS.
WARNING:This system is not designed to prevent contact with
small or moving objects. The system is designed to provide a
warning to assist the driver in detecting large stationary objects to
avoid damaging the vehicle. The system may not detect smaller
objects, particularly those close to the ground.
WARNING:Certain add-on devices such as large trailer hitches,
bike or surfboard racks and any device that may block the
normal detection zone of the RSS system may create false beeps.
Driving
292
2011 F-250/350/450/550(f23)
Owners Guide, 4th Printing
USA(fus)
ProCarManuals.com
Page 296 of 449
WARNING:The camera system is a reverse aid supplement
device that still requires the driver to use it in conjunction with
the rear view mirror and the side mirrors for maximum coverage.
WARNING:Objects that are close to either corner of the
bumper or under the bumper, might not be seen on the screen
due to the limited coverage of the camera system.
WARNING:Back up as slow as possible since higher speeds
might limit your reaction time to stop the vehicle.
WARNING:Do not use the camera system with the tailgate
open.
If the back end of the vehicle is hit or damaged, then check with your
authorized dealer to have your rearview camera system checked for
proper coverage and operation.
Night time and dark area use
At night time or in dark areas, the camera system relies on the reverse
lamp lighting to produce an image. Therefore it is necessary that both
reverse lamps are operating in order to get a clear image in the dark. If
either of the lamps are not operating, stop using the camera system, at
least in the dark, until the lamp(s) are replaced and functioning.
Servicing
•If the image comes on while the vehicle is not in R (Reverse), have
the system inspected by your authorized dealer.
•If the image is not clear, then check if there is anything covering the
lens such as dirt, mud, ice, snow, etc. If the image is still not clear
after cleaning, have your system inspected by your authorized dealer.
FOUR-WHEEL DRIVE (4WD) OPERATION (IF EQUIPPED)
WARNING:For important information regarding safe operation
of this type of vehicle, seePreparing to drive your vehiclein
this chapter.
When four–wheel drive (4WD) is engaged, power is supplied to all four
wheels through a transfer case. 4WD can be selected when additional
driving power is desired.
Driving
296
2011 F-250/350/450/550(f23)
Owners Guide, 4th Printing
USA(fus)
ProCarManuals.com