2011 FORD F350 belt
[x] Cancel search: beltPage 211 of 449
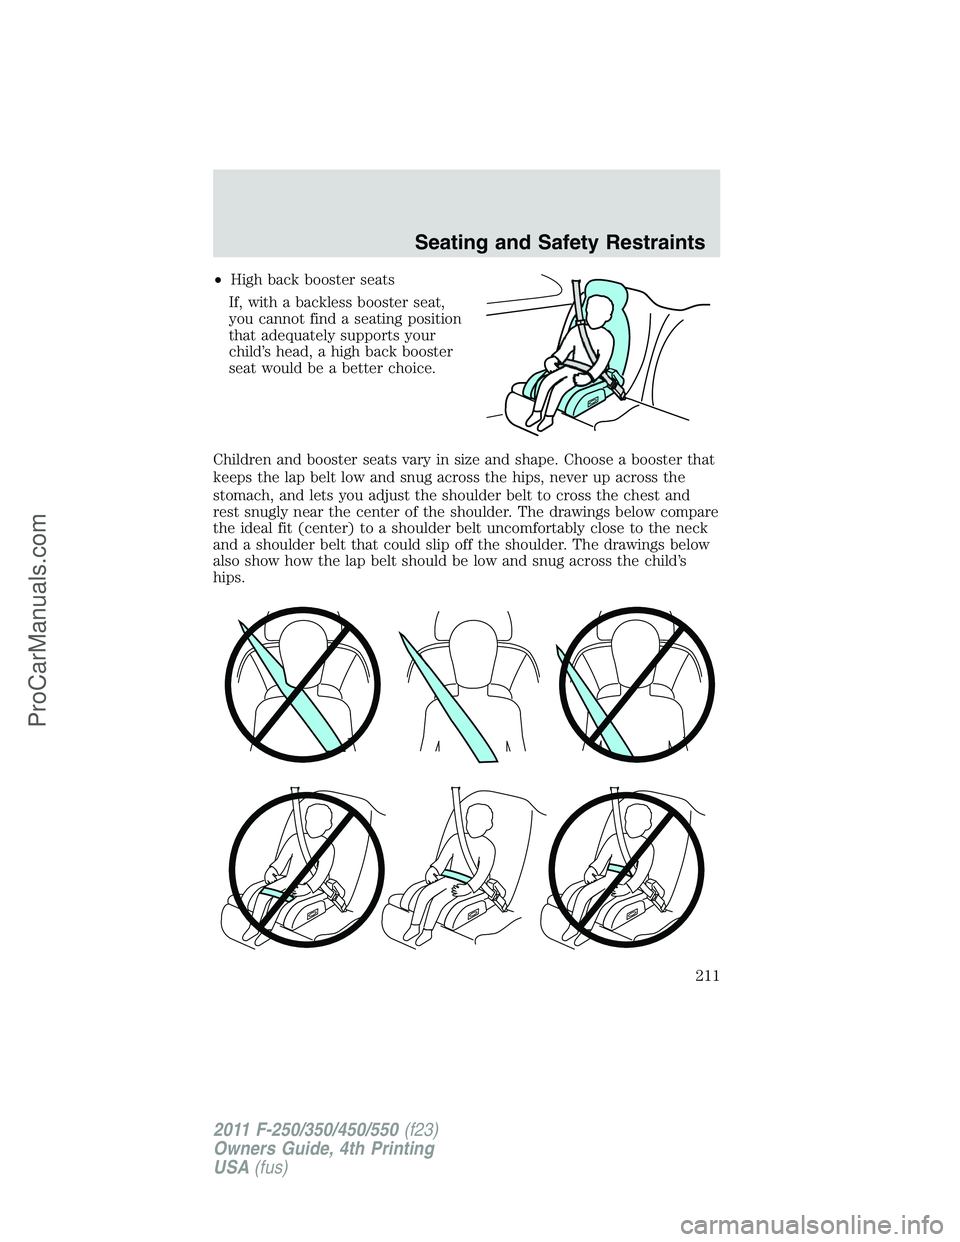
•High back booster seats
If, with a backless booster seat,
you cannot find a seating position
that adequately supports your
child’s head, a high back booster
seat would be a better choice.
Children and booster seats vary in size and shape. Choose a booster that
keeps the lap belt low and snug across the hips, never up across the
stomach, and lets you adjust the shoulder belt to cross the chest and
rest snugly near the center of the shoulder. The drawings below compare
the ideal fit (center) to a shoulder belt uncomfortably close to the neck
and a shoulder belt that could slip off the shoulder. The drawings below
also show how the lap belt should be low and snug across the child’s
hips.
Seating and Safety Restraints
211
2011 F-250/350/450/550(f23)
Owners Guide, 4th Printing
USA(fus)
ProCarManuals.com
Page 212 of 449
If the booster seat slides on the vehicle seat, placing a rubberized mesh
sold as shelf or carpet liner under the booster seat may improve this
condition. Do not introduce any item thicker than this under the booster
seat. Check with the booster seat manufacturer’s instructions.
The importance of shoulder belts
Using a booster without a shoulder belt increases the risk of a child’s
head hitting a hard surface in a collision. For this reason, you should
never use a booster seat with a lap belt only. It is generally best to use a
booster seat with lap/shoulder belts in the back seat.
Move a child to a different seating location if the shoulder belt does not
stay positioned on the shoulder during use.
Follow all instructions provided by the manufacturer of the booster seat.
WARNING:Never place, or allow a child to place, the shoulder
belt under a child’s arm or behind the back because it reduces
the protection for the upper part of the body and may increase the risk
of injury or death in a collision.
Child restraint and safety belt maintenance
Inspect the vehicle safety belts and child safety seat systems periodically
to make sure they work properly and are not damaged. Inspect the
vehicle and child seat safety belts to make sure there are no nicks, tears
or cuts. Replace if necessary. All vehicle safety belt assemblies, including
retractors, buckles, front safety belt buckle assemblies, buckle support
assemblies (slide bar-if equipped), shoulder belt height adjusters (if
equipped), shoulder belt guide on seatback (if equipped), child safety
seat LATCH and tether anchors, and attaching hardware, should be
inspected after a collision. Refer to the child restraint manufacturer’s
instructions for additional inspection and maintenance information
specific to the child restraint. Ford Motor Company recommends that all
safety belt assemblies in use in vehicles involved in a collision be
replaced. However, if the collision was minor and an authorized dealer
finds that the belts do not show damage and continue to operate
properly, they do not need to be replaced. Safety belt assemblies not in
use during a collision should also be inspected and replaced if either
damage or improper operation is noted.
For proper care of soiled safety belts, refer toInteriorin theCleaning
chapter.
Seating and Safety Restraints
212
2011 F-250/350/450/550(f23)
Owners Guide, 4th Printing
USA(fus)
ProCarManuals.com
Page 213 of 449
WARNING:Failure to inspect and if necessary replace the
safety belt assembly or child restraint system under the above
conditions could result in severe personal injuries in the event of a
collision.
Seating and Safety Restraints
213
2011 F-250/350/450/550(f23)
Owners Guide, 4th Printing
USA(fus)
ProCarManuals.com
Page 214 of 449
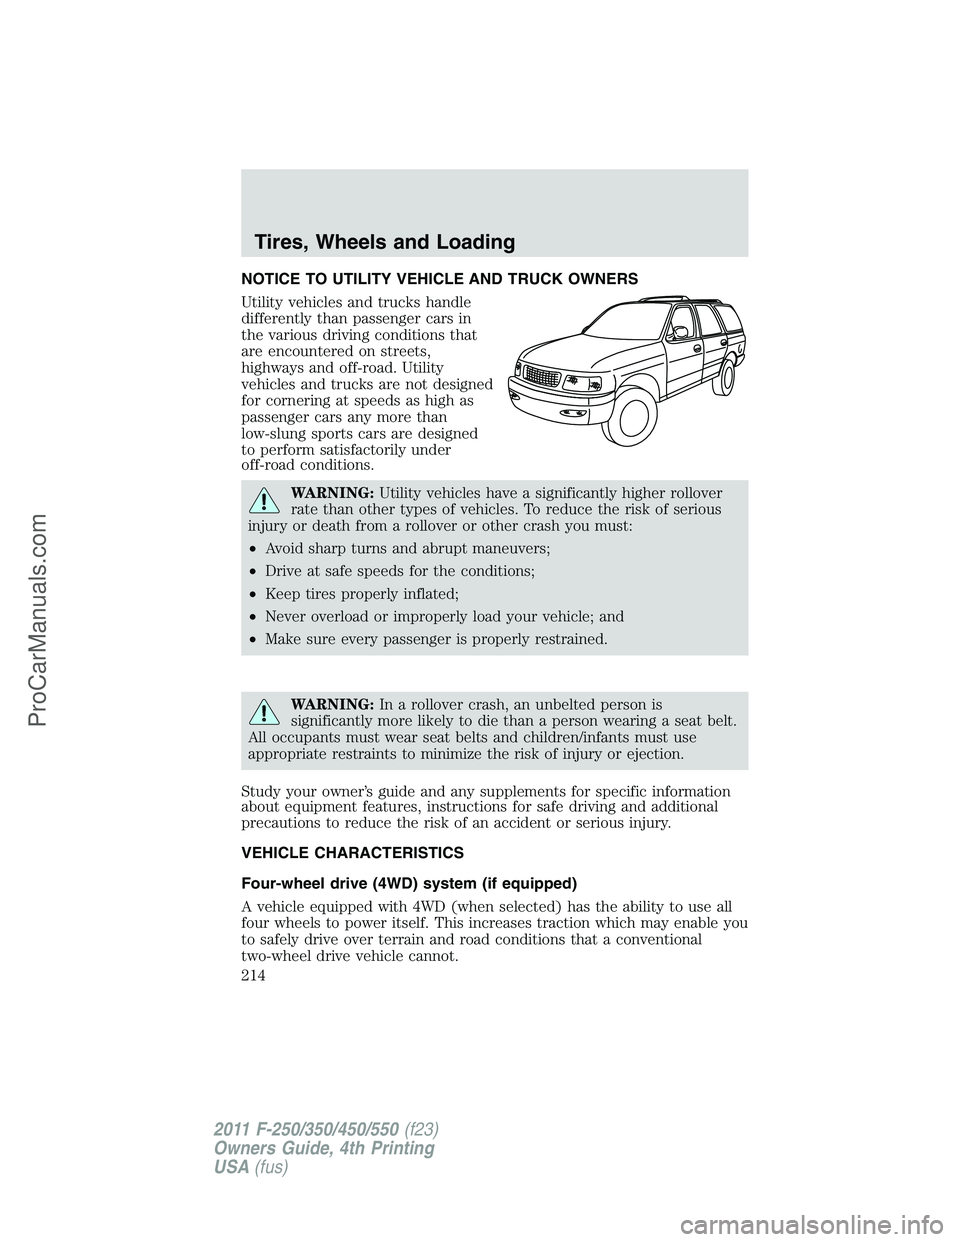
NOTICE TO UTILITY VEHICLE AND TRUCK OWNERS
Utility vehicles and trucks handle
differently than passenger cars in
the various driving conditions that
are encountered on streets,
highways and off-road. Utility
vehicles and trucks are not designed
for cornering at speeds as high as
passenger cars any more than
low-slung sports cars are designed
to perform satisfactorily under
off-road conditions.
WARNING:Utility vehicles have a significantly higher rollover
rate than other types of vehicles. To reduce the risk of serious
injury or death from a rollover or other crash you must:
•Avoid sharp turns and abrupt maneuvers;
•Drive at safe speeds for the conditions;
•Keep tires properly inflated;
•Never overload or improperly load your vehicle; and
•Make sure every passenger is properly restrained.
WARNING:In a rollover crash, an unbelted person is
significantly more likely to die than a person wearing a seat belt.
All occupants must wear seat belts and children/infants must use
appropriate restraints to minimize the risk of injury or ejection.
Study your owner’s guide and any supplements for specific information
about equipment features, instructions for safe driving and additional
precautions to reduce the risk of an accident or serious injury.
VEHICLE CHARACTERISTICS
Four-wheel drive (4WD) system (if equipped)
A vehicle equipped with 4WD (when selected) has the ability to use all
four wheels to power itself. This increases traction which may enable you
to safely drive over terrain and road conditions that a conventional
two-wheel drive vehicle cannot.
Tires, Wheels and Loading
214
2011 F-250/350/450/550(f23)
Owners Guide, 4th Printing
USA(fus)
ProCarManuals.com
Page 263 of 449

WARNING:Do not start your vehicle in a closed garage or in
other enclosed areas. Exhaust fumes can be toxic. Always open
the garage door before you start the engine. SeeGuarding against
exhaust fumesin this chapter for more instructions.
WARNING:If you smell exhaust fumes inside your vehicle, have
your dealer inspect your vehicle immediately. Do not drive if you
smell exhaust fumes.
Important safety precautions
When the engine starts, the idle RPM runs faster to warm the engine. If
the engine idle speed does not slow down automatically, have the vehicle
checked. If your vehicle is operated in a heavy snow storm or blowing
snow conditions, the engine air induction may become partially clogged
with snow and/or ice. If this occurs, the engine may experience a
significant reduction in power output. At the earliest opportunity, clear
all the snow and/or ice away from the air induction inlet. The following
starting instructions are for vehicles equipped with a gasoline engine; if
your vehicle is equipped with a diesel engine, refer toStarting the
enginein your diesel supplement.
Before starting the vehicle:
1. Make sure all occupants buckle their safety belts. For more
information on safety belts and their proper usage, refer to theSeating
and Safety Restraintschapter.
2. Make sure the headlamps and electrical accessories are off.
•Make sure the parking brake is
set.
•Make sure the gearshift is in P
(Park).
Driving
263
2011 F-250/350/450/550(f23)
Owners Guide, 4th Printing
USA(fus)
ProCarManuals.com
Page 281 of 449
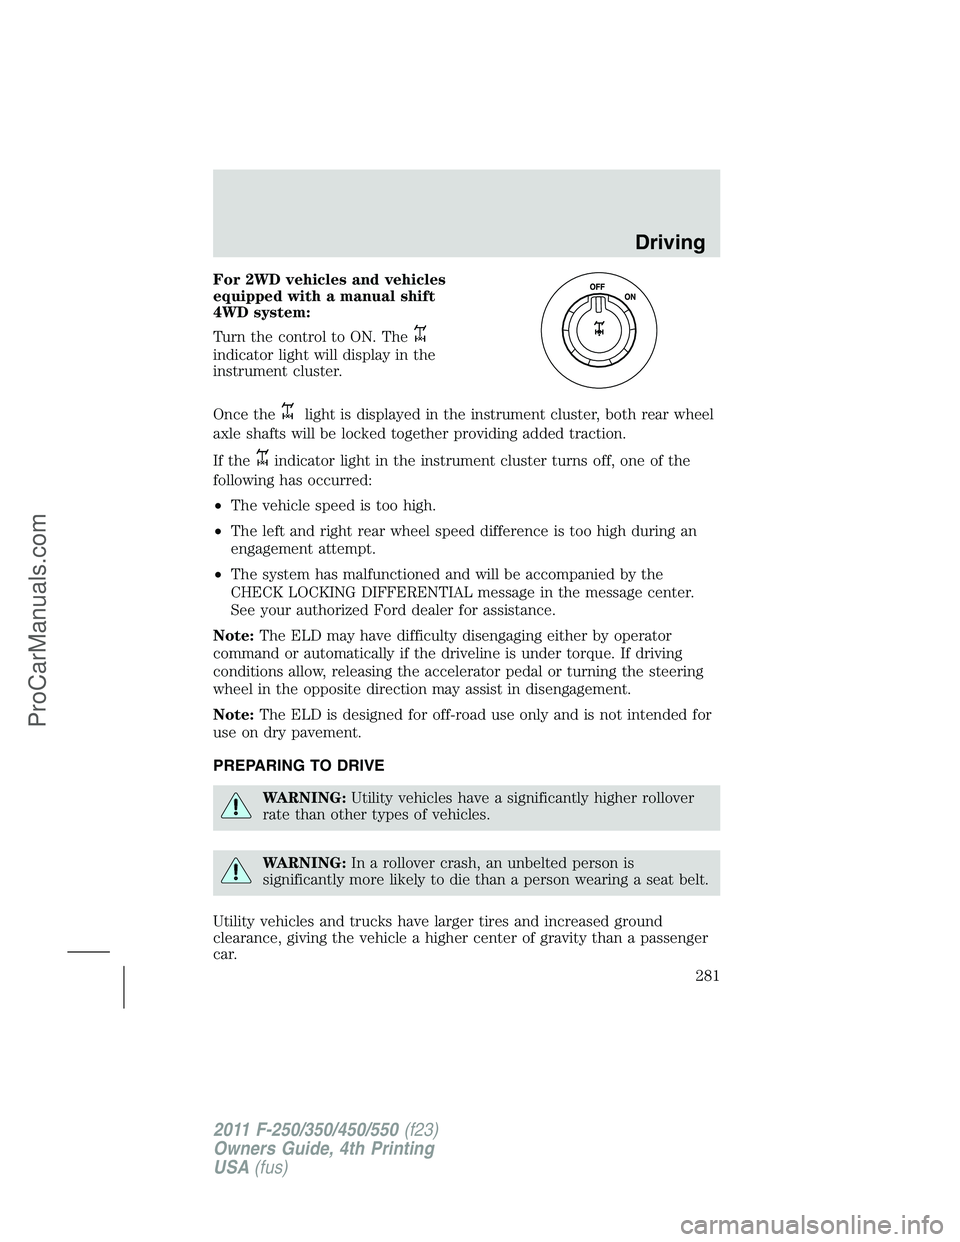
For 2WD vehicles and vehicles
equipped with a manual shift
4WD system:
Turn the control to ON. The
indicator light will display in the
instrument cluster.
Once the
light is displayed in the instrument cluster, both rear wheel
axle shafts will be locked together providing added traction.
If the
indicator light in the instrument cluster turns off, one of the
following has occurred:
•The vehicle speed is too high.
•The left and right rear wheel speed difference is too high during an
engagement attempt.
•The system has malfunctioned and will be accompanied by the
CHECK LOCKING DIFFERENTIAL message in the message center.
See your authorized Ford dealer for assistance.
Note:The ELD may have difficulty disengaging either by operator
command or automatically if the driveline is under torque. If driving
conditions allow, releasing the accelerator pedal or turning the steering
wheel in the opposite direction may assist in disengagement.
Note:The ELD is designed for off-road use only and is not intended for
use on dry pavement.
PREPARING TO DRIVE
WARNING:Utility vehicles have a significantly higher rollover
rate than other types of vehicles.
WARNING:In a rollover crash, an unbelted person is
significantly more likely to die than a person wearing a seat belt.
Utility vehicles and trucks have larger tires and increased ground
clearance, giving the vehicle a higher center of gravity than a passenger
car.
Driving
281
2011 F-250/350/450/550(f23)
Owners Guide, 4th Printing
USA(fus)
ProCarManuals.com
Page 312 of 449

Operating the vehicle with the snowplow attached
Do not use your vehicle for snow removal until it has been driven at
least 500 miles (800 km).
The attached snowplow blade restricts airflow to the radiator, and may
cause the engine to run at a higher temperature: Attention to engine
temperature is especially important when outside temperatures are
above freezing. Angle the blade to maximize airflow to the radiator and
monitor engine temperature to determine whether a left or right angle
provides the best performance.
Follow the severe duty schedule in yourscheduled maintenance
informationfor engine oil and transmission fluid change intervals.
Snowplowing with your airbag-equipped vehicle
Your vehicle is equipped with a driver and passenger airbag
Supplemental Restraint System (SRS) The SRS is designed to activate in
certain frontal and offset frontal collisions when the vehicle sustains
sufficient longitudinal deceleration.
Careless or high speed driving while plowing snow which results in
sufficient vehicle decelerations can deploy the airbag. Such driving also
increases the risk of accidents.
WARNING:All occupants of the vehicle, including the driver,
should always properly wear their safety belts, even when an air
bag supplemental restraint system (SRS) is provided.
Never remove or defeat the “tripping mechanisms” designed into the
snow removal equipment by its manufacturer. Doing so may cause
damage to the vehicle and the snow removal equipment as well as
possible airbag deployment.
WARNING:Do not attempt to service, repair, or modify the air
bag supplemental restraint system (SRS) or its fuses. See your
Ford or Lincoln Mercury dealer.
WARNING:Additional equipment such as snowplow equipment
may effect the performance of the airbag sensors increasing the
risk of injury. Please refer to theBody Builders Layout Bookfor
instructions about the appropriate installation of additional equipment.
Driving
312
2011 F-250/350/450/550(f23)
Owners Guide, 4th Printing
USA(fus)
ProCarManuals.com
Page 345 of 449
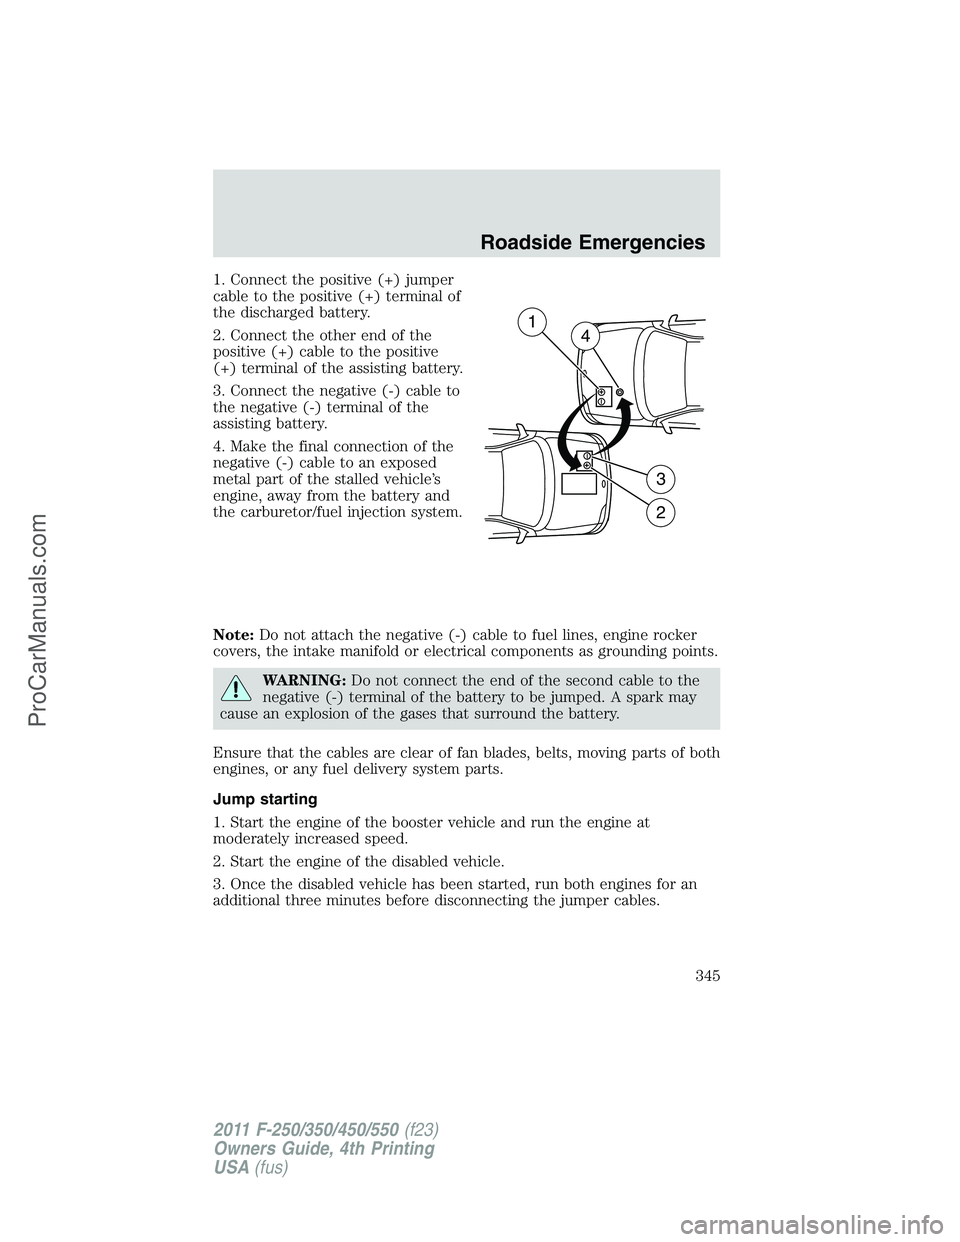
1. Connect the positive (+) jumper
cable to the positive (+) terminal of
the discharged battery.
2. Connect the other end of the
positive (+) cable to the positive
(+) terminal of the assisting battery.
3. Connect the negative (-) cable to
the negative (-) terminal of the
assisting battery.
4. Make the final connection of the
negative (-) cable to an exposed
metal part of the stalled vehicle’s
engine, away from the battery and
the carburetor/fuel injection system.
Note:Do not attach the negative (-) cable to fuel lines, engine rocker
covers, the intake manifold or electrical components as grounding points.
WARNING:Do not connect the end of the second cable to the
negative (-) terminal of the battery to be jumped. A spark may
cause an explosion of the gases that surround the battery.
Ensure that the cables are clear of fan blades, belts, moving parts of both
engines, or any fuel delivery system parts.
Jump starting
1. Start the engine of the booster vehicle and run the engine at
moderately increased speed.
2. Start the engine of the disabled vehicle.
3. Once the disabled vehicle has been started, run both engines for an
additional three minutes before disconnecting the jumper cables.
+–
+–
2
3
14
Roadside Emergencies
345
2011 F-250/350/450/550(f23)
Owners Guide, 4th Printing
USA(fus)
ProCarManuals.com