2011 FORD F350 lock
[x] Cancel search: lockPage 280 of 449
If any steering components are serviced or replaced, install new
fasteners (many are coated with thread adhesive or have prevailing
torque features which may not be re-used). Never re-use a bolt or nut.
Torque fasteners to specifications inWorkshop Manual.
A high crown in the road or high crosswinds may also make the steering
seem to wander/pull.
ELECTRONIC LOCKING DIFFERENTIAL (ELD) (IF EQUIPPED)
The electronic locking differential (ELD) is a device housed in the rear
axle which allows both rear wheels to turn at the same speed. It provides
added traction on slippery and/or off road surfaces, particularly when
one wheel is on a poor traction surface. The ELD may be locked or
unlocked by the vehicle operator and can be engaged or disengaged on
the fly. When the axle is unlocked it will function like a standard rear
axle. When the axle is locked it will not allow the rear wheels to rotate
at different speeds when turning. It is not recommended for use on good
traction surfaces such as dry pavement. Doing so may result in abnormal
driving behavior and noise while cornering and excessive tire wear.
The ELD is affected by the following conditions of your vehicle:
•On 2WD vehicles and 4WD vehicles in 2H (4X2) or 4H (4X4 High),
the ELD will not engage if the vehicle speed is above 25 mph
(40 km/h).
•On 2WD vehicles and 4WD vehicles in 2H (4X2) or 4H (4X4 High),
the ELD will automatically disengage at speeds above 25 mph
(40 km/h) and will automatically reengage at speeds below 19 mph
(30 km/h).
•On 4WD vehicles in 4L (4X4 Low), the ELD can be engaged at any
speed and will not automatically disengage.
Activating the electronic locking differential (ELD)
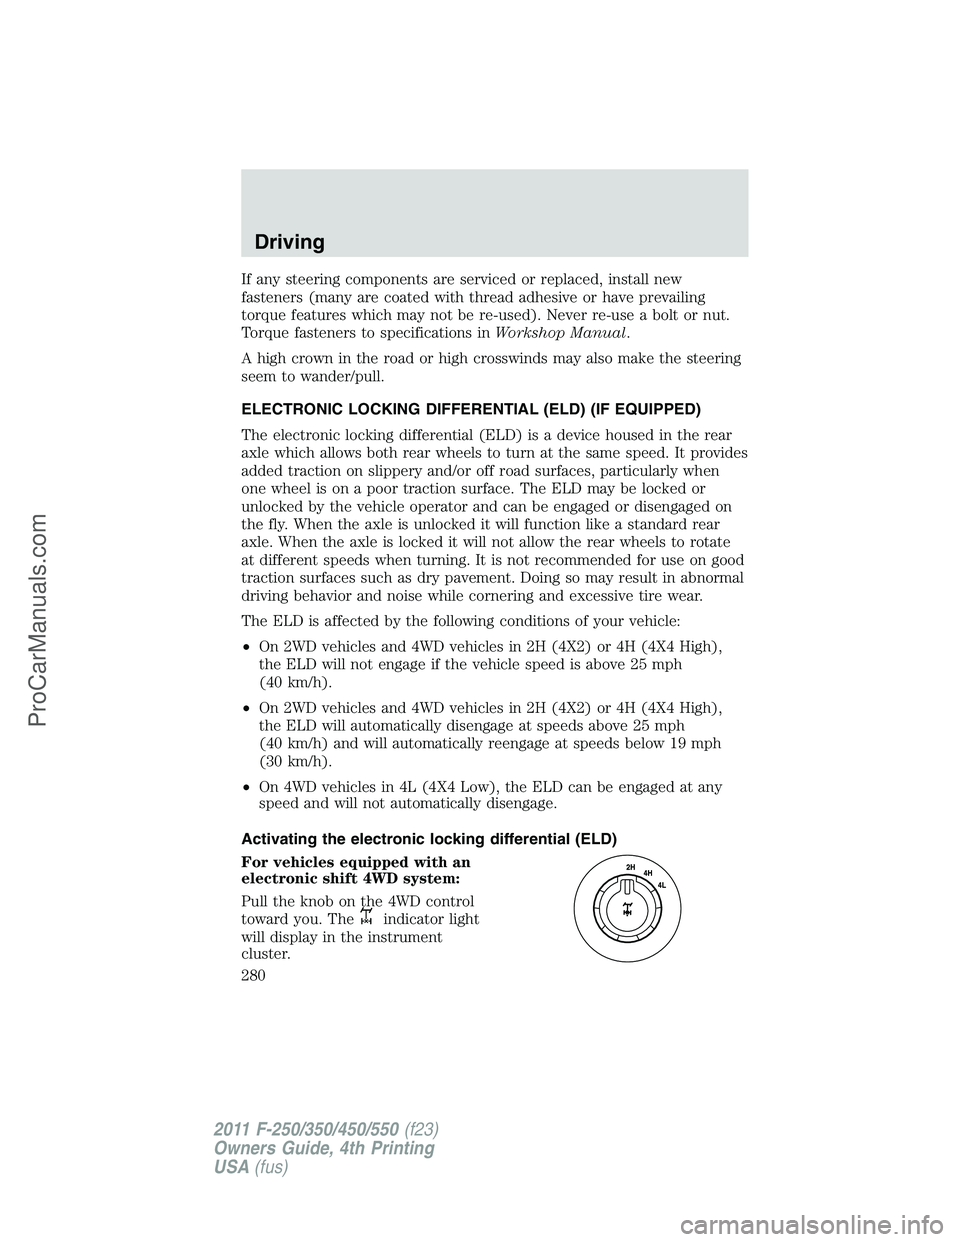
For vehicles equipped with an
electronic shift 4WD system:
Pull the knob on the 4WD control
toward you. The
indicator light
will display in the instrument
cluster.
Driving
280
2011 F-250/350/450/550(f23)
Owners Guide, 4th Printing
USA(fus)
ProCarManuals.com
Page 281 of 449
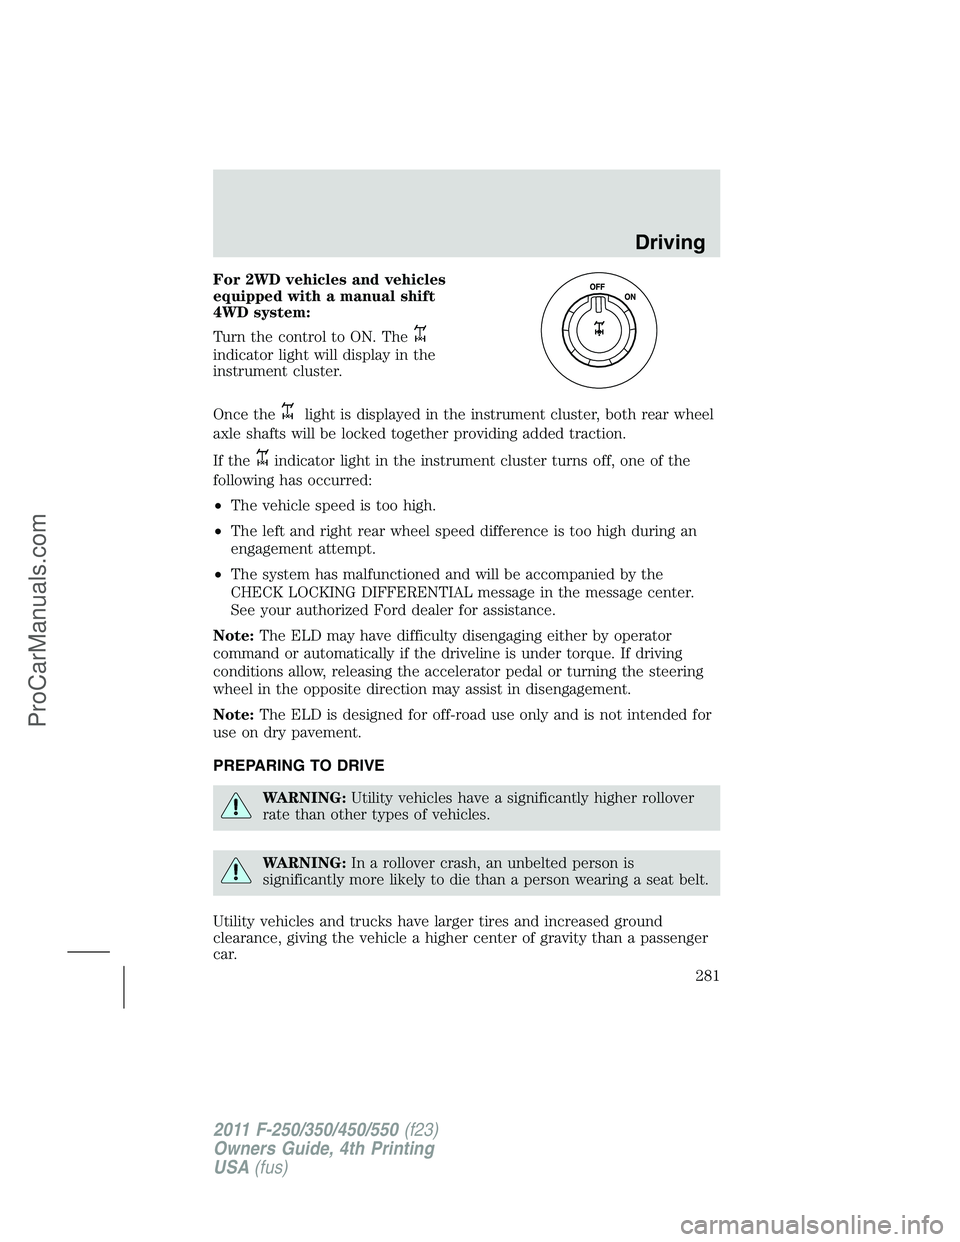
For 2WD vehicles and vehicles
equipped with a manual shift
4WD system:
Turn the control to ON. The
indicator light will display in the
instrument cluster.
Once the
light is displayed in the instrument cluster, both rear wheel
axle shafts will be locked together providing added traction.
If the
indicator light in the instrument cluster turns off, one of the
following has occurred:
•The vehicle speed is too high.
•The left and right rear wheel speed difference is too high during an
engagement attempt.
•The system has malfunctioned and will be accompanied by the
CHECK LOCKING DIFFERENTIAL message in the message center.
See your authorized Ford dealer for assistance.
Note:The ELD may have difficulty disengaging either by operator
command or automatically if the driveline is under torque. If driving
conditions allow, releasing the accelerator pedal or turning the steering
wheel in the opposite direction may assist in disengagement.
Note:The ELD is designed for off-road use only and is not intended for
use on dry pavement.
PREPARING TO DRIVE
WARNING:Utility vehicles have a significantly higher rollover
rate than other types of vehicles.
WARNING:In a rollover crash, an unbelted person is
significantly more likely to die than a person wearing a seat belt.
Utility vehicles and trucks have larger tires and increased ground
clearance, giving the vehicle a higher center of gravity than a passenger
car.
Driving
281
2011 F-250/350/450/550(f23)
Owners Guide, 4th Printing
USA(fus)
ProCarManuals.com
Page 282 of 449

WARNING:Vehicles with a higher center of gravity such as
utility vehicles and trucks handle differently than vehicles with a
lower center of gravity. Utility vehicles and trucks arenotdesigned for
cornering at speeds as high as passenger cars any more than low-slung
sports cars are designed to perform satisfactorily under off-road
conditions. Avoid sharp turns, excessive speed or abrupt maneuvers in
these vehicles. Failure to drive cautiously could result in an increased
risk of loss of vehicle control, vehicle rollover, personal injury and
death.
WARNING:Loaded vehicles, with a higher center of gravity,
may handle differently than unloaded vehicles. Do not overload
your vehicle and use extra precautions, such as driving at slower
speeds, avoiding abrupt steering changes and allowing for increased
stopping distance, when driving a heavily loaded vehicle. Over-loading
or loading the vehicle improperly can deteriorate handling capability
and contribute to loss of vehicle control and vehicle rollover.
BRAKE-SHIFT INTERLOCK
This vehicle is equipped with a brake-shift interlock feature that prevents
the gearshift lever from being moved from P (Park) when the ignition is
in the 3 (on) position and the brake pedal is not pressed.
If you cannot move the gearshift lever out of P (Park) with ignition in
the on position and the brake pedal pressed, it is possible that a fuse has
blown or the vehicle’s brake lamps are not operating properly. Refer to
Fuses and relaysin theRoadside Emergencieschapter.
If the fuse is not blown and the brake lamps are working properly, the
following procedure will allow you to move the gearshift lever from P
(Park):
1. Apply the parking brake. Turn the ignition key to 1 (off), then remove
the key.
2. Move the steering column to the full down and full rearward position
(toward the driver’s seat).
3. Remove the gearshift lever boot.
4. Place fingers into hole where the gearshift lever boot was removed
from and pull top half of shroud up and forward to separate it from the
lower half of the shroud. There is a hinge at the forward edge of the top
shroud. Roll the top half of the shroud upward on the hinge point to
clear the hazard flasher button, then pull straight rearward toward the
driver’s seat to remove.
Driving
282
2011 F-250/350/450/550(f23)
Owners Guide, 4th Printing
USA(fus)
ProCarManuals.com
Page 283 of 449
5. Remove the top half of the shroud.
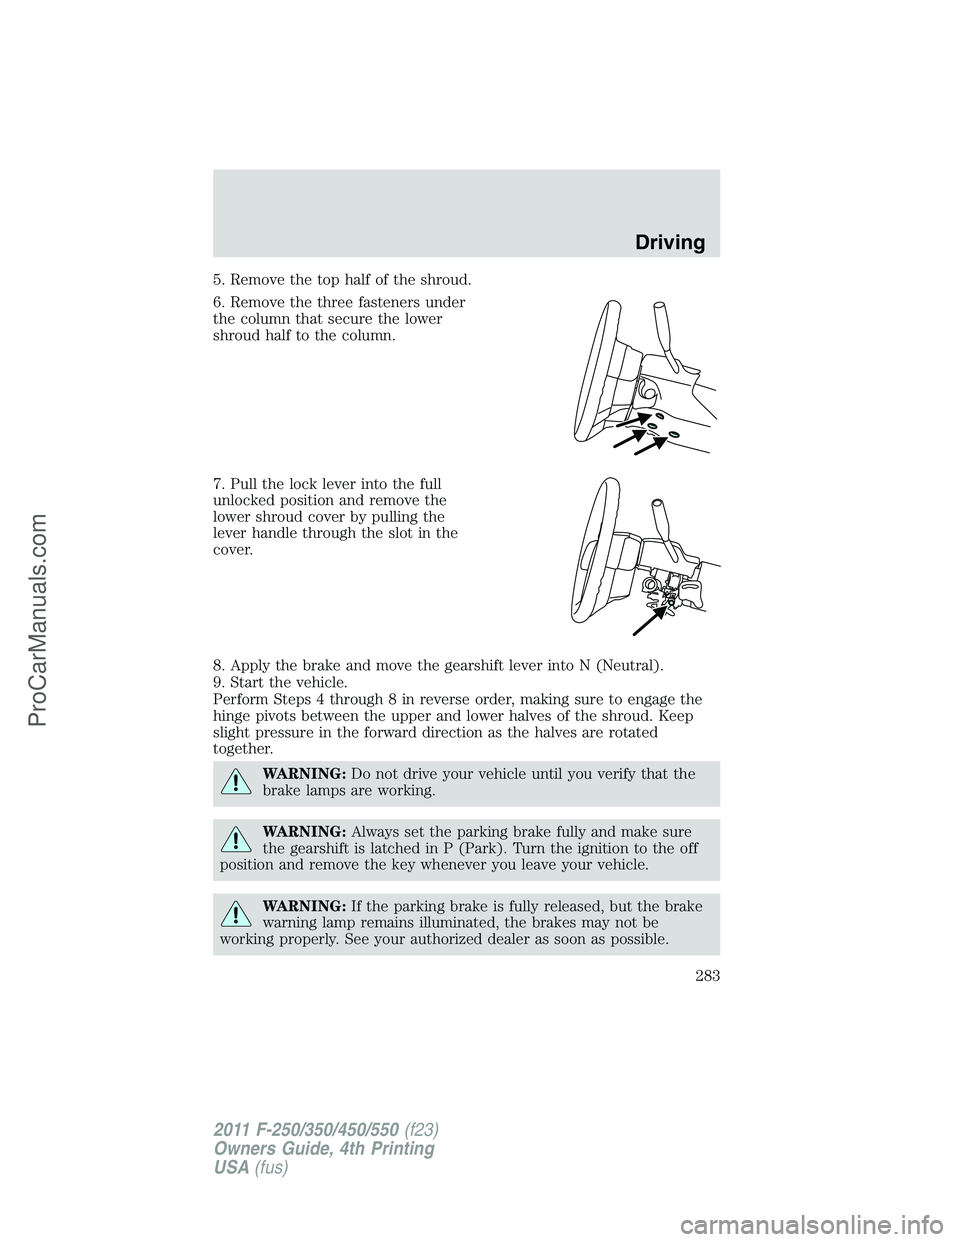
6. Remove the three fasteners under
the column that secure the lower
shroud half to the column.
7. Pull the lock lever into the full
unlocked position and remove the
lower shroud cover by pulling the
lever handle through the slot in the
cover.
8. Apply the brake and move the gearshift lever into N (Neutral).
9. Start the vehicle.
Perform Steps 4 through 8 in reverse order, making sure to engage the
hinge pivots between the upper and lower halves of the shroud. Keep
slight pressure in the forward direction as the halves are rotated
together.
WARNING:Do not drive your vehicle until you verify that the
brake lamps are working.
WARNING:Always set the parking brake fully and make sure
the gearshift is latched in P (Park). Turn the ignition to the off
position and remove the key whenever you leave your vehicle.
WARNING:If the parking brake is fully released, but the brake
warning lamp remains illuminated, the brakes may not be
working properly. See your authorized dealer as soon as possible.
Driving
283
2011 F-250/350/450/550(f23)
Owners Guide, 4th Printing
USA(fus)
ProCarManuals.com
Page 284 of 449

AUTOMATIC TRANSMISSION OPERATION
Understanding the shift positions of the 5–speed automatic
transmission (if equipped)
This vehicle is equipped with an adaptive transmission shift strategy.
Adaptive transmission shift strategy offers the optimal transmission
operation and shift quality. When the vehicle’s battery has been
disconnected for any type of service or repair, the transmission will need
to relearn the normal shift strategy parameters, much like having to reset
your radio stations when your vehicle battery has been disconnected.
The adaptive transmission shift strategy allows the transmission to
relearn these operating parameters. This learning process could take
several transmission upshifts and downshifts; during this learning
process, slightly firmer shifts may occur. After this learning process,
normal shift feel and shift scheduling will resume.
P (Park)
This position locks the transmission and prevents the rear wheels from
turning.
To put your vehicle in gear:
•Start the engine
•Press the brake pedal
•Move the gearshift lever into the desired gear
To put your vehicle in P (Park):
•Come to a complete stop
•Move the gearshift lever and securely latch it in P (Park)
WARNING:Always set the parking brake fully and make sure
the gearshift is latched in P (Park). Turn the ignition to the off
position and remove the key whenever you leave your vehicle.
R (Reverse)
With the gearshift lever in R (Reverse), the vehicle will move backward.
Always come to a complete stop before shifting into and out of R
(Reverse).
Driving
284
2011 F-250/350/450/550(f23)
Owners Guide, 4th Printing
USA(fus)
ProCarManuals.com
Page 287 of 449

P (Park)
This position locks the transmission and prevents the rear wheels from
turning.
To put your vehicle in gear:
1. Start the engine
2. Press the brake pedal
3. Move the gearshift lever into the desired gear
To put your vehicle in P (Park):
1. Come to a complete stop
2. Move the gearshift lever and securely latch it in P (Park)
WARNING:Always set the parking brake fully and make sure
the gearshift is latched in P (Park). Turn the ignition to the off
position and remove the key whenever you leave your vehicle.
R (Reverse)
With the gearshift lever in R (Reverse), the vehicle will move backward.
Always come to a complete stop before shifting into and out of R
(Reverse).
N (Neutral)
With the gearshift lever in N (Neutral), the vehicle can be started and is
free to roll. Hold the brake pedal down while in this position.
D (Overdrive) with Tow/Haul Off
D (Overdrive) with tow/haul off is the normal driving position for the
best fuel economy. The overdrive function allows automatic upshifts and
downshifts through gears one through six.
D (Overdrive) with Tow/Haul On
The tow/haul feature improves transmission operation when towing a
trailer or a heavy load. All transmission gear ranges are available when
using tow/haul.
Driving
287
2011 F-250/350/450/550(f23)
Owners Guide, 4th Printing
USA(fus)
ProCarManuals.com
Page 289 of 449
To return to normal D (Overdrive) position, move the shift lever back
fromMtoD.
•The transmission will operate in gears one through six.
2 (Second)
Use 2 (Second) to start-up on slippery roads or to provide additional
engine braking on downgrades.
1 (First)
•Provides maximum engine braking.
•Allows upshifts by moving gearshift lever.
•The transmission will not downshift into 1 (First) at high speeds; it
will downshift to a lower gear and then shift into 1 (First) when the
vehicle reaches slower speeds.
Forced downshifts
•Allowed in D (Overdrive).
•Press the accelerator to the floor.
•Allows transmission to select an appropriate gear.
Understanding your SelectShift Automatic™ transmission (SST)
gearshift lever
This vehicle is equipped with a SelectShift Automatic™ transmission
(SST) gearshift lever. The SST is an automatic transmission with the
ability for the driver to change gears up or down (without a clutch) as
desired.
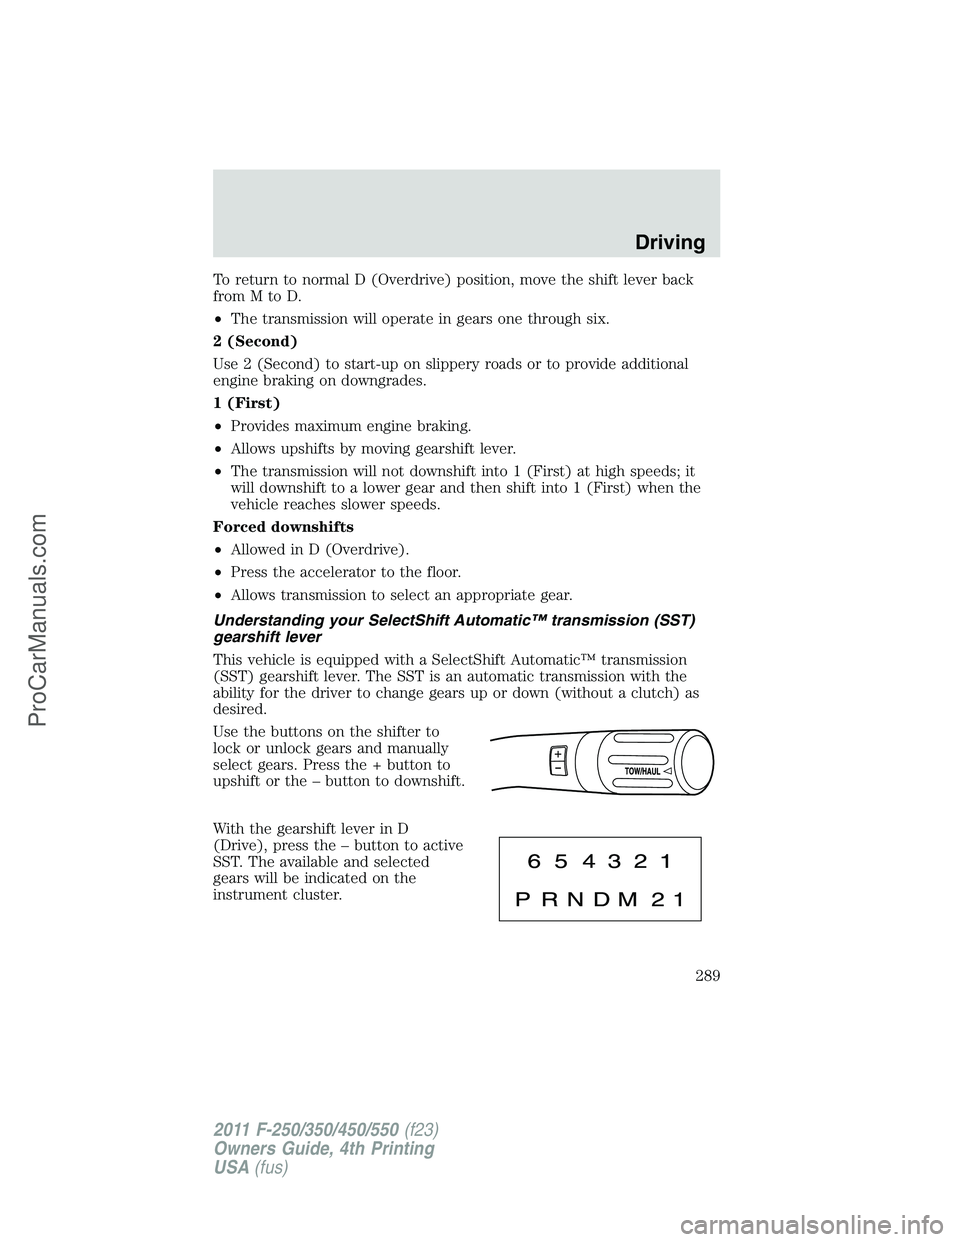
Use the buttons on the shifter to
lock or unlock gears and manually
select gears. Press the + button to
upshift or the – button to downshift.
With the gearshift lever in D
(Drive), press the – button to active
SST. The available and selected
gears will be indicated on the
instrument cluster.
Driving
289
2011 F-250/350/450/550(f23)
Owners Guide, 4th Printing
USA(fus)
ProCarManuals.com
Page 290 of 449
All available gears will be displayed with the current gear indicated.
Press the – button again to lock out gears beginning with the highest
gear. Example: press the – button twice to lock out 6th and 5th gears.
Only the available gears will be displayed and the transmission will
automatically shift between the available gears. Press the + button to
unlock gears.
By moving the gearshift lever from the D (Drive) position to the M
(Manual) position you may now manually select the gear you desire.
Only the current gear will be displayed. Press the + button or the –
button to upshift or downshift. If the – button is pressed at a vehicle
speed that would cause an engine overspeed, the requested gear will
flash then disappear and the transmission will remain in the current gear.
Recommended shift speeds
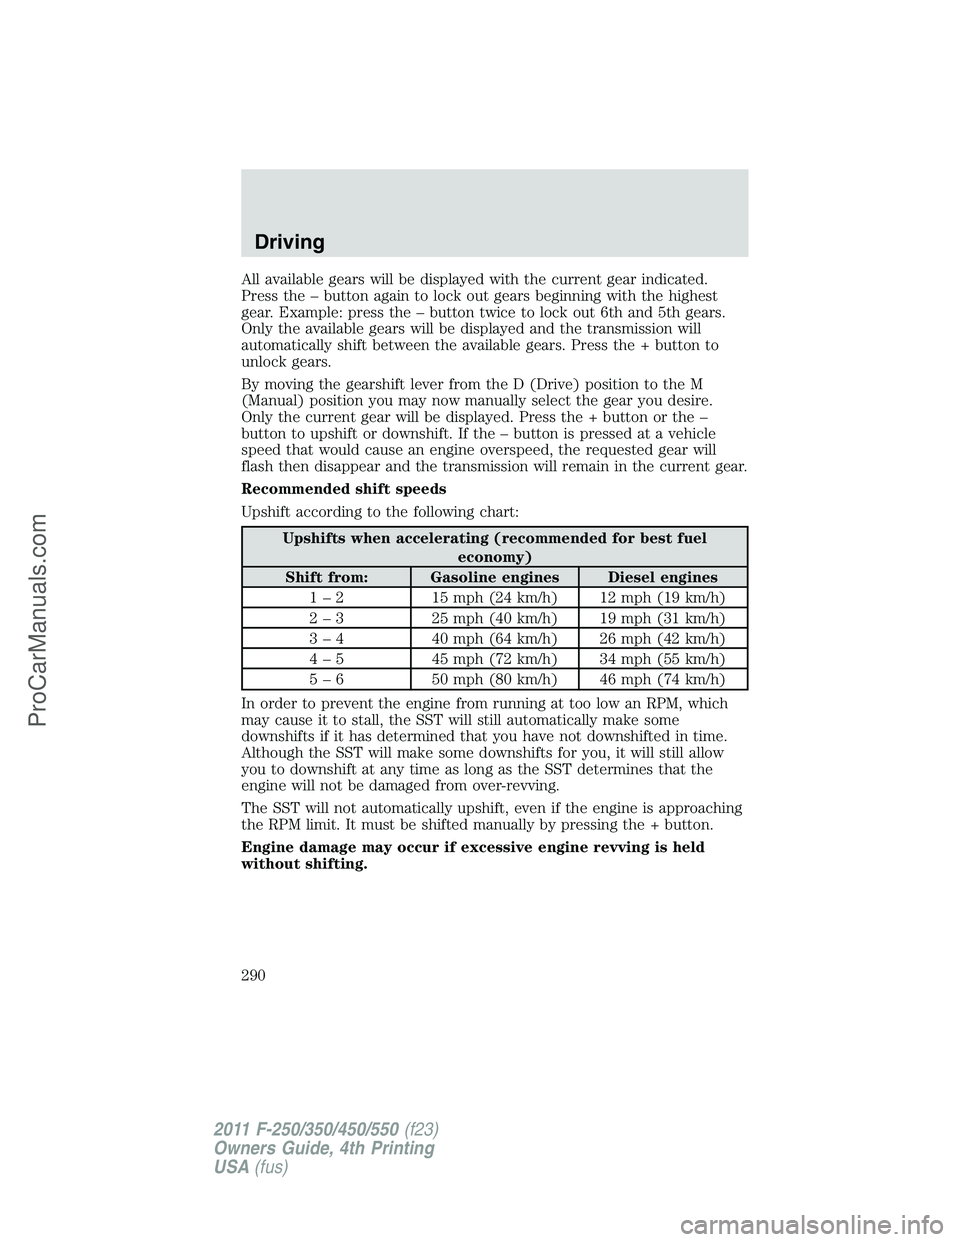
Upshift according to the following chart:
Upshifts when accelerating (recommended for best fuel
economy)
Shift from: Gasoline engines Diesel engines
1 – 2 15 mph (24 km/h) 12 mph (19 km/h)
2 – 3 25 mph (40 km/h) 19 mph (31 km/h)
3 – 4 40 mph (64 km/h) 26 mph (42 km/h)
4 – 5 45 mph (72 km/h) 34 mph (55 km/h)
5 – 6 50 mph (80 km/h) 46 mph (74 km/h)
In order to prevent the engine from running at too low an RPM, which
may cause it to stall, the SST will still automatically make some
downshifts if it has determined that you have not downshifted in time.
Although the SST will make some downshifts for you, it will still allow
you to downshift at any time as long as the SST determines that the
engine will not be damaged from over-revving.
The SST will not automatically upshift, even if the engine is approaching
the RPM limit. It must be shifted manually by pressing the + button.
Engine damage may occur if excessive engine revving is held
without shifting.
Driving
290
2011 F-250/350/450/550(f23)
Owners Guide, 4th Printing
USA(fus)
ProCarManuals.com