2011 FORD F250 SUPER DUTY scheduled maintenance
[x] Cancel search: scheduled maintenancePage 4 of 449
Scheduled Maintenance 422Normal scheduled maintenance and log 428
Index 443
All rights reserved. Reproduction by any means, electronic or mechanical
including photocopying, recording or by any information storage and retrieval
system or translation in whole or part is not permitted without written
authorization from Ford Motor Company. Ford may change the contents without
notice and without incurring obligation.
Copyright © 2011 Ford Motor CompanyTable of Contents
4
2011 F-250/350/450/550 (f23)
Owners Guide, 4th Printing
USA (fus)
Page 21 of 449
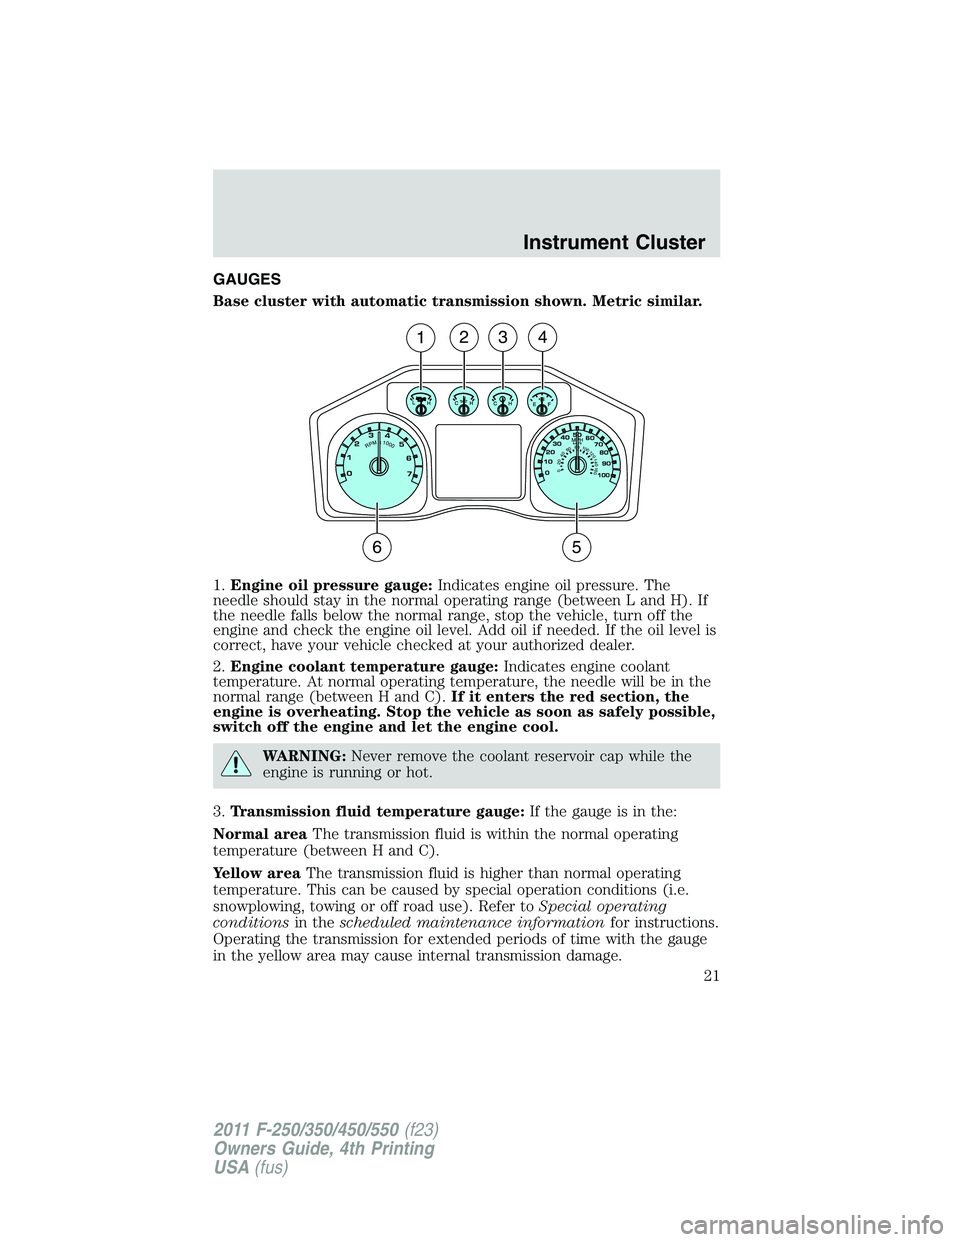
GAUGES
Base cluster with automatic transmission shown. Metric similar.
1. Engine oil pressure gauge: Indicates engine oil pressure. The
needle should stay in the normal operating range (between L and H). If
the needle falls below the normal range, stop the vehicle, turn off the
engine and check the engine oil level. Add oil if needed. If the oil level is
correct, have your vehicle checked at your authorized dealer.
2. Engine coolant temperature gauge: Indicates engine coolant
temperature. At normal operating temperature, the needle will be in the
normal range (between H and C). If it enters the red section, the
engine is overheating. Stop the vehicle as soon as safely possible,
switch off the engine and let the engine cool.
WARNING: Never remove the coolant reservoir cap while the
engine is running or hot.
3. Transmission fluid temperature gauge: If the gauge is in the:
Normal area The transmission fluid is within the normal operating
temperature (between H and C).
Yellow area The transmission fluid is higher than normal operating
temperature. This can be caused by special operation conditions (i.e.
snowplowing, towing or off road use). Refer to Special operating
conditions in the scheduled maintenance information for instructions.
Operating the transmission for extended periods of time with the gauge
in the yellow area may cause internal transmission damage. km/h
RPMx100
0
0 2 0 4 060801 0 0
1
2
0
1
4
0
16
0 MPH
1 2 3 4
6 5Instrument Cluster
21
2011 F-250/350/450/550 (f23)
Owners Guide, 4th Printing
USA (fus)
Page 38 of 449
SPEED LIMITED TO XX MPH CONTAMINATED EXHAUST FLUID
(diesel engine only) — Displayed when the diesel exhaust fluid is
contaminated. The diesel exhaust fluid must be replaced to resume
normal operation of the vehicle and prevent a limited speed range. Refer
to your diesel supplement for more information.
ENGINE IDLED UPON REFUEL CONTAMINATED EXHAUST
FLUID (diesel engine only) — Displayed when the diesel exhaust
fluid is contaminated. The vehicle will enter into an idle-only mode upon
refueling the vehicle. The diesel exhaust fluid must be replaced to
resume normal operation of the vehicle. Refer to your diesel supplement
for more information.
ENGINE IDLED SEE MANUAL CONTAMINATED EXHAUST
FLUID (diesel engine only) — Displayed when the diesel exhaust
fluid is contaminated. The vehicle will enter into an idle-only mode. The
diesel exhaust fluid must be replaced to resume normal operation of the
vehicle. Refer to your diesel supplement for more information.
ENGINE OIL DILUTED (diesel engine only) — Displays once the
engine oil has become diluted and needs to be changed. Refer to your
diesel supplement for more information.
ENGINE OIL CHANGE SOON — Displayed when the engine oil life
remaining is 5% to 1%. Refer to the scheduled maintenance
information for more information.
OIL CHANGE REQUIRED — Displayed when the oil life left reaches
0%. Refer to the scheduled maintenance information for more
information.
LOW FUEL PRESSURE SEE MANUAL (diesel engine only) —If
this message appears during a cold start or during cold operation 32°F
(0°C) up to 10 minutes after the initial cold start; monitor the message
center and if it disappears and does not re-appear after the engine has
fully warmed up, the low fuel pressure message is most likely caused by
waxed or gelled fuel. To prevent this, use an anti-gel additive. Refer to
your diesel supplement for more information. The customer warranty
may be void from using additives that do not meet or exceed Ford
specifications. If the low fuel pressure message persistently appears after
re-fueling during the cold start and cold operation conditions defined
previously and then disappear when the engine has fully warmed up,
consider different fuel sources.Instrument Cluster
38
2011 F-250/350/450/550 (f23)
Owners Guide, 4th Printing
USA (fus)
Page 51 of 449
counter has reached 0 seconds, OK TO DRIVE will be displayed and the
engine will respond to accelerator pedal movement. Refer to your diesel
supplement for more information.
EXHAUST FILTER DRIVE COMPLETE (diesel engine only) —
Displayed when the Diesel Particulate Filter (DPF) has been adequately
cleaned after the DRIVE TO CLEAN EXHAUST FILTER followed by
CLEANING EXHAUST FILTER messages have been displayed. This
message is NORMAL. Refer to your diesel supplement for more
information.
FUEL FILTER CHANGE REQUIRED (diesel engine only) —
Displayed when a fuel filter change is required. Refer to the scheduled
maintenance information for more information.
IN XX MILES, SPEED LIMITED TO XX MPH EXHAUST FLUID
EMPTY (diesel engine only) — Displayed when the diesel exhaust
fluid is nearing empty. The vehicle’s top speed will become limited in the
displayed distance. The diesel exhaust fluid must be replenished to
resume normal operation of the vehicle. Refer to your diesel supplement
for more information.
SPEED LIMITED TO XX MPH UPON RESTART EXHAUST FLUID
EMPTY (diesel engine only) — Displayed when the remaining diesel
exhaust fluid level is depleted. Speed will be limited upon restart. The
diesel exhaust fluid must be replenished to resume normal operation of
the vehicle. Refer to your diesel supplement for more information.
SPEED LIMITED TO XX MPH EXHAUST FLUID EMPTY (diesel
engine only) — Displayed when the diesel exhaust fluid is empty. The
diesel exhaust fluid must be replenished to resume normal operation of
the vehicle. Refer to your diesel supplement for more information.
ENGINE IDLED UPON REFUEL EXHAUST FLUID EMPTY (diesel
engine only) — Displayed when the diesel exhaust fluid is empty. The
vehicle will enter into an idle-only mode. The diesel exhaust fluid must
be replenished to resume normal operation of the vehicle. Refer to your
diesel supplement for more information.
ENGINE IDLED - SEE OWNER’S MANUAL EXHAUST FLUID
EMPTY (diesel engine only) — Displayed when a problem exists with
the SCR system. The vehicle will enter into an idle-only mode. If the
exhaust fluid is empty, it must be replenished to resume normal
operation of the vehicle. Refer to your diesel supplement for more
information. Instrument Cluster
51
2011 F-250/350/450/550 (f23)
Owners Guide, 4th Printing
USA (fus)
Page 159 of 449
Note: Do not do the following:
• Place heavy objects on the seat
• Operate the seat heater if water or any other liquid is spilled on the
seat. Allow the seat to dry thoroughly.
The heated seats will only function when the engine is running.
To operate the heated seats:
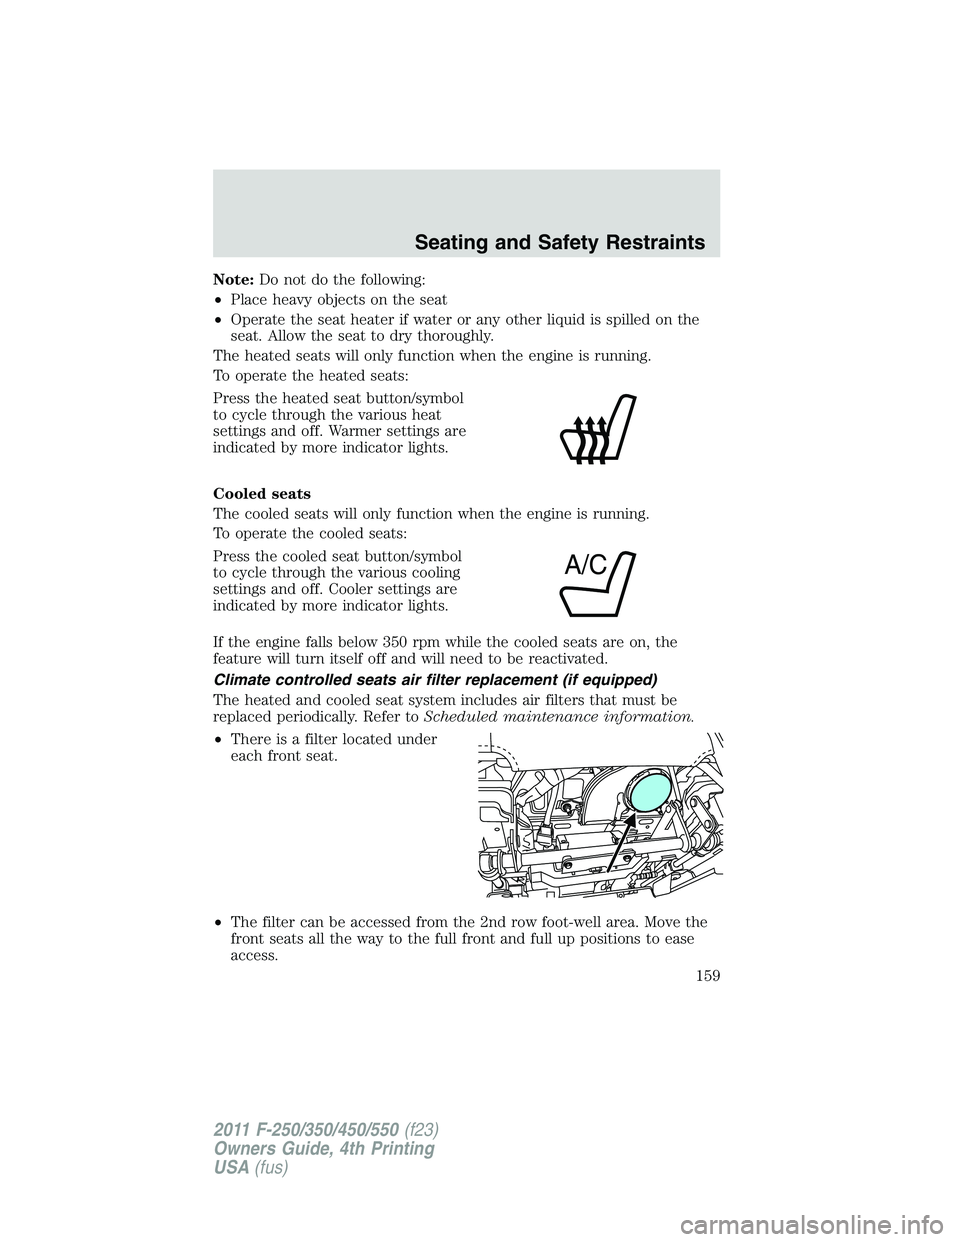
Press the heated seat button/symbol
to cycle through the various heat
settings and off. Warmer settings are
indicated by more indicator lights.
Cooled seats
The cooled seats will only function when the engine is running.
To operate the cooled seats:
Press the cooled seat button/symbol
to cycle through the various cooling
settings and off. Cooler settings are
indicated by more indicator lights.
If the engine falls below 350 rpm while the cooled seats are on, the
feature will turn itself off and will need to be reactivated.
Climate controlled seats air filter replacement (if equipped)
The heated and cooled seat system includes air filters that must be
replaced periodically. Refer to Scheduled maintenance information.
• There is a filter located under
each front seat.
• The filter can be accessed from the 2nd row foot-well area. Move the
front seats all the way to the full front and full up positions to ease
access. A/CSeating and Safety Restraints
159
2011 F-250/350/450/550 (f23)
Owners Guide, 4th Printing
USA (fus)
Page 227 of 449
Tire rotation
Rotating your tires at the recommended interval (as indicated in the
Scheduled Maintenance chapter) will help your tires wear more evenly,
providing better tire performance and longer tire life.
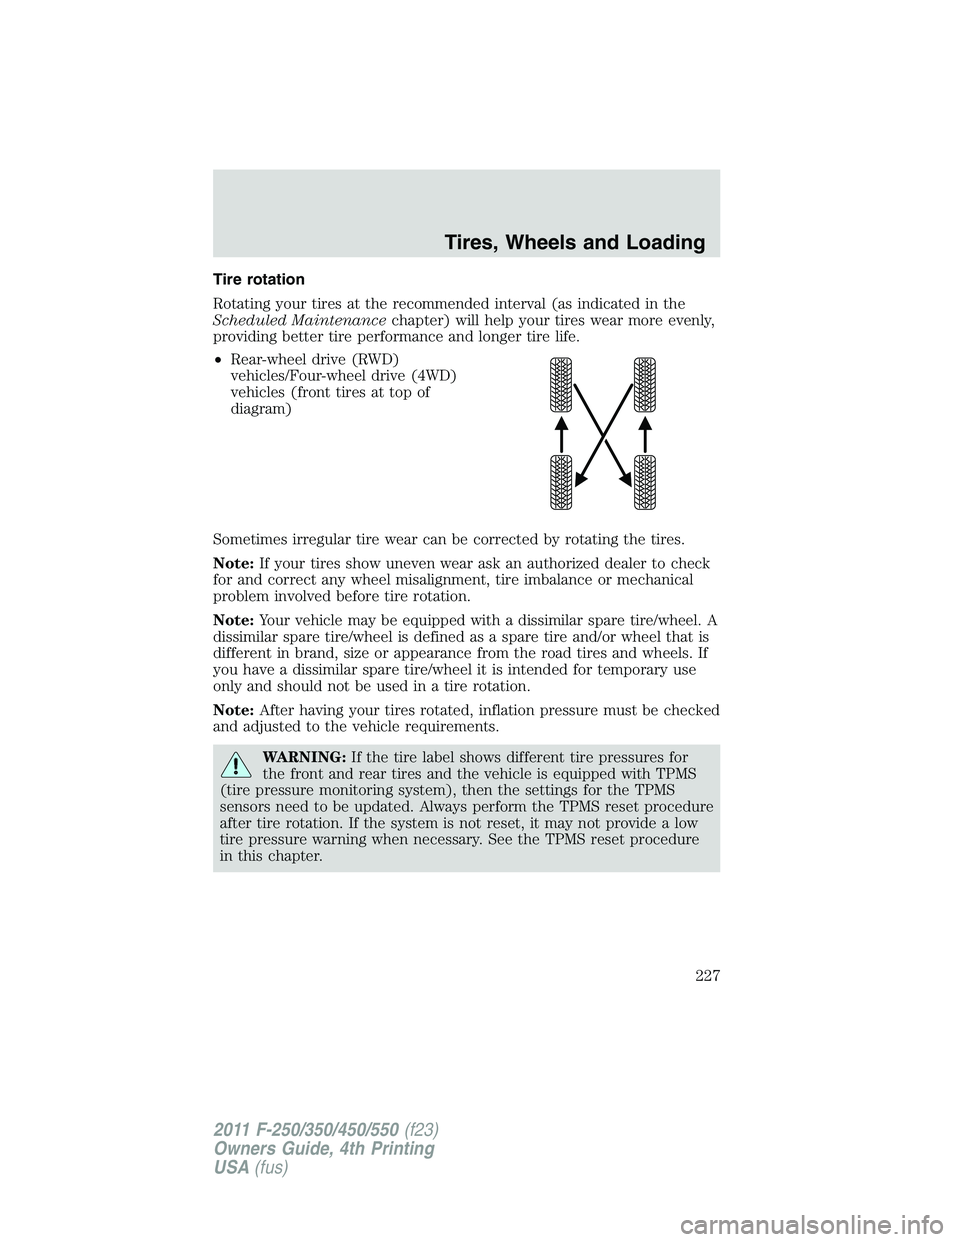
• Rear-wheel drive (RWD)
vehicles/Four-wheel drive (4WD)
vehicles (front tires at top of
diagram)
Sometimes irregular tire wear can be corrected by rotating the tires.
Note: If your tires show uneven wear ask an authorized dealer to check
for and correct any wheel misalignment, tire imbalance or mechanical
problem involved before tire rotation.
Note: Your vehicle may be equipped with a dissimilar spare tire/wheel. A
dissimilar spare tire/wheel is defined as a spare tire and/or wheel that is
different in brand, size or appearance from the road tires and wheels. If
you have a dissimilar spare tire/wheel it is intended for temporary use
only and should not be used in a tire rotation.
Note: After having your tires rotated, inflation pressure must be checked
and adjusted to the vehicle requirements.
WARNING: If the tire label shows different tire pressures for
the front and rear tires and the vehicle is equipped with TPMS
(tire pressure monitoring system), then the settings for the TPMS
sensors need to be updated. Always perform the TPMS reset procedure
after tire rotation. If the system is not reset, it may not provide a low
tire pressure warning when necessary. See the TPMS reset procedure
in this chapter. Tires, Wheels and Loading
227
2011 F-250/350/450/550 (f23)
Owners Guide, 4th Printing
USA (fus)
Page 312 of 449
Operating the vehicle with the snowplow attached
Do not use your vehicle for snow removal until it has been driven at
least 500 miles (800 km).
The attached snowplow blade restricts airflow to the radiator, and may
cause the engine to run at a higher temperature: Attention to engine
temperature is especially important when outside temperatures are
above freezing. Angle the blade to maximize airflow to the radiator and
monitor engine temperature to determine whether a left or right angle
provides the best performance.
Follow the severe duty schedule in your scheduled maintenance
information for engine oil and transmission fluid change intervals.
Snowplowing with your airbag-equipped vehicle
Your vehicle is equipped with a driver and passenger airbag
Supplemental Restraint System (SRS) The SRS is designed to activate in
certain frontal and offset frontal collisions when the vehicle sustains
sufficient longitudinal deceleration.
Careless or high speed driving while plowing snow which results in
sufficient vehicle decelerations can deploy the airbag. Such driving also
increases the risk of accidents.
WARNING: All occupants of the vehicle, including the driver,
should always properly wear their safety belts, even when an air
bag supplemental restraint system (SRS) is provided.
Never remove or defeat the “tripping mechanisms” designed into the
snow removal equipment by its manufacturer. Doing so may cause
damage to the vehicle and the snow removal equipment as well as
possible airbag deployment.
WARNING: Do not attempt to service, repair, or modify the air
bag supplemental restraint system (SRS) or its fuses. See your
Ford or Lincoln Mercury dealer.
WARNING: Additional equipment such as snowplow equipment
may effect the performance of the airbag sensors increasing the
risk of injury. Please refer to the Body Builders Layout Book for
instructions about the appropriate installation of additional equipment.Driving
312
2011 F-250/350/450/550 (f23)
Owners Guide, 4th Printing
USA (fus)
Page 342 of 449
4. Slide the wheel partially under the vehicle and install the retainer
through the wheel center. Pull on the cable to align the components at
the end of the cable.
5. Turn the jack handle clockwise until the tire is raised to its stowed
position underneath the vehicle. The effort to turn the jack handle
increases significantly and the spare tire carrier ratchets or slips when
the tire is raised to the maximum tightness. Tighten to the best of your
ability, to the point where the ratchet/slip occurs, if possible. The spare
tire carrier will not allow you to overtighten. If the spare tire carrier
ratchets or slips with little effort, take the vehicle to your authorized
dealer for assistance at your earliest convenience.
6. Check that the tire lies flat against the frame and is properly
tightened. Try to push or pull, then turn the tire to be sure it will not
move. Loosen and retighten, if necessary. Failure to properly stow the
spare tire may result in failure of the winch cable and loss of the tire.
7. Repeat this tightness check procedure when servicing the spare tire
pressure (every six months, per scheduled maintenance information),
or at any time that the spare tire is disturbed through service of other
components.
8. If removed, install the spare tire lock (if equipped) into the bumper
drive tube with the spare tire lock key (if equipped) and jack handle.
WHEEL LUG NUT TORQUE SPECIFICATIONS
On vehicles equipped with single rear wheels, retighten the lug nuts to
the specified torque at 500 miles (800 km) after any wheel disturbance
(tire rotation, changing a flat tire, wheel removal, etc.).
On vehicles equipped with dual rear wheels, retighten the wheel lug nuts
to the specified torque at 100 miles (160 km), and again at 500 miles
(800 km) of new vehicle operation and after any wheel disturbance (tire
rotation, changing a flat tire, wheel removal, etc.).
Bolt size Wheel lug nut torque*
ft-lb N • m
M14 x 1.5 165 224
* Torque specifications are for nut and bolt threads free of dirt and
rust. Use only Ford recommended replacement fasteners.
It is important to follow the proper wheel mounting and lug nut torque
procedures.Roadside Emergencies
342
2011 F-250/350/450/550 (f23)
Owners Guide, 4th Printing
USA (fus)