Page 1 of 461
Introduction 4
Instrument Cluster 12
Warning lights and chimes 12
Gauges 18
Message center 19
Entertainment Systems 47
AM/FM stereo 47
AM/FM stereo with CD/MP3 49
Auxiliary input jack (Line in) 57
USB port 59
Satellite radio information 62
Navigation system 65
SYNC�65
Climate Controls 66
Manual heating and air conditioning 66
Dual electronic automatic temperature control 69
Navigation system based climate control 74
Rear window defroster 78
Lights 80
Headlamps 80
Turn signal control 83
Bulb replacement 86
Driver Controls 92
Windshield wiper/washer control 92
Steering wheel adjustment 93
Power windows 100
Mirrors 103
Speed control 108
Tailgate 120
Table of Contents
1
2011 F-150(f12)
Owners Guide, 1st Printing
USA(fus)
Page 17 of 461

ignition is turned on, or remains on, have the system serviced
immediately by your authorized dealer.
Four-wheel drive high (RTT) (if
equipped):Displays when
four-wheel drive high is engaged. If
the light fails to display when the
ignition is turned on, or remains on, have the system serviced
immediately by your authorized dealer.
All-wheel drive (RTT) (if
equipped):Displays when using the
AWD system.
Electronic locking differential
(RTT) (if equipped):Displays
when using the electronic locking
differential.
Speed control (if equipped):The
speed control system indicator light
changes color to indicate what mode
the system is in:
•On (amber light):Illuminates
when the speed control system is turned on. Turns off when the speed
control system is engaged or turned off.
•Engaged (green light):Illuminates when the speed control system is
engaged. Turns off when the speed control system is disengaged.
Turn signal:Illuminates when the
left or right turn signal or the
hazard lights are turned on. If the
indicators stay on or flash faster, check for a burned out bulb.
High beams:Illuminates when the
high beam headlamps are turned on.
Key-in-ignition warning chime:Sounds when the key is left in the
ignition in the off or accessory position and the driver’s door is opened.
Headlamps on warning chime:Sounds when the headlamps or parking
lamps are on, the ignition is off (the key is not in the ignition) and the
driver’s door is opened.
4x4
HIGH
AWD
Instrument Cluster
17
2011 F-150(f12)
Owners Guide, 1st Printing
USA(fus)
Page 87 of 461
Function Number of
bulbsTrade number
Rear
stop/turn/sidemarker/tail
lamp (styleside)4 3057K
High-mount brakelamp 1 912
Cargo lamp 2 912
License plate lamp 2 194
Exterior mounted mirror
turn signal indicator
(if equipped)2 See your dealer
Puddle lamp
(if equipped)2 See your dealer
All replacement bulbs are clear in color except where noted.
To replace all instrument panel lights - see your authorized dealer
Replacing exterior bulbs
Check the operation of all the bulbs frequently.
Replacing headlamp bulbs
1. Make sure that the headlamp control is in the off position and open
the hood.
2. Remove the pushpin that holds
the air deflector/protective cover
from the upper inboard corner of
the lamp.
Lights
87
2011 F-150(f12)
Owners Guide, 1st Printing
USA(fus)
Page 89 of 461
Replacing front parking lamp/turn signal/sidemarker bulbs
1. Make sure that the headlamp control is in the off position and open
the hood.
2. Remove the pushpin that holds
the air deflector/protective cover
from the upper inboard corner of
the lamp.
3. Loosen the three retaining bolts
(two at top of lamp, one at lower
inboard corner).
4. Once the three retaining bolts
have been removed, slide the
headlamp assembly forward,
disconnecting the two snap attachments at the fender.
5. Remove the bulb and socket by
turning it counterclockwise, then
pull it straight out.
6. Pull the bulb straight out of the
socket.
Install the new bulb(s) in reverse order.
Replacing tail/brake/turn signal/backup lamp bulbs
1. Make sure the headlamp control
is in the off position.
2. Open the tailgate to expose the
lamp assembly and remove the two
bolts from the tail lamp assembly.
Lights
89
2011 F-150(f12)
Owners Guide, 1st Printing
USA(fus)
Page 90 of 461

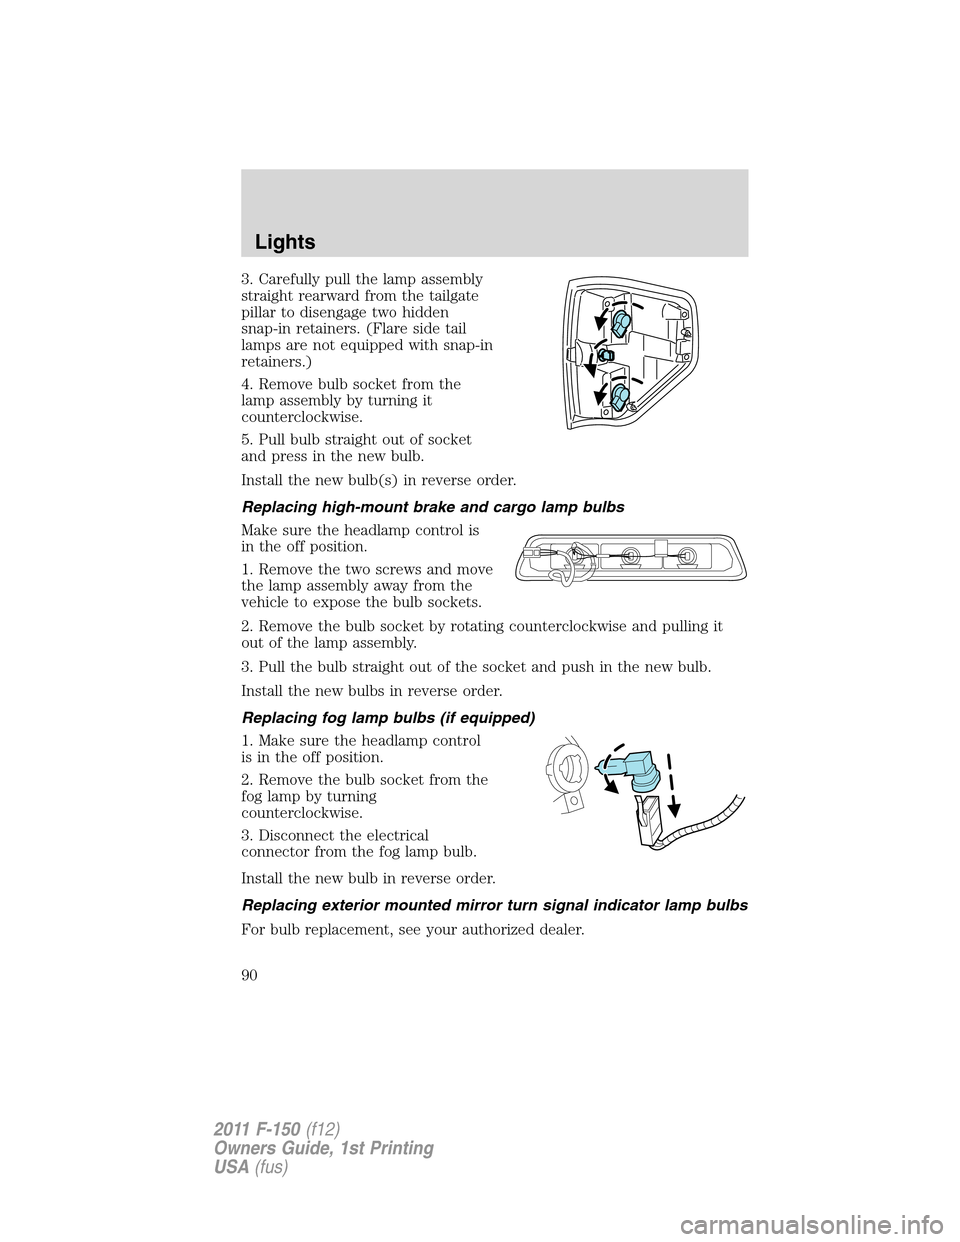
3. Carefully pull the lamp assembly
straight rearward from the tailgate
pillar to disengage two hidden
snap-in retainers. (Flare side tail
lamps are not equipped with snap-in
retainers.)
4. Remove bulb socket from the
lamp assembly by turning it
counterclockwise.
5. Pull bulb straight out of socket
and press in the new bulb.
Install the new bulb(s) in reverse order.
Replacing high-mount brake and cargo lamp bulbs
Make sure the headlamp control is
in the off position.
1. Remove the two screws and move
the lamp assembly away from the
vehicle to expose the bulb sockets.
2. Remove the bulb socket by rotating counterclockwise and pulling it
out of the lamp assembly.
3. Pull the bulb straight out of the socket and push in the new bulb.
Install the new bulbs in reverse order.
Replacing fog lamp bulbs (if equipped)
1. Make sure the headlamp control
is in the off position.
2. Remove the bulb socket from the
fog lamp by turning
counterclockwise.
3. Disconnect the electrical
connector from the fog lamp bulb.
Install the new bulb in reverse order.
Replacing exterior mounted mirror turn signal indicator lamp bulbs
For bulb replacement, see your authorized dealer.
Lights
90
2011 F-150(f12)
Owners Guide, 1st Printing
USA(fus)