Page 117 of 461

4. Press and release the button again. The garage door should move,
confirming that programming is successful. If your garage door does not
operate, repeat the previous steps in this section.
After successful programming, you will be able to operate your Car2U�
system by pressing the button you programmed to activate the opener.
The indicator light above the selected button will turn on to confirm that
the Car2U�system is responding to the button command.
To program another rolling code device such as an additional garage door
opener, a security device or home lighting, repeat Steps 1 through 4
substituting a different function button in Step 3 than what you used for
the garage door opener. For example, you could assign the left-most
button to the garage door, the center button to a security device, and
the right-most button to another garage door opener.
Note:The Car2U�system allows for three devices to be programmed. If
you need to change or replace any of the three devices after it has been
initially programmed, it is necessary to erase the current settings using
theErasing the Car2U�Home Automation System buttonsprocedure
and then programming all of the devices being used.
Fixed code programming
Note:Do not program the Car2U�system with the vehicle in the garage.
Make sure that your key is on and engine off while programming the
transmitter.
1. To program units with fixed code DIP switches, you will need the
garage door hand-held transmitter, paper and a pen or pencil.
Driver Controls
117
2011 F-150(f12)
Owners Guide, 1st Printing
USA(fus)
Page 118 of 461

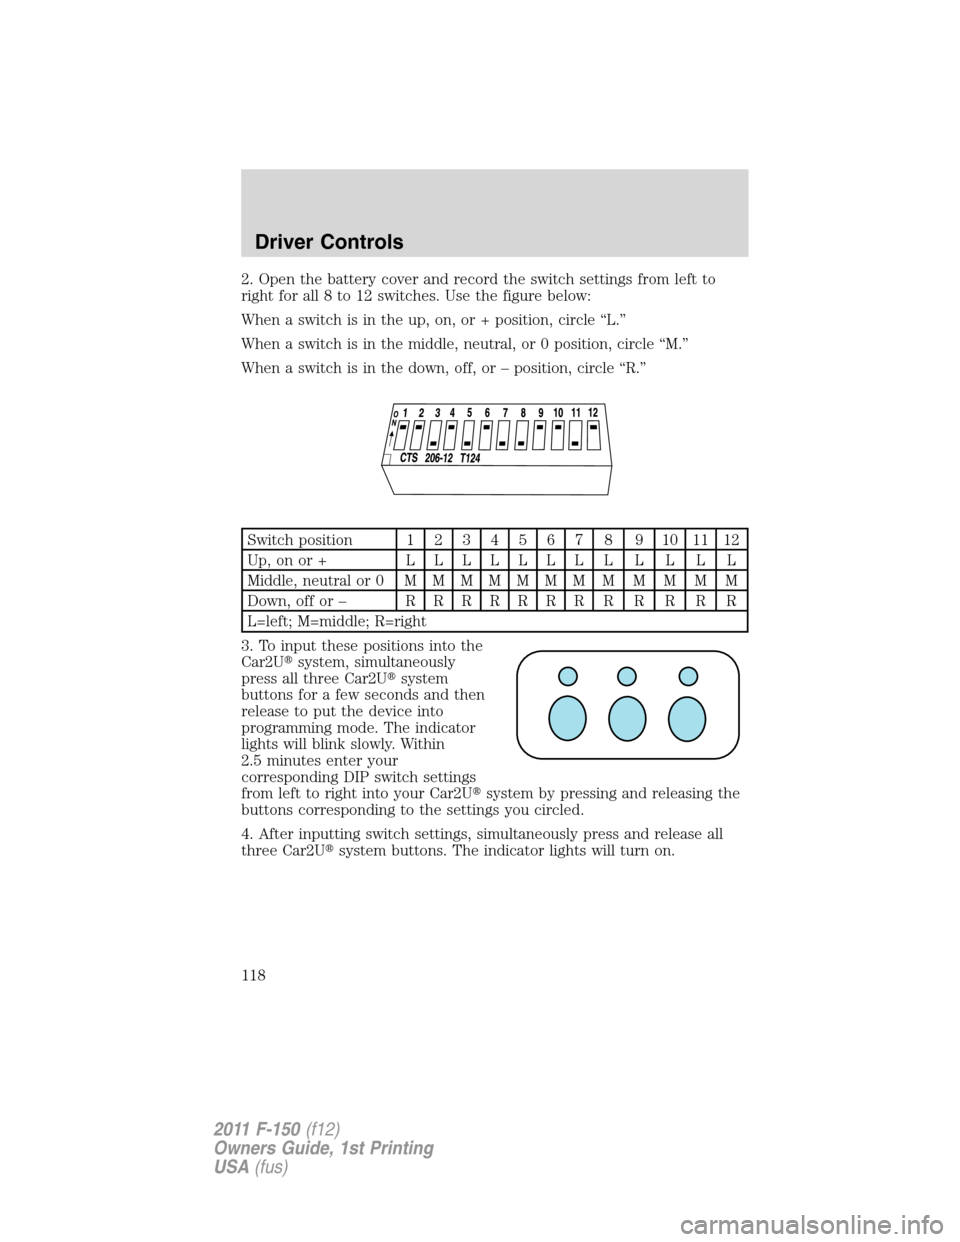
2. Open the battery cover and record the switch settings from left to
right for all 8 to 12 switches. Use the figure below:
When a switch is in the up, on, or + position, circle “L.”
When a switch is in the middle, neutral, or 0 position, circle “M.”
When a switch is in the down, off, or – position, circle “R.”
Switch position1234567 8 9101112
Up,onor+ LLLLLLLLLLLL
Middle, neutral or 0MMMMMMMMMMMM
Down, off or –RRRRRRRRRRRR
L=left; M=middle; R=right
3. To input these positions into the
Car2U�system, simultaneously
press all three Car2U�system
buttons for a few seconds and then
release to put the device into
programming mode. The indicator
lights will blink slowly. Within
2.5 minutes enter your
corresponding DIP switch settings
from left to right into your Car2U�system by pressing and releasing the
buttons corresponding to the settings you circled.
4. After inputting switch settings, simultaneously press and release all
three Car2U�system buttons. The indicator lights will turn on.
Driver Controls
118
2011 F-150(f12)
Owners Guide, 1st Printing
USA(fus)
Page 119 of 461

5. Press and hold the Car2U�
system button you would like to use
to control the garage door.
Immediately (within 1 second)
release the button once the garage
door moves. During this time the
selected button indicator light will
blink slowly. Do not release the
button until you see the garage door move. Most garage doors open
quickly. You may need to hold the button from 5–55 seconds before
observing movement of the garage door.
6. The indicator light will (begin to) blink rapidly until programming is
complete. If your garage door opener does not operate following these
steps, repeat Steps 2 through 6. Otherwise, call the toll-free Car2U�help
line at 1-866-57Car2U (1-866-572-2728).
After successful programming, you will be able to operate your Car2U�
system by pressing the button you programmed to activate the opener.
The indicator light above the selected button will turn on to confirm that
the Car2U�system is responding to the button command.
Erasing the Car2U�Home Automation System buttons
Note:The system allows for three devices to be programmed. If you
need to change or replace any of the three devices after it has been
initially programmed, it will be necessary to erase the current settings
using the procedure below and then reprogramming all of the devices
being used.
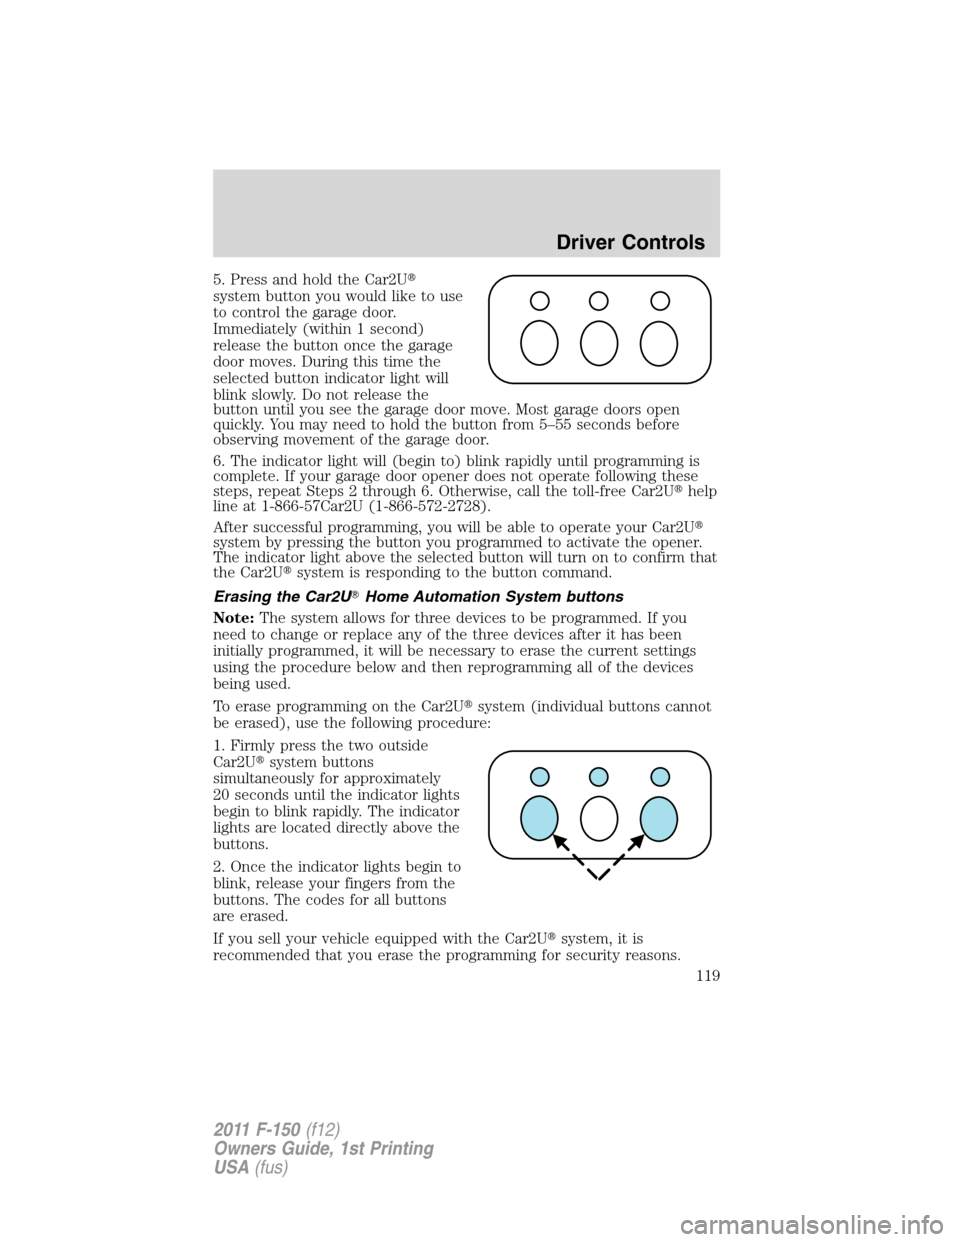
To erase programming on the Car2U�system (individual buttons cannot
be erased), use the following procedure:
1. Firmly press the two outside
Car2U�system buttons
simultaneously for approximately
20 seconds until the indicator lights
begin to blink rapidly. The indicator
lights are located directly above the
buttons.
2. Once the indicator lights begin to
blink, release your fingers from the
buttons. The codes for all buttons
are erased.
If you sell your vehicle equipped with the Car2U�system, it is
recommended that you erase the programming for security reasons.
Driver Controls
119
2011 F-150(f12)
Owners Guide, 1st Printing
USA(fus)
Page 122 of 461

Tailgate step (if equipped)
Your vehicle may be equipped with a feature that allows easier entry into
the truck bed. To open the tailgate step:
1. Flip down the tailgate.
2. Pull the yellow latch lever to the
unlock position (
) to release the
grab handle from its stowed position
and raise the handle upright until
you feel it latch and see the latch
lever in the lock position (
). The
yellow lever only needs to be used
when releasing the grab handle.
3. Rotate the center molding to
unlatch the tailgate step and pull it
towards you to extend it.
4. Flip open the step panel to widen
the step.
Note:To reduce risk of falling:
•Operate step only when the
vehicle is on level surface.
•Operate step only in areas with
sufficient lighting
•Always open flip panel to widen step.
•Always use grab handle when stepping up and down.
•Step not intended for bare-footed use.
•Keep step clean from contamination before use (e.g. snow, mud)
•Keep the step load (you + load) below 350 lb (159 kg).
•Never drive with step deployed.
To close the tailgate step:
1. Close the step panel, then lift and fully close the tailgate step into the
tailgate.
2. Slide the latch at the bottom of the handle, then lower the handle.
Driver Controls
122
2011 F-150(f12)
Owners Guide, 1st Printing
USA(fus)
Page 127 of 461
CARGO MANAGEMENT SYSTEM (IF EQUIPPED)
The cargo management system consists of the Cargo rail package with
the following as optional accessories:
•Front header bar (if equipped)
•Cross bars (if equipped)
•Bed divider (if equipped)
•Side mounted tool bins (if equipped)
Cargo rail package:The strong extruded aluminum double channel
rails and four adjustable cleats are designed to hold loads up to 600 lb
(272 kg) per cleat (maximum of two cleats per rail).
•Cleat positions are adjusted by pulling the knob and turning slightly to
lock open. The cleat can then be moved along the rail. Once the
desired position is reached, return the knob to the horizontal position.
Pull the cleat side-to-side to ensure it has locked into the next
available hole location.
Driver Controls
127
2011 F-150(f12)
Owners Guide, 1st Printing
USA(fus)
Page 128 of 461
•To remove cleat from rail, pull the knob and turn slightly to lock open
and slide it off the end of the rail.
When installing cleat, reverse instructions above.
Note:When replacing a cleat into the rail, make sure the oval embossed
on the knob is not upside down. This will ensure that the cleat is
properly oriented to accept accessory attachments.
Front header bar:Spans the header area of the pickup box, providing
the function of a header rail.
•Attachment cleats from side rails or other attachments may be
positioned in the front header bar to secure loads up to 600 lb
(272 kg) per cleat (maximum of two cleats).
•Cleats and other attachments may be inserted through the access
window located in the center of the header bar. These items can then
be slid to either side, and secured the same way as the side rails.
Driver Controls
128
2011 F-150(f12)
Owners Guide, 1st Printing
USA(fus)
Page 135 of 461

4. Wait until KEY RESTRICTED AT NEXT START is displayed.
For optional message center:
1. At the main menu screen select SETTING then MYKEY by pressing
OK or the right arrow key.
2. Press OK to select CREATE MYKEY.
3. Hold OK as prompted until you see MARK THIS KEY AS
RESTRICTED.
MyKey™ is successfully programmed. Make sure you label it so you can
distinguish it from the admin keys.Note:To program the optional
settings go to Step 2 in theProgramming MyKey™ optional settings
section. If your vehicle is equipped with remote start, see theUsing
MyKey™ with remote start systemssection.
Note:The MyKey™ can be cleared within the same key cycle that it was
created, otherwise a standard key (administrator key) is required to
clear the MyKey™ programming. To clear all MyKeys™ go to Step 2 in
theClear MyKey™section.
Programming MyKey™ optional settings
To program the optional settings, use the message center buttons to do
the following:
For standard message center:
1. Press SETUP until RESET FOR MYKEY SETTINGS is displayed.
2. Press and release the RESET button to display MyKey™ setup menus.
The first menu shown is:
MYKEY MAX MPH <80 MPH> OFF
3. If you don’t want to change the maximum speed setting, press the
SETUP button to display the next menu. The remaining menus appear as
follows with the default settings shown:
MYKEY MPH TONES 45 55 65
MYKEY VOLUME LIMIT OFF
MYKEY ADVTRAC CTRL ON .
4. On any of the menus press RESET to highlight your choice with the
<…>.
5. Press SETUP to enter your choice. The next optional setting will be
displayed.
6. Repeat Steps 4 and 5 until you are done changing the optional
settings.
Locks and Security
135
2011 F-150(f12)
Owners Guide, 1st Printing
USA(fus)
Page 149 of 461

Illuminated entry
The interior lamps and parking lamps illuminate when the remote entry
system is used to unlock the door(s).
The illuminated entry system will turn off the lights if:
•the ignition switch is turned to the on position, or
•the remote transmitter lock control is pressed, or
•the 7•8 and the 9•0 controls on the keyless entry keypad are
pressed, or
•after 25 seconds of illumination.
The dome lamp control (if equipped) mustnotbe set to the off position
for the illuminated entry system to operate.
The lights will not turn off if:
•they have been turned on with the dimmer control, or
•any door is open.
The battery saver will shut off the interior lamps 30 minutes after the
ignition has been turned to the off position, 10 minutes after if the dome
lamp is off, and 30 minutes after if the dome lamp switch is left on.
Remote start (if equipped)
Your vehicle may be equipped with the remote start feature which allows
you to start the engine from outside the vehicle. If your transmitter has
a
icon, you have remote start. The remote start feature has an
extended operating range which allows you to remote start your vehicle
from a farther distance from your vehicle. All the buttons have this
increased range performance capability when equipped with remote
start.
Many states and provinces have restrictions for the use of remote start.
Check your local and state or provincial laws for specific requirements
regarding remote start systems.
Note:Do not use remote start if your vehicle is low on fuel.
WARNING:To avoid exhaust fumes, do not use remote start if
your vehicle is parked indoors or areas that are not well
ventilated.
Locks and Security
149
2011 F-150(f12)
Owners Guide, 1st Printing
USA(fus)