2011 FORD F150 fuel
[x] Cancel search: fuelPage 272 of 461
STARTING
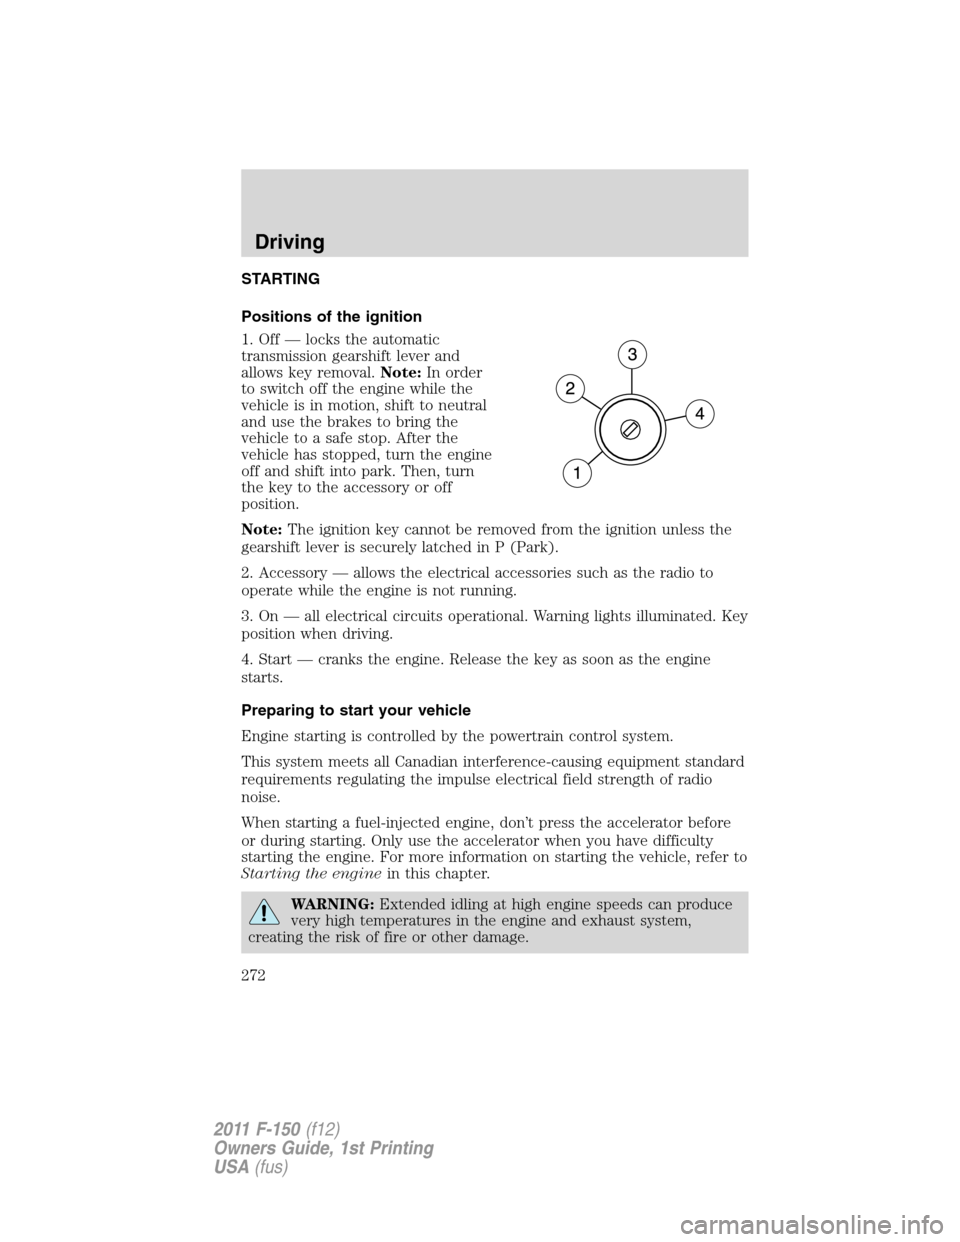
Positions of the ignition
1. Off — locks the automatic
transmission gearshift lever and
allows key removal.Note:In order
to switch off the engine while the
vehicle is in motion, shift to neutral
and use the brakes to bring the
vehicle to a safe stop. After the
vehicle has stopped, turn the engine
off and shift into park. Then, turn
the key to the accessory or off
position.
Note:The ignition key cannot be removed from the ignition unless the
gearshift lever is securely latched in P (Park).
2. Accessory — allows the electrical accessories such as the radio to
operate while the engine is not running.
3. On — all electrical circuits operational. Warning lights illuminated. Key
position when driving.
4. Start — cranks the engine. Release the key as soon as the engine
starts.
Preparing to start your vehicle
Engine starting is controlled by the powertrain control system.
This system meets all Canadian interference-causing equipment standard
requirements regulating the impulse electrical field strength of radio
noise.
When starting a fuel-injected engine, don’t press the accelerator before
or during starting. Only use the accelerator when you have difficulty
starting the engine. For more information on starting the vehicle, refer to
Starting the enginein this chapter.
WARNING:Extended idling at high engine speeds can produce
very high temperatures in the engine and exhaust system,
creating the risk of fire or other damage.
Driving
272
2011 F-150(f12)
Owners Guide, 1st Printing
USA(fus)
Page 275 of 461
Starting the engine
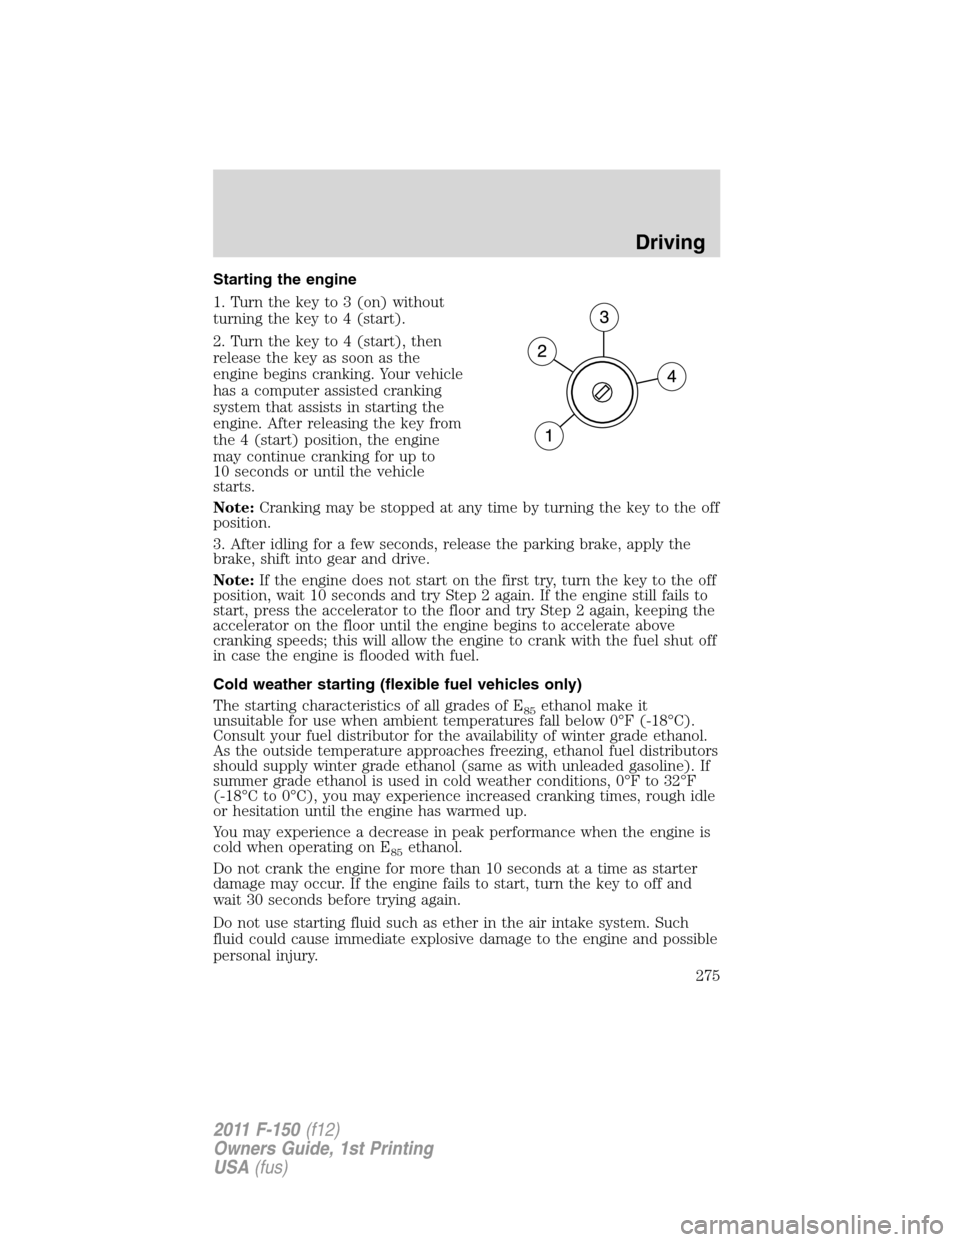
1. Turn the key to 3 (on) without
turning the key to 4 (start).
2. Turn the key to 4 (start), then
release the key as soon as the
engine begins cranking. Your vehicle
has a computer assisted cranking
system that assists in starting the
engine. After releasing the key from
the 4 (start) position, the engine
may continue cranking for up to
10 seconds or until the vehicle
starts.
Note:Cranking may be stopped at any time by turning the key to the off
position.
3. After idling for a few seconds, release the parking brake, apply the
brake, shift into gear and drive.
Note:If the engine does not start on the first try, turn the key to the off
position, wait 10 seconds and try Step 2 again. If the engine still fails to
start, press the accelerator to the floor and try Step 2 again, keeping the
accelerator on the floor until the engine begins to accelerate above
cranking speeds; this will allow the engine to crank with the fuel shut off
in case the engine is flooded with fuel.
Cold weather starting (flexible fuel vehicles only)
The starting characteristics of all grades of E
85ethanol make it
unsuitable for use when ambient temperatures fall below 0°F (-18°C).
Consult your fuel distributor for the availability of winter grade ethanol.
As the outside temperature approaches freezing, ethanol fuel distributors
should supply winter grade ethanol (same as with unleaded gasoline). If
summer grade ethanol is used in cold weather conditions, 0°F to 32°F
(-18°C to 0°C), you may experience increased cranking times, rough idle
or hesitation until the engine has warmed up.
You may experience a decrease in peak performance when the engine is
cold when operating on E
85ethanol.
Do not crank the engine for more than 10 seconds at a time as starter
damage may occur. If the engine fails to start, turn the key to off and
wait 30 seconds before trying again.
Do not use starting fluid such as ether in the air intake system. Such
fluid could cause immediate explosive damage to the engine and possible
personal injury.
Driving
275
2011 F-150(f12)
Owners Guide, 1st Printing
USA(fus)
Page 276 of 461

If you should experience cold weather starting problems on E85ethanol,
and neither an alternative brand of E
85ethanol nor an engine block
heater is available, the addition of unleaded gasoline to your tank will
improve cold starting performance. Your vehicle is designed to operate
on E
85ethanol alone, unleaded gasoline alone, or any mixture of the two.
SeeChoosing the right fuelin theMaintenance and Specifications
chapter for more information on ethanol.
If the engine fails to start using the preceding instructions
(flexible fuel vehicles only)
1. Press and hold down the accelerator 1/3 to 1/2 way to floor, then
crank the engine.
2. When the engine starts, release the key, then gradually release the
accelerator pedal as the engine speeds up. If the engine still fails to start,
repeat Step 1.
Guarding against exhaust fumes
Carbon monoxide is present in exhaust fumes. Take precautions to avoid
its dangerous effects.
WARNING:If you smell exhaust fumes inside your vehicle, have
your dealer inspect your vehicle immediately. Do not drive if you
smell exhaust fumes.
Important ventilating information
If the engine is idling while the vehicle is stopped for a long period of
time, open the windows at least 1 inch (2.5 cm) or adjust the heating or
air conditioning to bring in fresh air.
ENGINE BLOCK HEATER (IF EQUIPPED)
An engine block heater warms the engine coolant which aids in starting
and allows the heater/defroster system to respond quickly. If your vehicle
is equipped with this system, your equipment includes a heater element
which is installed in your engine block and a wire harness which allows
the user to connect the system to a grounded 120 volt A/C electrical
source. The block heater system is most effective when outdoor
temperatures reach below 0°F (-18°C).
For flexible fuel vehicles, if operating with E
85ethanol, an engine block
heater must be used if ambient temperature is below 0°F (-18°C).
SeeCold weather startingearlier in this chapter for more information
on starting with ethanol.
Driving
276
2011 F-150(f12)
Owners Guide, 1st Printing
USA(fus)
Page 294 of 461
D (Drive) with Tow/Haul Off
The normal driving position for the best fuel economy. Transmission
operates in gears one through six.
D (Drive) with Tow/Haul On
The Tow/Haul feature improves transmission operation when towing a
trailer or a heavy load. All transmission gear ranges are available when
using Tow/Haul.
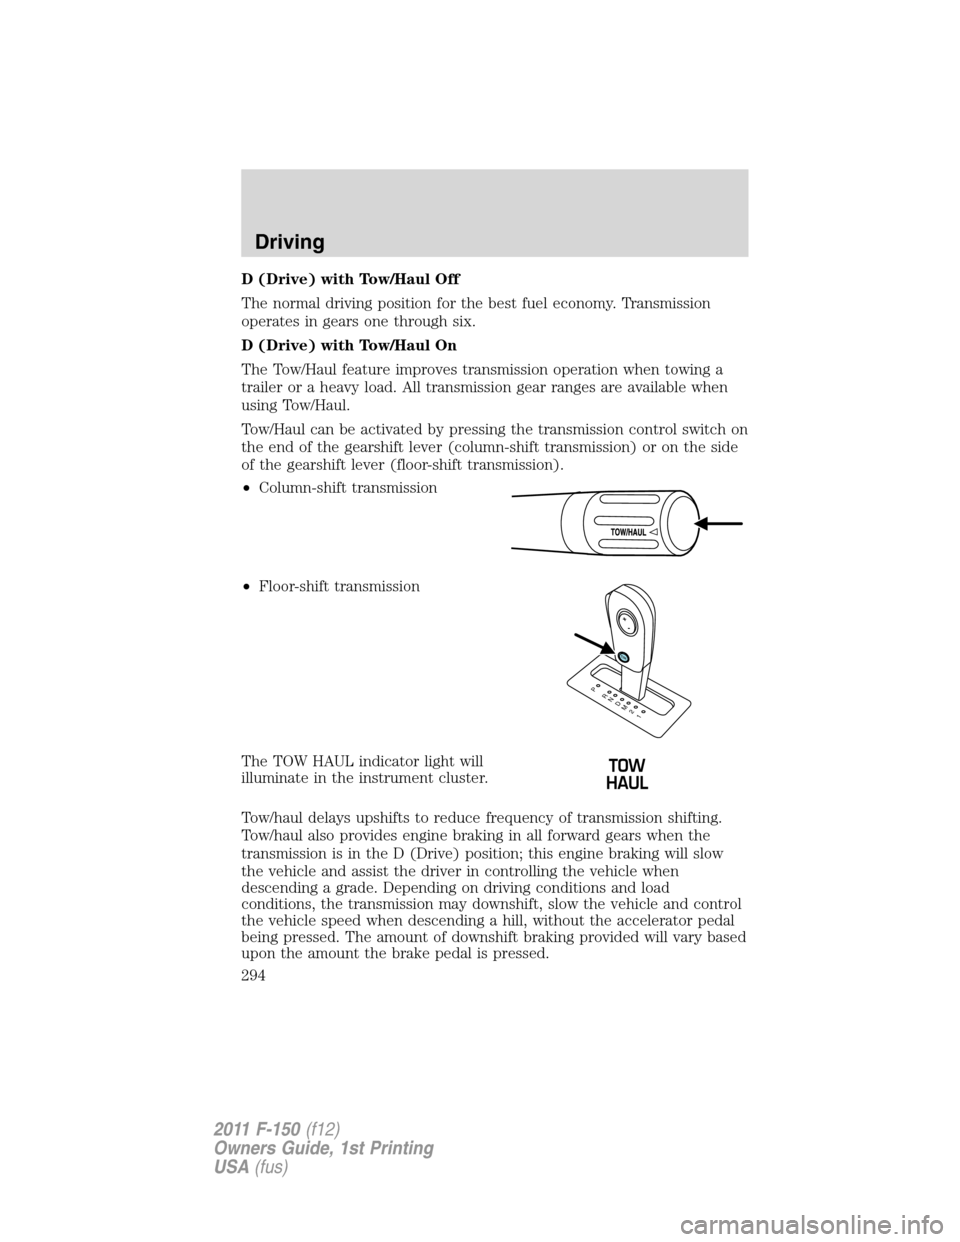
Tow/Haul can be activated by pressing the transmission control switch on
the end of the gearshift lever (column-shift transmission) or on the side
of the gearshift lever (floor-shift transmission).
•Column-shift transmission
•Floor-shift transmission
The TOW HAUL indicator light will
illuminate in the instrument cluster.
Tow/haul delays upshifts to reduce frequency of transmission shifting.
Tow/haul also provides engine braking in all forward gears when the
transmission is in the D (Drive) position; this engine braking will slow
the vehicle and assist the driver in controlling the vehicle when
descending a grade. Depending on driving conditions and load
conditions, the transmission may downshift, slow the vehicle and control
the vehicle speed when descending a hill, without the accelerator pedal
being pressed. The amount of downshift braking provided will vary based
upon the amount the brake pedal is pressed.
T/H
PR
N
D
M
2
1
+
-
Driving
294
2011 F-150(f12)
Owners Guide, 1st Printing
USA(fus)
Page 307 of 461
•CHECK 4X4- Displays when a
4X4 fault is present.
Note:When a 4X4 system fault is present, the system will typically
remain in whichever 4X4 mode was selected prior to the fault condition
occurring. It will not default to 4X2 in all circumstances. When this
warning is displayed, have your vehicle serviced by an authorized dealer.
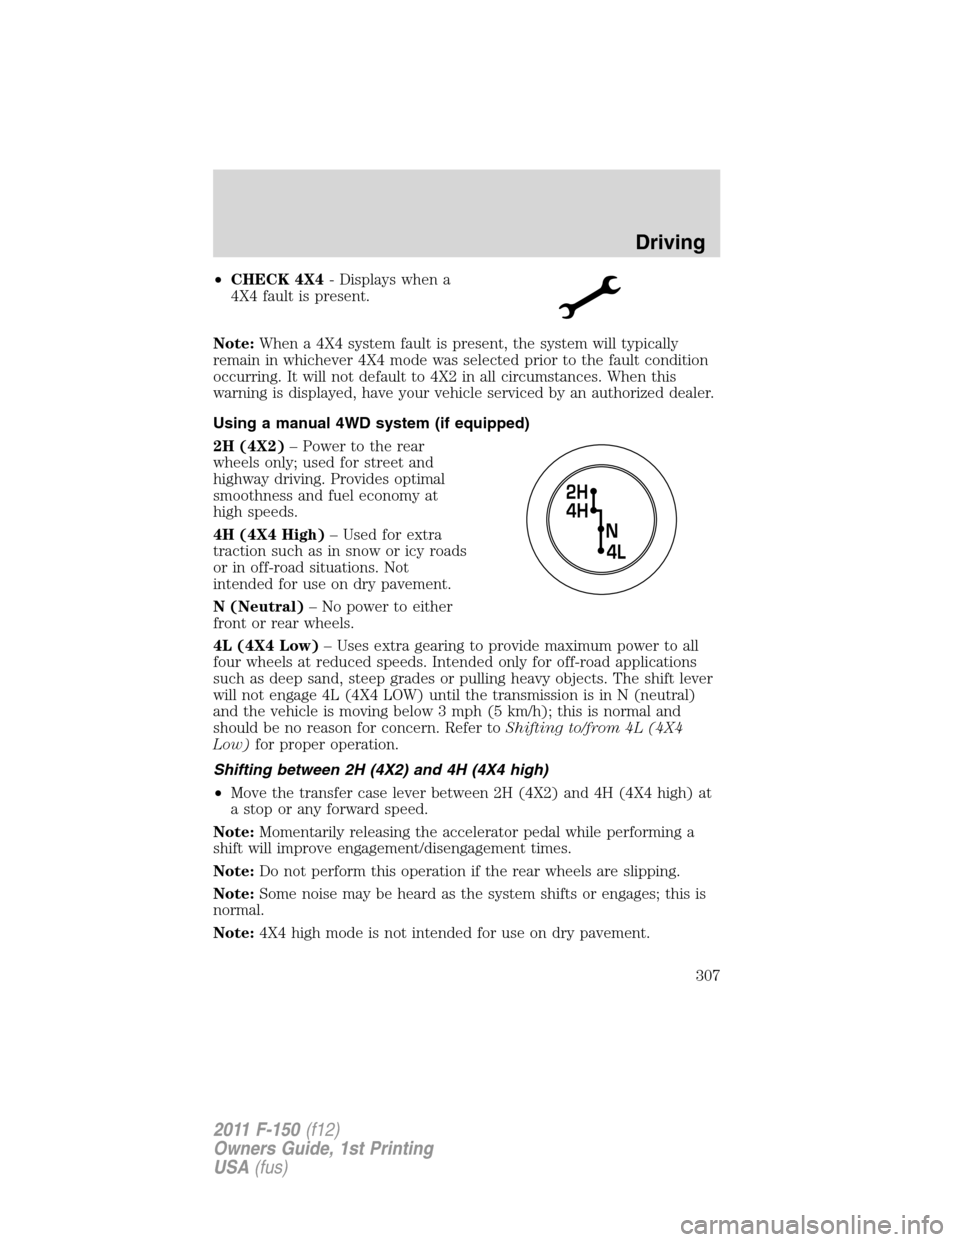
Using a manual 4WD system (if equipped)
2H (4X2)– Power to the rear
wheels only; used for street and
highway driving. Provides optimal
smoothness and fuel economy at
high speeds.
4H (4X4 High)– Used for extra
traction such as in snow or icy roads
or in off-road situations. Not
intended for use on dry pavement.
N (Neutral)– No power to either
front or rear wheels.
4L (4X4 Low)– Uses extra gearing to provide maximum power to all
four wheels at reduced speeds. Intended only for off-road applications
such as deep sand, steep grades or pulling heavy objects. The shift lever
will not engage 4L (4X4 LOW) until the transmission is in N (neutral)
and the vehicle is moving below 3 mph (5 km/h); this is normal and
should be no reason for concern. Refer toShifting to/from 4L (4X4
Low)for proper operation.
Shifting between 2H (4X2) and 4H (4X4 high)
•Move the transfer case lever between 2H (4X2) and 4H (4X4 high) at
a stop or any forward speed.
Note:Momentarily releasing the accelerator pedal while performing a
shift will improve engagement/disengagement times.
Note:Do not perform this operation if the rear wheels are slipping.
Note:Some noise may be heard as the system shifts or engages; this is
normal.
Note:4X4 high mode is not intended for use on dry pavement.
Driving
307
2011 F-150(f12)
Owners Guide, 1st Printing
USA(fus)
Page 309 of 461
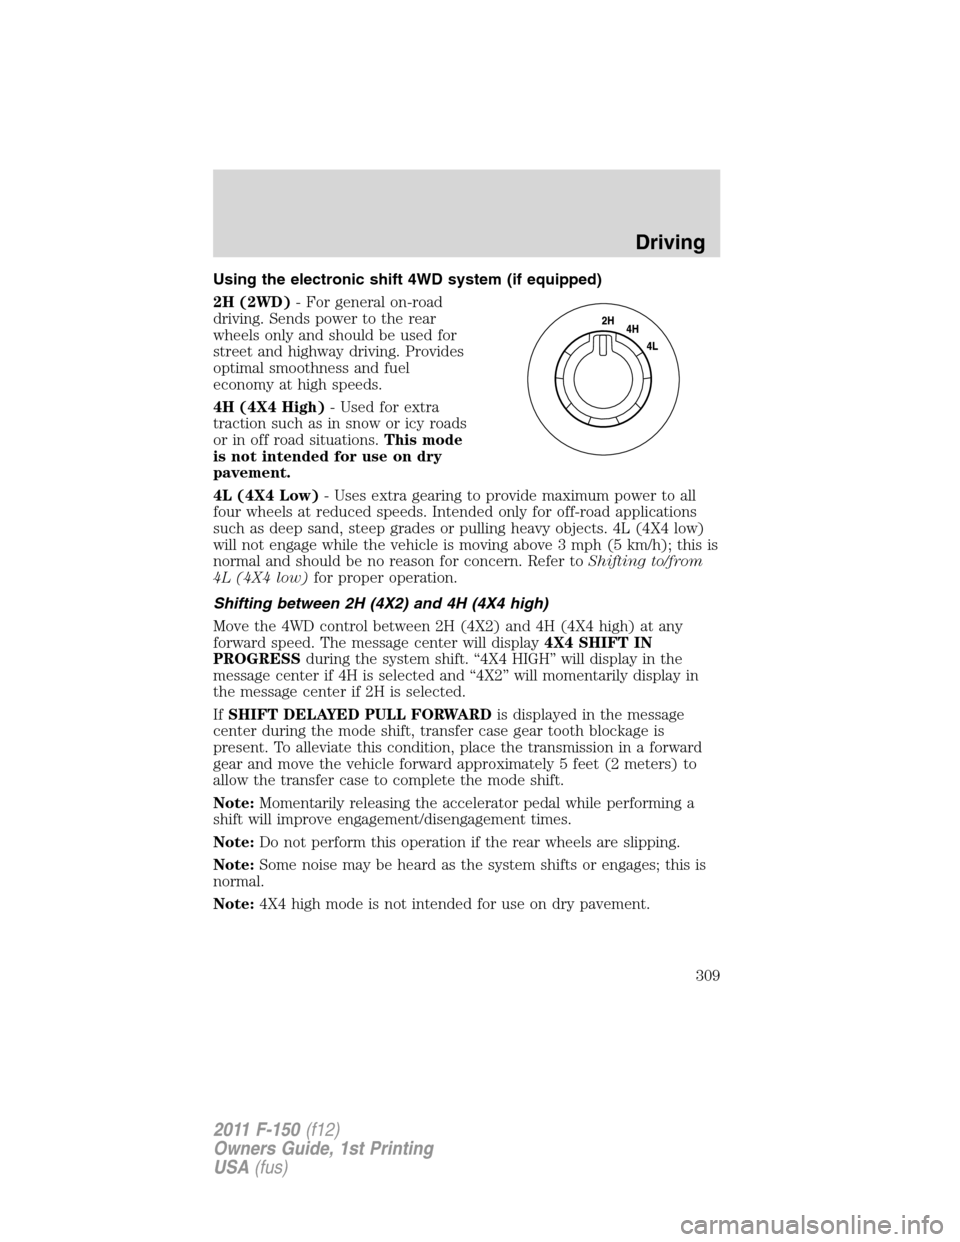
Using the electronic shift 4WD system (if equipped)
2H (2WD)- For general on-road
driving. Sends power to the rear
wheels only and should be used for
street and highway driving. Provides
optimal smoothness and fuel
economy at high speeds.
4H (4X4 High)- Used for extra
traction such as in snow or icy roads
or in off road situations.This mode
is not intended for use on dry
pavement.
4L (4X4 Low)- Uses extra gearing to provide maximum power to all
four wheels at reduced speeds. Intended only for off-road applications
such as deep sand, steep grades or pulling heavy objects. 4L (4X4 low)
will not engage while the vehicle is moving above 3 mph (5 km/h); this is
normal and should be no reason for concern. Refer toShifting to/from
4L (4X4 low)for proper operation.
Shifting between 2H (4X2) and 4H (4X4 high)
Move the 4WD control between 2H (4X2) and 4H (4X4 high) at any
forward speed. The message center will display4X4 SHIFT IN
PROGRESSduring the system shift. “4X4 HIGH” will display in the
message center if 4H is selected and “4X2” will momentarily display in
the message center if 2H is selected.
IfSHIFT DELAYED PULL FORWARDis displayed in the message
center during the mode shift, transfer case gear tooth blockage is
present. To alleviate this condition, place the transmission in a forward
gear and move the vehicle forward approximately 5 feet (2 meters) to
allow the transfer case to complete the mode shift.
Note:Momentarily releasing the accelerator pedal while performing a
shift will improve engagement/disengagement times.
Note:Do not perform this operation if the rear wheels are slipping.
Note:Some noise may be heard as the system shifts or engages; this is
normal.
Note:4X4 high mode is not intended for use on dry pavement.
Driving
309
2011 F-150(f12)
Owners Guide, 1st Printing
USA(fus)
Page 310 of 461

Shifting to/from 4L (4X4 low)
1. Bring the vehicle to a speed of 3 mph (5 km/h) or less.
2. Place the transmission in N (Neutral).
3. Move the 4WD control to the desired position.
The message center will display4X4 SHIFT IN PROGRESSduring the
shift. The message center will then display the system mode selected. If
any of the above shift conditions are not met, the shift will not occur and
the message center will display information guiding the driver through
the proper shifting procedures.
IfSHIFT DELAYED PULL FORWARDis displayed in the message
center, transfer case gear tooth blockage is present. To alleviate this
condition, place the transmission in a forward gear, move the vehicle
forward approximately 5 feet (1.5 m), and shift the transmission back to
neutral to allow the transfer case to complete the range shift.
Note:Some noise may be heard as the system shifts or engages; this is
normal.
Note:4x4 low mode is not intended for use on dry pavement.
Using the all-wheel drive (AWD) system
(if equipped, Harley-Davidson™ only)
This system includes an electronically controlled transfer case. The
system is interactive with the road, continually monitoring and adjusting
torque delivery to the front and rear wheels to optimize traction.
2H (4X2)- Power to the rear
wheels only; used for street and
highway driving. Provides optimal
smoothness and fuel economy at
high speeds. The message center
will momentarily display “4X2” when
this mode is selected.
AWD (4X4 auto)- Power delivered
to all four wheels, as required, for
increased traction.
4H (4X4 high)- Used for extra
traction on snow covered or icy roads and in off-road situations. This
position is not recommended for use on dry pavement. This position is
only intended for severe winter or off-road conditions, such as deep
snow, ice or deep sand. The message center will display “4X4 High”
when this mode is selected.
Driving
310
2011 F-150(f12)
Owners Guide, 1st Printing
USA(fus)
Page 321 of 461
ROADSIDE ASSISTANCE
Getting roadside assistance
To fully assist you should you have a vehicle concern, Ford Motor
Company offers a complimentary roadside assistance program. This
program is separate from the New Vehicle Limited Warranty. The service
is available:
•24-hours, seven days a week
•for the coverage period listed on the Roadside Assistance Card
included in your Owner Guide portfolio.
Roadside assistance will cover:
•a flat tire change with a good spare (except vehicles that have been
supplied with a tire inflation kit)
•battery jump start
•lock-out assistance (key replacement cost is the customer’s
responsibility)
•fuel delivery – Independent Service Contractors, if not prohibited by
state, local or municipal law shall deliver up to 2.0 gallons (7.5L) of
gasoline or 5.0 gallons (18.9L) of diesel fuel to a disabled vehicle. Fuel
delivery service is limited to two no-charge occurrences within a
12-month period.
•winch out – available within 100 feet (30.5 meters) of a paved or
county maintained road, no recoveries.
•towing – Ford and Lincoln eligible vehicles towed to an authorized
dealer within 35 miles (56 km) of the disablement location or to the
nearest authorized dealer. If a member requests to be towed to an
authorized dealer more than 35 miles (56 km) from the disablement
location, the member shall be responsible for any mileage costs in
excess of 35 miles (56 km).
Trailers shall be covered up to $200 if the disabled eligible vehicle
requires service at the nearest authorized dealer. If the trailer is disabled,
but the towing vehicle is operational, the trailer does not qualify for any
roadside services.
Roadside Emergencies
321
2011 F-150(f12)
Owners Guide, 1st Printing
USA(fus)