Page 1 of 395
Introduction 4
Instrument Cluster 12
Warning lights and chimes 12
Gauges 18
Message center 20
Entertainment Systems 39
AM/FM stereo with CD 39
Auxiliary input jack (Line in) 46
USB port 48
Rear seat controls 49
Satellite radio information 56
Navigation system 59
SYNC�59
Climate Controls 60
Manual heating and air conditioning 60
Dual automatic temperature control 64
Rear window defroster 70
Lights 71
Headlamps 71
Turn signal control 74
Bulb replacement 76
Driver Controls 82
Windshield wiper/washer control 82
Steering wheel adjustment 84
Power windows 89
Mirrors 91
Speed control 96
Moon roof 100
Table of Contents
1
2011 Expedition(exd)
Owners Guide, 1st Printing
USA(fus)
Page 17 of 395
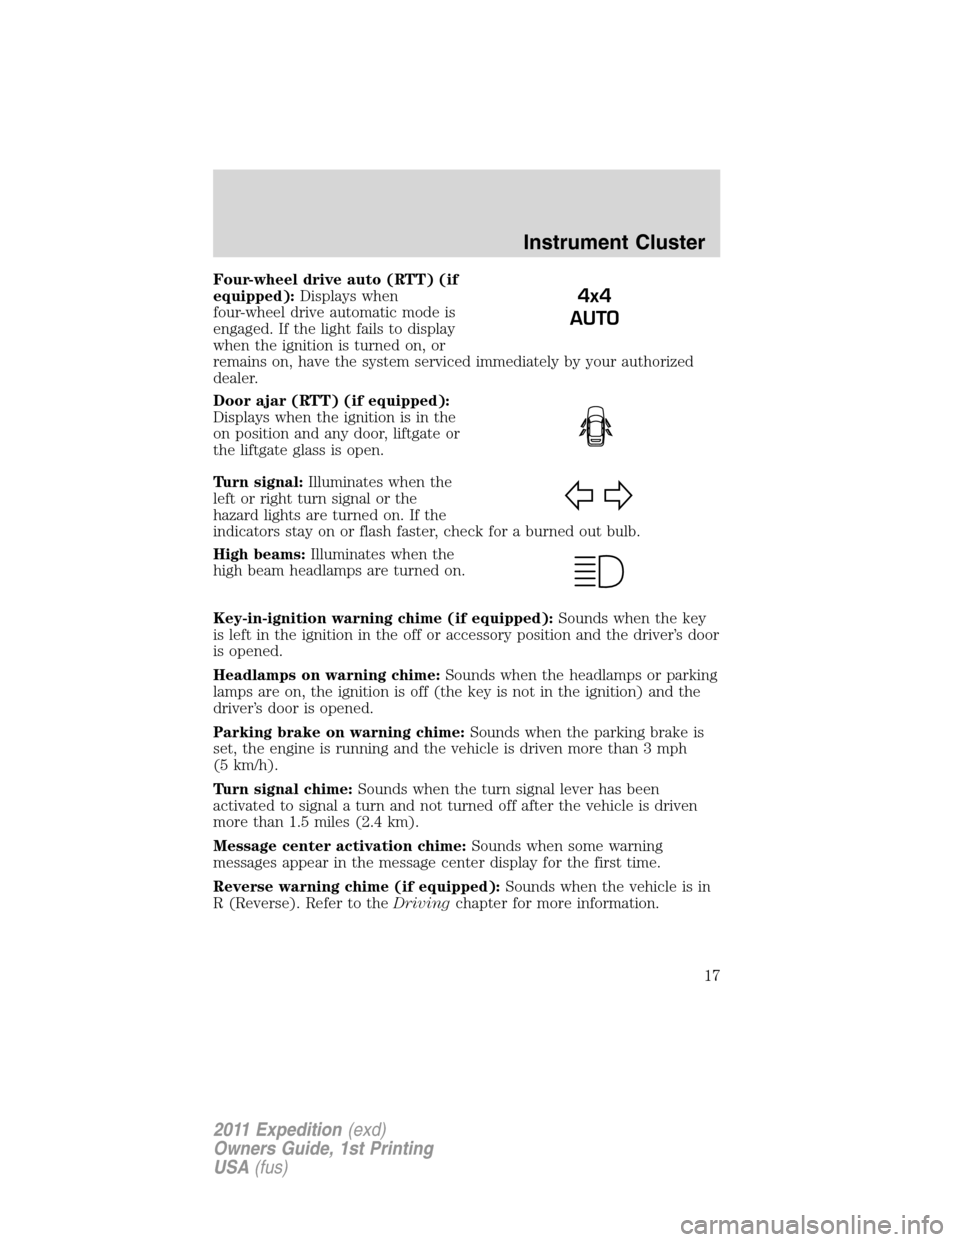
Four-wheel drive auto (RTT) (if
equipped):Displays when
four-wheel drive automatic mode is
engaged. If the light fails to display
when the ignition is turned on, or
remains on, have the system serviced immediately by your authorized
dealer.
Door ajar (RTT) (if equipped):
Displays when the ignition is in the
on position and any door, liftgate or
the liftgate glass is open.
Turn signal:Illuminates when the
left or right turn signal or the
hazard lights are turned on. If the
indicators stay on or flash faster, check for a burned out bulb.
High beams:Illuminates when the
high beam headlamps are turned on.
Key-in-ignition warning chime (if equipped):Sounds when the key
is left in the ignition in the off or accessory position and the driver’s door
is opened.
Headlamps on warning chime:Sounds when the headlamps or parking
lamps are on, the ignition is off (the key is not in the ignition) and the
driver’s door is opened.
Parking brake on warning chime:Sounds when the parking brake is
set, the engine is running and the vehicle is driven more than 3 mph
(5 km/h).
Turn signal chime:Sounds when the turn signal lever has been
activated to signal a turn and not turned off after the vehicle is driven
more than 1.5 miles (2.4 km).
Message center activation chime:Sounds when some warning
messages appear in the message center display for the first time.
Reverse warning chime (if equipped):Sounds when the vehicle is in
R (Reverse). Refer to theDrivingchapter for more information.
4x4
AUTO
Instrument Cluster
17
2011 Expedition(exd)
Owners Guide, 1st Printing
USA(fus)
Page 52 of 395
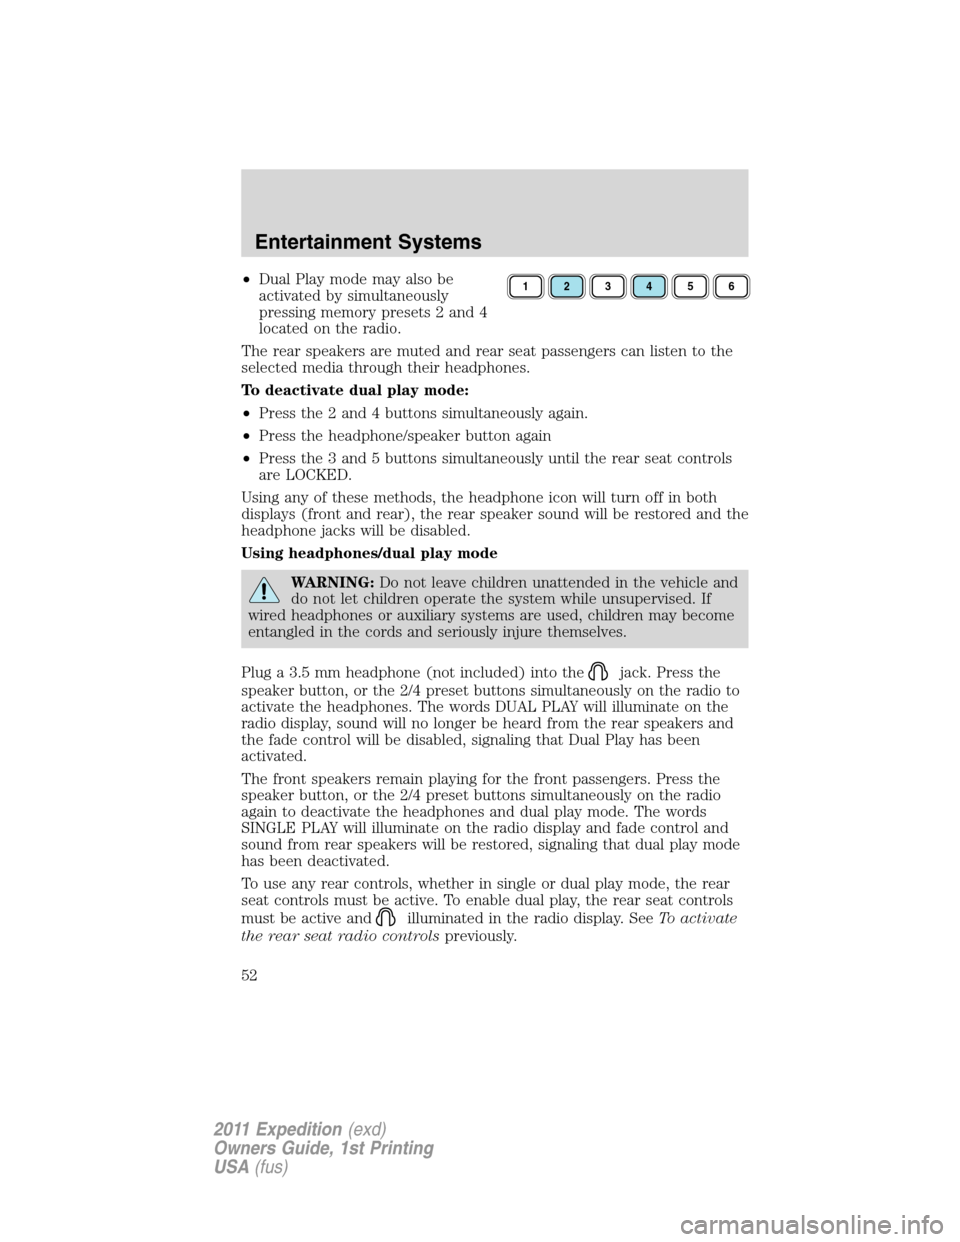
•Dual Play mode may also be
activated by simultaneously
pressing memory presets 2 and 4
located on the radio.
The rear speakers are muted and rear seat passengers can listen to the
selected media through their headphones.
To deactivate dual play mode:
•Press the 2 and 4 buttons simultaneously again.
•Press the headphone/speaker button again
•Press the 3 and 5 buttons simultaneously until the rear seat controls
are LOCKED.
Using any of these methods, the headphone icon will turn off in both
displays (front and rear), the rear speaker sound will be restored and the
headphone jacks will be disabled.
Using headphones/dual play mode
WARNING:Do not leave children unattended in the vehicle and
do not let children operate the system while unsupervised. If
wired headphones or auxiliary systems are used, children may become
entangled in the cords and seriously injure themselves.
Plug a 3.5 mm headphone (not included) into the
jack. Press the
speaker button, or the 2/4 preset buttons simultaneously on the radio to
activate the headphones. The words DUAL PLAY will illuminate on the
radio display, sound will no longer be heard from the rear speakers and
the fade control will be disabled, signaling that Dual Play has been
activated.
The front speakers remain playing for the front passengers. Press the
speaker button, or the 2/4 preset buttons simultaneously on the radio
again to deactivate the headphones and dual play mode. The words
SINGLE PLAY will illuminate on the radio display and fade control and
sound from rear speakers will be restored, signaling that dual play mode
has been deactivated.
To use any rear controls, whether in single or dual play mode, the rear
seat controls must be active. To enable dual play, the rear seat controls
must be active and
illuminated in the radio display. SeeTo activate
the rear seat radio controlspreviously.
123456
Entertainment Systems
52
2011 Expedition(exd)
Owners Guide, 1st Printing
USA(fus)
Page 58 of 395
Radio Display Condition Action Required
NO TEXT Artist information not
available.Artist information not
available at this time on
this channel. The
system is working
properly.
NO TEXT Song title information
not available.Song title information
not available at this
time on this channel.
The system is working
properly.
NO TEXT Category information
not available.Category information
not available at this
time on this channel.
The system is working
properly.
NO SIGNAL Loss of signal from
the SIRIUS�satellite
or SIRIUS�tower to
the vehicle antenna.You are in a location
that is blocking the
SIRIUS�signal (i.e.,
tunnel, under an
overpass, dense foliage,
etc). The system is
working properly. When
you move into an open
area, the signal should
return.
UPDATING Update of channel
programming in
progress.No action required. The
process may take up to
three minutes.
CALL SIRIUS�
1–888–539–7474Satellite service has
been deactivated by
SIRIUS�satellite
radio.Call SIRIUS�at
1–888–539–7474 to
re-activate or resolve
subscription issues.
Entertainment Systems
58
2011 Expedition(exd)
Owners Guide, 1st Printing
USA(fus)
Page 74 of 395
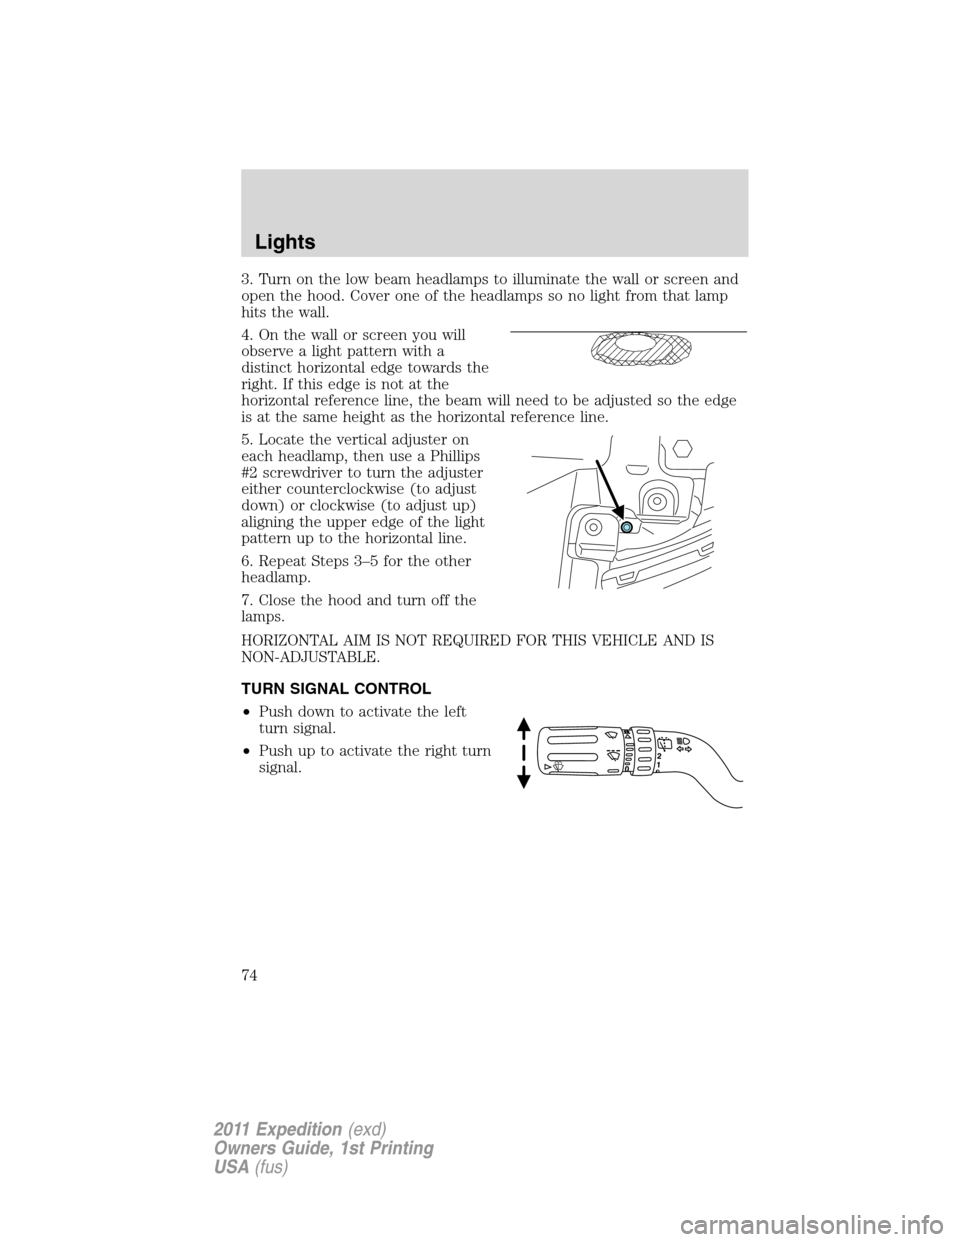
3. Turn on the low beam headlamps to illuminate the wall or screen and
open the hood. Cover one of the headlamps so no light from that lamp
hits the wall.
4. On the wall or screen you will
observe a light pattern with a
distinct horizontal edge towards the
right. If this edge is not at the
horizontal reference line, the beam will need to be adjusted so the edge
is at the same height as the horizontal reference line.
5. Locate the vertical adjuster on
each headlamp, then use a Phillips
#2 screwdriver to turn the adjuster
either counterclockwise (to adjust
down) or clockwise (to adjust up)
aligning the upper edge of the light
pattern up to the horizontal line.
6. Repeat Steps 3–5 for the other
headlamp.
7. Close the hood and turn off the
lamps.
HORIZONTAL AIM IS NOT REQUIRED FOR THIS VEHICLE AND IS
NON-ADJUSTABLE.
TURN SIGNAL CONTROL
•Push down to activate the left
turn signal.
•Push up to activate the right turn
signal.
Lights
74
2011 Expedition(exd)
Owners Guide, 1st Printing
USA(fus)
Page 77 of 395
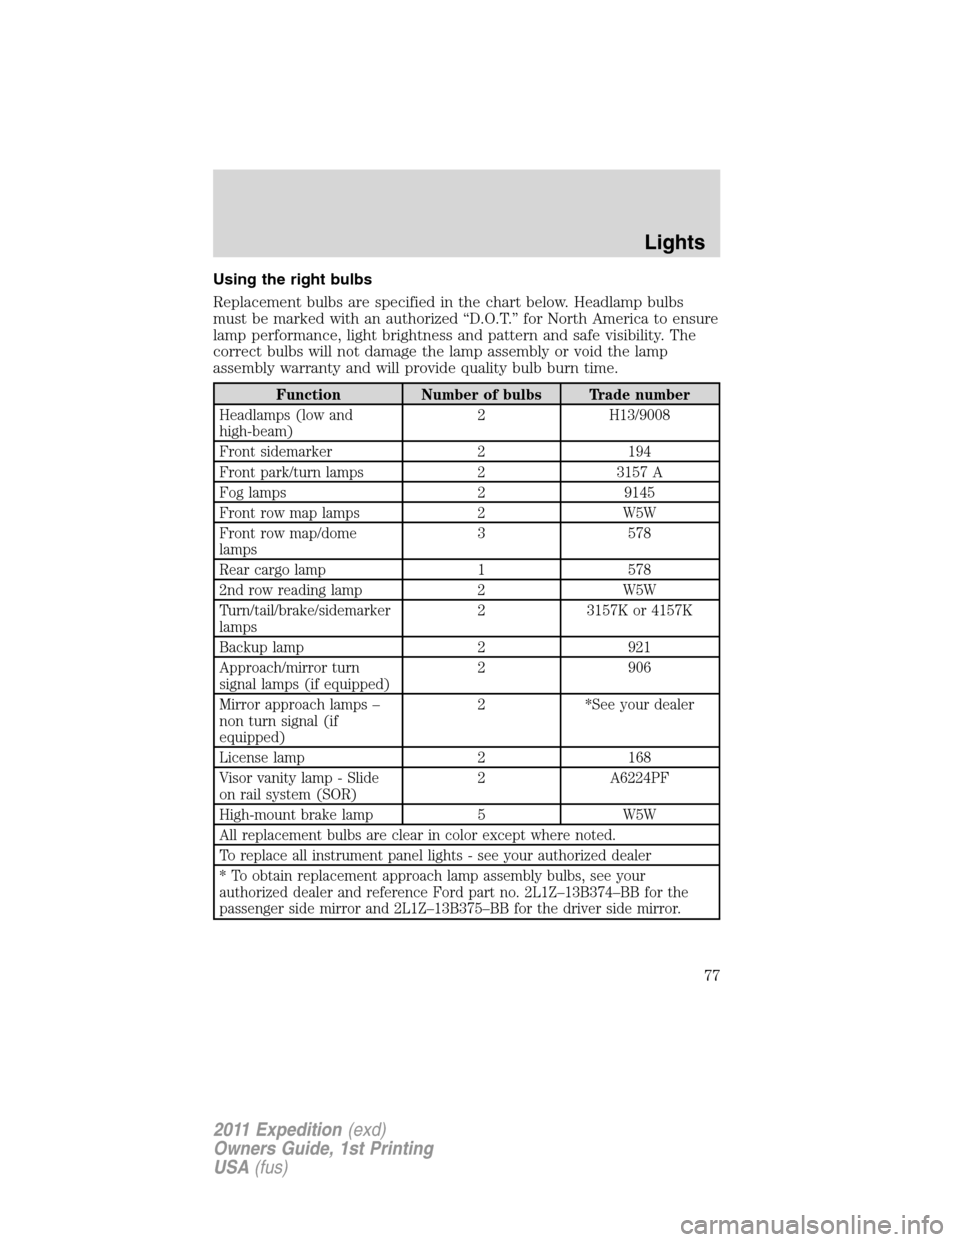
Using the right bulbs
Replacement bulbs are specified in the chart below. Headlamp bulbs
must be marked with an authorized “D.O.T.” for North America to ensure
lamp performance, light brightness and pattern and safe visibility. The
correct bulbs will not damage the lamp assembly or void the lamp
assembly warranty and will provide quality bulb burn time.
Function Number of bulbs Trade number
Headlamps (low and
high-beam)2 H13/9008
Front sidemarker 2 194
Front park/turn lamps 2 3157 A
Fog lamps 2 9145
Front row map lamps 2 W5W
Front row map/dome
lamps3 578
Rear cargo lamp 1 578
2nd row reading lamp 2 W5W
Turn/tail/brake/sidemarker
lamps2 3157K or 4157K
Backup lamp 2 921
Approach/mirror turn
signal lamps (if equipped)2 906
Mirror approach lamps –
non turn signal (if
equipped)2 *See your dealer
License lamp 2 168
Visor vanity lamp - Slide
on rail system (SOR)2 A6224PF
High-mount brake lamp 5 W5W
All replacement bulbs are clear in color except where noted.
To replace all instrument panel lights - see your authorized dealer
* To obtain replacement approach lamp assembly bulbs, see your
authorized dealer and reference Ford part no. 2L1Z–13B374–BB for the
passenger side mirror and 2L1Z–13B375–BB for the driver side mirror.
Lights
77
2011 Expedition(exd)
Owners Guide, 1st Printing
USA(fus)
Page 79 of 395
7. Insert the glass end of the new bulb into the headlamp assembly.
When the grooves in the plastic base are aligned, turn the new bulb
clockwise to install.
8. Connect the electrical connector.
9. Install the headlamp assembly and secure with two retainer bolts.
Replacing front parking lamp/turn/sidemarker signal bulbs
1. Make sure that the headlamp control is in the off position.
2. Open the hood.
3. At the back of the headlamp,
remove the two headlamp assembly
retainer bolts.
4. Slide headlamp assembly forward
and off the retaining tab to expose
the back of the headlamp assembly.
5. Rotate the bulb socket
counterclockwise and remove from
the lamp assembly.
6. Carefully pull the bulb out of the
socket and push in the new bulb.
7. Install the bulb socket into the
lamp assembly and rotate clockwise.
8. Install the headlamp assembly
and secure with two retainer bolts.
Lights
79
2011 Expedition(exd)
Owners Guide, 1st Printing
USA(fus)
Page 81 of 395
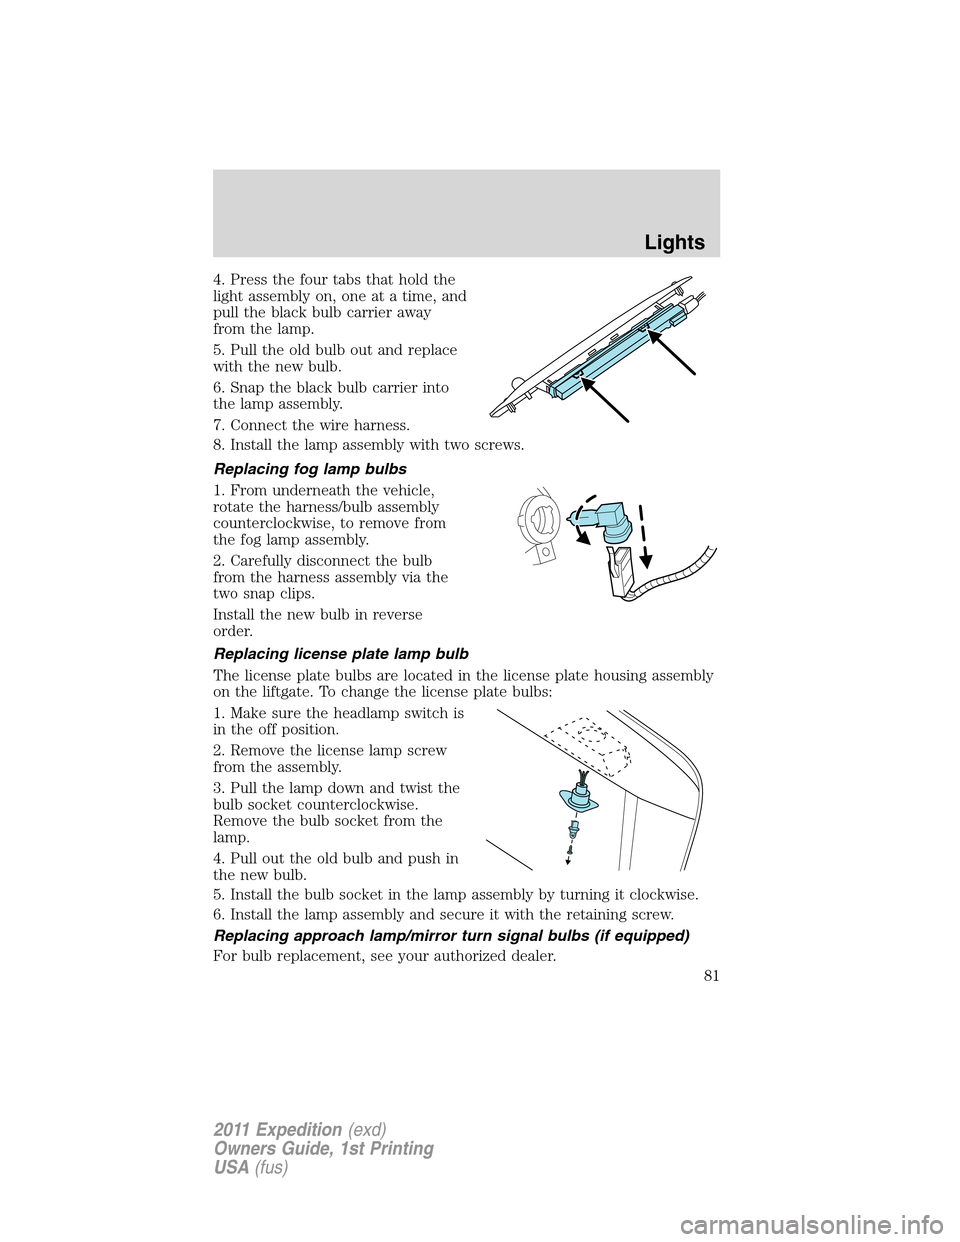
4. Press the four tabs that hold the
light assembly on, one at a time, and
pull the black bulb carrier away
from the lamp.
5. Pull the old bulb out and replace
with the new bulb.
6. Snap the black bulb carrier into
the lamp assembly.
7. Connect the wire harness.
8. Install the lamp assembly with two screws.
Replacing fog lamp bulbs
1. From underneath the vehicle,
rotate the harness/bulb assembly
counterclockwise, to remove from
the fog lamp assembly.
2. Carefully disconnect the bulb
from the harness assembly via the
two snap clips.
Install the new bulb in reverse
order.
Replacing license plate lamp bulb
The license plate bulbs are located in the license plate housing assembly
on the liftgate. To change the license plate bulbs:
1. Make sure the headlamp switch is
in the off position.
2. Remove the license lamp screw
from the assembly.
3. Pull the lamp down and twist the
bulb socket counterclockwise.
Remove the bulb socket from the
lamp.
4. Pull out the old bulb and push in
the new bulb.
5. Install the bulb socket in the lamp assembly by turning it clockwise.
6. Install the lamp assembly and secure it with the retaining screw.
Replacing approach lamp/mirror turn signal bulbs (if equipped)
For bulb replacement, see your authorized dealer.
Lights
81
2011 Expedition(exd)
Owners Guide, 1st Printing
USA(fus)