Page 14 of 195
12
INSTRUMENT PANEL
The presence and position of the instruments and indicators may vary according to the version.
fig. 6
Trekking / Working version fig. 6
1. Adjustable side air diffusers – 2. Left external light control stalk – 3. Horn – 4. Instrument panel – 5. Right stalk
(windscreen wiper-washer and trip computer) – 6. Control buttons – 7. Adjustable central air diffusers – 8. Hazard
warning lights switch – 9. Car radio (or car radio set-up) – 10. Passenger airbag or upper compartment – 11. Glove
compartment – 12. Storage compartment – 13. Climate control / ventilation controls – 14. Ignition switch – 15. Driver
front airbag – 16. Bonnet release lever – 17. Fuse cover on dashboard – 18. Headlight alignment corrector and controls.
F0X0006m
Page 15 of 195
13
The presence and position of the instruments and indicators may vary according to the version.
F0X0007mfig. 7
Adventure version fig. 7
1. Adjustable side air diffusers – 2. Left external light control stalk – 3. Horn – 4. Instrument panel – 5. Right stalk
(windscreen wiper-washer and trip computer) – 6. Adjustable central air diffusers – 7. Control buttons – 8. Compass
9. Roll meter – 10. Pitch meter 11. Car radio (or car radio set-up) – 12. Hazard warning lights switch – 13. Passenger
airbag or upper compartment – 14. Glove compartment – 15. Storage compartment – 16. Climate control / ventilation
controls – 17. Ignition switch - 18. Driver front airbag – 19. Bonnet release lever – 20. Fuse cover on dashboard
21. Headlight alignment corrector, E-Locker (where provided) and controls.
Page 34 of 195

32
On some versions, when a door is
opened / closed with the key
removed, the display shows the total
milometer reading and the clock for
10 seconds; others will display the
time permanently.
The display can also show the
following:
– through the flashing “spanner”
icon, when the vehicle must be
taken to a Fiat Dealership for
Scheduled Servicing;
– TRIP COMPUTER indications;
– FIAT MY CAR menu;
– warning messages in the event of
failures;
– notification that the previously set
speed has been exceeded. – select one of the various TRIP
COMPUTER functions
– confirm / modify a selected
function
– enter TRIP mode.
Before carrying out any operation,
you are advised to read the whole of
this section carefully.
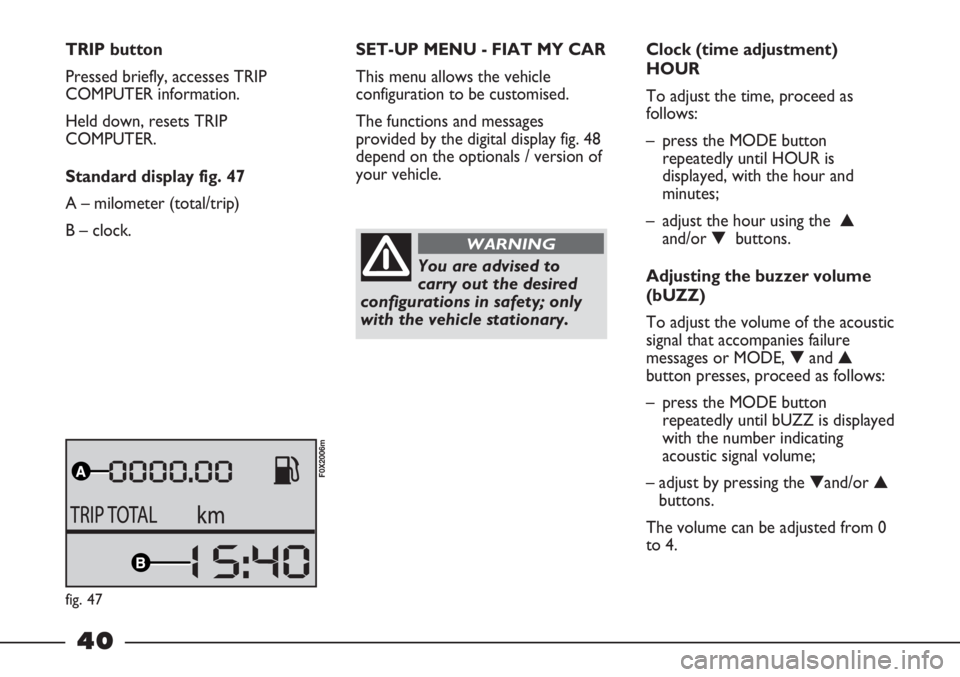
Standard display fig. 43
A – milometer (total/trip)
B – clock.ELECTRONIC DISPLAY
The functions and messages
provided by the electronic display
depend on the optionals / version of
your vehicle.
CONTROL BUTTONS
To correctly make use of the
information that the display can
provide, with ignition key at MAR-
ON, you need to familiarise yourself
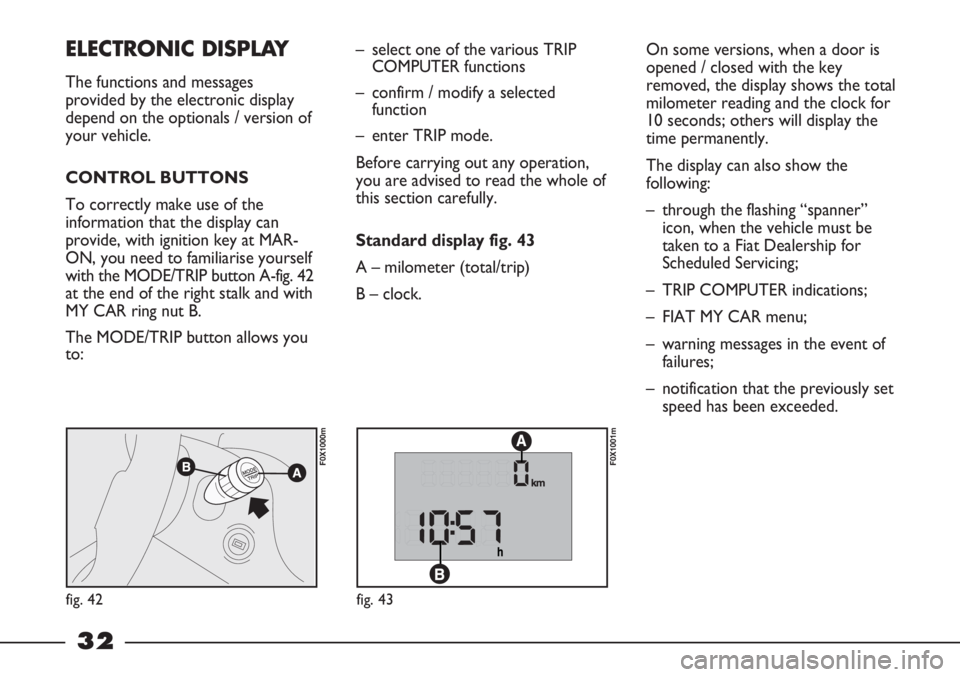
with the MODE/TRIP button A-fig. 42
at the end of the right stalk and with
MY CAR ring nut B.
The MODE/TRIP button allows you
to:
fig. 42
F0X1000m
fig. 43
F0X1001m
Page 41 of 195
39
DIGITAL DISPLAY
The functions and messages
provided by the digital display fig. 44
depend on the optionals / version of
your vehicle.
fig. 45
F0X0154m
CONTROL BUTTONS
To correctly make use of the
information that the display can
provide, with ignition key at MAR-
ON, you need to familiarise yourself
with the TRIP button-fig. 45 at the
end of the right stalk and with the
MODE and ▼▲ buttons fig. 46 on
the dashboard to the left of the
steering wheel.
F0X2003m
F0X2004m
fig. 46
F0X2005m
MODE button
Brief press: enter and exit FIAT MY
CAR set-up menu; confirm / modify
a selected function; interrupt
warning messages shown on the
display.
Long press: exit FIAT MY CAR set-
up menu, storing settings and
returning to the standard display or,
depending on the situation, to the
previous display.
▲▼buttons
These allow FIAT MY CAR set-up
menu options to be selected and
some functions to be adjusted.
fig. 44
F0X2001m
F0X1039m
Page 42 of 195

40
TRIP button
Pressed briefly, accesses TRIP
COMPUTER information.
Held down, resets TRIP
COMPUTER.
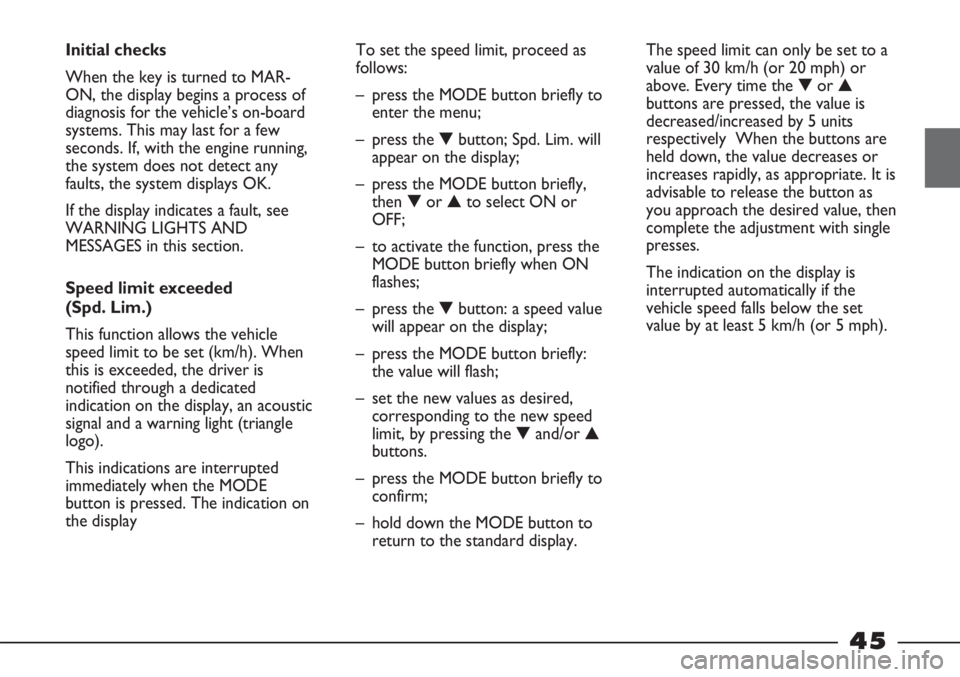
Standard display fig. 47
A – milometer (total/trip)
B – clock.SET-UP MENU - FIAT MY CAR
This menu allows the vehicle
configuration to be customised.
The functions and messages
provided by the digital display fig. 48
depend on the optionals / version of
your vehicle.
You are advised to
carry out the desired
configurations in safety; only
with the vehicle stationary.
WARNING
Clock (time adjustment)
HOUR
To adjust the time, proceed as
follows:
– press the MODE button
repeatedly until HOUR is
displayed, with the hour and
minutes;
– adjust the hour using the ▲
and/or ▼ buttons.
Adjusting the buzzer volume
(bUZZ)
To adjust the volume of the acoustic
signal that accompanies failure
messages or MODE, ▼and ▲
button presses, proceed as follows:
– press the MODE button
repeatedly until bUZZ is displayed
with the number indicating
acoustic signal volume;
– adjust by pressing the ▼and/or ▲
buttons.
The volume can be adjusted from 0
to 4.
fig. 47
F0X2006m
Page 43 of 195
41
Set speed limit exceeded - SPEEd
This function allows the vehicle speed limit to be set (km/h). When this is exceeded, the driver is notified through an
acoustic signal.
To set the speed limit, proceed as follows:
– press the MODE button repeatedly until SPEEd is displayed with the unit of measurement km/h;
– set the new limit as desired by pressing the ▼ and/or ▲buttons.
The speed limit can only be set to a value of 30 km/h or above.
Every time the ▼ and/or ▲buttons are pressed, the value is decreased/increased by 5 units respectively. When the
buttons are held down, the value decreases or increases rapidly, as appropriate.
It is advisable to release the button as you approach the desired value, then complete the adjustment with single presses.
fig. 48
▼
▼ ▼
▼
MODE
MODE MODE
MODE
MODE MODE
Page 44 of 195
42
MULTIFUNCTION
DISPLAY
The functions and messages
provided by the multifunction display
fig. 48 depend on the optionals /
version of your vehicle.
fig. 49
F0X0154m
CONTROL BUTTONS
To correctly make use of the
information that the display can
provide, with ignition key at MAR-
ON, you need to familiarise yourself
with the TRIP button-fig. 49 at the
end of the right stalk
and with the MODE and ▼▲
buttons fig. 50 on the dashboard to
the left of the steering wheel.MODE button
Brief press:
– enter and exit FIAT MY CAR set-
up menu;
– confirm / modify a selected
function
– interrupt warning messages shown
on the display.
Long press:
exit FIAT MY CAR set-up menu,
storing settings and returning to the
standard display or, depending on
the situation, to the previous display.
▲▼buttons
These allow FIAT MY CAR set-up
menu options to be selected and
some functions to be adjusted.
fig. 48
F0X3001m
F0X1039mF0X2003m
F0X2004m
fig. 50
F0X2005m
Page 47 of 195

45
Initial checks
When the key is turned to MAR-
ON, the display begins a process of
diagnosis for the vehicle’s on-board
systems. This may last for a few
seconds. If, with the engine running,
the system does not detect any
faults, the system displays OK.
If the display indicates a fault, see
WARNING LIGHTS AND
MESSAGES in this section.
Speed limit exceeded
(Spd. Lim.)
This function allows the vehicle
speed limit to be set (km/h). When
this is exceeded, the driver is
notified through a dedicated
indication on the display, an acoustic
signal and a warning light (triangle
logo).
This indications are interrupted
immediately when the MODE
button is pressed. The indication on
the displayTo set the speed limit, proceed as
follows:
– press the MODE button briefly to
enter the menu;
– press the ▼button; Spd. Lim. will
appear on the display;
– press the MODE button briefly,
then ▼or ▲to select ON or
OFF;
– to activate the function, press the
MODE button briefly when ON
flashes;
– press the ▼button: a speed value
will appear on the display;
– press the MODE button briefly:
the value will flash;
– set the new values as desired,
corresponding to the new speed
limit, by pressing the ▼and/or ▲
buttons.
– press the MODE button briefly to
confirm;
– hold down the MODE button to
return to the standard display.The speed limit can only be set to a
value of 30 km/h (or 20 mph) or
above. Every time the ▼or ▲
buttons are pressed, the value is
decreased/increased by 5 units
respectively When the buttons are
held down, the value decreases or
increases rapidly, as appropriate. It is
advisable to release the button as
you approach the desired value, then
complete the adjustment with single
presses.
The indication on the display is
interrupted automatically if the
vehicle speed falls below the set
value by at least 5 km/h (or 5 mph).