2011 DODGE JOURNEY key
[x] Cancel search: keyPage 52 of 108
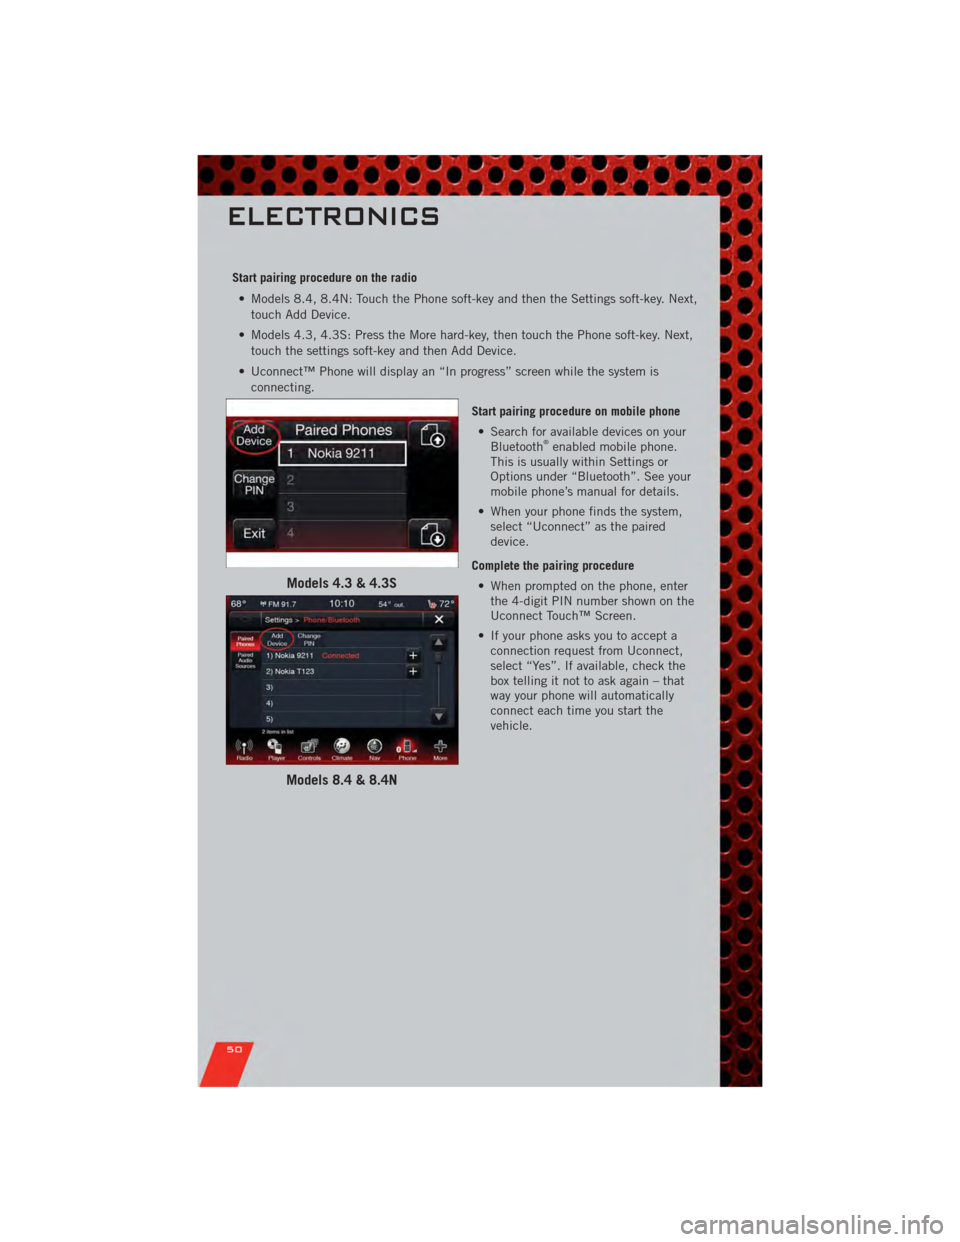
Start pairing procedure on the radio• Models 8.4, 8.4N: Touch the Phone soft-key and then the Settings soft-key. Next, touch Add Device.
• Models 4.3, 4.3S: Press the More hard-key, then touch the Phone soft-key. Next, touch the settings soft-key and then Add Device.
• Uconnect™ Phone will display an “In progress” screen while the system is connecting.
Start pairing procedure on mobile phone• Search for available devices on your Bluetooth
®enabled mobile phone.
This is usually within Settings or
Options under “Bluetooth”. See your
mobile phone’s manual for details.
• When your phone finds the system, select “Uconnect” as the paired
device.
Complete the pairing procedure • When prompted on the phone, enter the 4-digit PIN number shown on the
Uconnect Touch™ Screen.
• If your phone asks you to accept a connection request from Uconnect,
select “Yes”. If available, check the
box telling it not to ask again – that
way your phone will automatically
connect each time you start the
vehicle.
Models 4.3 & 4.3S
Models 8.4 & 8.4N
ELECTRONICS
50
Page 55 of 108
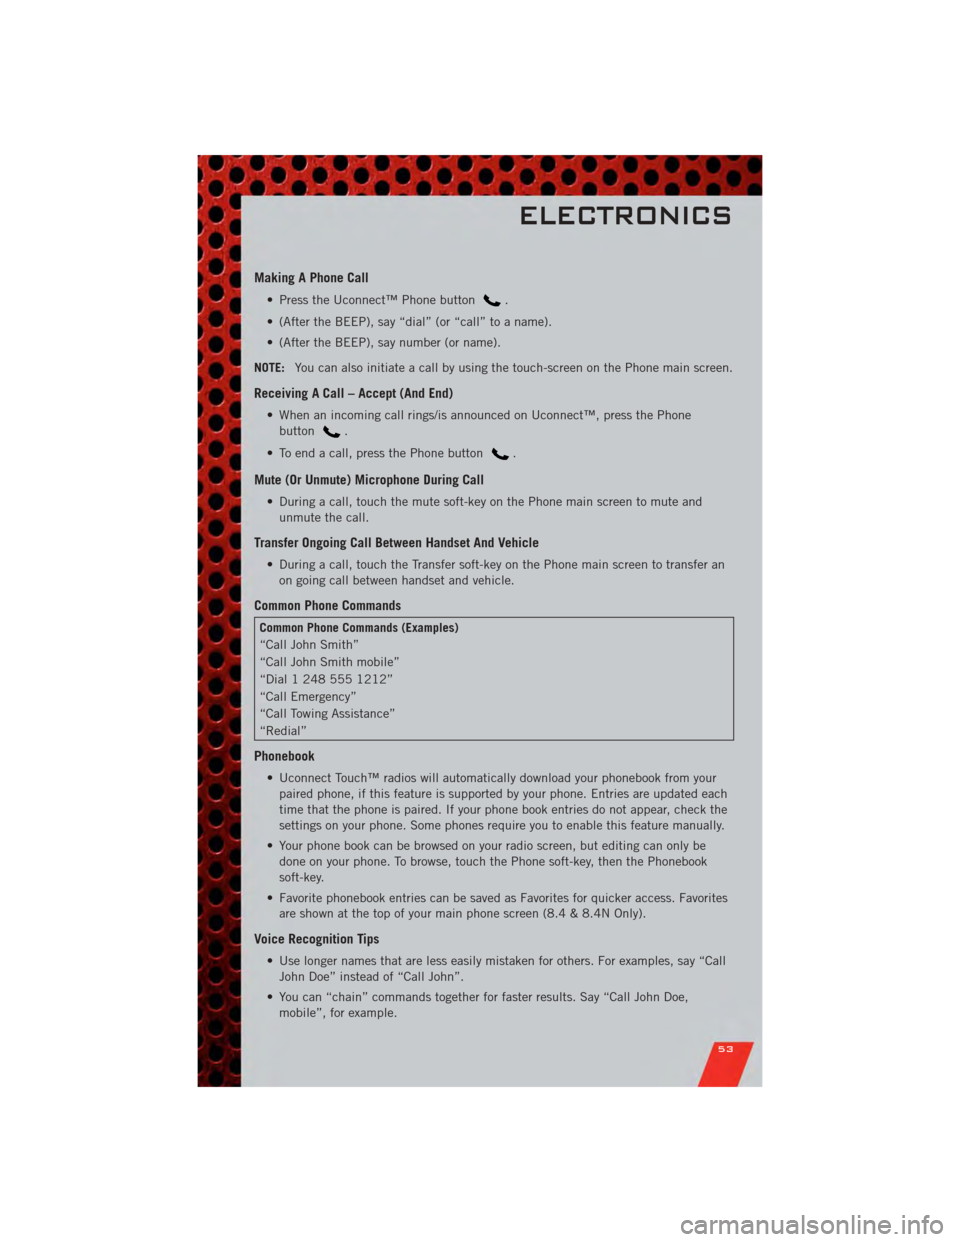
Making A Phone Call
• Press the Uconnect™ Phone button.
• (After the BEEP), say “dial” (or “call” to a name).
• (After the BEEP), say number (or name).
NOTE: You can also initiate a call by using the touch-screen on the Phone main screen.
Receiving A Call – Accept (And End)
• When an incoming call rings/is announced on Uconnect™, press the Phone
button
.
• To end a call, press the Phone button
.
Mute (Or Unmute) Microphone During Call
• During a call, touch the mute soft-key on the Phone main screen to mute and unmute the call.
Transfer Ongoing Call Between Handset And Vehicle
• During a call, touch the Transfer soft-key on the Phone main screen to transfer anon going call between handset and vehicle.
Common Phone Commands
Common Phone Commands (Examples)
“Call John Smith”
“Call John Smith mobile”
“Dial 1 248 555 1212”
“Call Emergency”
“Call Towing Assistance”
“Redial”
Phonebook
• Uconnect Touch™ radios will automatically download your phonebook from yourpaired phone, if this feature is supported by your phone. Entries are updated each
time that the phone is paired. If your phone book entries do not appear, check the
settings on your phone. Some phones require you to enable this feature manually.
• Your phone book can be browsed on your radio screen, but editing can only be done on your phone. To browse, touch the Phone soft-key, then the Phonebook
soft-key.
• Favorite phonebook entries can be saved as Favorites for quicker access. Favorites are shown at the top of your main phone screen (8.4 & 8.4N Only).
Voice Recognition Tips
• Use longer names that are less easily mistaken for others. For examples, say “CallJohn Doe” instead of “Call John”.
• You can “chain” commands together for faster results. Say “Call John Doe, mobile”, for example.
ELECTRONICS
53
Page 58 of 108
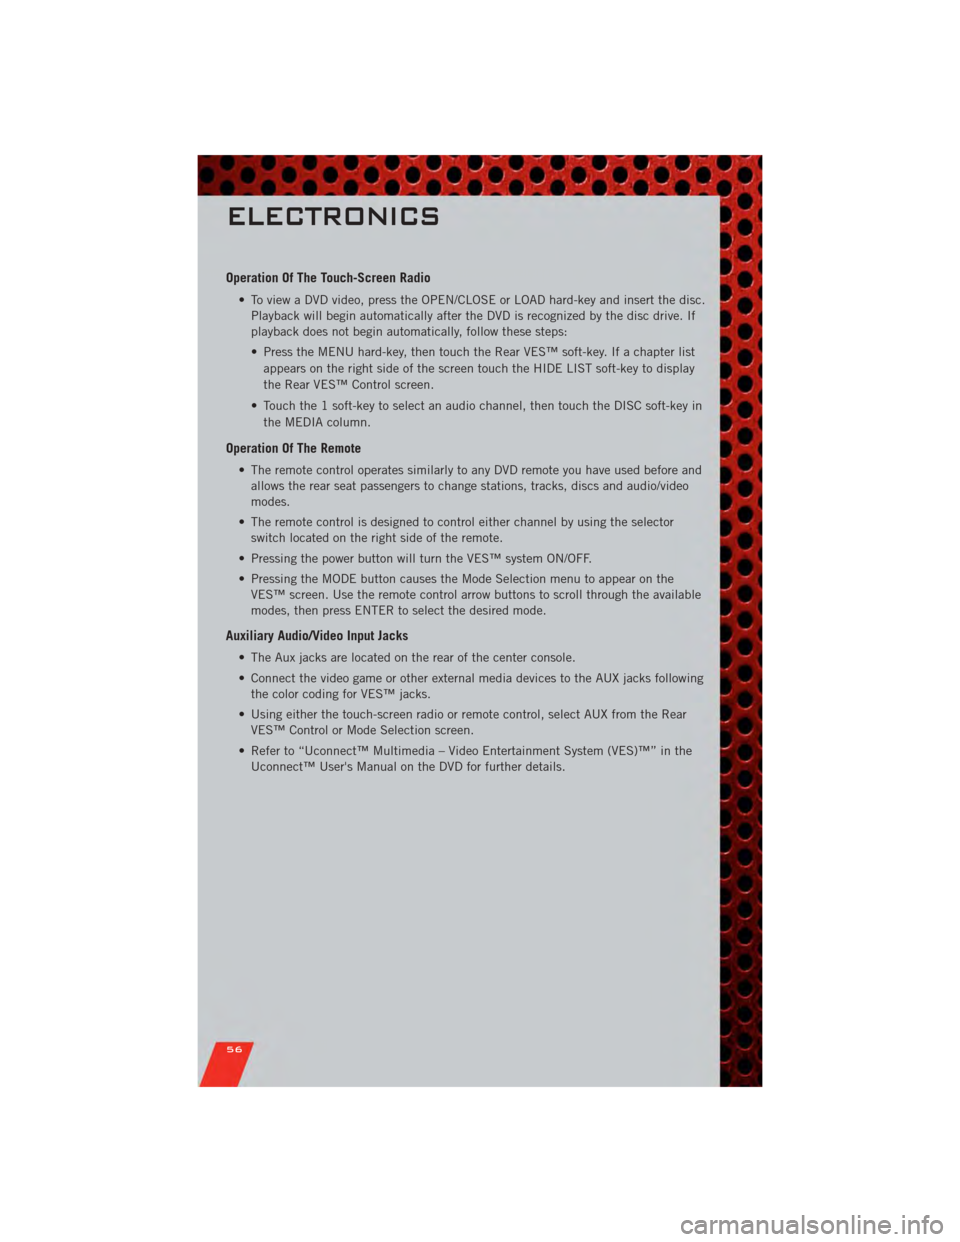
Operation Of The Touch-Screen Radio
• To view a DVD video, press the OPEN/CLOSE or LOAD hard-key and insert the disc.Playback will begin automatically after the DVD is recognized by the disc drive. If
playback does not begin automatically, follow these steps:
• Press the MENU hard-key, then touch the Rear VES™ soft-key. If a chapter list
appears on the right side of the screen touch the HIDE LIST soft-key to display
the Rear VES™ Control screen.
• Touch the 1 soft-key to select an audio channel, then touch the DISC soft-key in the MEDIA column.
Operation Of The Remote
• The remote control operates similarly to any DVD remote you have used before andallows the rear seat passengers to change stations, tracks, discs and audio/video
modes.
• The remote control is designed to control either channel by using the selector switch located on the right side of the remote.
• Pressing the power button will turn the VES™ system ON/OFF.
• Pressing the MODE button causes the Mode Selection menu to appear on the VES™ screen. Use the remote control arrow buttons to scroll through the available
modes, then press ENTER to select the desired mode.
Auxiliary Audio/Video Input Jacks
• The Aux jacks are located on the rear of the center console.
• Connect the video game or other external media devices to the AUX jacks followingthe color coding for VES™ jacks.
• Using either the touch-screen radio or remote control, select AUX from the Rear VES™ Control or Mode Selection screen.
• Refer to “Uconnect™ Multimedia – Video Entertainment System (VES)™” in the Uconnect™ User's Manual on the DVD for further details.
ELECTRONICS
56
Page 60 of 108
PROGRAMMABLE FEATURES
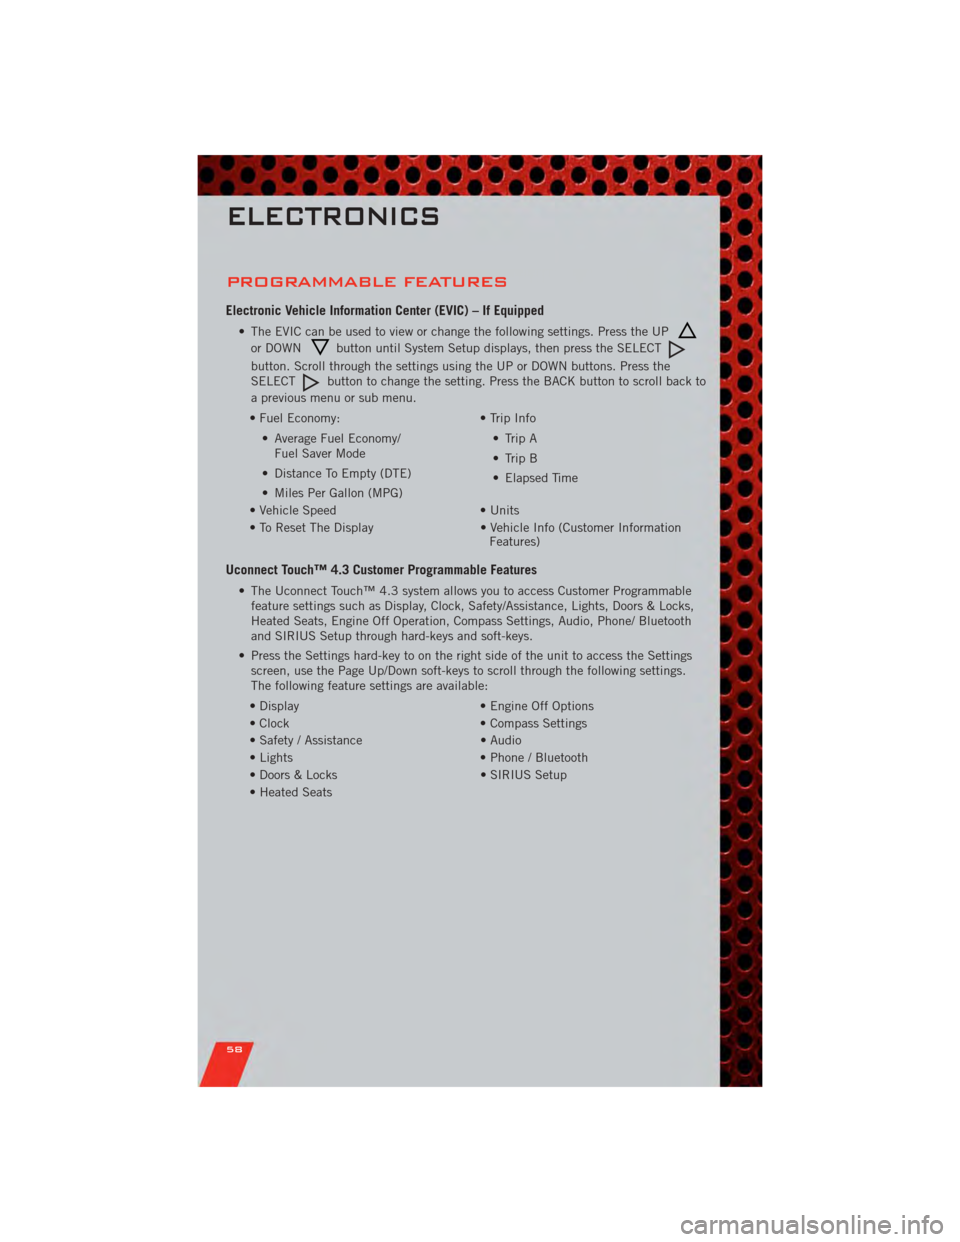
Electronic Vehicle Information Center (EVIC) – If Equipped
• The EVIC can be used to view or change the following settings. Press the UP
or DOWNbutton until System Setup displays, then press the SELECT
button. Scroll through the settings using the UP or DOWN buttons. Press the
SELECTbutton to change the setting. Press the BACK button to scroll back to
a previous menu or sub menu.
• Fuel Economy: • Average Fuel Economy/Fuel Saver Mode
• Distance To Empty (DTE)
• Miles Per Gallon (MPG) • Trip Info
• Trip A
• Trip B
• Elapsed Time
• Vehicle Speed • Units
• To Reset The Display • Vehicle Info (Customer Information Features)
Uconnect Touch™ 4.3 Customer Programmable Features
• The Uconnect Touch™ 4.3 system allows you to access Customer Programmable
feature settings such as Display, Clock, Safety/Assistance, Lights, Doors & Locks,
Heated Seats, Engine Off Operation, Compass Settings, Audio, Phone/ Bluetooth
and SIRIUS Setup through hard-keys and soft-keys.
• Press the Settings hard-key to on the right side of the unit to access the Settings screen, use the Page Up/Down soft-keys to scroll through the following settings.
The following feature settings are available:
• Display • Engine Off Options
• Clock • Compass Settings
• Safety / Assistance • Audio
• Lights • Phone / Bluetooth
• Doors & Locks • SIRIUS Setup
• Heated Seats
ELECTRONICS
58
Page 61 of 108
Uconnect Touch™ 8.4 Customer Programmable Features
• The Uconnect Touch™ 8.4 system allows you to access Customer Programmablefeature settings such as Display, Clock, Safety/Assistance, Lights, Doors & Locks,
Heated Seats, Engine Off Operation, Compass Settings, Audio, Phone/ Bluetooth
and SIRIUS Setup through soft-keys.
• Touch the More soft-key to on the bottom of the screen, then touch the Settings soft-key to access the Settings screen. When making a selection, scroll up or down
until the preferred setting is highlighted, then press and release the preferred
setting until a check-mark appears next to the setting, showing that setting has
been selected. The following feature settings are available:
• Display • Engine Off Options
• Clock • Compass Settings
• Safety / Assistance • Audio
• Lights • Phone / Bluetooth
• Doors & Locks • SIRIUS Setup
• Heated Seats
UNIVERSAL GARAGE DOOR OPENER
(HomeLink®)
Programming HomeLink®
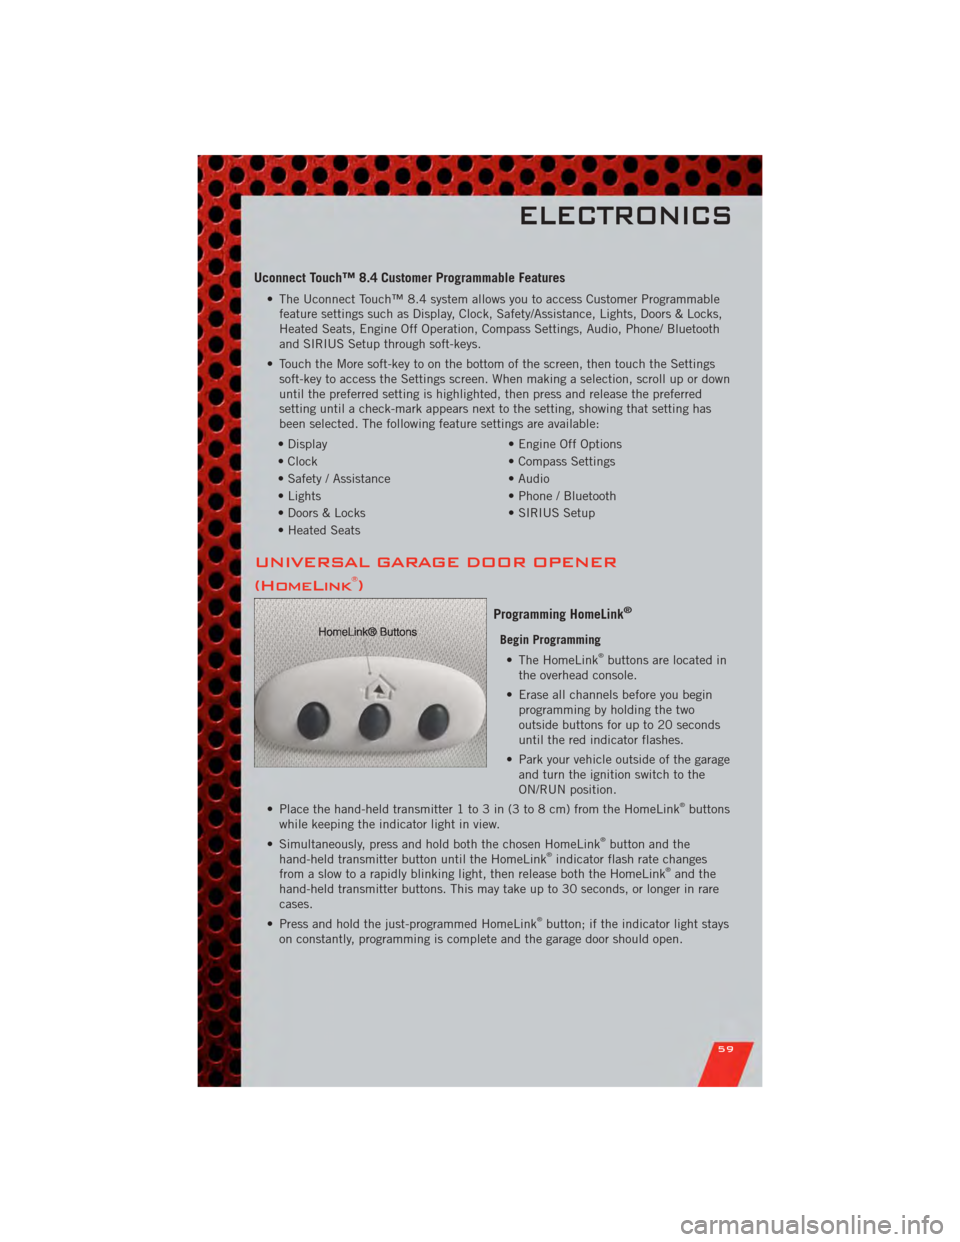
Begin Programming • The HomeLink®buttons are located in
the overhead console.
• Erase all channels before you begin programming by holding the two
outside buttons for up to 20 seconds
until the red indicator flashes.
• Park your vehicle outside of the garage and turn the ignition switch to the
ON/RUN position.
• Place the hand-held transmitter 1 to 3 in (3 to 8 cm) from the HomeLink
®buttons
while keeping the indicator light in view.
• Simultaneously, press and hold both the chosen HomeLink
®button and the
hand-held transmitter button until the HomeLink®indicator flash rate changes
from a slow to a rapidly blinking light, then release both the HomeLink®and the
hand-held transmitter buttons. This may take up to 30 seconds, or longer in rare
cases.
• Press and hold the just-programmed HomeLink
®button; if the indicator light stays
on constantly, programming is complete and the garage door should open.
ELECTRONICS
59
Page 63 of 108
POWER INVERTER
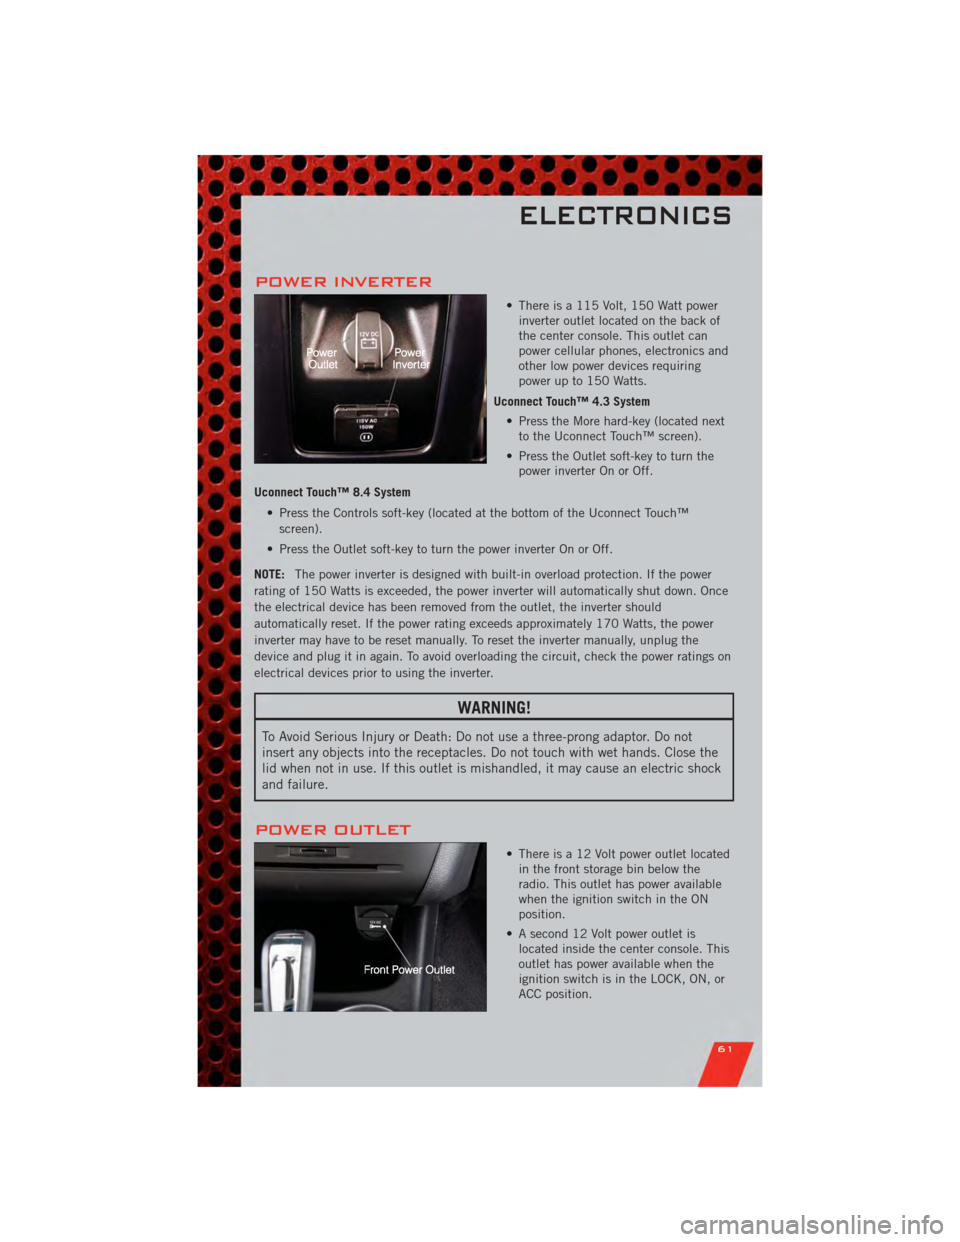
• There is a 115 Volt, 150 Watt powerinverter outlet located on the back of
the center console. This outlet can
power cellular phones, electronics and
other low power devices requiring
power up to 150 Watts.
Uconnect Touch™ 4.3 System • Press the More hard-key (located nextto the Uconnect Touch™ screen).
• Press the Outlet soft-key to turn the power inverter On or Off.
Uconnect Touch™ 8.4 System • Press the Controls soft-key (located at the bottom of the Uconnect Touch™screen).
• Press the Outlet soft-key to turn the power inverter On or Off.
NOTE: The power inverter is designed with built-in overload protection. If the power
rating of 150 Watts is exceeded, the power inverter will automatically shut down. Once
the electrical device has been removed from the outlet, the inverter should
automatically reset. If the power rating exceeds approximately 170 Watts, the power
inverter may have to be reset manually. To reset the inverter manually, unplug the
device and plug it in again. To avoid overloading the circuit, check the power ratings on
electrical devices prior to using the inverter.
WARNING!
To Avoid Serious Injury or Death: Do not use a three-prong adaptor. Do not
insert any objects into the receptacles. Do not touch with wet hands. Close the
lid when not in use. If this outlet is mishandled, it may cause an electric shock
and failure.
POWER OUTLET
• There is a 12 Volt power outlet located in the front storage bin below the
radio. This outlet has power available
when the ignition switch in the ON
position.
• A second 12 Volt power outlet is located inside the center console. This
outlet has power available when the
ignition switch is in the LOCK, ON, or
ACC position.
ELECTRONICS
61
Page 79 of 108

TOWING A DISABLED VEHICLEModelFlat Towing (all four
wheels on the ground)Flatbed Towing (all four
wheels suspended OFF the
ground)Front Wheels Raised, Rear
Wheels on the Ground
Rear Wheels Raised, Front
Wheels on the Ground
FWD Without a Key NOT Permitted
Recommended Method May Be Used NOT Permitted without a
front end dolly
FWD With a Key Shift lever must be in
NEUTRAL. The distance
to be traveled must not
exceed 15 mi (25 km),
and the towing speed
must not exceed 25 mph
(40 km/h).Recommended Method May Be Used
NOT Permitted without a
front end dolly
AWD Without a Key NOT Permitted
Recommended Method NOT Permitted NOT Permitted
AWDWithaKey Shift lever must be in
NEUTRAL, the distance
to be traveled must not
exceed 15 mi (25 km),
the towing speed must
not exceed 25 mph
(40 km/h), and both front
and rear wheels must be
on the ground.Recommended Method NOT Permitted
NOT Permitted
WHAT TO DO IN EMERGENCIES
77
Page 97 of 108

Air Conditioning............ 27
Airbag .................. 13
Alarm,Panic ............... 8
Arming Theft System
(Security Alarm) ............ 11
Audio Settings ........... 35,37
Automatic Headlights ......... 25
Automatic Temperature Control
(ATC) ................... 27
Automatic Transmission FluidType .............. 83
Auxiliary Audio/Video Input Jacks . . 56
AxleFluid ................ 83
Back-Up Camera ............ 30
Belts, Seat ............... 12
Booster Seat .............. 14
Brake Fluid ............... 83
BulbReplacement ........... 91
Calibration,Compass ......... 57
ChangeOilIndicator .......... 68
Child Booster Seat ........... 14
Child Restraint ............. 14
Child Restraint Tether Anchors .... 15
Climate Control ............. 27
Clock Setting ............ 35,37
Compass Calibration .......... 57
Cooling System Coolant Capacity ........... 83
Cruise Control (Speed Control) .... 26
CruiseLight ............... 26
Customer Assistance .......... 92
Customer Programmable
Features ............... 58,59
Defects, Reporting ........... 93
Dimmer Control ............. 25
Dimmer Switch, Headlight ...... 25
Disarming, Theft System ....... 12
Driver Cockpit .............. 4
Electronic Speed Control
(Cruise Control) ............. 26
Electronic Vehicle Information Center
(EVIC) ................ 57,58 Electronics
Your Vehicle's Sound System .... 32
Emergency Key .............. 8
Emergency, In Case of Freeing Vehicle When Stuck .... 78
Overheating ............. 69
Engine Compartment ............. 81
Oil Selection ............. 83
Overheating ............. 69
Starting ................ 10
Stopping ............... 10
Event Data Recorder .......... 79
Express Down Windows ......... 8
Exterior Lights ............. 91
Fluid Capacities ............ 83
Fluids .................. 83
FogLights ................ 25
Folding Front Passenger Seat ..... 18
FoldingRearSeat ........... 19
Freeing A Stuck Vehicle ........ 78
Front Heated Seats ........... 21
Fuel Specifications ............ 83
Fuses .................. 88
Garage Door Opener (HomeLink
®)..59
Headlights ............... 25
Automatic .............. 25
Dimmer Switch ........... 25
Heated Seats .............. 21
HomeLink
®(Garage Door Opener)
Transmitter ............... 59
Hood Release .............. 80
Instrument Cluster ............ 6
Indicators ............... 7
Instrument Cluster Warning
Lights ................. 6,65
Intermittent Wipers (Delay Wipers) . . 24
Introduction ............... 2
Inverter Outlet (115V) ......... 61
Inverter, Power ............. 61
iPod
®/USB/MP3 Control ........ 48
Bluetooth Streaming Audio ..... 49
INDEX
95