Page 84 of 562

A quantity of non-toxic gas is generated to inflate the side
curtain air bag. The inflating side curtain air bag pushes
the outside edge of the headliner out of the way and
covers the window. The air bag inflates in about 30
milliseconds (about one-quarter of the time that it takes
to blink your eyes) with enough force to injure you if you
are not belted and seated properly, or if items are
positioned in the area where the side curtain air bag
inflates. This especially applies to children. The side
curtain air bag is only about 3-1/2 in (9 cm) thick when
it is inflated.
Because air bag sensors estimate deceleration over time,
vehicle speed and damage are not good indicators of
whether or not an air bag should have deployed.
NOTE:In a rollover the pretensioners and/or SAB and
SABIC air bags may deploy on both sides of the vehicle.Front And Side Impact Sensors
In front and side impacts, impact sensors can aid the ORC
in determining appropriate response to impact events.
Enhanced Accident Response System
In the event of an impact causing air bag deployment, if
the communication network remains intact, and the
power remains intact, depending on the nature of the
event the ORC will determine whether to have the
Enhanced Accident Response System perform the follow-
ing functions:
•Cut off fuel to the engine.
•Flash hazard lights as long as the battery has power or
until the ignition key is turned off.
•Turn on the interior lights, which remain on as long as
the battery has power or until the ignition key is
removed.
•Unlock the doors automatically.
82 THINGS TO KNOW BEFORE STARTING YOUR VEHICLE
Page 111 of 562

▫Lights-On Reminder .................. 166
▫ Daytime Running Lights — If Equipped .... 167
▫ Front Fog Lights — If Equipped .......... 167
▫ Dimmer Controls .................... 167
▫ Multifunction Lever .................. 169
▫ Turn Signals ........................ 170
▫ Lane Change Assist ................... 170
▫ High/Low Beam Switch ............... 170
▫ Flash-To-Pass ....................... 170
▫ Battery Protection .................... 171
� Windshield Wiper And Washers ........... 171
▫ Intermittent Wiper System .............. 172
▫ Windshield Wiper Operation ............ 172▫
Windshield Washers .................. 172
▫ Mist Feature ........................ 173
▫ Rear Wiper And Washer ............... 173
▫ Rain Sensing Wipers — If Equipped ....... 173
� Tilt/Telescoping Steering Column .......... 175
� Heated Steering Wheel — If Equipped ...... 176
� Adjustable Pedals — If Equipped .......... 177
� Electronic Speed Control — If Equipped ..... 178
▫ To Activate ......................... 179
▫ To Set A Desired Speed ................ 180
▫ To Deactivate ....................... 180
▫ To Resume Speed .................... 180
▫ To Vary The Speed Setting .............. 180
3
UNDERSTANDING THE FEATURES OF YOUR VEHICLE 109
Page 173 of 562

Battery Protection
This feature provides battery protection to avoid wearing
down the battery if the headlights, parking lights, or
front fog lights are left on for extended periods of time
when the ignition switch is in the LOCK position. After
eight minutes of the ignition switch being in the LOCK
position and the headlight switch in any position other
than OFF or AUTO, the lights will turn off automatically
until the next cycle of the ignition switch or headlight
switch.
The battery protection feature will be disabled if the
ignition switch is turned to any other position other than
LOCK during the eight minute delay.
WINDSHIELD WIPER AND WASHERS
The wipers and washers are operated by a switch within
the multifunction lever. Rotate the end of the multifunc-
tion lever to select the desired wiper speed.NOTE:
Always remove any buildup of snow that pre-
vents the windshield wiper blades from returning to the
off position. If the windshield wiper switch is turned off
and the blades cannot return to the off position, damage
to the wiper motor may occur.
Washer And Wiper Controls
3
UNDERSTANDING THE FEATURES OF YOUR VEHICLE 171
Page 199 of 562
Rear Console Halo Lighting
The rear overhead console has recessed halo lighting
around the perimeter of the console base. This feature
provides additional lighting options while traveling and
is controlled by the headlight switch. Refer to “Lights/
Halo Lights — If Equipped” in “Understanding the
Features Of Your Vehicle” for further information.
GARAGE DOOR OPENER — IF EQUIPPED
HomeLink�replaces up to three remote controls (hand-
held transmitters) that operate devices such as garage
door openers, motorized gates, lighting or home security
systems. The HomeLink� unit operates off your vehicle’s
battery.
The HomeLink� buttons that are located in the headliner
or sun visor designate the three different HomeLink �
channels.
Overhead Compartment Features
1 — DVD15 — Storage
2 — Rear HVAC 6 — DVD1
3 — Interior Lights 7 — Interior Lights
4 — Storage 8 — Halo Lighting
1If equipped, otherwise storage.
3
UNDERSTANDING THE FEATURES OF YOUR VEHICLE 197
Page 201 of 562

Programming HomeLink�
Before You Begin
If you have not trained any of the HomeLink� buttons,
erase all channels before you begin training.
To do this, press and hold the two outside buttons for up
to 20 seconds until the red indicator flashes.
It is recommended that a new battery be placed in the
handheld transmitter of the device that is being copied to
HomeLink� for more efficient training and accurate
transmission of the radio-frequency signal.
Your vehicle should be parked outside of the garage
when programming.
1. Turn the ignition switch to the ON/RUN position.
2. Hold the battery side of the handheld transmitter
away from the HomeLink� button you wish to program. Place the handheld transmitter 1 to 3 in (3 to 8 cm) away
from the HomeLink�
button you wish to program while
keeping the indicator light in view.
3. Simultaneously press and hold both the chosen
HomeLink� button and the handheld transmitter button
until the HomeLink� indicator changes from a slow to a
rapidly blinking light, then release both the HomeLink�
and handheld transmitter buttons.
Watch for the HomeLink� indicator to change flash rates.
When it changes, it is programmed. It may take up to
30 seconds or longer in rare cases. The garage door may
open and close while you train.
NOTE:
•Some gate operators and garage door openers may
require you to replace Step 3 with procedures noted in
the “Gate Operator/Canadian Programming” section.
3
UNDERSTANDING THE FEATURES OF YOUR VEHICLE 199
Page 205 of 562

Troubleshooting Tips
If you are having trouble programming HomeLink�, here
are some of the most common solutions:
•Replace the battery in the original transmitter.
•Press the LEARN button on the Garage Door Opener
to complete the training for a Rolling Code.
•Did you unplug the device for training, and remember
to plug it back in?
If you have any problems, or require assistance, please
call toll-free 1–800–355–3515 or, on the Internet at
www.HomeLink.com for information or assistance.
General Information
This device complies with FCC rules Part 15 and Industry
Canada RSS-210. Operation is subject to the following
two conditions:
1. This device may not cause harmful interference.
2. This device must accept any interference that may be
received including interference that may cause undesired
operation.
NOTE:
•The transmitter has been tested and it complies with
FCC and IC rules. Changes or modifications not
expressly approved by the party responsible for com-
pliance could void the user ’s authority to operate the
device.
•The term IC before the certification/registration num-
ber only signifies that Industry Canada technical
specifications were met.
3
UNDERSTANDING THE FEATURES OF YOUR VEHICLE 203
Page 209 of 562

Ignition Off Operation
For vehicles not equipped with the Electronic Vehicle
Information Center (EVIC), the power sunroof switch
will remain active for 45 seconds after the ignition switch
is turned to the LOCK position. Opening either front
door will cancel this feature.
NOTE:For vehicles equipped with the EVIC, the power
sunroof switch will remain active for up to approxi-
mately ten minutes after the ignition switch is turned to
the LOCK position. Opening either front door will cancel
this feature.
Sunroof Fully Closed
Press the switch forward and release to ensure that the
sunroof is fully closed.
ELECTRICAL POWER OUTLETS — IF EQUIPPED
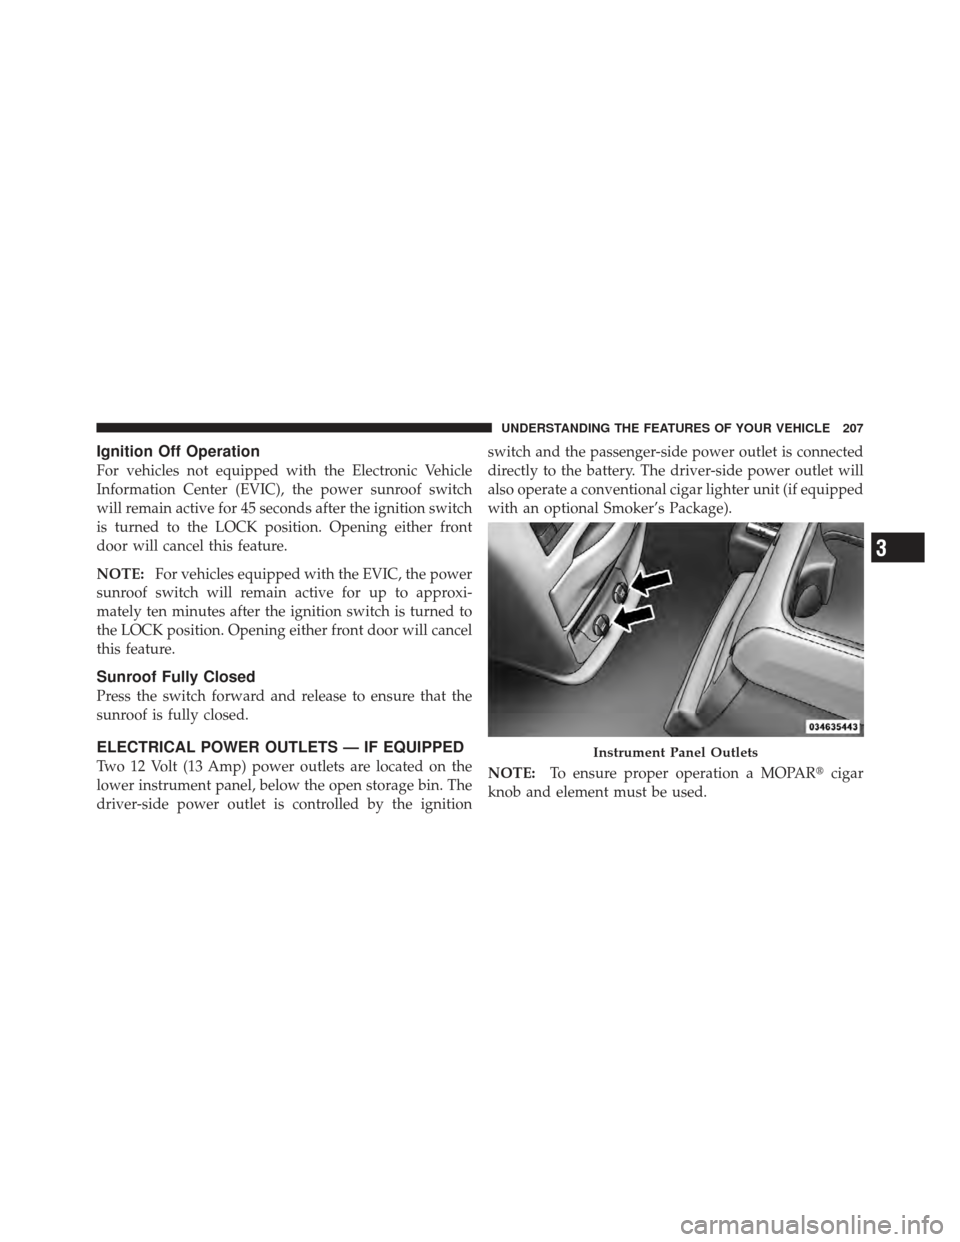
Two 12 Volt (13 Amp) power outlets are located on the
lower instrument panel, below the open storage bin. The
driver-side power outlet is controlled by the ignition switch and the passenger-side power outlet is connected
directly to the battery. The driver-side power outlet will
also operate a conventional cigar lighter unit (if equipped
with an optional Smoker’s Package).
NOTE:
To ensure proper operation a MOPAR� cigar
knob and element must be used.Instrument Panel Outlets
3
UNDERSTANDING THE FEATURES OF YOUR VEHICLE 207
Page 210 of 562
CAUTION!
•Do not exceed the maximum power of 160 Watts
(13 Amps) at 12 Volts. If the 160 Watt (13 Amp)
power rating is exceeded the fuse protecting the
system will need to be replaced.
•Power outlets are designed for accessory plugs
only. Do not insert any other object in the power
outlets as this will damage the outlet and blow the
fuse. Improper use of the power outlet can cause
damage not covered by your New Vehicle Limited
Warranty.One outlet in the removable floor console (if equipped)
shares a fuse with the lower outlet in the instrument
panel and is also connected to the battery. Do not exceed
a maximum power of 160 Watts (13 Amps) shared
between the lower panel outlet and the removable floor
console outlet.
Removable Console Outlet
208 UNDERSTANDING THE FEATURES OF YOUR VEHICLE