Page 147 of 490

Interior Lights
The interior lights come on when a door is opened.
To protect the battery, the interior lights will turn off
automatically 10 minutes after the ignition is placed in
the OFF position. This will occur if the interior lights
were switched on manually or are on because a door is
open. This includes the glove box light, but not the trunk
light. To restore interior light operation, either place the
ignition in the RUN position or cycle the light switch.
Dimmer Control
The dimmer control is located to the right of the head-
light switch. With the parking lights or headlights on,
rotating the dimmer control upward will increase the
brightness of the instrument panel lights and, if
equipped, the lighting in the door map pockets, door
handles and cupholders.
Dome Light Position
Rotate the dimmer control completely upward to the
second detent to turn on the interior lights. The interior
lights will remain on when the dimmer control is in this
position.
Interior Light Defeat (OFF)
Rotate the dimmer control to the extreme bottom off
position. The interior lights will remain off when the
doors are open.
Parade Mode (Daytime Brightness Feature)
Rotate the dimmer control upward to the first detent.
This feature brightens all text displays such as the
odometer, Electronic Vehicle Information Center (EVIC),
and radio when the parking lights or headlights are on.
3
UNDERSTANDING THE FEATURES OF YOUR VEHICLE 145
Page 148 of 490

WINDSHIELD WIPERS AND WASHERS
The multifunction lever operates the windshield
wipers and washer when the ignition is placed in
the ON/RUN or ACC position. The multifunction
lever is located on the left side of the steering column. Rotate the end of the multifunction lever to the first
detent past the intermittent settings for low-speed wiper
operation, or to the second detent past the intermittent
settings for high-speed wiper operation.
CAUTION!
Turn the windshield wipers off when driving
through an automatic car wash. Damage to the wind-
shield wipers may result if the wiper switch is left in
any position other than off.
Intermittent Wiper System
Use the intermittent wiper when weather conditions
make a single wiping cycle with a variable pause be-
tween cycles desirable. Rotate the end of the multifunc-
tion lever to the first detent position, and then turn the
end of the lever to select the desired delay interval. There
are four delay settings, which allow you to regulate the
wipe interval from a minimum of one cycle every second
Windshield Wiper/Washer Control
146 UNDERSTANDING THE FEATURES OF YOUR VEHICLE
Page 152 of 490

the same time. If this occurs, the Electronic Speed Control
System can be reactivated by pushing the Electronic
Speed Control ON/OFF button and resetting the desired
vehicle set speed.
To Activate
Push the ON/OFF button. The Cruise Indicator Light in
the instrument cluster will illuminate. To turn the system
off, push the ON/OFF button a second time. The Cruise
Indicator Light will turn off. The system should be
turned off when not in use.
WARNING!
Leaving the Electronic Speed Control system on
when not in use is dangerous. You could accidentally
set the system or cause it to go faster than you want.
You could lose control and have an accident. Always
leave the system OFF when you are not using it.
To Set A Desired Speed
Turn the Electronic Speed Control ON. When the vehicle
has reached the desired speed, press the SET (-) button
and release. Release the accelerator and the vehicle will
operate at the selected speed.
NOTE:
The vehicle should be traveling at a steady speed
and on level ground before pressing the SET button.
To Deactivate
A soft tap on the brake pedal, pushing the CANCEL
button, or normal brake pressure while slowing the
vehicle will deactivate Electronic Speed Control without
erasing the set speed memory. Pressing the ON/OFF
button or turning the ignition switch OFF erases the set
speed memory.
To Resume Speed
To resume a previously set speed, push the RES (+)
button and release. Resume can be used at any speed
above 20 mph (32 km/h).
150 UNDERSTANDING THE FEATURES OF YOUR VEHICLE
Page 156 of 490

WARNING!
•Your motorized door or gate will open and close
while you are training the Universal Transceiver.
Do not train the transceiver if people, pets, or
other objects are in the path of the door or gate.
•Do not run your vehicle in the garage while
training the transceiver. Exhaust gas from your
vehicle contains Carbon Monoxide (CO) which is
odorless and colorless. Carbon Monoxide is poi-
sonous when inhaled and cause you and others to
be severely injured or killed.
NOTE:
Only use this transceiver with a garage door
opener that has a “stop and reverse” feature as required
by federal safety standards. This includes most garage
door opener models manufactured after 1982. Do not use
a garage door opener without these safety features. Call
toll-free 1–800–355–3515 or, on the Internet at
www.HomeLink.com for safety information or assistance.
Programming HomeLink�
Before You Begin
If you have not trained any of the HomeLink� buttons,
erase all channels before you begin training.
To do this, press and hold the two outside buttons for up
to 20 seconds. The EVIC will display “CLEARING
CHANNELS.” Release the buttons when the EVIC mes-
sage states “CHANNELS CLEARED.”
It is recommended that a new battery be placed in the
handheld transmitter of the device that is being copied to
HomeLink� for more efficient training and accurate
transmission of the radio-frequency signal.
Your vehicle should be parked outside of the garage
while training.
1. Place the ignition in the RUN position.
154 UNDERSTANDING THE FEATURES OF YOUR VEHICLE
Page 159 of 490
 after several seconds of
transmission – which may not be long enough for
Ho")
Gate Operator/Canadian Programming
Canadian radio-frequency laws require transmitter sig-
nals to “time-out” (or quit) after several seconds of
transmission – which may not be long enough for
HomeLink�to pick up the signal during programming.
Similar to this Canadian law, some U.S. gate operators are
designed to “time-out” in the same manner.
It may be helpful to unplug the device during the cycling
process to prevent possible overheating of the garage
door or gate motor.
If you are having difficulties programming a garage door
opener or a gate operator, replace “Programming
HomeLink” Step 3 with the following:
3. Continue to press and hold the HomeLink� button,
while you press and release (“cycle”), your handheld
transmitter every two seconds until HomeLink� has
successfully accepted the frequency signal. The EVIC
display will change from “CHANNEL # TRAINING” to
“CHANNEL # TRAINED.” If you unplugged the device for training, plug it back in
at this time.
Then proceed with Step 4 under “Programming
HomeLink�” earlier in this section.
Using HomeLink�
To operate, press and release the programmed
HomeLink�
button. Activation will now occur for the
trained device (i.e., garage door opener, gate operator,
security system, entry door lock, home/office lighting,
etc.,). The handheld transmitter of the device may also be
used at any time.
Reprogramming A Single HomeLink� Button
To reprogram a channel that has been previously trained,
follow these steps:
1. Place the ignition in the RUN position.
3
UNDERSTANDING THE FEATURES OF YOUR VEHICLE 157
Page 162 of 490
. Occupants, par")
WARNING!
•Never leave children in a vehicle with the key in
the ignition switch (or with the ignition in the
Accessory or Run position, for vehicles equipped
with Keyless Enter-N-Go). Occupants, particularly
unattended children, can become entrapped by the
power sunroof while operating the power sunroof
switch. Such entrapment may result in serious
injury or death.
•In a collision, there is a greater risk of being
thrown from a vehicle with an open sunroof. You
could also be seriously injured or killed. Always
fasten your seat belt properly and make sure all
passengers are also properly secured.
•Do not allow small children to operate the sun-
roof. Never allow your fingers, other body parts, or
any object, to project through the sunroof opening.
Injury may result.
Opening Sunroof — Express
Press the switch rearward and release it within one-half
second and the sunroof will open automatically from any
position. The sunroof will open fully and stop automati-
cally. This is called “Express Open”. During Express
Open operation, any movement of the sunroof switch
will stop the sunroof.
Opening Sunroof — Manual Mode
To open the sunroof, press and hold the switch rearward
to full open. Any release of the switch will stop the
movement and the sunroof will remain in a partially
opened condition until the switch is pushed and held
rearward again.
160 UNDERSTANDING THE FEATURES OF YOUR VEHICLE
Page 164 of 490

and will occur regardless of sunroof position. During
Express Vent operation, any movement of the switch will
stop the sunroof.
Sunshade Operation
The sunshade can be opened manually. However, the
sunshade will open automatically as the sunroof opens.
NOTE:The sunshade cannot be closed if the sunroof is
open.
Wind Buffeting
Wind buffeting can be described as the perception of
pressure on the ears or a helicopter-type sound in the
ears. Your vehicle may exhibit wind buffeting with the
windows down, or the sunroof (if equipped) is in certain
open or partially open positions. This is a normal occur-
rence and can be minimized. If the buffeting occurs with
the rear windows open, open the front and rear windows
together to minimize the buffeting. If the buffeting occurs with the sunroof open, adjust the sunroof opening to
minimize the buffeting or open any window.
Sunroof Maintenance
Use only a nonabrasive cleaner and a soft cloth to clean
the glass panel.
Ignition Off Operation
The power sunroof switches remain active for up to
approximately ten minutes after the ignition switch has
been turned OFF. Opening either front door will cancel
this feature.
ELECTRICAL POWER OUTLETS
There are two 12 Volt (13 Amp) electrical power outlets
on this vehicle. Both of the outlets are protected by a fuse.
The front 12 Volt power outlet has power available only
when the ignition is placed in the ACC or RUN position.
This power outlet will also operate a conventional cigar
lighter unit. If desired, the front power outlet can be
162 UNDERSTANDING THE FEATURES OF YOUR VEHICLE
Page 165 of 490
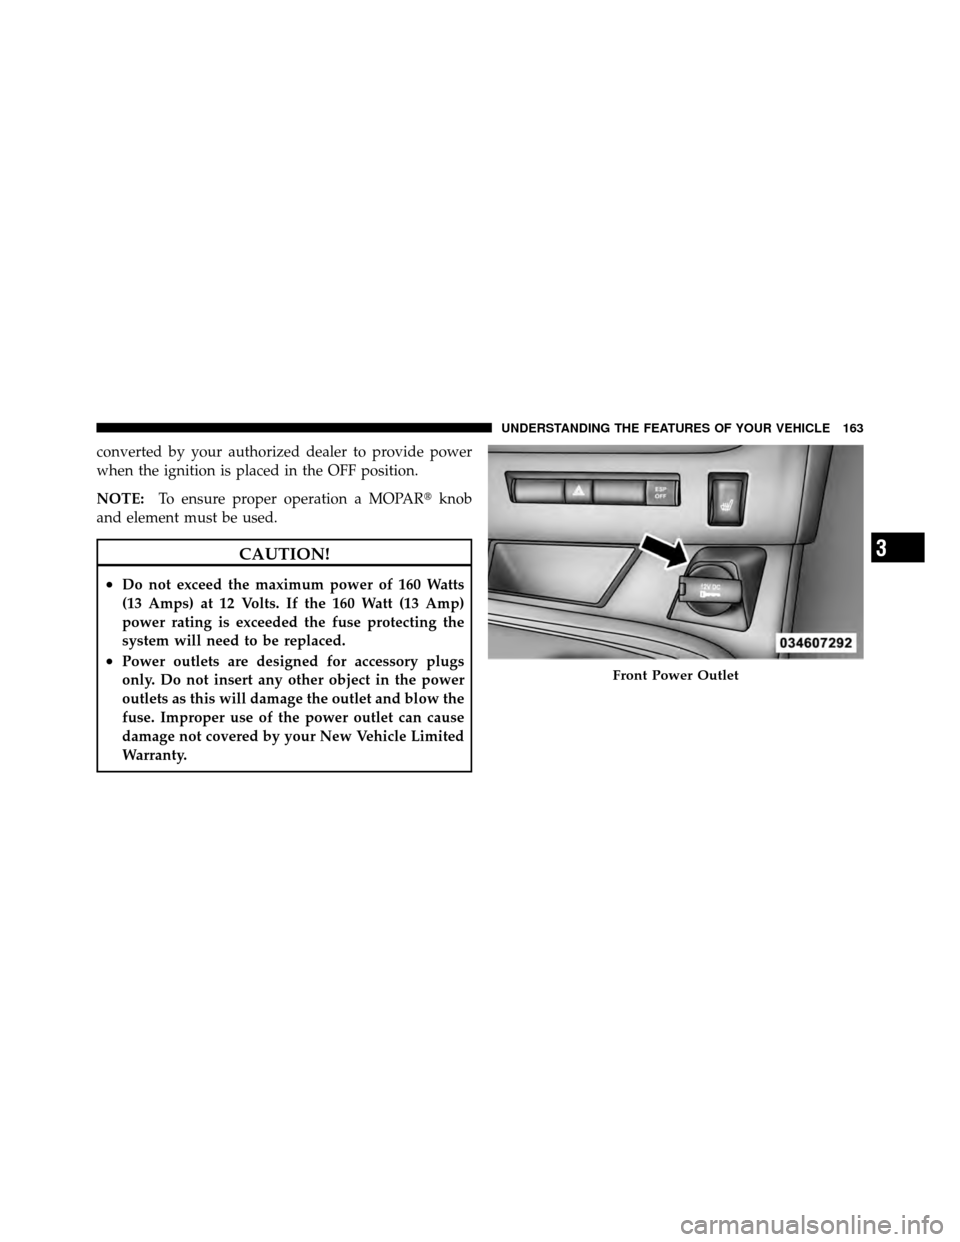
converted by your authorized dealer to provide power
when the ignition is placed in the OFF position.
NOTE:To ensure proper operation a MOPAR� knob
and element must be used.
CAUTION!
•Do not exceed the maximum power of 160 Watts
(13 Amps) at 12 Volts. If the 160 Watt (13 Amp)
power rating is exceeded the fuse protecting the
system will need to be replaced.
•Power outlets are designed for accessory plugs
only. Do not insert any other object in the power
outlets as this will damage the outlet and blow the
fuse. Improper use of the power outlet can cause
damage not covered by your New Vehicle Limited
Warranty.Front Power Outlet
3
UNDERSTANDING THE FEATURES OF YOUR VEHICLE 163