2011 DODGE AVENGER warning
[x] Cancel search: warningPage 181 of 494

WARNING!
Do not operate this vehicle with a console compart-
ment lid in the open position. Cellular phones, music
players, and other handheld electronic devices
should be stowed while driving. Use of these devices
while driving can cause an accident due to distrac-
tion, resulting in death or injury.
CARGO AREA FEATURES
The 60/40 split-folding rear seat provides cargo-carrying
versatility. The seatbacks fold down easily by pulling
nylon tabs between the seatbacks and the bolsters. When
the seats are folded down, they provide a continuous,
nearly flat extension of the load floor.
When the seatback is folded to the upright position, make
sure it is latched by strongly pulling on the top of the
seatback above the seat strap.
WARNING!
•Be certain that the seatback is securely locked into
position. If the seatback in not securely locked
into position, the seat will not provide the proper
stability for child seats and/or passengers. An
improperly latched seat could cause serious injury.
•The cargo area in the rear of the vehicle (with the
rear seatbacks in the locked-up or folded down
position) should not be used as a play area by
children when the vehicle is in motion. They could
be seriously injured in a collision. Children should
be seated and using the proper restraint system.
•To help protect against personal injury, passengers
should not be seated in the rear cargo area. The
rear cargo space is intended for load carrying
purposes only, not for passengers, who should sit
in seats and use seat belts.(Continued)
3
UNDERSTANDING THE FEATURES OF YOUR VEHICLE 179
Page 182 of 494

WARNING! (Continued)
•The weight and position of cargo and passengers
can change the vehicle center of gravity and ve-
hicle handling. To avoid loss of control resulting
in personal injury, follow these guidelines for
loading your vehicle:
Always place cargo evenly on the cargo floor. Put heavier
objects as low and as far forward as possible. Place as
much cargo as possible in front of the rear axle. Too much
weight or improperly placed weight over or behind the
rear axle can cause the rear of the vehicle to sway.
Do not pile luggage or cargo higher than the top of the
seatback. This could impair visibility or become a dan-
gerous projectile in a sudden stop or collision.
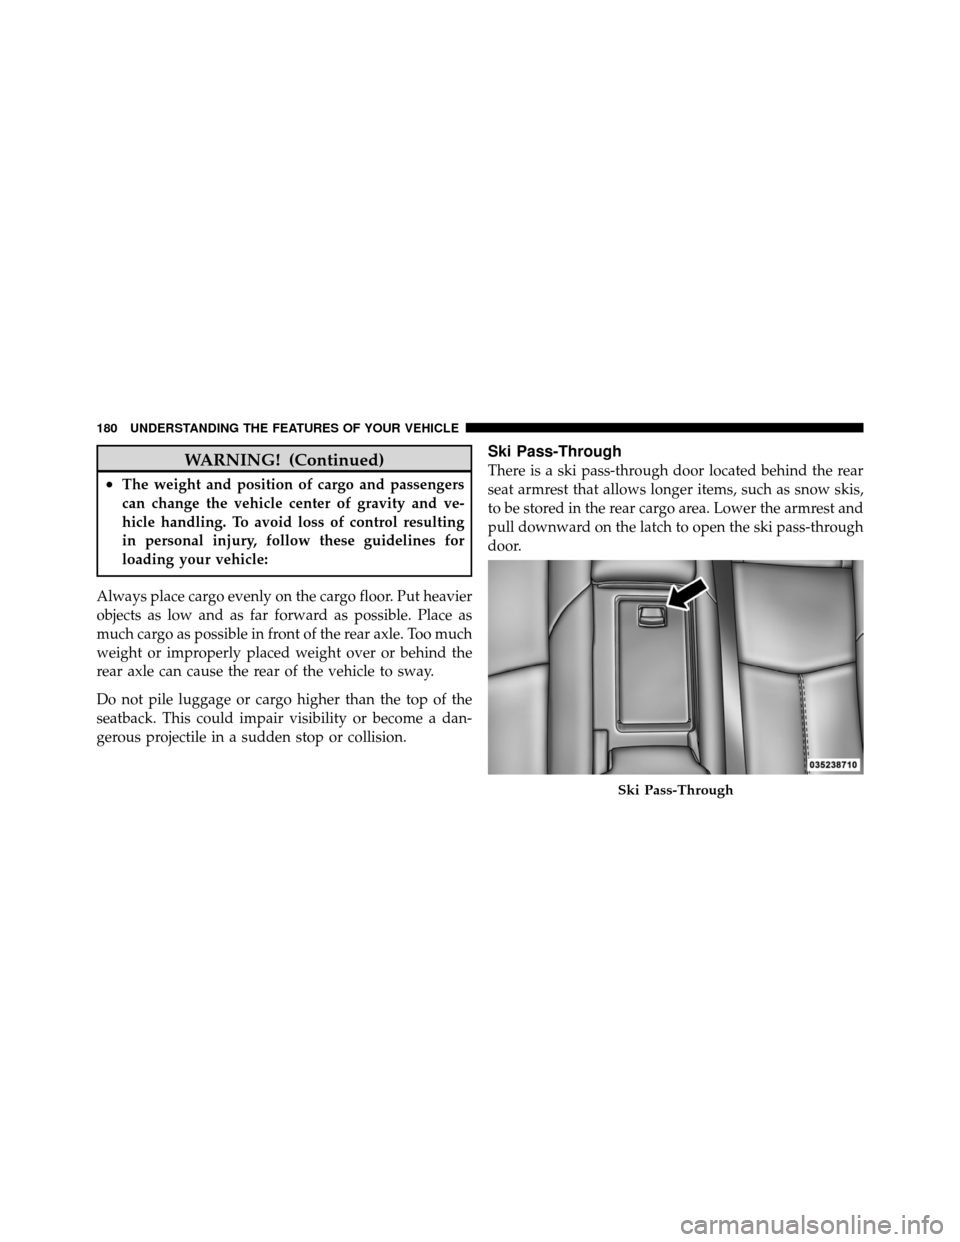
Ski Pass-Through
There is a ski pass-through door located behind the rear
seat armrest that allows longer items, such as snow skis,
to be stored in the rear cargo area. Lower the armrest and
pull downward on the latch to open the ski pass-through
door.
Ski Pass-Through
180 UNDERSTANDING THE FEATURES OF YOUR VEHICLE
Page 191 of 494

5. Low Fuel LightWhen the fuel level drops to approximately 2.0 gal-
lons (7.6 Liters), the fuel symbol will light and a
single chime will sound.
NOTE: This light will remain on until a minimum of
approximately 3.0 gallons of fuel is added.
6. Charging System Light This light shows the status of the electrical charg-
ing system. The light should come on briefly when
the ignition is first turned on and remain on briefly as a
bulb check. If the light stays on or comes on while
driving, turn off some of the vehicle’s electrical devices,
such as the Front Fog Lights or Rear Window Defroster.
If the Charging System Light remains on, it means that
the vehicle is experiencing a problem with the charging
system. Obtain SERVICE IMMEDIATELY. See your local
authorized dealer. If jump starting is required, refer to “Jump Starting
Procedures” in “What To Do In Emergencies”.
7. Air Bag Warning Light
This light will turn on for four to eight seconds
as a bulb check when the ignition switch is first
turned to ON/RUN. If the light is either not on
during starting, stays on, or turns on while
driving, have the system inspected at an authorized
dealer as soon as possible. Refer to “Occupant Restraints”
in “Things To Know Before Starting Your Vehicle” for
further information.
8. Seat Belt Reminder Light When the ignition switch is first turned to ON/
RUN, this light will turn on for four to eight
seconds as a bulb check. During the bulb check, if
the driver’s seat belt is unbuckled, a chime will sound.
After the bulb check or when driving, if the driver seat
belt remains unbuckled, the Seat Belt Warning Light will
4
UNDERSTANDING YOUR INSTRUMENT PANEL 189
Page 192 of 494

flash or remain on continuously. Refer to “Occupant
Restraints” in “Things To Know Before Starting Your
Vehicle” for further information.
9. Oil Pressure Warning LightThis light indicates low engine oil pressure. The
light will come on and remain on when the
ignition switch is turned from the OFF to the ON/RUN
position, and the light will turn off after the engine is
started. If the bulb does not come on during starting,
have the system checked by an authorized dealer.
If the light comes on and remains on while driving, stop
the vehicle and shut off the engine. DO NOT OPERATE
THE VEHICLE UNTIL THE CAUSE IS CORRECTED.
The light does not show the quantity of oil in the engine.
This can be determined using the procedure shown in
“Maintaining Your Vehicle”. 10. Engine Temperature Warning Light
This light warns of an overheated engine condi-
tion. If the engine is critically hot, a warning chime
will sound 10 times. After the chime turns off, the
engine will still be critically hot until the light goes out.
11. Brake Warning Light This light monitors various brake functions,
including brake fluid level and parking brake
application. If the brake light turns on it may
indicate that the parking brake is applied, that
the brake fluid level is low, or that there is a problem with
the anti-lock brake system.
The dual brake system provides a reserve braking capac-
ity in the event of a failure to a portion of the hydraulic
system. Failure of either half of the dual brake system is
indicated by the Brake Warning Light which will turn on
when the brake fluid level in the master cylinder has
dropped below a specified level.
190 UNDERSTANDING YOUR INSTRUMENT PANEL
Page 193 of 494

The light will remain on until the cause is corrected.
NOTE:The light may flash momentarily during sharp
cornering maneuvers which change fluid level condi-
tions. The vehicle should have service performed, and
the brake fluid level checked.
If brake failure is indicated, immediate repair is neces-
sary.
WARNING!
Driving a vehicle with the brake light on is danger-
ous. Part of the brake system may have failed. It will
take longer to stop the vehicle. You could have a
collision. Have the vehicle checked immediately.
Vehicles equipped with Anti-Lock brakes (ABS), are also
equipped with Electronic Brake Force Distribution (EBD). In the event of an EBD failure, the Brake Warning Light
will turn on along with the ABS Light. Immediate repair
to the ABS system is required.
The operation of the Brake Warning Light can be checked
by turning the ignition switch from the OFF position to
the ON/RUN position. The light should illuminate for
approximately three seconds. The light should then turn
off unless the parking brake is applied or a brake fault is
detected. If the light does not illuminate, have the light
inspected by an authorized dealer.
The light also will turn on when the parking brake is
applied with the ignition switch in the ON/RUN posi-
tion.
NOTE:
This light shows only that the parking brake is
applied. It does not show the degree of brake application.
4
UNDERSTANDING YOUR INSTRUMENT PANEL 191
Page 195 of 494

Vehicle Odometer Messages
When the appropriate conditions exist, the odometer will
display the following messages:
door............................. Door Ajar
dECK ............................ T runk Ajar
LoW tirE ..................... LowTirePr essure
CHANgE OIL ............... Oil Change Required
gASCAP ....................... Fuel Cap Fault
HOTOIL ............ Tr ansmission Oil Temperature
Exceeds Safe Threshold
NOTE: If the instrument cluster is equipped with the
optional Electronic Vehicle Information Center (EVIC),
then all warnings including ”Low Tire,” “Door Ajar” and
“Trunk Ajar” will only display in the EVIC. (Refer to
“Electronic Vehicle Information Center (EVIC)” for spe-
cific messages). LoW tirE
When the appropriate condition exists, the odometer
display will toggle between LoW and tirE for three
cycles.
HOTOIL
When this message is displayed there is a transmission
over-temperature condition. When this condition occurs,
the “HOTOIL” message will be displayed in the odom-
eter along with a chime.
NOTE:
When this message is displayed, bring the
vehicle to a stop and idle the engine in park until the
message clears. Raising the idle of the engine slightly will
help speed up the cooling.
gASCAP
If the vehicle diagnostic system detects a leak or change
in the evaporative system, or the fuel filler cap is loose,
improperly installed, or damaged, the words “gASCAP”
will display in the odometer display area. If this occurs,
4
UNDERSTANDING YOUR INSTRUMENT PANEL 193
Page 200 of 494

reduces fuel efficiency and tire tread life, and may affect
the vehicle’s handling and stopping ability.
Please note that the TPMS is not a substitute for proper
tire maintenance, and it is the driver ’s responsibility to
maintain correct tire pressure, even if under-inflation has
not reached the level to trigger illumination of the TPMS
low tire pressure telltale.
Your vehicle has also been equipped with a TPMS
malfunction indicator to indicate when the system is not
operating properly. The TPMS malfunction indicator is
combined with the low tire pressure telltale. When the
system detects a malfunction, the telltale will flash for
approximately one minute and then remain continuously
illuminated. This sequence will continue upon subse-
quent vehicle start-ups as long as the malfunction exists.
When the malfunction indicator is illuminated, the sys-
tem may not be able to detect or signal low tire pressure
as intended. TPMS malfunctions may occur for a variety
of reasons, including the installation of replacement oralternate tires or wheels on the vehicle that prevent the
TPMS from functioning properly. Always check the
TPMS malfunction telltale after replacing one or more
tires or wheels on your vehicle, to ensure that the
replacement or alternate tires and wheels allow the TPMS
to continue to function properly.
CAUTION!
The TPMS has been optimized for the original
equipment tires and wheels. TPMS pressures and
warning have been established for the tire size
equipped on your vehicle. Undesirable system opera-
tion or sensor damage may result when using re-
placement equipment that is not of the same size,
type, and/or style. Aftermarket wheels can cause
sensor damage. Do not use tire sealant from a can or
balance beads if your vehicle is equipped with a
TPMS, as damage to the sensors may result.
198 UNDERSTANDING YOUR INSTRUMENT PANEL
Page 201 of 494

25. Malfunction Indicator Light (MIL)The Malfunction Indicator Light (MIL) is part of
an onboard diagnostic system called OBD that
monitors emissions, engine, and automatic trans-
mission control systems. The light will illuminate when
the key is in the ON/RUN position before engine start. If
the bulb does not come on when turning the key from
LOCK to ON/RUN, have the condition checked
promptly.
Certain conditions, such as a loose or missing gas cap,
poor fuel quality, etc., may illuminate the light after
engine start. The vehicle should be serviced if the light
stays on through several of your typical driving cycles. In
most situations, the vehicle will drive normally and will
not require towing.CAUTION!
Prolonged driving with the MIL on could cause
damage to the engine control system. It also could
affect fuel economy and drivability. If the MIL is
flashing, severe catalytic converter damage and
power loss will soon occur. Immediate service is
required.
WARNING!
A malfunctioning catalytic converter, as referenced
above, can reach higher temperatures than in normal
operating conditions. This can cause a fire if you
drive slowly or park over flammable substances such
as dry plants, wood, cardboard, etc. This could result
in death or serious injury to the driver, occupants or
others.
4
UNDERSTANDING YOUR INSTRUMENT PANEL 199