2011 Citroen JUMPY Wiper
[x] Cancel search: WiperPage 115 of 260

11
3
Battery
QUICK HEL
P
7
BATTERY
This is housed in a compartment located
underneath the fl oor, in front of the front right seat.
Before disconnecting the battery, you must
wait for 2 minutes after switching off the
ignition.
Never disconnect a terminal when the
engine is running.
Never charge a battery without first
disconnecting the terminals.
After every reconnection of the battery,
switch on the ignition and wait 1 minute
before starting to allow the electronic
systems to be initialised. If some problems
persist after this operation, please contact a
CITROËN dealer or a qualified workshop. It is advisable to disconnect the battery
if the vehicle is not to be used for a
period of more than one month.
After the engine has stopped, with the key
in the ignition position, certain functions
(windscreen wiper, electric windows, courtesy
lights, audio equipment, etc.) can only be used
for a cumulative duration of thirty minutes, to
prevent discharging of the battery.
To charge the battery using a battery
charger
- Disconnect the battery,
- Follow the instructions for use given by
the battery charger manufacturer,
- Reconnect starting with the negative (-)
terminal,
- Check that the terminals and connectors
are clean. If they are covered with
sulphate (white or greenish deposit),
disconnect them and clean them.
To start the vehicle from another
battery
- Connect the red cable to the positive (+)
terminals of the two batteries,
- Connect one end of the green or black
cable to the negative (-) terminal of the
slave battery,
- Connect the other end of the green or
black cable to an earth point on the
broken down vehicle as far as possible
from the battery,
- Operate the starter, let the engine run,
- Wait for the engine to return to idle, then
disconnect the cables. Once the thirty minutes are over, the active
functions are put on standby and the battery
warning light flashes accompanied by a
message on the display.
To resume the use of these functions
immediately, start the engine and let it run
for a few minutes.
The time available will then be double the
time for which the engine was left running.
However, this time will always be between
five and thirty minutes.
A flat battery will prevent the engine from
starting.
Page 129 of 260

12
7
Changing a fuse
QUICK HEL
P
7
RIGHT-HAND SIDE DASHBOARD
FUSES
- Tilt the storage compartment then pull it
firmly to access the fuses.
Fuses
A (amps)
Allocation
1
15
Rear wiper
2
-
Free
3
5
Airbag control unit
4
10
Steering wheel angle sensor, Diagnostic socket, ESP
sensor, Manual ventilation, Clutch switch, Headlamp beam
height, Particle emission filter pump
5
30
Electric mirrors, Passenger electric window motor
6
30
Front electric windows supply
7
5
Courtesy lamps and glove box lamp
8
20
Multifunction screen, Anti-theft alarm siren, Audio
equipment, Compact disc changer, Audio/telephone, Trailer
fusebox (accessory), Coachbuilder/vehicle converter unit
(platform cab)
9
10
Load space accessory socket
10
30
Rear ride height corrector, Steering wheel switching,
Instrument panel
11
15
Diagnostic socket, Ignition switch
12
15
Hands-free kit, Airbag control unit, Parking sensors
control unit
13
5
Engine fusebox, Trailer fusebox
14
15
Rain sensor, Digital air conditioning, Instrument panel
15
30
Locking/unlocking/deadlocking
16
-
Free
17
40 Heated rear screen, Heated mirrors
17
10
Heated mirrors only
Page 130 of 260

128
Changing a fuse
PASSENGER COMPARTMENT
FUSES
- Unclip the battery compartment cover.
- Remove the red battery terminal (+).
When you have finished, close the cover
carefully.
Fuses
A (amps)
Allocation
1
30
Heated seats
2
-
Free
3
40/50
Trailer fuse box (accessory)/Coachbuilder/vehicle modifier
unit (platform cab)
4
-
Free
36
15
Hinged door locks
37
10
Hinged door locks
38
20
Hinged door rear wiper
39
-
Free
40
5
Folding door mirrors
Page 131 of 260

12
9
Changing a fuse
QUICK HEL
P
7
FUSES UNDER THE BONNET
- After opening the bonnet, slide the
screenwash support to make access
easier.
- Unclip and tilt the box to access
the fuses.
Fuses
A (amps)
Allocation
1
20
Engine control unit, Fuel supply and air supply systems,
Fan assembly
2
15
Horn
3
10
Front and rear screenwash pump
4
20
Headlamp wash pump
5
15
Fuel supply system
6
10
Power steering, Secondary brake pedal switch
7
10
Braking system (ABS/ESP)
8
20
Starter motor control
9
10
Main brake pedal switch
10
30
Fuel supply and air supply systems, Emissions control systems
11
40
Front ventilation
12
30 Windscreen wipers
13
40
Built-in systems interface
14
30
Free
Page 133 of 260

131
Changing a wiper blade
QUICK HEL
P
7
Placing the wiper blades in the
special position
- Less than a minute after switching
off the ignition, press the wipers stalk
downwards to position the wiper blades
along the windscreen uprights (special
position).
Changing a front wiper blade
- Lift the wiper arm.
- Unclip the blade and remove it.
- Fit the new blade.
- Push back the wiper arm.
Changing the rear wiper blade
- Lift the wiper arm, then unclip the blade
and remove it.
- Fit the new blade and push back the
wiper arm.
CHANGING A WINDSCREEN WIPER BLADE
To return the windscreen wipers to their
normal position, switch on the ignition and
operate the wipers stalk.
Page 217 of 260

9.73
10
1
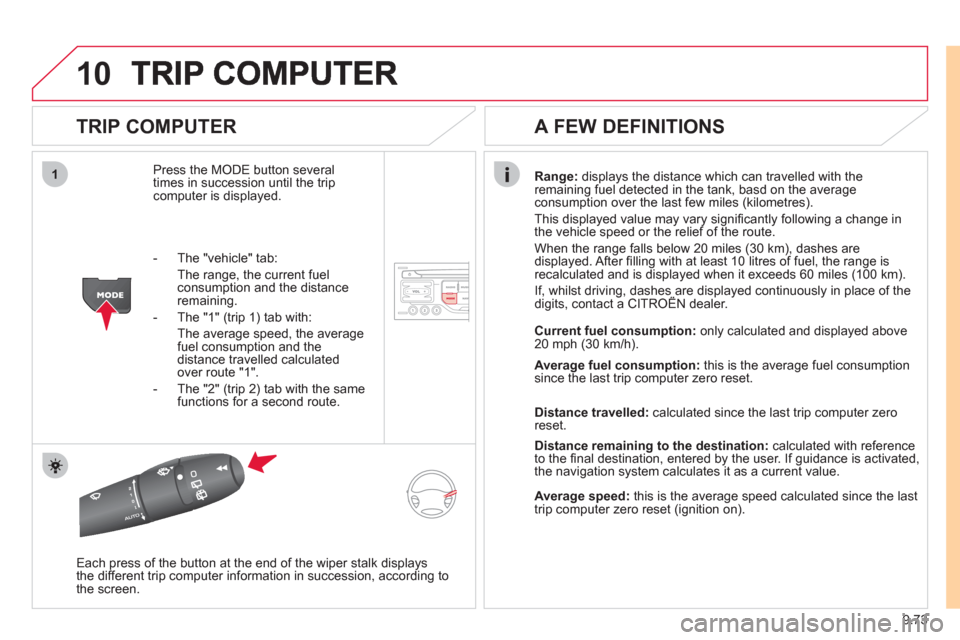
TRIP COMPUTER
Press the MODE button several
times in succession until the tripcomputer is displayed.
Range: displays the distance which can travelled with the
remaining fuel detected in the tank, basd on the average consumption over the last few miles (kilometres).
This displa
yed value may vary signifi cantly following a change in
the vehicle speed or the relief of the route.
When the range
falls below 20 miles (30 km), dashes are
displayed. After fi lling with at least 10 litres of fuel, the range is
recalculated and is displayed when it exceeds 60 miles (100 km).
If, whilst driving, dashes are displayed continuously in place of thedigits, contact a CITROÀN dealer. ,g, p
Each press of the button at the end of the wiper stalk displays
the different trip computer information in succession, according to
the screen.
A FEW DEFINITIONS
- The "vehicle" tab:
The ran
ge, the current fuel consumption and the distance
remaining.
- The "1"
(trip 1) tab with:
The average speed, the average fuel consumption and thedistance travelled calculated over route "1".
- The "2"
(trip 2) tab with the same
functions for a second route.Current fuel consum
ption:only calculated and displayed above
20 mph (30 km/h).
Average fuel consumption: this is the average fuel consumption
since the last trip computer zero reset.
Distance travelled: calculated since the last trip computer zero
reset.
Distance remaining to the destination:calculated with referenceto the fi nal destination, entered by the user. If guidance is activated,
the navigation system calculates it as a current value.
Average speed:this is the average speed calculated since the last
trip computer zero reset (ignition on).
Page 241 of 260

9.97
11
08
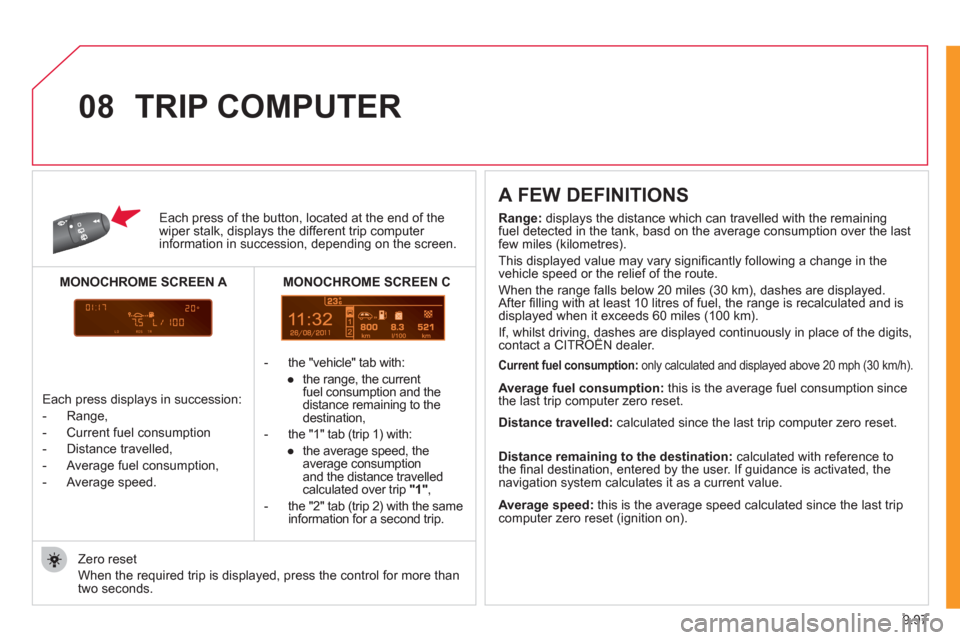
Each press of the button, located at the end of the wiper stalk, displays the different trip computer information in succession, depending on the screen.
- th
e "vehicle" tab with:
●
the ran
ge, the current
fuel consumption and the
distance remaining to thedestination,
- the "1" tab
(trip 1) with:
●
the avera
ge speed, the
average consumptionand the distance travelled calculated over trip "1" ,
- the "2" tab
(trip 2) with the same
information for a second trip.
A FEW DEFINITIONS
Zero reset
When the required trip is displa
yed, press the control for more than
two seconds.
TRIP COMPUTER
Range:
displays the distance which can travelled with the remaining fuel detected in the tank, basd on the average consumption over the lastfew miles (kilometres).
This displayed value may vary signi
fi cantly following a change in the
vehicle speed or the relief of the route.
When the ran
ge falls below 20 miles (30 km), dashes are displayed.
After fi lling with at least 10 litres of fuel, the range is recalculated and is
displayed when it exceeds 60 miles (100 km).
If, whilst driving, dashes are displayed continuously in place of the digits,contact a CITROËN dealer. ,g,
Current fuel consumption:only calculated and displayed above 20 mph (30 km/h).
Average fuel consumption: this is the average fuel consumption since
the last trip computer zero reset.
Average speed: this is the average speed calculated since the last trip computer zero reset (ignition on).
Distance travelled:
calculated since the last trip computer zero reset.
Distance remaining to the destination:calculated with reference to
the fi nal destination, entered by the user. If guidance is activated, the
navigation system calculates it as a current value.
Each press displays in succession:
-
Range,
-
Current fuel consumption
- Distance travelled,
- Avera
ge fuel consumption,
- Avera
ge speed.
MONOCHROME SCREEN C
MONOCHROME SCREEN A
Page 249 of 260

14
3
Exterior
VISUAL SEARCH
10
EXTERIOR
Remote control 19-20
Changing the battery, reinitialisation 20
Key 20
Starting 41
Central locking/
unlocking 19, 23
Locking/unlocking
the load space 19, 23
Alarm 21-22
Fuel cut-off, Diesel priming 111-112 Wiper blade 131
Door mirrors 79
Side repeater 123
Front lamps, foglamps,
direction indicators 42-44
Headlamp beam height adjustment 44
Changing front bulbs 121-123
Headlamp wash 45, 106
Snow shield 120
Front doors 23
Sliding side door 24
Key 20
Opening the bonnet 102
Filler cap, fuel tank 110
Towing, lifting 132
Towbar 98-99
Rear parking sensors 83 Load space 19, 23
Doors, tailgate 23-25
Emergency control 25
Temporary puncture repair kit 114
Spare wheel, jack,
changing a wheel, tools 116-120
Infl ation, pressures 142 Rear lamps, direction
indicators 42-43, 123
3rd brake lamp 125
Changing rear bulbs 121, 124 Accessories 100-101
Roof bars 100
Number plate lamp 125 Van dimensions 134-137
Platform cab dimensions 138-139
Brakes, pads 82, 107
Emergency braking 84
ABS, EBFD 84
ASR, ESP 85
Tyre, pressure 142
Rear suspension 76-78