2011 CHRYSLER 200 CONVERTIBLE service
[x] Cancel search: servicePage 123 of 505
mobile service plan. For example, if your mobile service
plan provides three-way calling, this feature can be
accessed through the Uconnect™ Phone. Check with
your mobile service provider for the features that you
have.
Answer Or Reject An Incoming Call — No Call
Currently In Progress
When you receive a call on your mobile phone, the
Uconnect™ Phone will interrupt the vehicle audio sys-
tem, if on, and will ask if you would like to answer the
call. Press the
button to accept the call. To reject the
call, press and hold the
button until you hear a
single beep, indicating that the incoming call was
rejected.
Answer Or Reject An Incoming Call — Call
Currently In Progress
If a call is currently in progress and you have another
incoming call, you will hear the same network tones for call waiting that you normally hear when using your
mobile phone. Press the
button to place the current
call on hold and answer the incoming call.
NOTE: The Uconnect™ Phone compatible phones in the
market today do not support rejecting an incoming call
when another call is in progress. Therefore, the user can
only answer an incoming call or ignore it.
Making A Second Call While Current Call Is In
Progress
To make a second call while you are currently on a call,
press the
button and say “Dial” or “Call” followed
by the phone number or phonebook entry you wish to
call. The first call will be on hold while the second call is
in progress. To go back to the first call, refer to “Toggling
Between Calls” in this section. To combine two calls, refer
to “Conference Call” in this section.
3
UNDERSTANDING THE FEATURES OF YOUR VEHICLE 121
Page 126 of 505
After selecting one of the languages, all prompts and
voice commands will be in that language.
NOTE:After every Uconnect™ Phone language change
operation, only the language-specific 32-name phone-
book is usable. The paired phone name is not language-
specific and is usable across all languages.
Emergency Assistance
If you are in an emergency and the mobile phone is
reachable:
•Pick up the phone and manually dial the emergency
number for your area.
If the phone is not reachable and the Uconnect™ Phone is
operational, you may reach the emergency number as
follows:
•Press thebutton to begin.
•After the “Ready” prompt and the following beep, say
“Emergency” and the Uconnect™ Phone will instruct
the paired mobile phone to call the emergency num-
ber. This feature is supported in the U.S., Canada, and
Mexico.
NOTE:
•The emergency number dialed is based on the country
where the vehicle is purchased (911 for the U.S. and
Canada and 060 for Mexico). The number dialed may
not be applicable with the available mobile service and
area.
•If supported, this number may be programmable on
some systems. To do this, press the
button and
say “Setup”, followed by “Emergency”.
•The Uconnect™ Phone does slightly lower your
chances of successfully making a phone call as to that
for the mobile phone directly.
124 UNDERSTANDING THE FEATURES OF YOUR VEHICLE
Page 128 of 505

Working With Automated Systems
This method is used in instances where one generally has
to press numbers on the mobile phone keypad while
navigating through an automated telephone system.
You can use your Uconnect™ Phone to access a voice
mail system or an automated service, such as a paging
service or automated customer service line. Some ser-
vices require immediate response selection. In some
instances, that may be too quick for use of the
Uconnect™ Phone.
When calling a number with your Uconnect™ Phone that
normally requires you to enter in a touch-tone sequence
on your mobile phone keypad, you can press the
button and say the sequence you wish to enter, followed
by the word “Send”. For example, if required to enter
your PIN followed with a pound, (3746#),youcan
press the
button and say, “3746#Send”. Saying
a number, or sequence of numbers, followed by “Send”, is also to be used for navigating through an automated
customer service center menu structure, and to leave a
number on a pager.
You can also send stored Uconnect™ phonebook entries
as tones for fast and easy access to voice mail and pager
entries. To use this feature, dial the number you wish to
call and then press the
button and say, “Send.” The
system will prompt you to enter the name or number and
say the name of the phonebook entry you wish to send.
The Uconnect™ Phone will then send the corresponding
phone number associated with the phonebook entry, as
tones over the phone.
NOTE:
•You may not hear all of the tones due to mobile phone
network configurations. This is normal.
•Some paging and voice mail systems have system time
out settings that are too short and may not allow the
use of this feature.
126 UNDERSTANDING THE FEATURES OF YOUR VEHICLE
Page 156 of 505
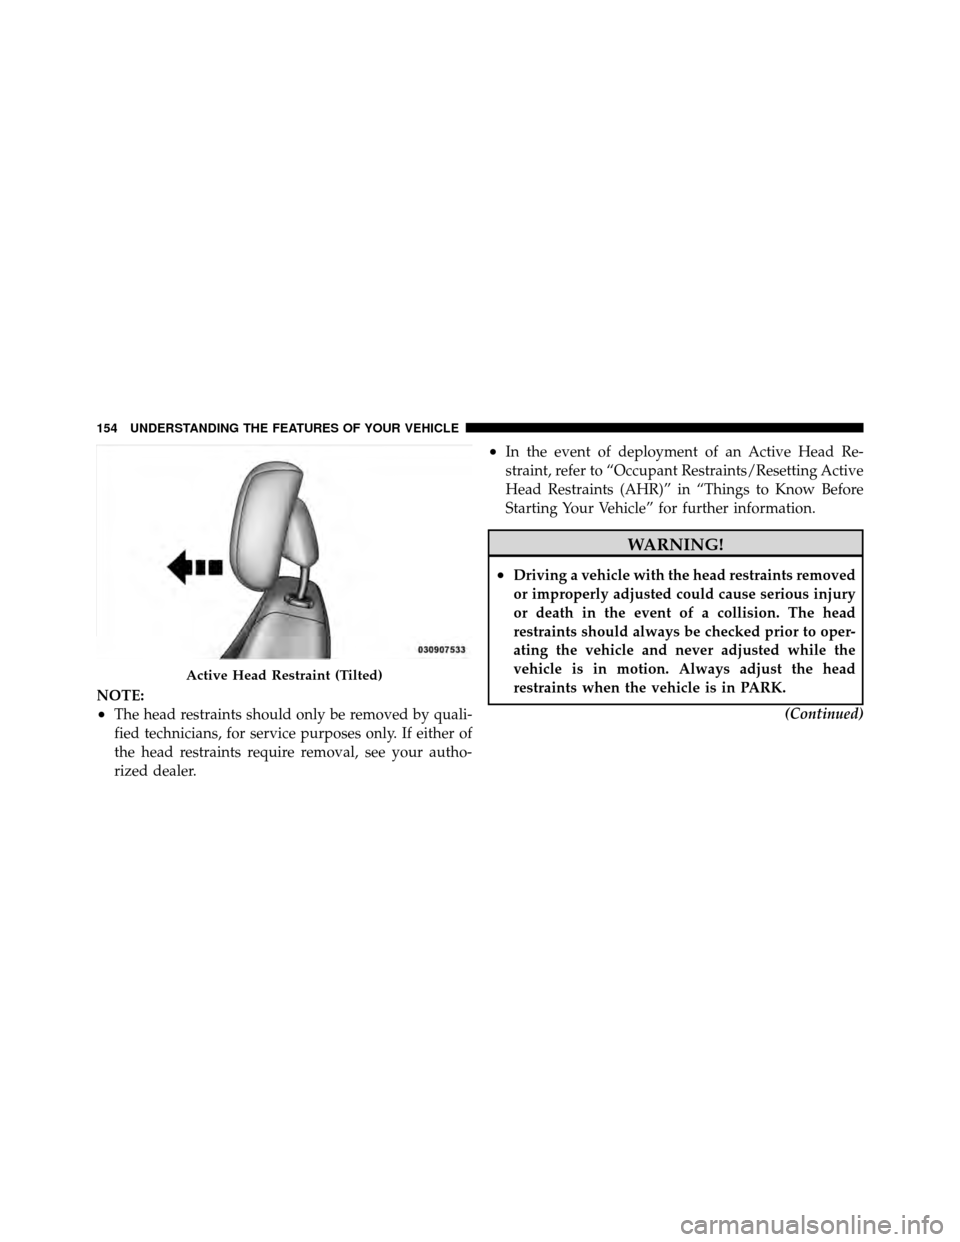
NOTE:
•The head restraints should only be removed by quali-
fied technicians, for service purposes only. If either of
the head restraints require removal, see your autho-
rized dealer.
•In the event of deployment of an Active Head Re-
straint, refer to “Occupant Restraints/Resetting Active
Head Restraints (AHR)” in “Things to Know Before
Starting Your Vehicle” for further information.
WARNING!
•Driving a vehicle with the head restraints removed
or improperly adjusted could cause serious injury
or death in the event of a collision. The head
restraints should always be checked prior to oper-
ating the vehicle and never adjusted while the
vehicle is in motion. Always adjust the head
restraints when the vehicle is in PARK.(Continued)
Active Head Restraint (Tilted)
154 UNDERSTANDING THE FEATURES OF YOUR VEHICLE
Page 196 of 505
INSTRUMENT CLUSTER DESCRIPTIONS
1. Temperature Gauge
The temperature gauge shows engine coolant tempera-
ture. Any reading below the red area of the gauge shows
that the engine cooling system is operating properly. The
gauge pointer may show a higher than normal tempera-
ture when driving in hot weather, up mountain grades, in
heavy stop and go traffic, or when towing a trailer.
If the pointer rises to theH(red) mark, the instrument
cluster will sound a chime. Pull over and stop the vehicle.
Idle the vehicle with the air conditioner turned off until
the pointer drops back into the normal range. If the
pointer remains on the H(red) mark, turn the engine off
immediately and call for service.
There are steps that you can take to slow down an
impending overheat condition. If your air conditioning is
on, turn it off. The air conditioning system adds heat to
the engine cooling system and turning off the A/C removes this heat. You can also turn the Temperature
control to maximum heat, the Mode control to Floor and
the Fan control to High. This allows the heater core to act
as a supplement to the radiator and aids in removing heat
from the engine cooling system.
2. Fuel Door Reminder
This is a reminder that the Fuel Filler Door is
located on the left side of the vehicle.
3. Fuel Gauge
When the ignition switch is in the ON/RUN position, the
pointer will show the level of fuel remaining in the fuel
tank.
4. Speedometer
Indicates the vehicle speed in miles per hour (MPH) and
kilometers per hour (km/h).
194 UNDERSTANDING YOUR INSTRUMENT PANEL
Page 197 of 505

5. Low Fuel LightWhen the fuel level drops to approximately 2.0 gal-
lons (7.6 Liters), the fuel symbol will light and a
single chime will sound.
NOTE: This light will remain on until a minimum of
approximately 3.0 gallons (11.3 Liters) of fuel is added.
6. Charging System Light This light shows the status of the electrical charg-
ing system. The light should come on briefly when
the ignition is first turned on and remain on briefly as a
bulb check. If the light stays on or comes on while
driving, turn off some of the vehicle’s electrical devices,
such as the Front Fog Lights or Rear Window Defroster.
If the Charging System Light remains on, it means that
the vehicle is experiencing a problem with the charging
system. Obtain SERVICE IMMEDIATELY. See your local
authorized dealer. If jump starting is required, refer to “Jump Starting
Procedures” in “What To Do In Emergencies”.
7. Air Bag Warning Light
This light will turn on for four to eight seconds
as a bulb check when the ignition switch is first
turned to ON/RUN. If the light is either not on
during starting, stays on, or turns on while
driving, have the system inspected at an authorized
dealer as soon as possible. Refer to “Occupant Restraints”
in “Things To Know Before Starting Your Vehicle” for
further information.
8. Seat Belt Reminder Light When the ignition switch is first turned to ON/
RUN, this light will turn on for four to eight
seconds as a bulb check. During the bulb check, if
the driver’s seat belt is unbuckled, a chime will sound.
After the bulb check or when driving, if the driver seat
belt remains unbuckled, the Seat Belt Warning Light will
4
UNDERSTANDING YOUR INSTRUMENT PANEL 195
Page 198 of 505

flash or remain on continuously. Refer to “Occupant
Restraints” in “Things To Know Before Starting Your
Vehicle” for further information.
9. Oil Pressure Warning LightThis light indicates low engine oil pressure. The
light will come on and remain on when the
ignition switch is turned from the OFF to the ON/RUN
position, and the light will turn off after the engine is
started. If the bulb does not come on during starting,
have the system checked by an authorized dealer.
If the light comes on and remains on while driving, stop
the vehicle and shut off the engine. DO NOT OPERATE
THE VEHICLE UNTIL THE CAUSE IS CORRECTED.
The light does not show the quantity of oil in the engine.
This can be determined using the procedure shown in
“Maintaining Your Vehicle”. 10. Engine Temperature Warning Light
This light warns of an overheated engine condi-
tion. As temperatures rise and the gauge ap-
proaches H,this indicator will illuminate and a
single chime will sound after reaching a set threshold.
Further overheating will cause the temperature gauge to
pass H,the indicator will continuously flash and a
continuous chime will occur until the engine is allowed
to cool.
If the light turns on while driving, safely pull over and
stop the vehicle. If the A/C system is on, turn it off. Also,
shift the transmission into NEUTRAL and idle the ve-
hicle. If the temperature reading does not return to
normal, turn the engine off immediately and call for
service. Refer to “If Your Engine Overheats” in “What To
Do In Emergencies” for further information.
196 UNDERSTANDING YOUR INSTRUMENT PANEL
Page 199 of 505
11. Brake Warning LightThis light monitors various brake functions,
including brake fluid level and parking brake
application. If the brake light turns on it may
indicate that the parking brake is applied, that
the brake fluid level is low, or that there is a problem with
the anti-lock brake system.
The dual brake system provides a reserve braking capac-
ity in the event of a failure to a portion of the hydraulic
system. Failure of either half of the dual brake system is
indicated by the Brake Warning Light which will turn on
when the brake fluid level in the master cylinder has
dropped below a specified level.
The light will remain on until the cause is corrected.
NOTE: The light may flash momentarily during sharp
cornering maneuvers which change fluid level condi-
tions. The vehicle should have service performed, and
the brake fluid level checked. If brake failure is indicated, immediate repair is neces-
sary.
WARNING!
Driving a vehicle with the brake light on is danger-
ous. Part of the brake system may have failed. It will
take longer to stop the vehicle. You could have a
collision. Have the vehicle checked immediately.
Vehicles equipped with Anti-Lock brakes (ABS), are also
equipped with Electronic Brake Force Distribution (EBD).
In the event of an EBD failure, the Brake Warning Light
will turn on along with the ABS Light. Immediate repair
to the ABS system is required.
4
UNDERSTANDING YOUR INSTRUMENT PANEL 197