2011 CHEVROLET SUBURBAN parking brake
[x] Cancel search: parking brakePage 424 of 542
Black plate (34,1)Chevrolet Tahoe/Suburban Owner Manual - 2011
10-34 Vehicle Care
Park Brake and P (Park)
Mechanism Check
{WARNING
When you are doing this check,
the vehicle could begin to move.
You or others could be injured
and property could be damaged.
Make sure there is room in front
of the vehicle in case it begins to
roll. Be ready to apply the regular
brake at once should the vehicle
begin to move.Park on a fairly steep hill, with the
vehicle facing downhill. Keeping
your foot on the regular brake, set
the parking brake.
.To check the parking brake's
holding ability: With the engine
running and the transmission in
N (Neutral), slowly remove foot
pressure from the regular brake
pedal. Do this until the vehicle is
held by the parking brake only.
.To check the P (Park)
mechanism's holding ability:
With the engine running, shift to
P (Park). Then release the
parking brake followed by the
regular brake.
Contact your dealer if service is
required.
Wiper Blade Replacement
Windshield wiper blades should be
inspected for wear or cracking. See
Scheduled Maintenance on
page 11‑3.
Replacement blades come in
different types and are removed in
different ways.
Front Wiper Blade
Replacement
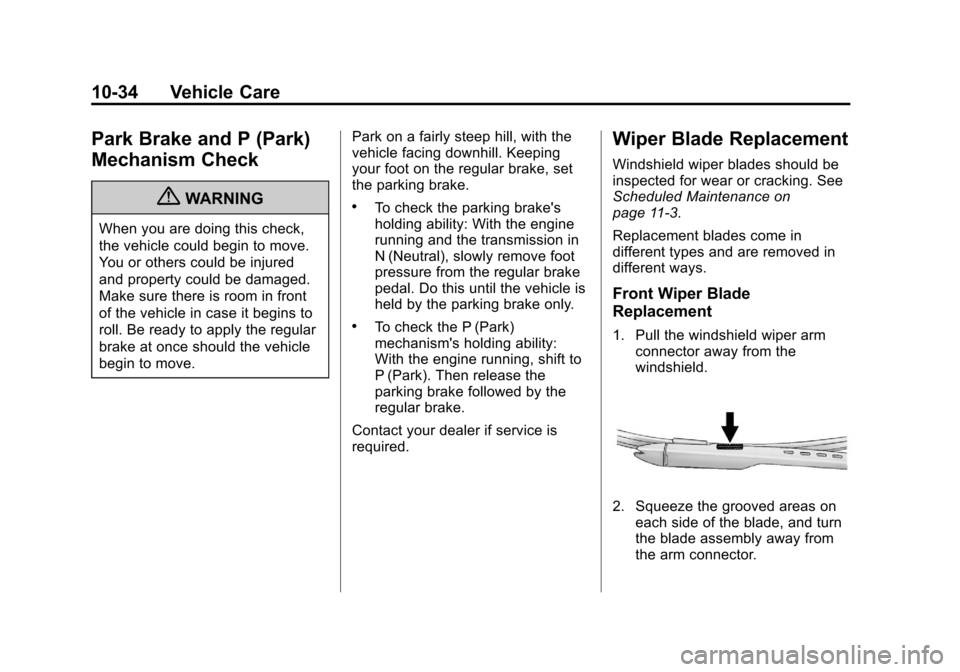
1. Pull the windshield wiper arm connector away from the
windshield.
2. Squeeze the grooved areas on
each side of the blade, and turn
the blade assembly away from
the arm connector.
Page 435 of 542
Black plate (45,1)Chevrolet Tahoe/Suburban Owner Manual - 2011
Vehicle Care 10-45
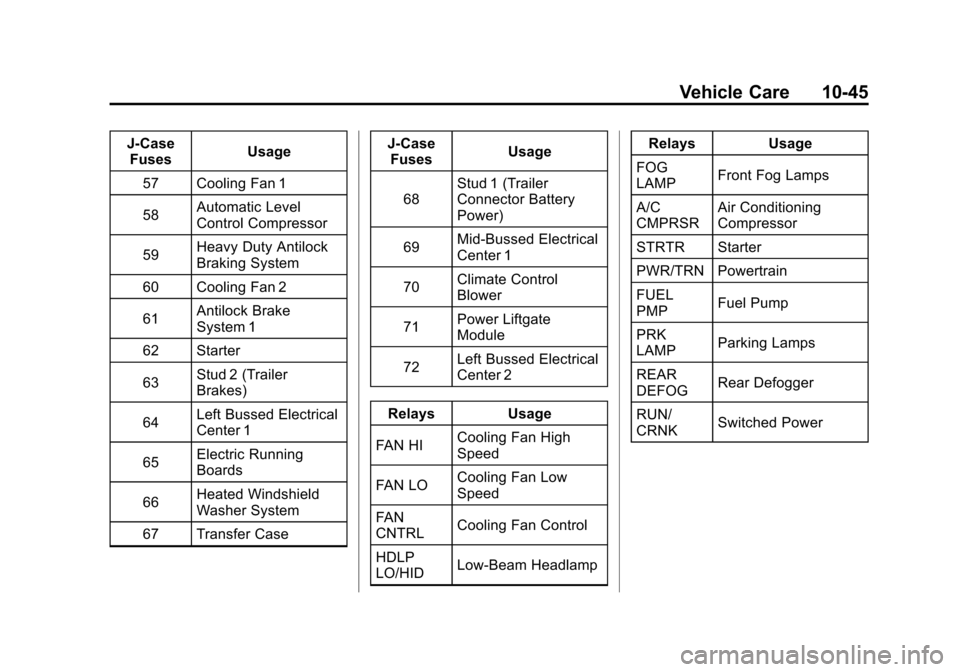
J-CaseFuses Usage
57 Cooling Fan 1
58 Automatic Level
Control Compressor
59 Heavy Duty Antilock
Braking System
60 Cooling Fan 2
61 Antilock Brake
System 1
62 Starter
63 Stud 2 (Trailer
Brakes)
64 Left Bussed Electrical
Center 1
65 Electric Running
Boards
66 Heated Windshield
Washer System
67 Transfer Case J-Case
Fuses Usage
68 Stud 1 (Trailer
Connector Battery
Power)
69 Mid-Bussed Electrical
Center 1
70 Climate Control
Blower
71 Power Liftgate
Module
72 Left Bussed Electrical
Center 2
Relays Usage
FAN HI Cooling Fan High
Speed
FAN LO Cooling Fan Low
Speed
FAN
CNTRL Cooling Fan Control
HDLP
LO/HID Low-Beam Headlamp Relays Usage
FOG
LAMP Front Fog Lamps
A/C
CMPRSR Air Conditioning
Compressor
STRTR Starter
PWR/TRN Powertrain
FUEL
PMP Fuel Pump
PRK
LAMP Parking Lamps
REAR
DEFOG Rear Defogger
RUN/
CRNK Switched Power
Page 452 of 542
Black plate (62,1)Chevrolet Tahoe/Suburban Owner Manual - 2011
10-62 Vehicle Care
.Operating electronic devices or
being near facilities using radio
wave frequencies similar to the
TPMS could cause the TPMS
sensors to malfunction.
If the TPMS is not functioning it
cannot detect or signal a low tire
condition. See your dealer for
service if the TPMS malfunction
light and DIC message comes on
and stays on.
TPMS Sensor Matching
Process
Each TPMS sensor has a unique
identification code. Any time you
rotate your vehicle's tires or replace
one or more of the TPMS sensors,
the identification codes will need to
be matched to the new tire/wheel
position. The sensors are matched
to the tire/wheel positions in the
following order: driver side front tire,
passenger side front tire, passenger
side rear tire, and driver side rear
tire using a TPMS diagnostic tool.
See your dealer for service. The TPMS sensors can also be
matched to each tire/wheel position
by increasing or decreasing the
tire's air pressure. If increasing the
tire's air pressure, do not exceed
the maximum inflation pressure
indicated on the tire's sidewall.
To decrease air-pressure out of a
tire you can use the pointed end of
the valve cap, a pencil-style air
pressure gauge, or a key.
You have two minutes to match the
first tire/wheel position, and
five minutes overall to match all four
tire/wheel positions. If it takes longer
than two minutes, to match the first
tire and wheel, or more than
five minutes to match all four tire
and wheel positions the matching
process stops and you need to
start over.
The TPMS sensor matching process
is outlined below:
1. Set the parking brake.
2. Turn the ignition switch to ON/
RUN with the engine off. 3. Press
QandKon the Remote
Keyless Entry (RKE) transmitter
at the same time for
approximately five seconds. The
horn sounds twice to signal the
receiver is in relearn mode and
TIRE LEARNING ACTIVE
message displays on the DIC
screen.
4. Start with the driver side front tire.
5. Remove the valve cap from the valve cap stem. Activate the
TPMS sensor by increasing or
decreasing the tire's air pressure
for five seconds, or until a horn
chirp sounds. The horn chirp,
which may take up to
30 seconds to sound, confirms
that the sensor identification
code has been matched to this
tire and wheel position.
6. Proceed to the passenger side front tire, and repeat the
procedure in Step 5.
Page 462 of 542
Black plate (72,1)Chevrolet Tahoe/Suburban Owner Manual - 2011
10-72 Vehicle Care
be very bumpy and noisy, but you
can still steer. Gently brake to a
stop, well off the road, if possible.
{WARNING
Driving on a flat tire will cause
permanent damage to the tire.
Re-inflating a tire after it has
been driven on while severely
under-inflated or flat may cause a
blowout and a serious crash.
Never attempt to re-inflate a tire
that has been driven on while
severely under-inflated or flat.
Have your dealer or an authorized
tire service center repair or
replace the flat tire as soon as
possible.
{WARNING
Lifting a vehicle and getting
under it to do maintenance or
repairs is dangerous without the
appropriate safety equipment and
training. If a jack is provided with
the vehicle, it is designed only for
changing a flat tire. If it is used for
anything else, you or others could
be badly injured or killed if the
vehicle slips off the jack. If a jack
is provided with the vehicle, only
use it for changing a flat tire.
If your vehicle is a hybrid, see the
hybrid supplement for more
information.
If a tire goes flat, avoid further tire
and wheel damage by driving slowly
to a level place, well off the road,
if possible. Turn on the hazard
warning flashers. See Hazard
Warning Flashers on page 6‑5.
{WARNING
Changing a tire can be
dangerous. The vehicle can slip
off the jack and roll over or fall on
you or other people. You and they
could be badly injured or even
killed. Find a level place to
change your tire. To help prevent
the vehicle from moving:
1. Set the parking brake firmly.
2. Put the shift lever in P (Park).
3. If you have a four-wheel-drive vehicle with
a N (Neutral) transfer case
position, be sure the
transfer case is in a drive
gear —not in N (Neutral).
(Continued)
Page 479 of 542
Black plate (89,1)Chevrolet Tahoe/Suburban Owner Manual - 2011
Vehicle Care 10-89
WARNING (Continued)
If you do not follow these steps
exactly, some or all of these
things can hurt you.
Notice: Ignoring these steps
could result in costly damage to
the vehicle that would not be
covered by the warranty.
Trying to start the vehicle by
pushing or pulling it will not
work, and it could damage the
vehicle.
1. Check the other vehicle. It must have a 12-volt battery with a
negative ground system.
Notice: Only use vehicles with
12-volt systems with negative
grounds to jump start your
vehicle. If the other vehicle's
system is not a 12-volt system
with a negative ground, both
vehicles can be damaged. 2. Get the vehicles close enough
so the jumper cables can reach,
but be sure the vehicles are not
touching each other. If they are,
it could cause a ground
connection you do not want. You
would not be able to start your
vehicle, and the bad grounding
could damage the electrical
systems.
To avoid the possibility of the
vehicles rolling, set the parking
brake firmly on both vehicles
involved in the jump start
procedure. Put the automatic
transmission in P (Park) or a
manual transmission in
N (Neutral) before setting the
parking brake. If the vehicle has
a four-wheel-drive transfer case
with a N (Neutral) position, be
sure the transfer case is in a
drive gear, not in N (Neutral).
Notice: If you leave the radio or
other accessories on during the
jump starting procedure, they
could be damaged. The repairs
would not be covered by the warranty. Always turn off the
radio and other accessories when
jump starting the vehicle.
3. Turn off the ignition on both
vehicles. Unplug unnecessary
accessories plugged into the
cigarette lighter or the accessory
power outlets. Turn off the radio
and all the lamps that are not
needed. This avoids sparks and
helps save both batteries. And it
could save the radio!
4. Open the hood on the other vehicle and locate the
positive (+) and negative (−)
terminal locations on that
vehicle.
Your vehicle has a remote
positive (+) jump starting
terminal and a remote
negative (−) jump starting
terminal. You should always use
these remote terminals instead
of the terminals on the battery.
Page 484 of 542
Black plate (94,1)Chevrolet Tahoe/Suburban Owner Manual - 2011
10-94 Vehicle Care
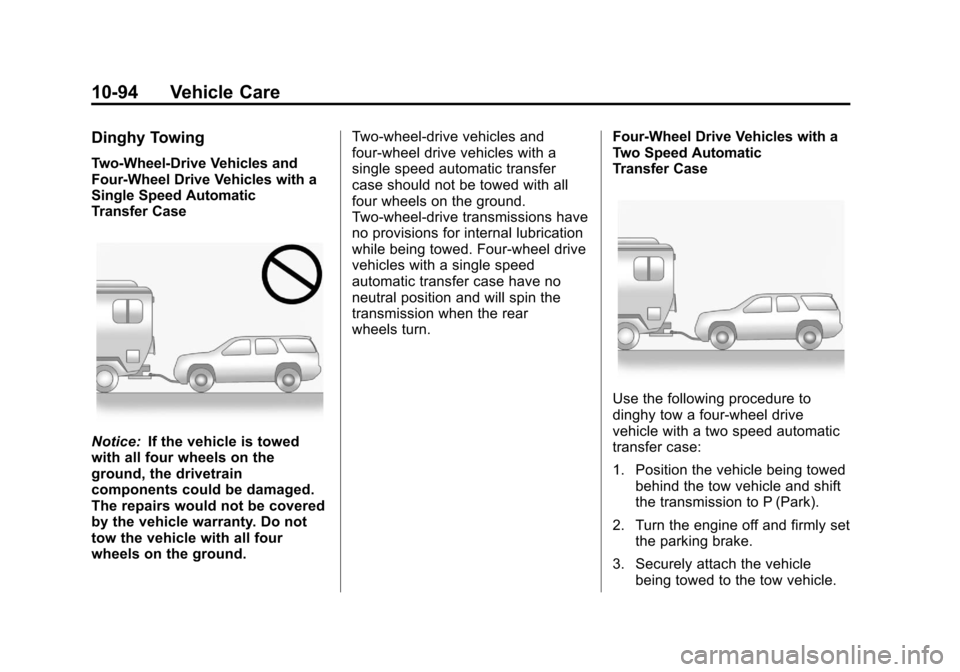
Dinghy Towing
Two-Wheel-Drive Vehicles and
Four-Wheel Drive Vehicles with a
Single Speed Automatic
Transfer Case
Notice:If the vehicle is towed
with all four wheels on the
ground, the drivetrain
components could be damaged.
The repairs would not be covered
by the vehicle warranty. Do not
tow the vehicle with all four
wheels on the ground. Two-wheel-drive vehicles and
four-wheel drive vehicles with a
single speed automatic transfer
case should not be towed with all
four wheels on the ground.
Two-wheel-drive transmissions have
no provisions for internal lubrication
while being towed. Four-wheel drive
vehicles with a single speed
automatic transfer case have no
neutral position and will spin the
transmission when the rear
wheels turn.
Four-Wheel Drive Vehicles with a
Two Speed Automatic
Transfer Case
Use the following procedure to
dinghy tow a four-wheel drive
vehicle with a two speed automatic
transfer case:
1. Position the vehicle being towed
behind the tow vehicle and shift
the transmission to P (Park).
2. Turn the engine off and firmly set the parking brake.
3. Securely attach the vehicle being towed to the tow vehicle.
Page 485 of 542

Black plate (95,1)Chevrolet Tahoe/Suburban Owner Manual - 2011
Vehicle Care 10-95
{WARNING
Shifting a four-wheel-drive
vehicle's transfer case into
N (Neutral) can cause the vehicle
to roll even if the transmission is
in P (Park). The driver or others
could be injured. Make sure the
parking brake is firmly set before
the transfer case is shifted to
N (Neutral).
4. Shift the transfer case to N (Neutral). See “Shifting into
Neutral” under“Four-Wheel
Drive” for the proper procedure
to select the Neutral position for
the vehicle.
5. Release the parking brake only after the vehicle being towed is
firmly attached to the towing
vehicle. 6. Turn the ignition to LOCK/OFF
and remove the key —the
steering wheel will still turn.
After towing, see “Shifting Out of
Neutral” under“Four-Wheel Drive”
for the proper procedure to take the
vehicle out of the Neutral position.
Dolly Towing –Front Towing
(Front Wheels Off the Ground)
Two-Wheel-Drive Vehicles and
Four-Wheel Drive Vehicles with a
Single Speed Automatic
Transfer Case
Notice: If a two-wheel drive
vehicle or a four-wheel drive
vehicle with a single speed
automatic transfer case is towed
with the rear wheels on the
ground, the transmission could
be damaged. The repairs would
not be covered by the vehicle
warranty. Never tow the vehicle
with the rear wheels on the
ground.
Two-wheel-drive vehicles and
four-wheel drive vehicles with a
single speed automatic transfer
case should not be towed with the
rear wheels on the ground.
Two-wheel-drive transmissions have
no provisions for internal lubrication
while being towed. Four-wheel drive
vehicles with a single speed
automatic transfer case have no
neutral position and will spin the
transmission when the rear
wheels turn.
Page 486 of 542
Black plate (96,1)Chevrolet Tahoe/Suburban Owner Manual - 2011
10-96 Vehicle Care
To dolly tow a two‐wheel‐drive
vehicle or a four-wheel drive vehicle
with a single speed automatic
transfer case, the vehicle must be
towed with the rear wheels on the
dolly. See“Rear Towing (Rear
Wheels Off the Ground)” later in this
section for more information.
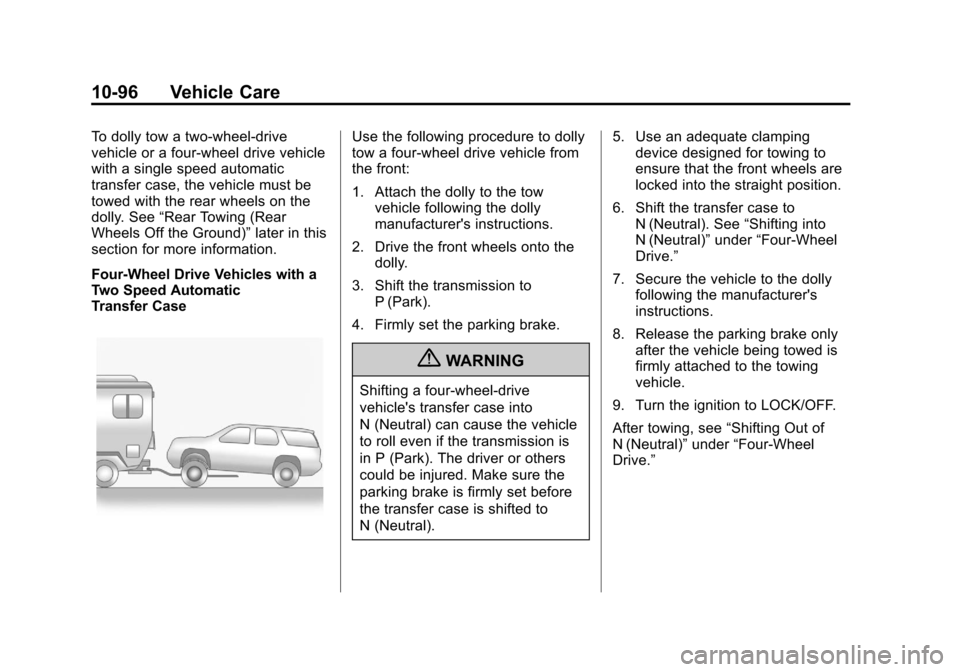
Four-Wheel Drive Vehicles with a
Two Speed Automatic
Transfer CaseUse the following procedure to dolly
tow a four-wheel drive vehicle from
the front:
1. Attach the dolly to the tow vehicle following the dolly
manufacturer's instructions.
2. Drive the front wheels onto the dolly.
3. Shift the transmission to P (Park).
4. Firmly set the parking brake.
{WARNING
Shifting a four-wheel-drive
vehicle's transfer case into
N (Neutral) can cause the vehicle
to roll even if the transmission is
in P (Park). The driver or others
could be injured. Make sure the
parking brake is firmly set before
the transfer case is shifted to
N (Neutral). 5. Use an adequate clamping
device designed for towing to
ensure that the front wheels are
locked into the straight position.
6. Shift the transfer case to N (Neutral). See “Shifting into
N (Neutral)” under“Four-Wheel
Drive.”
7. Secure the vehicle to the dolly following the manufacturer's
instructions.
8. Release the parking brake only after the vehicle being towed is
firmly attached to the towing
vehicle.
9. Turn the ignition to LOCK/OFF.
After towing, see “Shifting Out of
N (Neutral)” under“Four-Wheel
Drive.”