2011 CHEVROLET MALIBU warning light
[x] Cancel search: warning lightPage 1 of 382

Black plate (1,1)Chevrolet Malibu Owner Manual - 2011
2011 Chevrolet Malibu Owner ManualM
In Brief. . . . . . . . . . . . . . . . . . . . . . . . 1-1
Instrument Panel . . . . . . . . . . . . . . 1-2
Initial Drive Information . . . . . . . . 1-4
Vehicle Features . . . . . . . . . . . . . 1-14
Performance and Maintenance . . . . . . . . . . . . . . . . 1-18
Keys, Doors and Windows . . . 2-1
Keys and Locks . . . . . . . . . . . . . . . 2-2
Doors . . . . . . . . . . . . . . . . . . . . . . . . 2-10
Vehicle Security . . . . . . . . . . . . . . 2-12
Exterior Mirrors . . . . . . . . . . . . . . . 2-14
Interior Mirrors . . . . . . . . . . . . . . . . 2-15
Windows . . . . . . . . . . . . . . . . . . . . . 2-16
Roof . . . . . . . . . . . . . . . . . . . . . . . . . . 2-19
Seats and Restraints . . . . . . . . . 3-1
Head Restraints . . . . . . . . . . . . . . . 3-2
Front Seats . . . . . . . . . . . . . . . . . . . . 3-3
Rear Seats . . . . . . . . . . . . . . . . . . . . 3-7
Safety Belts . . . . . . . . . . . . . . . . . . . . 3-8
Airbag System . . . . . . . . . . . . . . . . 3-23
Child Restraints . . . . . . . . . . . . . . 3-38 Storage
. . . . . . . . . . . . . . . . . . . . . . . 4-1
Storage Compartments . . . . . . . . 4-1
Additional Storage Features . . . 4-2
Instruments and Controls . . . . 5-1
Controls . . . . . . . . . . . . . . . . . . . . . . . 5-2
Warning Lights, Gauges, and
Indicators . . . . . . . . . . . . . . . . . . . . 5-9
Information Displays . . . . . . . . . . 5-23
Vehicle Messages . . . . . . . . . . . . 5-26
Vehicle Personalization . . . . . . . 5-31
Lighting . . . . . . . . . . . . . . . . . . . . . . . 6-1
Exterior Lighting . . . . . . . . . . . . . . . 6-1
Interior Lighting . . . . . . . . . . . . . . . . 6-5
Lighting Features . . . . . . . . . . . . . . 6-6
Infotainment System . . . . . . . . . 7-1
Introduction . . . . . . . . . . . . . . . . . . . . 7-1
Radio . . . . . . . . . . . . . . . . . . . . . . . . . . 7-6
Audio Players . . . . . . . . . . . . . . . . 7-14
Phone . . . . . . . . . . . . . . . . . . . . . . . . 7-23 Climate Controls
. . . . . . . . . . . . . 8-1
Climate Control Systems . . . . . . 8-1
Air Vents . . . . . . . . . . . . . . . . . . . . . . . 8-9
Driving and Operating . . . . . . . . 9-1
Driving Information . . . . . . . . . . . . . 9-2
Starting and Operating . . . . . . . 9-17
Engine Exhaust . . . . . . . . . . . . . . 9-24
Automatic Transmission . . . . . . 9-25
Brakes . . . . . . . . . . . . . . . . . . . . . . . 9-28
Ride Control Systems . . . . . . . . 9-30
Cruise Control . . . . . . . . . . . . . . . . 9-34
Fuel . . . . . . . . . . . . . . . . . . . . . . . . . . 9-37
Towing . . . . . . . . . . . . . . . . . . . . . . . 9-43
Conversions and Add-Ons . . . 9-48
Vehicle Care . . . . . . . . . . . . . . . . . 10-1
General Information . . . . . . . . . . 10-2
Vehicle Checks . . . . . . . . . . . . . . . 10-4
Headlamp Aiming . . . . . . . . . . . 10-27
Bulb Replacement . . . . . . . . . . 10-28
Electrical System . . . . . . . . . . . . 10-30
Wheels and Tires . . . . . . . . . . . 10-38
Jump Starting . . . . . . . . . . . . . . . 10-78
Towing . . . . . . . . . . . . . . . . . . . . . . 10-83
Appearance Care . . . . . . . . . . . 10-85
Page 5 of 382

Black plate (5,1)Chevrolet Malibu Owner Manual - 2011
Introduction v
Vehicle Symbol Chart
Here are some additional symbols
that may be found on the vehicle
and what they mean. For more
information on the symbol, refer to
the Index.
9:Airbag Readiness Light
#:Air Conditioning
!:Antilock Brake System (ABS)
g:Audio Steering Wheel Controls
or OnStar®
$: Brake System Warning Light
":Charging System
I:Cruise Control
B: Engine Coolant Temperature
O:Exterior Lamps
#:Fog Lamps
.: Fuel Gauge
+:Fuses
3: Headlamp High/Low-Beam
Changer
j: LATCH System Child
Restraints
*: Malfunction Indicator Lamp
::Oil Pressure
}:Power
/:Remote Vehicle Start
>:Safety Belt Reminders
7:Tire Pressure Monitor
F:Traction Control
M:Windshield Washer Fluid
Page 25 of 382
Black plate (19,1)Chevrolet Malibu Owner Manual - 2011
In Brief 1-19
Tire Pressure Monitor
This vehicle may have a Tire
Pressure Monitor System (TPMS).
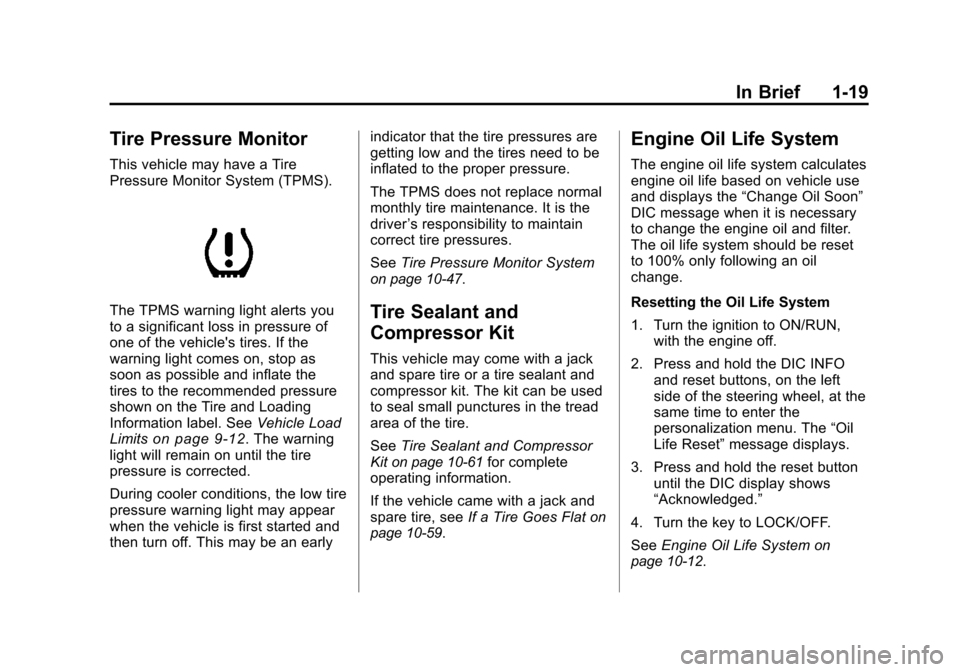
The TPMS warning light alerts you
to a significant loss in pressure of
one of the vehicle's tires. If the
warning light comes on, stop as
soon as possible and inflate the
tires to the recommended pressure
shown on the Tire and Loading
Information label. SeeVehicle Load
Limits
on page 9‑12. The warning
light will remain on until the tire
pressure is corrected.
During cooler conditions, the low tire
pressure warning light may appear
when the vehicle is first started and
then turn off. This may be an early indicator that the tire pressures are
getting low and the tires need to be
inflated to the proper pressure.
The TPMS does not replace normal
monthly tire maintenance. It is the
driver
’s responsibility to maintain
correct tire pressures.
See Tire Pressure Monitor System
on page 10‑47.
Tire Sealant and
Compressor Kit
This vehicle may come with a jack
and spare tire or a tire sealant and
compressor kit. The kit can be used
to seal small punctures in the tread
area of the tire.
SeeTire Sealant and Compressor
Kit
on page 10‑61for complete
operating information.
If the vehicle came with a jack and
spare tire, see If a Tire Goes Flat
on
page 10‑59.
Engine Oil Life System
The engine oil life system calculates
engine oil life based on vehicle use
and displays the “Change Oil Soon”
DIC message when it is necessary
to change the engine oil and filter.
The oil life system should be reset
to 100% only following an oil
change.
Resetting the Oil Life System
1. Turn the ignition to ON/RUN, with the engine off.
2. Press and hold the DIC INFO and reset buttons, on the left
side of the steering wheel, at the
same time to enter the
personalization menu. The “Oil
Life Reset” message displays.
3. Press and hold the reset button until the DIC display shows
“Acknowledged.”
4. Turn the key to LOCK/OFF.
See Engine Oil Life System
on
page 10‑12.
Page 34 of 382
Black plate (6,1)Chevrolet Malibu Owner Manual - 2011
2-6 Keys, Doors and Windows
If it is the first remote start since the
vehicle has been driven, repeat the
previous steps, while the engine is
still running, to extend the engine
running time by 10 minutes from the
time you repeat the steps for remote
starting. The remote start running
time can be extended one time and
only after the first remote start.
After entering the vehicle during a
remote start, insert and turn the key
to ON/RUN to drive the vehicle.
The engine will shut off
automatically after 10 minutes,
unless a time extension has been
done or the vehicle's key is inserted
into the ignition switch and turned to
ON/RUN.To manually shut off a remote start,
do any of the following.
.Aim the RKE transmitter at the
vehicle and press and release
the remote start button.
.Turn on the hazard warning
flashers.
.Turn the ignition switch out of
LOCK/OFF position and then
back to LOCK/OFF.
The parking lamps turn off to
indicate the engine is off.
After the engine has been started
two times, or one time with a time
extension, the vehicle's ignition
must be turned to ON/RUN using
the key before the remote start
procedure can be used again. See
Ignition Positions
on page 9‑18for
information regarding the ignition
positions on your vehicle. The remote vehicle start feature will
not operate if any of the follow
occur:
.The vehicle's key is in the
ignition.
.The vehicle's hood is open.
.The hazard warning flashers
are on.
.The check engine light is on.
See
Malfunction Indicator Lamp
on page 5‑16.
.The engine coolant temperature
is too high.
.The oil pressure is low.
.Two remote vehicle starts,
or one start with a time
extension, have already been
provided for that ignition cycle.
Page 42 of 382
Black plate (14,1)Chevrolet Malibu Owner Manual - 2011
2-14 Keys, Doors and Windows
If the engine still does not start, and
the key appears to be undamaged
or the light continues to stay on, try
another ignition key. If the engine
does not start with the other key, the
vehicle needs service. If the vehicle
does start, the first key may be
damaged. See your dealer who can
service the theft-deterrent system
and have a new key made.
It is possible for the theft-deterrent
system decoder to learn the
transponder value of a new or
replacement key. Up to 10 keys
can be programmed for the vehicle.
The following procedure is for
programming additional keys only.
To program the new key:
1. Verify that the new key hasa
1stamped on it.
2. Insert the already programmed key in the ignition and start the
engine. If the engine will not
start, see your dealer for service. 3. After the engine has started,
turn the key to LOCK/OFF, and
remove the key.
4. Insert the key to be programmed and turn it to ON/RUN within
five seconds of the original key
being turned to LOCK/OFF in
Step 3.
The security light will turn off
once the key has been
programmed. It may not be
apparent that the security light
went on due to how quickly the
key is programmed.
5. Repeat Steps 1 through 4 if additional keys are to be
programmed.
Do not leave the key or device that
disarms or deactivates the theft
deterrent system in the vehicle.
Exterior Mirrors
Convex Mirrors
{WARNING
A convex mirror can make things,
like other vehicles, look farther
away than they really are. If you
cut too sharply into the right lane,
you could hit a vehicle on the
right. Check the inside mirror or
glance over your shoulder before
changing lanes.
The passenger side mirror is convex
shaped. A convex mirror's surface is
curved so more can be seen from
the driver seat.
Page 44 of 382
Black plate (16,1)Chevrolet Malibu Owner Manual - 2011
2-16 Keys, Doors and Windows
Automatic Dimming
Rearview Mirror
The vehicle may have an automatic
dimming inside rearview mirror with
a compass display and OnStar
®
controls. See your dealer for more
information on the system and how
to subscribe to OnStar
®. See the
OnStar®owner's guide for more
information about the services
OnStar
®provides.
See Compass
on page 5‑5for
more information.
O(On/Off): Press to turn the
dimming feature on or off.
Automatic Dimming Mirror
Operation
Automatic dimming reduces the
glare of lights from behind the
vehicle. The dimming feature comes
on and the indicator light illuminates
each time the vehicle is started.
Cleaning the Mirror
Do not spray glass cleaner directly
on the mirror. Use a soft towel
dampened with water.
Windows
{WARNING
Leaving children, helpless adults,
or pets in a vehicle with the
windows closed is dangerous.
They can be overcome by
the extreme heat and suffer
permanent injuries or even death
from heat stroke. Never leave a
child, a helpless adult, or a pet
alone in a vehicle, especially with
the windows closed in warm or
hot weather.
Page 71 of 382
Black plate (23,1)Chevrolet Malibu Owner Manual - 2011
Seats and Restraints 3-23
{WARNING
Do not bleach or dye safety belts.
It may severely weaken them. In
a crash, they might not be able to
provide adequate protection.
Clean safety belts only with mild
soap and lukewarm water.
Replacing Safety Belt
System Parts After a
Crash
{WARNING
A crash can damage the safety
belt system in the vehicle.
A damaged safety belt system
may not properly protect the
person using it, resulting in
serious injury or even death in a
crash. To help make sure the
safety belt systems are working(Continued)
WARNING (Continued)
properly after a crash, have them
inspected and any necessary
replacements made as soon as
possible.
After a minor crash, replacement of
safety belts may not be necessary.
But the safety belt assemblies that
were used during any crash may
have been stressed or damaged.
See your dealer to have the safety
belt assemblies inspected or
replaced.
New parts and repairs may be
necessary even if the safety belt
system was not being used at the
time of the crash.
Have the safety belt pretensioners
checked if the vehicle has been in a
crash, or if the airbag readiness light
stays on after you start the vehicle
or while you are driving. See Airbag
Readiness Light on page 5‑14.
Airbag System
The vehicle has the following
airbags:
.A frontal airbag for the driver.
.A frontal airbag for the right front
passenger.
.A seat-mounted side impact
airbag for the driver.
.A seat-mounted side impact
airbag for the right front
passenger.
.A roof-rail airbag for the driver
and the passenger seated
directly behind the driver.
.A roof-rail airbag for the right
front passenger and the
passenger seated directly
behind the right front passenger.
All of the airbags in your vehicle will
have the word AIRBAG embossed
in the trim or on an attached label
near the deployment opening.
Page 73 of 382
Black plate (25,1)Chevrolet Malibu Owner Manual - 2011
Seats and Restraints 3-25
{WARNING
Children who are up against,
or very close to, any airbag when
it inflates can be seriously
injured or killed. Airbags plus
lap-shoulder belts offer protection
for adults and older children, but
not for young children and infants.
Neither the vehicle's safety belt
system nor its airbag system is
designed for them. Young
children and infants need the
protection that a child restraint
system can provide. Always
secure children properly in your
vehicle. To read how, seeOlder
Children
on page 3‑38or Infants
and Young Children
on
page 3‑40
.
There is an airbag readiness light
on the instrument panel cluster,
which shows the airbag symbol.
The system checks the airbag
electrical system for malfunctions.
The light tells you if there is an
electrical problem. See Airbag
Readiness Light
on page 5‑14for
more information.
Where Are the Airbags?
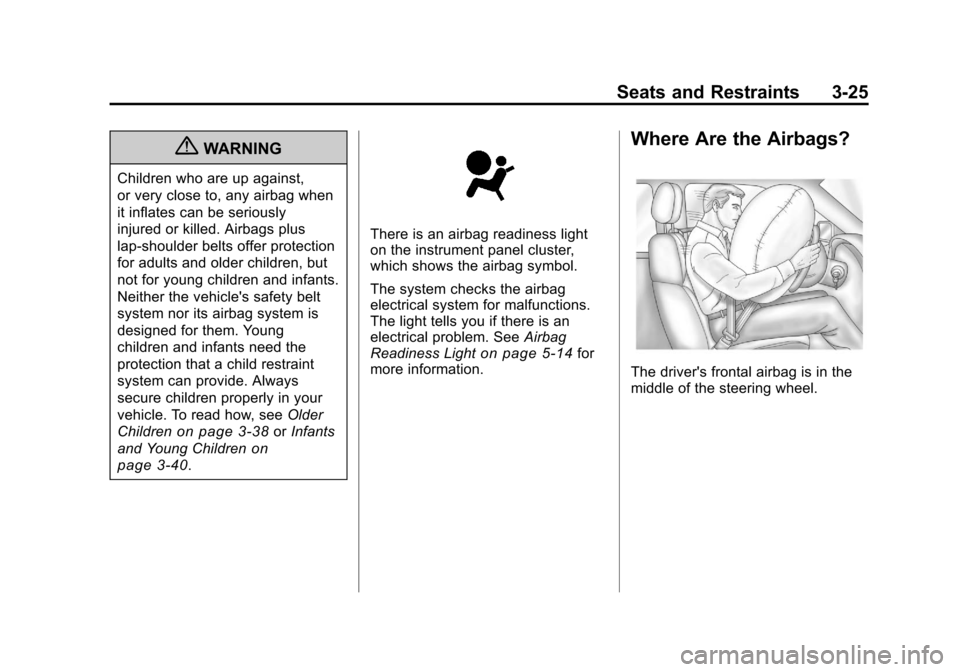
The driver's frontal airbag is in the
middle of the steering wheel.