2011 CHEVROLET MALIBU seat adjustment
[x] Cancel search: seat adjustmentPage 7 of 382
Black plate (1,1)Chevrolet Malibu Owner Manual - 2011
In Brief 1-1
In Brief
Instrument Panel
Instrument Panel . . . . . . . . . . . . . . 1-2
Initial Drive Information
Initial Drive Information . . . . . . . . 1-4
Remote Keyless Entry (RKE)System . . . . . . . . . . . . . . . . . . . . . . 1-4
Remote Vehicle Start . . . . . . . . . 1-4
Door Locks . . . . . . . . . . . . . . . . . . . 1-5
Trunk Release . . . . . . . . . . . . . . . . 1-5
Windows . . . . . . . . . . . . . . . . . . . . . . 1-6
Seat Adjustment . . . . . . . . . . . . . . 1-6
Second Row Seats . . . . . . . . . . . 1-7
Heated Seats . . . . . . . . . . . . . . . . . 1-8
Head Restraint Adjustment . . . . 1-8
Safety Belt . . . . . . . . . . . . . . . . . . . . 1-8
Sensing System for Passenger Airbag . . . . . . . . . . . . . . . . . . . . . . . 1-9 Mirror Adjustment . . . . . . . . . . . . . 1-9
Steering Wheel
Adjustment . . . . . . . . . . . . . . . . . 1-10
Interior Lighting . . . . . . . . . . . . . . 1-10
Exterior Lighting . . . . . . . . . . . . . 1-11
Windshield Wiper/Washer . . . . 1-11
Climate Controls . . . . . . . . . . . . . 1-12
Transmission . . . . . . . . . . . . . . . . 1-13
Vehicle Features
Radio(s) . . . . . . . . . . . . . . . . . . . . . 1-14
Satellite Radio . . . . . . . . . . . . . . . 1-15
Portable Audio Devices (Auxiliary Input or
USB Port) . . . . . . . . . . . . . . . . . . 1-15
Bluetooth
®. . . . . . . . . . . . . . . . . . . 1-16
Steering Wheel Controls . . . . . 1-16
Cruise Control . . . . . . . . . . . . . . . 1-16
Driver Information
Center (DIC) . . . . . . . . . . . . . . . 1-17
Power Outlets . . . . . . . . . . . . . . . 1-18
Performance and Maintenance
Traction Control System (TCS) . . . . . . . . . . . . . . 1-18
Electronic Stability Control (ESC) . . . . . . . . . . . . . . 1-18
Tire Pressure Monitor . . . . . . . . 1-19
Tire Sealant and
Compressor Kit . . . . . . . . . . . . . 1-19
Engine Oil Life System . . . . . . 1-19
Fuel E85 (85% Ethanol) . . . . . 1-20
Driving for Better Fuel Economy . . . . . . . . . . . . . . . . . . . 1-20
Roadside Assistance Program . . . . . . . . . . . . . . . . . . . . 1-20
OnStar
®. . . . . . . . . . . . . . . . . . . . . 1-21
Page 12 of 382
Black plate (6,1)Chevrolet Malibu Owner Manual - 2011
1-6 In Brief
Windows
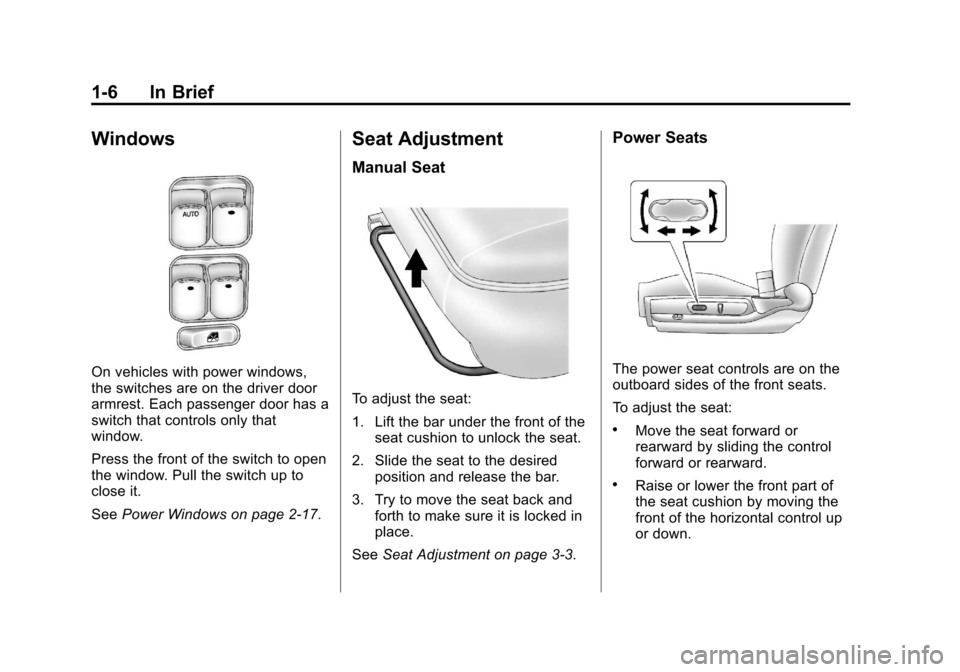
On vehicles with power windows,
the switches are on the driver door
armrest. Each passenger door has a
switch that controls only that
window.
Press the front of the switch to open
the window. Pull the switch up to
close it.
SeePower Windows on page 2‑17.
Seat Adjustment
Manual Seat
To adjust the seat:
1. Lift the bar under the front of the
seat cushion to unlock the seat.
2. Slide the seat to the desired position and release the bar.
3. Try to move the seat back and forth to make sure it is locked in
place.
See Seat Adjustment on page 3‑3.
Power Seats
The power seat controls are on the
outboard sides of the front seats.
To adjust the seat:
.Move the seat forward or
rearward by sliding the control
forward or rearward.
.Raise or lower the front part of
the seat cushion by moving the
front of the horizontal control up
or down.
Page 13 of 382
Black plate (7,1)Chevrolet Malibu Owner Manual - 2011
In Brief 1-7
.Raise or lower the rear part of
the seat cushion by moving the
rear of the horizontal control up
or down.
See Power Seat Adjustment
on
page 3‑3.
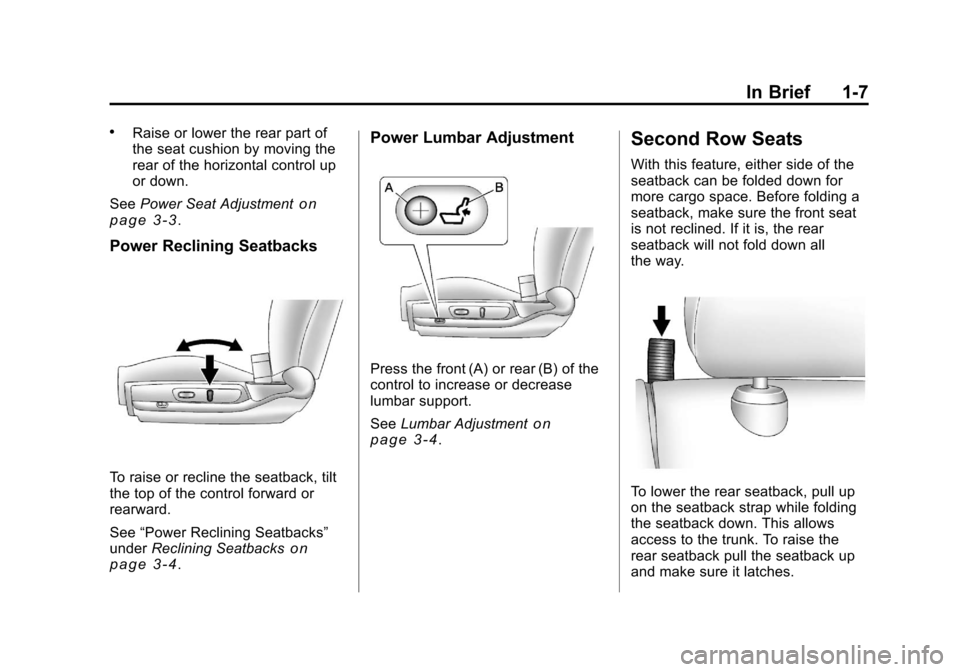
Power Reclining Seatbacks
To raise or recline the seatback, tilt
the top of the control forward or
rearward.
See “Power Reclining Seatbacks”
under Reclining Seatbacks
on
page 3‑4.
Power Lumbar Adjustment
Press the front (A) or rear (B) of the
control to increase or decrease
lumbar support.
See Lumbar Adjustment
on
page 3‑4.
Second Row Seats
With this feature, either side of the
seatback can be folded down for
more cargo space. Before folding a
seatback, make sure the front seat
is not reclined. If it is, the rear
seatback will not fold down all
the way.
To lower the rear seatback, pull up
on the seatback strap while folding
the seatback down. This allows
access to the trunk. To raise the
rear seatback pull the seatback up
and make sure it latches.
Page 14 of 382
Black plate (8,1)Chevrolet Malibu Owner Manual - 2011
1-8 In Brief
Push and pull on the seatback to
be sure it is locked in position.
Make sure that the safety belts
are properly stowed over the
seatback in all three positions.
SeeRear Seats
on page 3‑7for more information.
Heated Seats
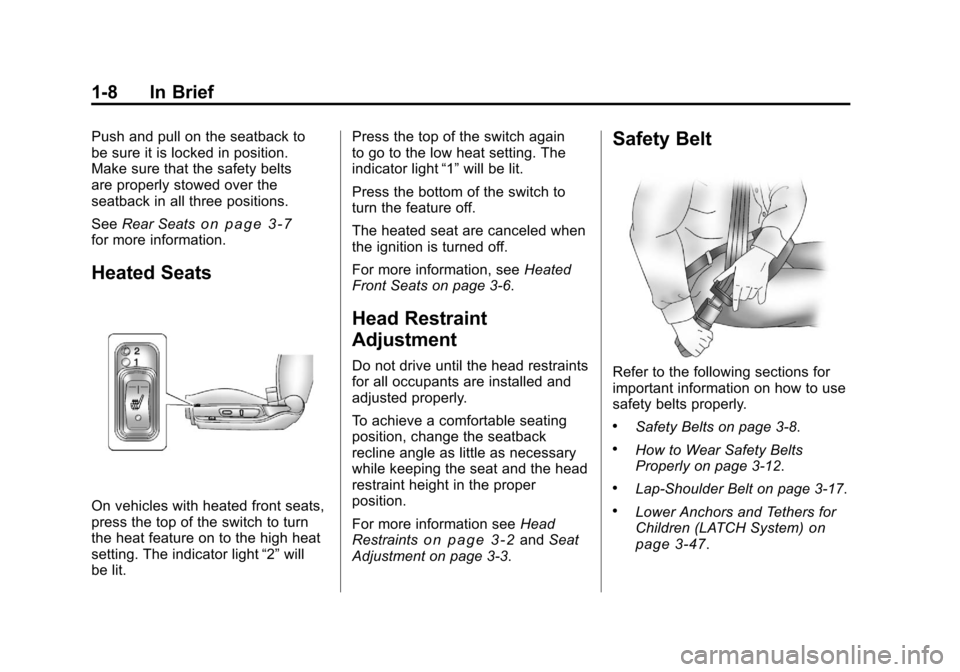
On vehicles with heated front seats,
press the top of the switch to turn
the heat feature on to the high heat
setting. The indicator light “2”will
be lit. Press the top of the switch again
to go to the low heat setting. The
indicator light
“1”will be lit.
Press the bottom of the switch to
turn the feature off.
The heated seat are canceled when
the ignition is turned off.
For more information, see Heated
Front Seats on page 3‑6.
Head Restraint
Adjustment
Do not drive until the head restraints
for all occupants are installed and
adjusted properly.
To achieve a comfortable seating
position, change the seatback
recline angle as little as necessary
while keeping the seat and the head
restraint height in the proper
position.
For more information see Head
Restraints
on page 3‑2and Seat
Adjustment on page 3‑3.
Safety Belt
Refer to the following sections for
important information on how to use
safety belts properly.
.Safety Belts on page 3‑8.
.How to Wear Safety Belts
Properly on page 3‑12.
.Lap-Shoulder Belt on page 3‑17.
.Lower Anchors and Tethers for
Children (LATCH System)on
page 3‑47.
Page 49 of 382

Black plate (1,1)Chevrolet Malibu Owner Manual - 2011
Seats and Restraints 3-1
Seats and
Restraints
Head Restraints
Head Restraints . . . . . . . . . . . . . . . 3-2
Front Seats
Seat Adjustment . . . . . . . . . . . . . . 3-3
Power Seat Adjustment . . . . . . . 3-3
Lumbar Adjustment . . . . . . . . . . . 3-4
Reclining Seatbacks . . . . . . . . . . 3-4
Heated Front Seats . . . . . . . . . . . 3-6
Rear Seats
Rear Seats . . . . . . . . . . . . . . . . . . . . 3-7
Safety Belts
Safety Belts . . . . . . . . . . . . . . . . . . . 3-8
How to Wear Safety BeltsProperly . . . . . . . . . . . . . . . . . . . . 3-12
Lap-Shoulder Belt . . . . . . . . . . . 3-17
Safety Belt Use During Pregnancy . . . . . . . . . . . . . . . . . . 3-22
Safety Belt Extender . . . . . . . . . 3-22 Safety System Check . . . . . . . . 3-22
Safety Belt Care . . . . . . . . . . . . . 3-22
Replacing Safety Belt System
Parts After a Crash . . . . . . . . . 3-23
Airbag System
Airbag System . . . . . . . . . . . . . . . 3-23
Where Are the Airbags? . . . . . 3-25
When Should an AirbagInflate? . . . . . . . . . . . . . . . . . . . . . 3-27
What Makes an Airbag Inflate? . . . . . . . . . . . . . . . . . . . . . 3-28
How Does an Airbag Restrain? . . . . . . . . . . . . . . . . . . . 3-29
What Will You See After an Airbag Inflates? . . . . . . . . . . . . 3-29
Passenger Sensing
System . . . . . . . . . . . . . . . . . . . . . 3-31
Servicing the Airbag-Equipped Vehicle . . . . . . . . . . . . . . . . . . . . . 3-35
Adding Equipment to the Airbag-Equipped Vehicle . . . 3-36
Airbag System Check . . . . . . . . 3-37
Replacing Airbag System Parts After a Crash . . . . . . . . . 3-37
Child Restraints
Older Children . . . . . . . . . . . . . . . 3-38
Infants and YoungChildren . . . . . . . . . . . . . . . . . . . . 3-40
Child Restraint Systems . . . . . 3-43
Where to Put the Restraint . . . 3-45
Lower Anchors and Tethers for Children (LATCH
System) . . . . . . . . . . . . . . . . . . . . 3-47
Replacing LATCH System Parts After a Crash . . . . . . . . . 3-54
Securing Child Restraints (Rear Seat) . . . . . . . . . . . . . . . . . 3-54
Securing Child Restraints (Front Passenger Seat) . . . . 3-57
Page 51 of 382
Black plate (3,1)Chevrolet Malibu Owner Manual - 2011
Seats and Restraints 3-3
Front Seats
Seat Adjustment
{WARNING
You can lose control of the
vehicle if you try to adjust a
manual driver seat while the
vehicle is moving. The sudden
movement could startle and
confuse you, or make you push a
pedal when you do not want to.
Adjust the driver seat only when
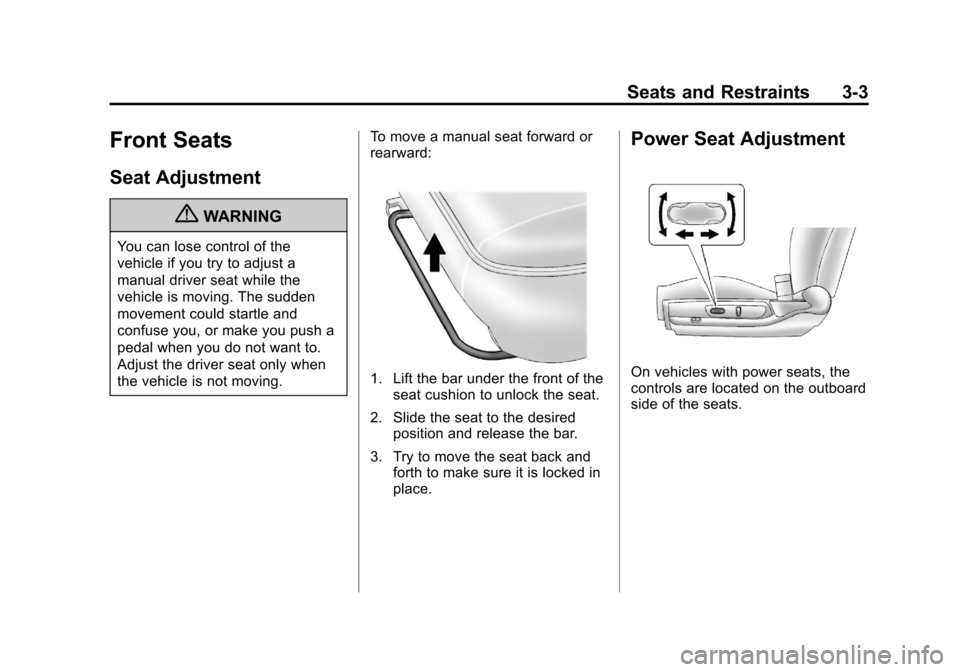
the vehicle is not moving.To move a manual seat forward or
rearward:
1. Lift the bar under the front of the
seat cushion to unlock the seat.
2. Slide the seat to the desired position and release the bar.
3. Try to move the seat back and forth to make sure it is locked in
place.
Power Seat Adjustment
On vehicles with power seats, the
controls are located on the outboard
side of the seats.
Page 52 of 382
Black plate (4,1)Chevrolet Malibu Owner Manual - 2011
3-4 Seats and Restraints
To adjust the seat:
.Move the seat forward or
rearward by sliding the control
forward or rearward.
.Raise or lower the front part of
the seat cushion by moving the
front of the control up or down.
.Raise or lower the rear part of
the seat cushion by moving the
rear of the control up or down.
Lumbar Adjustment
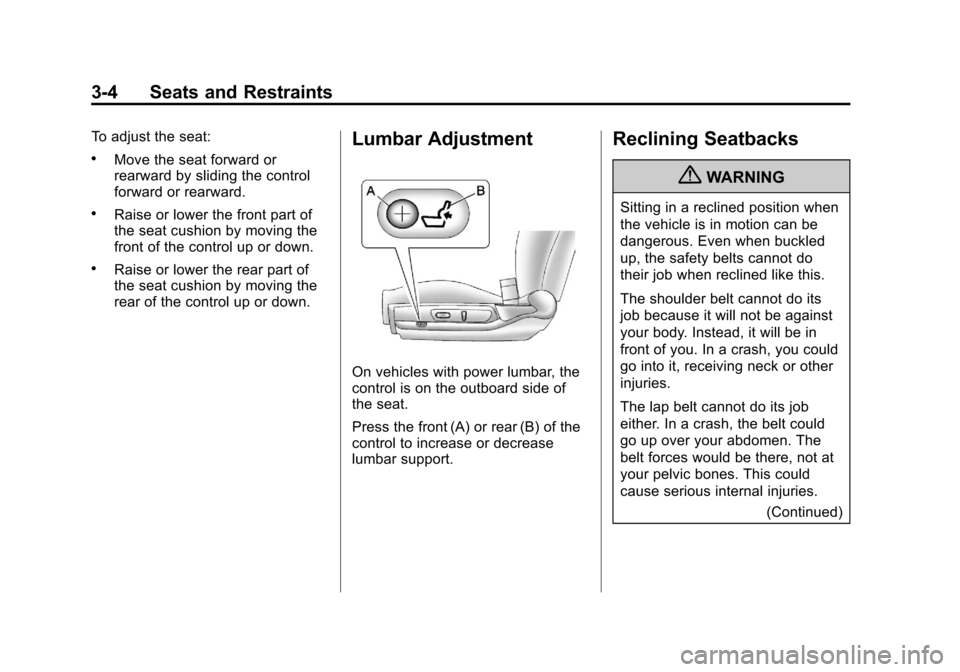
On vehicles with power lumbar, the
control is on the outboard side of
the seat.
Press the front (A) or rear (B) of the
control to increase or decrease
lumbar support.
Reclining Seatbacks
{WARNING
Sitting in a reclined position when
the vehicle is in motion can be
dangerous. Even when buckled
up, the safety belts cannot do
their job when reclined like this.
The shoulder belt cannot do its
job because it will not be against
your body. Instead, it will be in
front of you. In a crash, you could
go into it, receiving neck or other
injuries.
The lap belt cannot do its job
either. In a crash, the belt could
go up over your abdomen. The
belt forces would be there, not at
your pelvic bones. This could
cause serious internal injuries.(Continued)
Page 65 of 382
Black plate (17,1)Chevrolet Malibu Owner Manual - 2011
Seats and Restraints 3-17
Lap-Shoulder Belt
All seating positions in the vehicle
have a lap-shoulder belt.
The following instructions explain
how to wear a lap-shoulder belt
properly.
1. Adjust the seat, if the seat isadjustable, so you can sit up
straight. To see how, see “Seats”
in the Index.
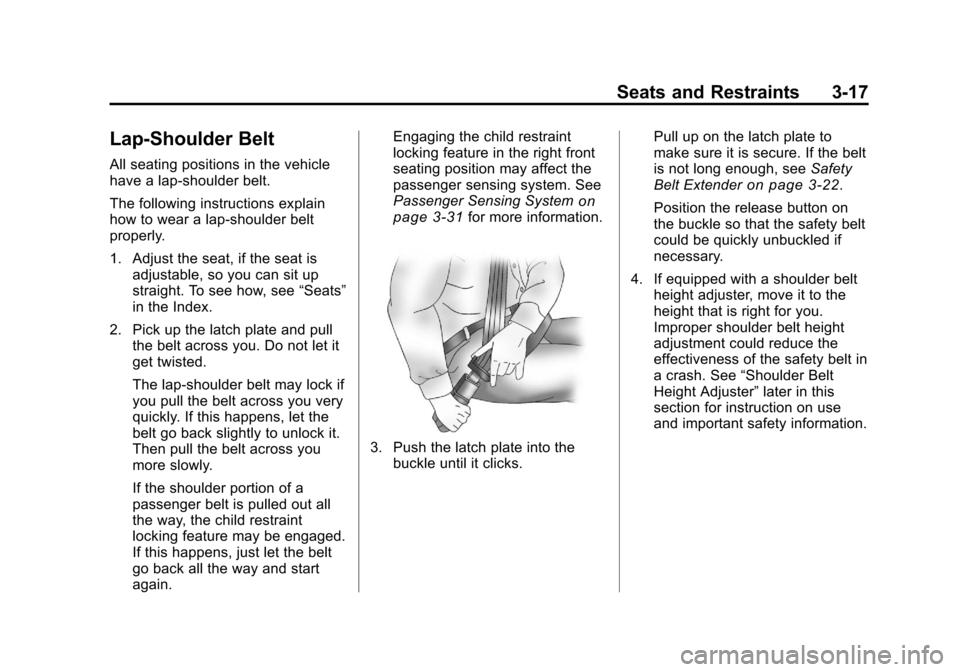
2. Pick up the latch plate and pull the belt across you. Do not let it
get twisted.
The lap-shoulder belt may lock if
you pull the belt across you very
quickly. If this happens, let the
belt go back slightly to unlock it.
Then pull the belt across you
more slowly.
If the shoulder portion of a
passenger belt is pulled out all
the way, the child restraint
locking feature may be engaged.
If this happens, just let the belt
go back all the way and start
again. Engaging the child restraint
locking feature in the right front
seating position may affect the
passenger sensing system. See
Passenger Sensing System
on
page 3‑31for more information.
3. Push the latch plate into the buckle until it clicks. Pull up on the latch plate to
make sure it is secure. If the belt
is not long enough, see
Safety
Belt Extender
on page 3‑22.
Position the release button on
the buckle so that the safety belt
could be quickly unbuckled if
necessary.
4. If equipped with a shoulder belt height adjuster, move it to the
height that is right for you.
Improper shoulder belt height
adjustment could reduce the
effectiveness of the safety belt in
a crash. See “Shoulder Belt
Height Adjuster” later in this
section for instruction on use
and important safety information.