2011 CHEVROLET MALIBU roof
[x] Cancel search: roofPage 1 of 382

Black plate (1,1)Chevrolet Malibu Owner Manual - 2011
2011 Chevrolet Malibu Owner ManualM
In Brief. . . . . . . . . . . . . . . . . . . . . . . . 1-1
Instrument Panel . . . . . . . . . . . . . . 1-2
Initial Drive Information . . . . . . . . 1-4
Vehicle Features . . . . . . . . . . . . . 1-14
Performance and Maintenance . . . . . . . . . . . . . . . . 1-18
Keys, Doors and Windows . . . 2-1
Keys and Locks . . . . . . . . . . . . . . . 2-2
Doors . . . . . . . . . . . . . . . . . . . . . . . . 2-10
Vehicle Security . . . . . . . . . . . . . . 2-12
Exterior Mirrors . . . . . . . . . . . . . . . 2-14
Interior Mirrors . . . . . . . . . . . . . . . . 2-15
Windows . . . . . . . . . . . . . . . . . . . . . 2-16
Roof . . . . . . . . . . . . . . . . . . . . . . . . . . 2-19
Seats and Restraints . . . . . . . . . 3-1
Head Restraints . . . . . . . . . . . . . . . 3-2
Front Seats . . . . . . . . . . . . . . . . . . . . 3-3
Rear Seats . . . . . . . . . . . . . . . . . . . . 3-7
Safety Belts . . . . . . . . . . . . . . . . . . . . 3-8
Airbag System . . . . . . . . . . . . . . . . 3-23
Child Restraints . . . . . . . . . . . . . . 3-38 Storage
. . . . . . . . . . . . . . . . . . . . . . . 4-1
Storage Compartments . . . . . . . . 4-1
Additional Storage Features . . . 4-2
Instruments and Controls . . . . 5-1
Controls . . . . . . . . . . . . . . . . . . . . . . . 5-2
Warning Lights, Gauges, and
Indicators . . . . . . . . . . . . . . . . . . . . 5-9
Information Displays . . . . . . . . . . 5-23
Vehicle Messages . . . . . . . . . . . . 5-26
Vehicle Personalization . . . . . . . 5-31
Lighting . . . . . . . . . . . . . . . . . . . . . . . 6-1
Exterior Lighting . . . . . . . . . . . . . . . 6-1
Interior Lighting . . . . . . . . . . . . . . . . 6-5
Lighting Features . . . . . . . . . . . . . . 6-6
Infotainment System . . . . . . . . . 7-1
Introduction . . . . . . . . . . . . . . . . . . . . 7-1
Radio . . . . . . . . . . . . . . . . . . . . . . . . . . 7-6
Audio Players . . . . . . . . . . . . . . . . 7-14
Phone . . . . . . . . . . . . . . . . . . . . . . . . 7-23 Climate Controls
. . . . . . . . . . . . . 8-1
Climate Control Systems . . . . . . 8-1
Air Vents . . . . . . . . . . . . . . . . . . . . . . . 8-9
Driving and Operating . . . . . . . . 9-1
Driving Information . . . . . . . . . . . . . 9-2
Starting and Operating . . . . . . . 9-17
Engine Exhaust . . . . . . . . . . . . . . 9-24
Automatic Transmission . . . . . . 9-25
Brakes . . . . . . . . . . . . . . . . . . . . . . . 9-28
Ride Control Systems . . . . . . . . 9-30
Cruise Control . . . . . . . . . . . . . . . . 9-34
Fuel . . . . . . . . . . . . . . . . . . . . . . . . . . 9-37
Towing . . . . . . . . . . . . . . . . . . . . . . . 9-43
Conversions and Add-Ons . . . 9-48
Vehicle Care . . . . . . . . . . . . . . . . . 10-1
General Information . . . . . . . . . . 10-2
Vehicle Checks . . . . . . . . . . . . . . . 10-4
Headlamp Aiming . . . . . . . . . . . 10-27
Bulb Replacement . . . . . . . . . . 10-28
Electrical System . . . . . . . . . . . . 10-30
Wheels and Tires . . . . . . . . . . . 10-38
Jump Starting . . . . . . . . . . . . . . . 10-78
Towing . . . . . . . . . . . . . . . . . . . . . . 10-83
Appearance Care . . . . . . . . . . . 10-85
Page 29 of 382
Black plate (1,1)Chevrolet Malibu Owner Manual - 2011
Keys, Doors and Windows 2-1
Keys, Doors and
Windows
Keys and Locks
Keys . . . . . . . . . . . . . . . . . . . . . . . . . . 2-2
Remote Keyless Entry (RKE)System . . . . . . . . . . . . . . . . . . . . . . 2-2
Remote Keyless Entry (RKE) System Operation . . . . . . . . . . . 2-3
Remote Vehicle Start . . . . . . . . . 2-5
Door Locks . . . . . . . . . . . . . . . . . . . 2-7
Power Door Locks . . . . . . . . . . . . 2-8
Door Ajar Reminder . . . . . . . . . . . 2-8
Delayed Locking . . . . . . . . . . . . . . 2-8
Automatic Door Locks . . . . . . . . . 2-9
Lockout Protection . . . . . . . . . . . . 2-9
Safety Locks . . . . . . . . . . . . . . . . . . 2-9
Doors
Trunk . . . . . . . . . . . . . . . . . . . . . . . . 2-10
Vehicle Security
Vehicle Security . . . . . . . . . . . . . . 2-12
Anti-Theft Alarm System . . . . . 2-12
Immobilizer . . . . . . . . . . . . . . . . . . 2-13
Immobilizer Operation . . . . . . . 2-13
Exterior Mirrors
Convex Mirrors . . . . . . . . . . . . . . 2-14
Power Mirrors . . . . . . . . . . . . . . . . 2-15
Heated Mirrors . . . . . . . . . . . . . . . 2-15
Interior Mirrors
Manual Rearview Mirror . . . . . . 2-15
Automatic Dimming Rearview Mirror . . . . . . . . . . . . . . . . . . . . . . . 2-16
Windows
Windows . . . . . . . . . . . . . . . . . . . . . 2-16
Power Windows . . . . . . . . . . . . . 2-17
Sun Visors . . . . . . . . . . . . . . . . . . . 2-19
Roof
Sunroof . . . . . . . . . . . . . . . . . . . . . . 2-19
Page 45 of 382
Black plate (17,1)Chevrolet Malibu Owner Manual - 2011
Keys, Doors and Windows 2-17
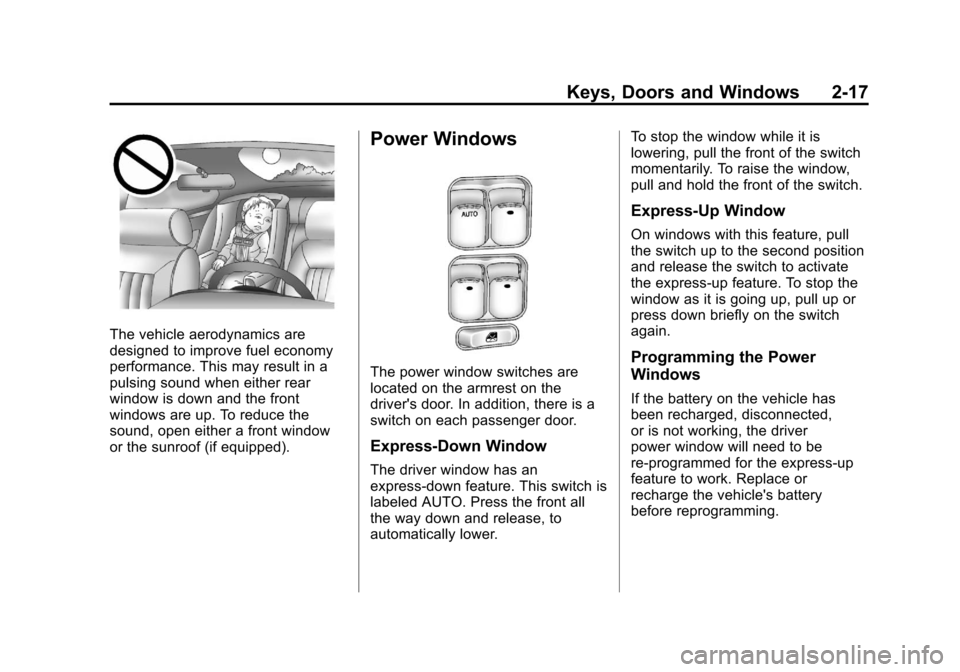
The vehicle aerodynamics are
designed to improve fuel economy
performance. This may result in a
pulsing sound when either rear
window is down and the front
windows are up. To reduce the
sound, open either a front window
or the sunroof (if equipped).
Power Windows
The power window switches are
located on the armrest on the
driver's door. In addition, there is a
switch on each passenger door.
Express-Down Window
The driver window has an
express-down feature. This switch is
labeled AUTO. Press the front all
the way down and release, to
automatically lower.To stop the window while it is
lowering, pull the front of the switch
momentarily. To raise the window,
pull and hold the front of the switch.
Express-Up Window
On windows with this feature, pull
the switch up to the second position
and release the switch to activate
the express-up feature. To stop the
window as it is going up, pull up or
press down briefly on the switch
again.
Programming the Power
Windows
If the battery on the vehicle has
been recharged, disconnected,
or is not working, the driver
power window will need to be
re-programmed for the express-up
feature to work. Replace or
recharge the vehicle's battery
before reprogramming.
Page 47 of 382
Black plate (19,1)Chevrolet Malibu Owner Manual - 2011
Keys, Doors and Windows 2-19
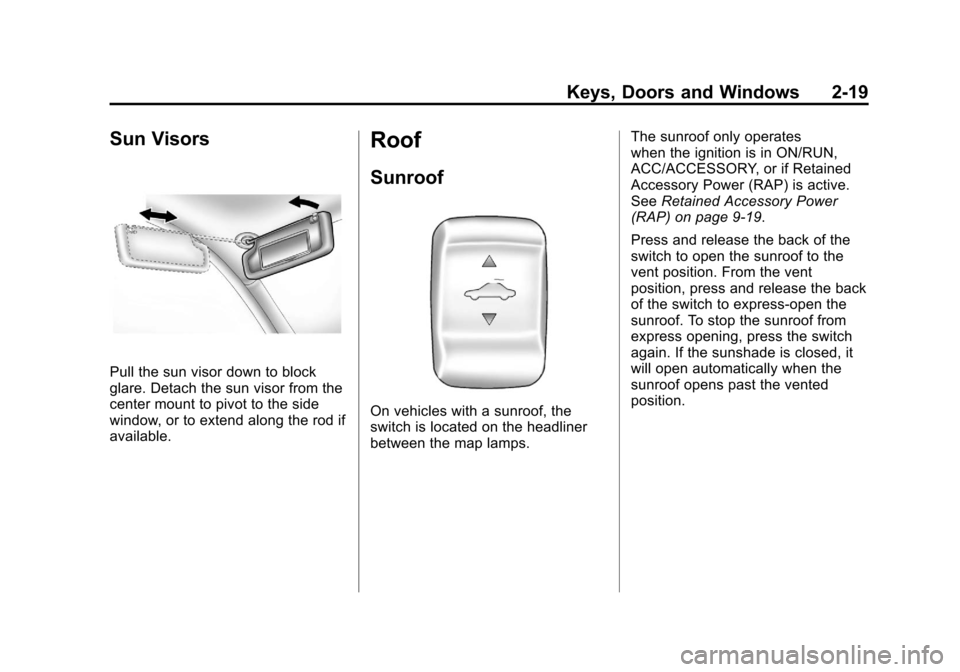
Sun Visors
Pull the sun visor down to block
glare. Detach the sun visor from the
center mount to pivot to the side
window, or to extend along the rod if
available.
Roof
Sunroof
On vehicles with a sunroof, the
switch is located on the headliner
between the map lamps.The sunroof only operates
when the ignition is in ON/RUN,
ACC/ACCESSORY, or if Retained
Accessory Power (RAP) is active.
See
Retained Accessory Power
(RAP) on page 9‑19.
Press and release the back of the
switch to open the sunroof to the
vent position. From the vent
position, press and release the back
of the switch to express-open the
sunroof. To stop the sunroof from
express opening, press the switch
again. If the sunshade is closed, it
will open automatically when the
sunroof opens past the vented
position.
Page 48 of 382
Black plate (20,1)Chevrolet Malibu Owner Manual - 2011
2-20 Keys, Doors and Windows
A deflector will automatically raise
when the sunroof is opened. The
deflector will retract when the
sunroof is closed.
To close the sunroof, press the front
of the switch and hold it until the
sunroof is closed. The sunroof will
stop if the switch is released. Close
the sunshade by hand.
The sunroof glass panel cannot be
opened or closed if the vehicle has
an electrical failure.Notice:
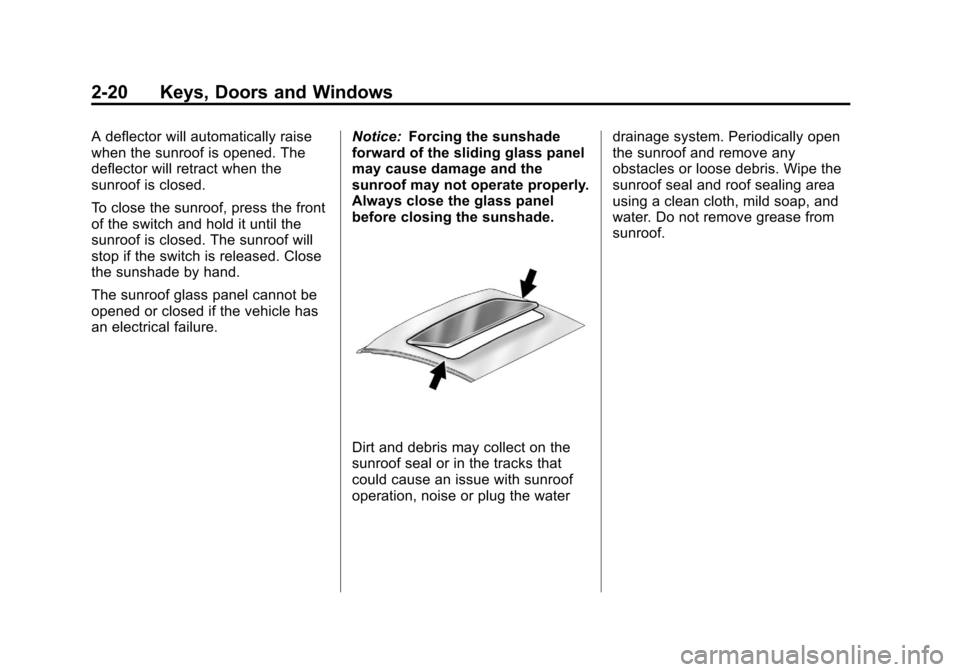
Forcing the sunshade
forward of the sliding glass panel
may cause damage and the
sunroof may not operate properly.
Always close the glass panel
before closing the sunshade.
Dirt and debris may collect on the
sunroof seal or in the tracks that
could cause an issue with sunroof
operation, noise or plug the water drainage system. Periodically open
the sunroof and remove any
obstacles or loose debris. Wipe the
sunroof seal and roof sealing area
using a clean cloth, mild soap, and
water. Do not remove grease from
sunroof.
Page 71 of 382
Black plate (23,1)Chevrolet Malibu Owner Manual - 2011
Seats and Restraints 3-23
{WARNING
Do not bleach or dye safety belts.
It may severely weaken them. In
a crash, they might not be able to
provide adequate protection.
Clean safety belts only with mild
soap and lukewarm water.
Replacing Safety Belt
System Parts After a
Crash
{WARNING
A crash can damage the safety
belt system in the vehicle.
A damaged safety belt system
may not properly protect the
person using it, resulting in
serious injury or even death in a
crash. To help make sure the
safety belt systems are working(Continued)
WARNING (Continued)
properly after a crash, have them
inspected and any necessary
replacements made as soon as
possible.
After a minor crash, replacement of
safety belts may not be necessary.
But the safety belt assemblies that
were used during any crash may
have been stressed or damaged.
See your dealer to have the safety
belt assemblies inspected or
replaced.
New parts and repairs may be
necessary even if the safety belt
system was not being used at the
time of the crash.
Have the safety belt pretensioners
checked if the vehicle has been in a
crash, or if the airbag readiness light
stays on after you start the vehicle
or while you are driving. See Airbag
Readiness Light on page 5‑14.
Airbag System
The vehicle has the following
airbags:
.A frontal airbag for the driver.
.A frontal airbag for the right front
passenger.
.A seat-mounted side impact
airbag for the driver.
.A seat-mounted side impact
airbag for the right front
passenger.
.A roof-rail airbag for the driver
and the passenger seated
directly behind the driver.
.A roof-rail airbag for the right
front passenger and the
passenger seated directly
behind the right front passenger.
All of the airbags in your vehicle will
have the word AIRBAG embossed
in the trim or on an attached label
near the deployment opening.
Page 72 of 382
Black plate (24,1)Chevrolet Malibu Owner Manual - 2011
3-24 Seats and Restraints
For frontal airbags, the word
AIRBAG will appear on the middle
part of the steering wheel for the
driver and on the instrument panel
for the right front passenger.
With seat-mounted side impact
airbags, the word AIRBAG will
appear on the side of the seatback
closest to the door.
With roof-rail airbags, the word
AIRBAG will appear along the
headliner or trim.
Airbags are designed to supplement
the protection provided by safety
belts. Even though today's airbags
are also designed to help reduce
the risk of injury from the force of an
inflating bag, all airbags must inflate
very quickly to do their job.Here are the most important things
to know about the airbag system:
{WARNING
You can be severely injured or
killed in a crash if you are not
wearing your safety belt
—even if
you have airbags. Airbags are
designed to work with safety
belts, but do not replace them.
Also, airbags are not designed to
deploy in every crash. In some
crashes safety belts are your only
restraint. See When Should an
Airbag Inflate? on page 3‑27.
Wearing your safety belt during a
crash helps reduce your chance
of hitting things inside the vehicle
or being ejected from it. Airbags
are “supplemental restraints” to
the safety belts. Everyone in your
vehicle should wear a safety belt
properly —whether or not there is
an airbag for that person.
{WARNING
Airbags inflate with great force,
faster than the blink of an eye.
Anyone who is up against, or very
close to, any airbag when it
inflates can be seriously injured
or killed. Do not sit unnecessarily
close to the airbag, as you would
be if you were sitting on the edge
of your seat or leaning forward.
Safety belts help keep you in
position before and during a
crash. Always wear your safety
belt, even with airbags. The driver
should sit as far back as possible
while still maintaining control of
the vehicle.
Occupants should not lean on or
sleep against the door or side
windows in seating positions with
seat-mounted side impact airbags
and/or roof-rail airbags.
Page 74 of 382
Black plate (26,1)Chevrolet Malibu Owner Manual - 2011
3-26 Seats and Restraints
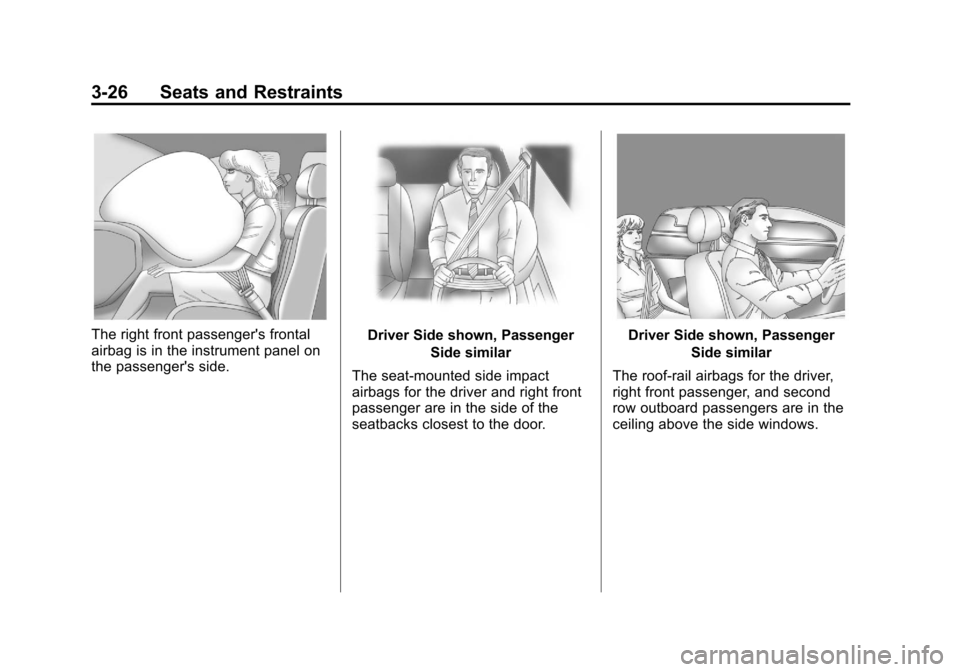
The right front passenger's frontal
airbag is in the instrument panel on
the passenger's side.Driver Side shown, PassengerSide similar
The seat-mounted side impact
airbags for the driver and right front
passenger are in the side of the
seatbacks closest to the door.Driver Side shown, Passenger Side similar
The roof-rail airbags for the driver,
right front passenger, and second
row outboard passengers are in the
ceiling above the side windows.