2011 CHEVROLET HHR left or right
[x] Cancel search: left or rightPage 16 of 430
Black plate (10,1)Chevrolet HHR Owner Manual - 2011
Sensing System for Passenger
Airbag
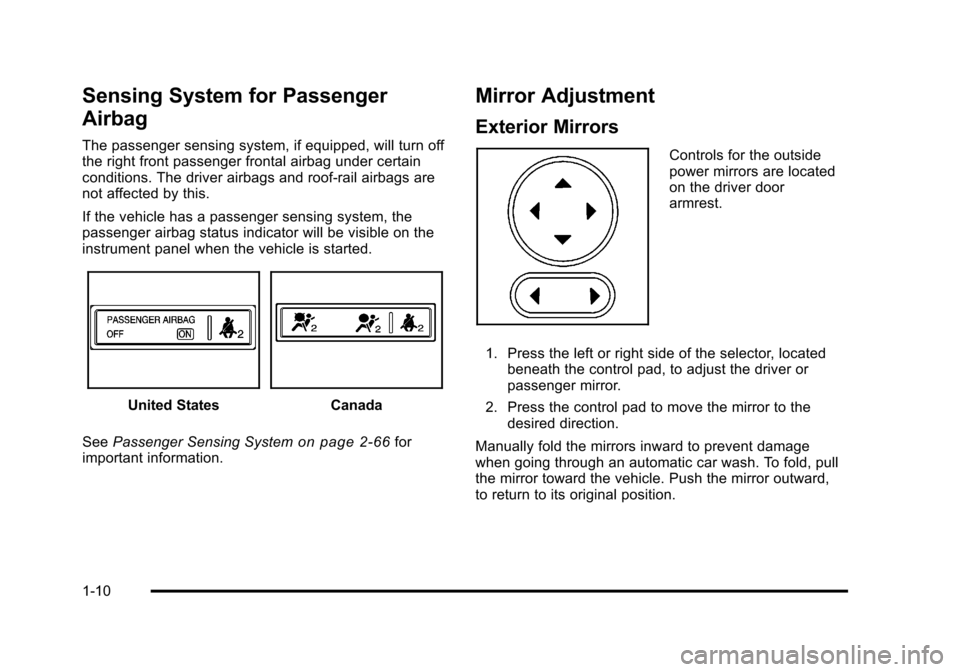
The passenger sensing system, if equipped, will turn off
the right front passenger frontal airbag under certain
conditions. The driver airbags and roof‐rail airbags are
not affected by this.
If the vehicle has a passenger sensing system, the
passenger airbag status indicator will be visible on the
instrument panel when the vehicle is started.
United StatesCanada
See Passenger Sensing System
on page 2‑66for
important information.
Mirror Adjustment
Exterior Mirrors
Controls for the outside
power mirrors are located
on the driver door
armrest.
1. Press the left or right side of the selector, located beneath the control pad, to adjust the driver or
passenger mirror.
2. Press the control pad to move the mirror to the desired direction.
Manually fold the mirrors inward to prevent damage
when going through an automatic car wash. To fold, pull
the mirror toward the vehicle. Push the mirror outward,
to return to its original position.
1-10
Page 18 of 430
Black plate (12,1)Chevrolet HHR Owner Manual - 2011
Interior Lighting
Dome Lamps
The front and rear dome lamps turn on when any door
is opened. To turn on all dome lamps with the doors
closed, turn the instrument panel brightness
thumbwheel located to the right of the steering wheel
and above the radio, completely to the right.
Reading Lamps
There are reading lamps located on the front and rear
dome lamps.
To turn the front reading lamps on or off, press the lamp
lens. To turn the rear reading lamps on or off, press the
button next to the lamp.
For more information, see:
.Instrument Panel Brightness on page 4‑14.
.Entry/Exit Lighting on page 4‑14.
Exterior Lighting
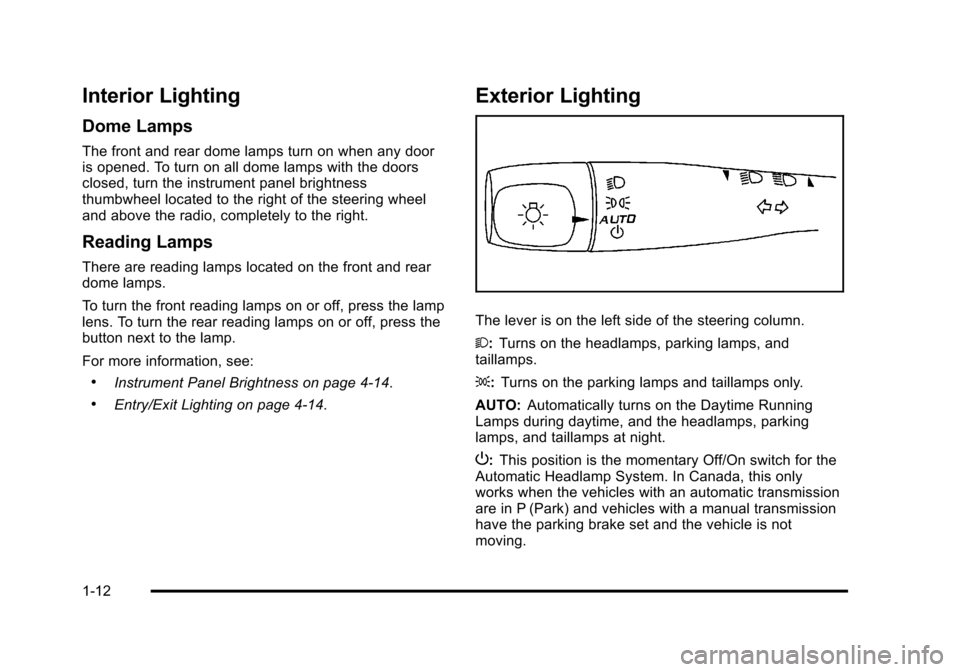
The lever is on the left side of the steering column.
2:Turns on the headlamps, parking lamps, and
taillamps.
;: Turns on the parking lamps and taillamps only.
AUTO: Automatically turns on the Daytime Running
Lamps during daytime, and the headlamps, parking
lamps, and taillamps at night.
P: This position is the momentary Off/On switch for the
Automatic Headlamp System. In Canada, this only
works when the vehicles with an automatic transmission
are in P (Park) and vehicles with a manual transmission
have the parking brake set and the vehicle is not
moving.
1-12
Page 110 of 430
Black plate (4,1)Chevrolet HHR Owner Manual - 2011
Notice:If the keys get locked in the vehicle, it may
have to be damaged to get them out. Always carry a
spare key.
If you are locked out of your vehicle, contact Roadside
Assistance. See Roadside Assistance Program
on
page 8‑6for more information.
Remote Keyless Entry (RKE) System
See Radio Frequency Statementon page 8‑17for
information regarding Part 15 of the Federal
Communications Commission (FCC) rules and Industry
Canada Standards RSS-210/220/310.
If there is a decrease in the RKE operating range,
try this:
.Check the distance. The transmitter may be too far
from the vehicle. Stand closer during rainy or
snowy weather.
.Check the location. Other vehicles or objects may
be blocking the signal. Take a few steps to the left
or right, hold the transmitter higher, and try again.
.Check the transmitter's battery. See “Battery
Replacement” later in this section.
.If the transmitter is still not working correctly, see
your dealer or a qualified technician for service.
Remote Keyless Entry (RKE) System
Operation
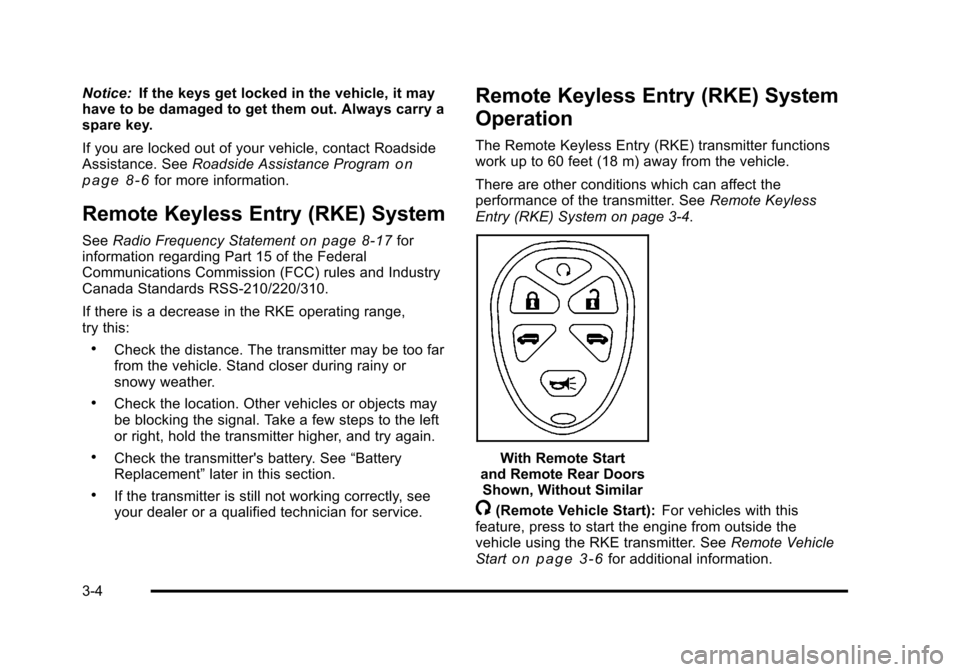
The Remote Keyless Entry (RKE) transmitter functions
work up to 60 feet (18 m) away from the vehicle.
There are other conditions which can affect the
performance of the transmitter. See Remote Keyless
Entry (RKE) System on page 3‑4.
With Remote Start
and Remote Rear Doors Shown, Without Similar
/(Remote Vehicle Start): For vehicles with this
feature, press to start the engine from outside the
vehicle using the RKE transmitter. See Remote Vehicle
Start
on page 3‑6for additional information.
3-4
Page 128 of 430
Black plate (22,1)Chevrolet HHR Owner Manual - 2011
3. Come to a complete stop, shift to P (Park), andturn the ignition to LOCK/OFF. On vehicles with an
automatic transmission, the shift lever must be in
P (Park) to turn the ignition switch to the LOCK/
OFF position.
4. Set the parking brake. See Parking Brake
on
page 3‑30.
The steering can bind with the wheel turned off center.
If this happens, move it from right to left while turning
the key to ACC/ACCESSORY. If this does not work,
then the vehicle needs service.
{WARNING:
If you have a manual transmission removing the
key from the ignition switch will lock the steering
column and result in a loss of ability to steer the
vehicle. This could cause a collision. If you need
to turn the engine off while the vehicle is moving,
turn the key to ACC/ACCESSORY. ACC (ACC/ACCESSORY):
This position operates
some of the electrical accessories. It unlocks the
steering wheel and ignition.
R (ON/RUN): This is the position in which you can
operate the electrical accessories and to display some
instrument panel cluster warning and indicator lights.
The switch stays in this position when the engine is
running.
If you leave the key in the ACC/ACCESSORY or ON/
RUN position with the engine off, the battery could be
drained. You may not be able to start the vehicle if the
battery is allowed to drain for an extended period
of time.
/ (START): This position starts the engine. When the
engine starts, release the key. The ignition switch will
return to ON/RUN for driving.
A warning tone will sound when the driver door is
opened, the ignition is in LOCK/OFF or ACC/
ACCESSORY and the key is in the ignition.
3-22
Page 144 of 430
Black plate (38,1)Chevrolet HHR Owner Manual - 2011
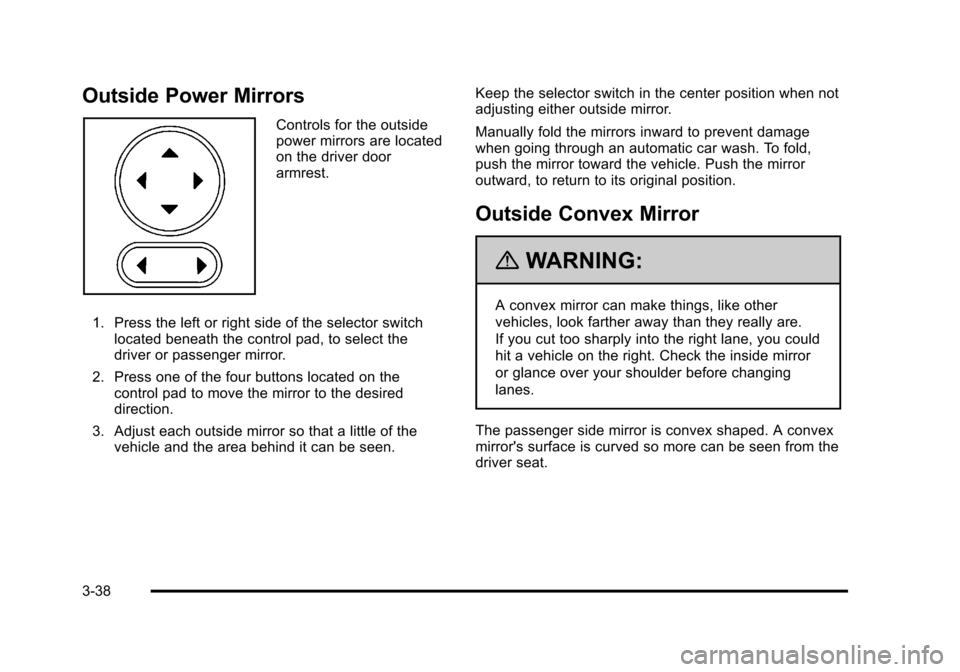
Outside Power Mirrors
Controls for the outside
power mirrors are located
on the driver door
armrest.
1. Press the left or right side of the selector switch located beneath the control pad, to select the
driver or passenger mirror.
2. Press one of the four buttons located on the control pad to move the mirror to the desired
direction.
3. Adjust each outside mirror so that a little of the vehicle and the area behind it can be seen. Keep the selector switch in the center position when not
adjusting either outside mirror.
Manually fold the mirrors inward to prevent damage
when going through an automatic car wash. To fold,
push the mirror toward the vehicle. Push the mirror
outward, to return to its original position.
Outside Convex Mirror
{WARNING:
A convex mirror can make things, like other
vehicles, look farther away than they really are.
If you cut too sharply into the right lane, you could
hit a vehicle on the right. Check the inside mirror
or glance over your shoulder before changing
lanes.
The passenger side mirror is convex shaped. A convex
mirror's surface is curved so more can be seen from the
driver seat.
3-38
Page 170 of 430
Black plate (14,1)Chevrolet HHR Owner Manual - 2011
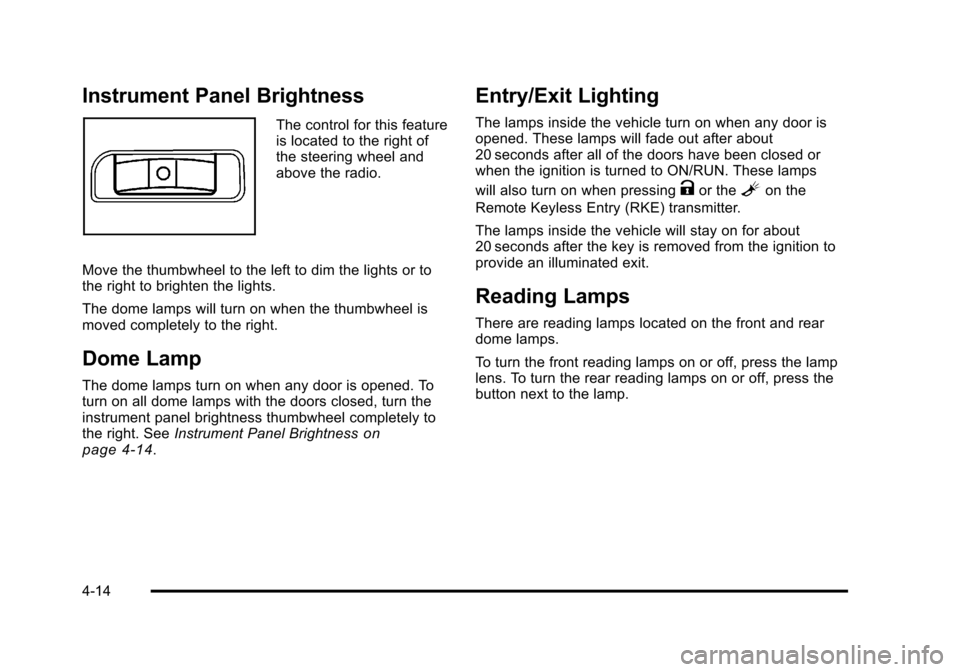
Instrument Panel Brightness
The control for this feature
is located to the right of
the steering wheel and
above the radio.
Move the thumbwheel to the left to dim the lights or to
the right to brighten the lights.
The dome lamps will turn on when the thumbwheel is
moved completely to the right.
Dome Lamp
The dome lamps turn on when any door is opened. To
turn on all dome lamps with the doors closed, turn the
instrument panel brightness thumbwheel completely to
the right. See Instrument Panel Brightness
on
page 4‑14.
Entry/Exit Lighting
The lamps inside the vehicle turn on when any door is
opened. These lamps will fade out after about
20 seconds after all of the doors have been closed or
when the ignition is turned to ON/RUN. These lamps
will also turn on when pressing
Kor theLon the
Remote Keyless Entry (RKE) transmitter.
The lamps inside the vehicle will stay on for about
20 seconds after the key is removed from the ignition to
provide an illuminated exit.
Reading Lamps
There are reading lamps located on the front and rear
dome lamps.
To turn the front reading lamps on or off, press the lamp
lens. To turn the rear reading lamps on or off, press the
button next to the lamp.
4-14
Page 194 of 430
Black plate (38,1)Chevrolet HHR Owner Manual - 2011
Driver Information Center (DIC)
Your vehicle has a Driver Information Center (DIC). The
DIC display gives you the status of many of your
vehicle's systems. The DIC is also used to display
driver personalization menu modes and warning/status
messages. All messages will appear in the DIC display,
located at the bottom of the instrument panel cluster.
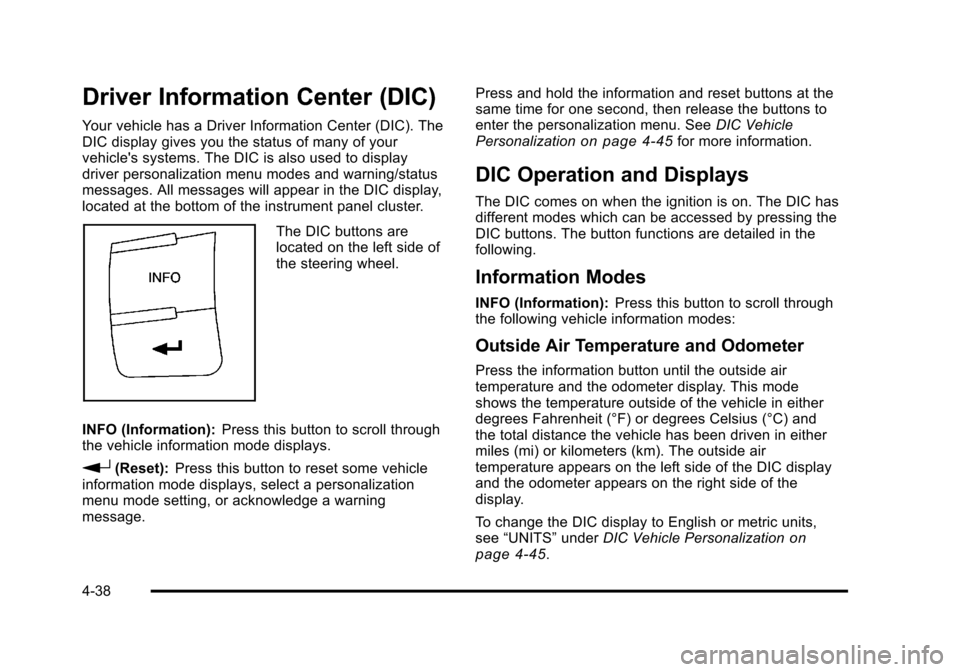
The DIC buttons are
located on the left side of
the steering wheel.
INFO (Information): Press this button to scroll through
the vehicle information mode displays.
r(Reset): Press this button to reset some vehicle
information mode displays, select a personalization
menu mode setting, or acknowledge a warning
message. Press and hold the information and reset buttons at the
same time for one second, then release the buttons to
enter the personalization menu. See
DIC Vehicle
Personalization
on page 4‑45for more information.
DIC Operation and Displays
The DIC comes on when the ignition is on. The DIC has
different modes which can be accessed by pressing the
DIC buttons. The button functions are detailed in the
following.
Information Modes
INFO (Information): Press this button to scroll through
the following vehicle information modes:
Outside Air Temperature and Odometer
Press the information button until the outside air
temperature and the odometer display. This mode
shows the temperature outside of the vehicle in either
degrees Fahrenheit (°F) or degrees Celsius (°C) and
the total distance the vehicle has been driven in either
miles (mi) or kilometers (km). The outside air
temperature appears on the left side of the DIC display
and the odometer appears on the right side of the
display.
To change the DIC display to English or metric units,
see “UNITS” underDIC Vehicle Personalization
on
page 4‑45.
4-38
Page 215 of 430
Black plate (59,1)Chevrolet HHR Owner Manual - 2011
Finding a Category (CAT) Station
(XM Satellite Radio Service Only)
CAT (Category):The radio may have the CAT button
feature.
To select and find a desired category:
1. Press BAND until the XM frequency displays.
2. Press CAT to display the category tabs on the radio display. Continue pressing the CAT button
until the desired category name displays.
3. Press either of the two softkeys below the desired category tab to immediately tune to the
first XM station associated with that category.
4. To go to the previous or to the next XM station within the selected category, do one of the
following:
.Turnf.
.Press the softkeys below the right or left arrows
on the radio display.
.Press©SEEK or¨SEEK.
5. To exit the category search mode, press the FAV button or BAND button to display the favorites
again. Undesired XM categories can be removed through the
setup menu. To remove an undesired category:
1. Press MENU to display the radio setup menu.
2. Press the softkey below the XM CAT tab.
3. Turn
fto display the category to be removed.
4. Press the softkey below the Remove tab until the category name along with the word Removed
displays.
5. Repeat the steps to remove additional categories.
Removed categories can be restored by pressing the
softkey under the Add tab when a removed category
displays or by pressing the softkey below the Restore
All tab.
Categories cannot be removed or added while the
vehicle is moving faster than 5 mph (8 km/h).
Radio Messages
Calibration Error: Displays if the radio is no longer
calibrated properly for the vehicle. The vehicle must be
returned to your dealer for service.
Loc or Locked: Displays when the THEFTLOCK
®
system has activated. Take the vehicle to your dealer
for service.
If any error occurs repeatedly or if an error cannot be
corrected, contact your dealer.
4-59