2011 CHEVROLET EQUINOX clock
[x] Cancel search: clockPage 25 of 446
Black plate (19,1)Chevrolet Equinox Owner Manual - 2011
In Brief 1-19
Vehicle Features
Radio(s)
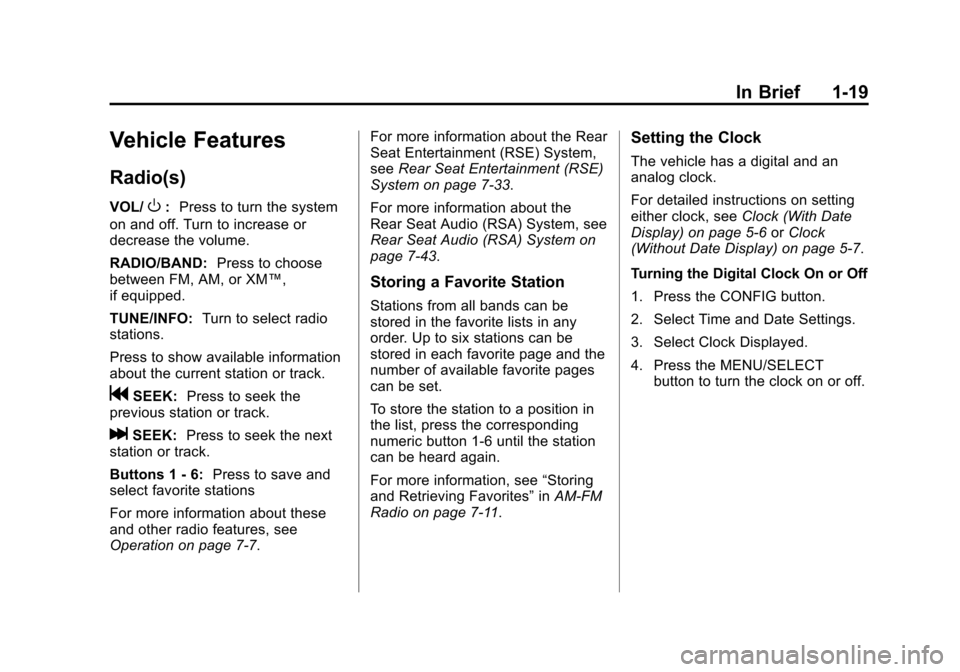
VOL/O:Press to turn the system
on and off. Turn to increase or
decrease the volume.
RADIO/BAND: Press to choose
between FM, AM, or XM™,
if equipped.
TUNE/INFO: Turn to select radio
stations.
Press to show available information
about the current station or track.
gSEEK: Press to seek the
previous station or track.
lSEEK: Press to seek the next
station or track.
Buttons 1 ‐6: Press to save and
select favorite stations
For more information about these
and other radio features, see
Operation on page 7‑7. For more information about the Rear
Seat Entertainment (RSE) System,
see
Rear Seat Entertainment (RSE)
System on page 7‑33.
For more information about the
Rear Seat Audio (RSA) System, see
Rear Seat Audio (RSA) System on
page 7‑43.
Storing a Favorite Station
Stations from all bands can be
stored in the favorite lists in any
order. Up to six stations can be
stored in each favorite page and the
number of available favorite pages
can be set.
To store the station to a position in
the list, press the corresponding
numeric button 1-6 until the station
can be heard again.
For more information, see “Storing
and Retrieving Favorites” inAM-FM
Radio on page 7‑11.
Setting the Clock
The vehicle has a digital and an
analog clock.
For detailed instructions on setting
either clock, see Clock (With Date
Display) on page 5‑6 orClock
(Without Date Display) on page 5‑7.
Turning the Digital Clock On or Off
1. Press the CONFIG button.
2. Select Time and Date Settings.
3. Select Clock Displayed.
4. Press the MENU/SELECT button to turn the clock on or off.
Page 125 of 446
Black plate (1,1)Chevrolet Equinox Owner Manual - 2011
Instruments and Controls 5-1
Instruments and
Controls
Controls
Steering Wheel Adjustment . . . 5-2
Steering Wheel Controls . . . . . . 5-3
Horn . . . . . . . . . . . . . . . . . . . . . . . . . . 5-3
Windshield Wiper/Washer . . . . . 5-4
Rear Window Wiper/Washer . . . . . . . . . . . . . . . . . . . . . . 5-5
Compass . . . . . . . . . . . . . . . . . . . . . 5-5
Clock (With Date Display) . . . . . 5-6
Clock (Without Date Display) . . . . . . . . . . . . . . . . . . . . . 5-7
Power Outlets . . . . . . . . . . . . . . . . . 5-7
Warning Lights, Gauges, and
Indicators
Warning Lights, Gauges, and Indicators . . . . . . . . . . . . . . . . . . . . 5-8
Instrument Cluster . . . . . . . . . . . . 5-9
Speedometer . . . . . . . . . . . . . . . . 5-10
Odometer . . . . . . . . . . . . . . . . . . . . 5-10
Tachometer . . . . . . . . . . . . . . . . . . 5-10
Fuel Gauge . . . . . . . . . . . . . . . . . . 5-10 Engine Coolant Temperature
Gauge . . . . . . . . . . . . . . . . . . . . . . 5-11
Safety Belt Reminders . . . . . . . 5-11
Airbag Readiness Light . . . . . . 5-12
Passenger Airbag Status Indicator . . . . . . . . . . . . . . . . . . . . 5-12
Charging System Light . . . . . . 5-13
Malfunction Indicator Lamp . . . . . . . . . . . . . 5-14
Brake System Warning Light . . . . . . . . . . . . . . . . . . . . . . . 5-16
Antilock Brake System (ABS) Warning Light . . . . . . . . . . . . . . 5-17
Traction Off Light . . . . . . . . . . . . 5-18
StabiliTrak
®OFF Light . . . . . . . 5-18
Traction Control System (TCS)/StabiliTrak
®Light . . . . 5-18
Tire Pressure Light . . . . . . . . . . 5-19
Engine Oil Pressure Light . . . . 5-20
Fuel Economy Light . . . . . . . . . 5-20
Low Fuel Warning Light . . . . . . 5-21
Security Light . . . . . . . . . . . . . . . . 5-21
High-Beam On Light . . . . . . . . . 5-21
Front Fog Lamp Light . . . . . . . . 5-21
Lamps On Reminder . . . . . . . . . 5-22
Cruise Control Light . . . . . . . . . 5-22
Information Displays
Driver Information Center (DIC) . . . . . . . . . . . . . . . 5-22
Vehicle Messages
Vehicle Messages . . . . . . . . . . . 5-26
Battery Voltage and ChargingMessages . . . . . . . . . . . . . . . . . . 5-26
Brake System Messages . . . . 5-26
Compass Messages . . . . . . . . . 5-27
Cruise Control Messages . . . . 5-27
Door Ajar Messages . . . . . . . . . 5-27
Engine Cooling System Messages . . . . . . . . . . . . . . . . . . 5-27
Engine Oil Messages . . . . . . . . 5-28
Engine Power Messages . . . . 5-29
Fuel System Messages . . . . . . 5-29
Key and Lock Messages . . . . . 5-29
Object Detection System Messages . . . . . . . . . . . . . . . . . . 5-29
Ride Control System Messages . . . . . . . . . . . . . . . . . . 5-30
Airbag System Messages . . . . 5-30
Safety Belt Messages . . . . . . . 5-31
Page 130 of 446
Black plate (6,1)Chevrolet Equinox Owner Manual - 2011
5-6 Instruments and Controls
SeeCompass Messages on
page 5‑27 for more information on
the messages that may be
displayed for the compass.
Clock (With Date Display)
The infotainment system controls,
located on the instrument panel, are
used to access the time and date
settings through the menu system.
See Operation on page 7‑7 for
information about how to use the
menu system.
Setting the Time and Date
1. Turn the infotainment system ON.
2. Press the CONFIG button and select Time and Date Settings.
3. Select Set Time or Set Date.
4. Turn the MENU/SEL knob to adjust the highlighted value.
5. Press the MENU/SEL knob to select the next value. 6. To save the time or date and
return to the Time and Date
Settings menu, press the
}BACK button at any time or
press the MENU/SEL knob after
adjusting the minutes or year.
Setting the 12/24 Hour Format
1. Turn the infotainment system ON.
2. Press the CONFIG button and select Time and Date Settings.
3. Highlight 12/24 Hour Format.
4. Press the MENU/SEL knob to select the 12 hour or 24 hour
display format.
Setting the Month and Day
Format
1. Turn the infotainmentsystem ON.
2. Press the CONFIG button and select Time and Date Settings. 3. Highlight Month and Day
Format.
4. Press the MENU/SEL knob to select MM/DD (month/day) or
DD/MM (day/month).
Setting the Auto Time Adjust
1. Turn the infotainmentsystem ON.
2. Press the CONFIG button and select Time and Date Settings.
3. Highlight Auto Time Adjust.
4. Press the MENU/SEL knob to turn Auto Time Adjust on or off.
5. Press the MENU/SEL knob to select Time Zone, and then
select the time zone.
6. Press the MENU/SEL knob to turn Daylight Savings on or off.
Page 131 of 446
Black plate (7,1)Chevrolet Equinox Owner Manual - 2011
Instruments and Controls 5-7
Clock (Without Date
Display)
The infotainment system controls,
located on the instrument panel, are
used to access the time and date
settings through the menu system.
SeeOperation on page 7‑7 for
information about how to use the
menu system.
Setting the Time
1. Turn the infotainment system ON.
2. Press the CONFIG button and select Time Settings, or press
the
Hbutton.
3. Select Set Time.
4. Turn the MENU/SEL knob to adjust the highlighted value.
5. Press the MENU/SEL knob to select the next value. 6. To save the time and return to
the Time Settings menu, press
the
}BACK button at any time
or press the SELECT button
after adjusting the minutes.
Setting the 12/24 Hour Format
1. Turn the infotainment system ON.
2. Press the CONFIG button and select Time Settings, or press
the
Hbutton.
3. Highlight 12/24 Hour Format.
4. Press the MENU/SEL knob to select the 12 hour or 24 hour
display format.
Power Outlets
The accessory power outlets can
be used to connect electrical
equipment, such as a cell phone or
MP3 player. There are four accessory power
outlets in the following locations:
below the CD slot, inside the center
console storage, on the rear of the
center console storage, and in the
rear cargo compartment.
To use the outlets, remove the cover
and close when not in use.
Notice:
Leaving electrical
equipment plugged in for an
extended period of time while the
vehicle is off will drain the
battery. Always unplug electrical
equipment when not in use and
do not plug in equipment that
exceeds the maximum 20 ampere
rating.
Certain accessory plugs may not be
compatible with the accessory
power outlets and could overload
vehicle and adapter fuses. If a
problem is experienced, see
your dealer.
Page 166 of 446
Black plate (4,1)Chevrolet Equinox Owner Manual - 2011
6-4 Lighting
Interior Lighting
Instrument Panel
Illumination Control
This control is located on the
instrument panel, to the left of the
steering column.
D(Instrument Panel
Brightness): Turn clockwise or
counterclockwise to brighten or
dim the lights.
Dome Lamps
There are front and rear dome
lamps.
The dome lamp controls are located
in the overhead console. To change
the settings, press the following:
*(Dome Lamp Override): Turns
the lamps off, even when a door
is open.
1(Door): The lamps come on
automatically when a door is
opened.
+(On): Turns the dome lamps on.
The dome lamps can also be turned
on and off by pressing the buttons
next to the lamps.
Reading Lamps
The reading lamps are located on
the overhead console. These lamps
come on automatically when any
door is opened.
For manual operation, press the
button next to each lamp to turn it
on or off.
Lighting Features
Entry Lighting
The dome lamp, cargo lamp, and
foot lamp inside the vehicle come
on when any door is opened, if the
dome lamp is in the door position.
In addition, these lamps come on
when the Remote Keyless Entry
(RKE) unlock button is pressed.
They stay on for 20 seconds or until
a door is opened. After the door is
opened and then closed, the light
remains on for 20 seconds, or until
the ignition is turned to ON/RUN.
Page 172 of 446

Black plate (4,1)Chevrolet Equinox Owner Manual - 2011
7-4 Infotainment System
F. FAV
.Radio: Opens the
favorites list.
G. TONE
.Opens the tone menu.
H. CONFIG
.Opens the settings menu.
I. MENU/SEL
.Press: Opens the menus
and selects menu items.
.Turn: Highlights menu
items or sets values while
in a menu. Manually
selects radio stations while
listening to the radio.
J. CD Slot
.Insert a CD.
K.
k
.CD: Pauses the CD. L. CD
.Selects the CD player
when listening to a
different audio source.
M.
X(CD Eject)
.Removes a disc from the
CD slot.
N.
lSEEK
.Radio: Seeks the next
station.
.CD: Selects the next track
or fast forwards within a
track.
O. INFO
.Radio: Shows available
information about the
current station.
.CD: Shows available
information about the
current track. P.
5/>
.Opens the phone
main menu.
.Mutes the audio system.
Q.
H
.Opens the clock menu.
R.
}BACK
.Menu: Moves one
level back.
.Character Input: Deletes
the last character.
Page 244 of 446
Black plate (6,1)Chevrolet Equinox Owner Manual - 2011
9-6 Driving and Operating
Steering in Emergencies
There are times when steering can
be more effective than braking. For
example, you come over a hill and
find a truck stopped in your lane,
or a car suddenly pulls out from
nowhere, or a child darts out from
between parked cars and stops right
in front of you. These problems can
be avoided by braking—if you can
stop in time. But sometimes you
cannot stop in time because there is
no room. That is the time for
evasive action —steering around
the problem.
The vehicle can perform very well in
emergencies like these. First apply
the brakes. See Braking on
page 9‑4. It is better to remove as
much speed as possible from a
collision. Then steer around the
problem, to the left or right
depending on the space available.
An emergency like this requires
close attention and a quick decision.
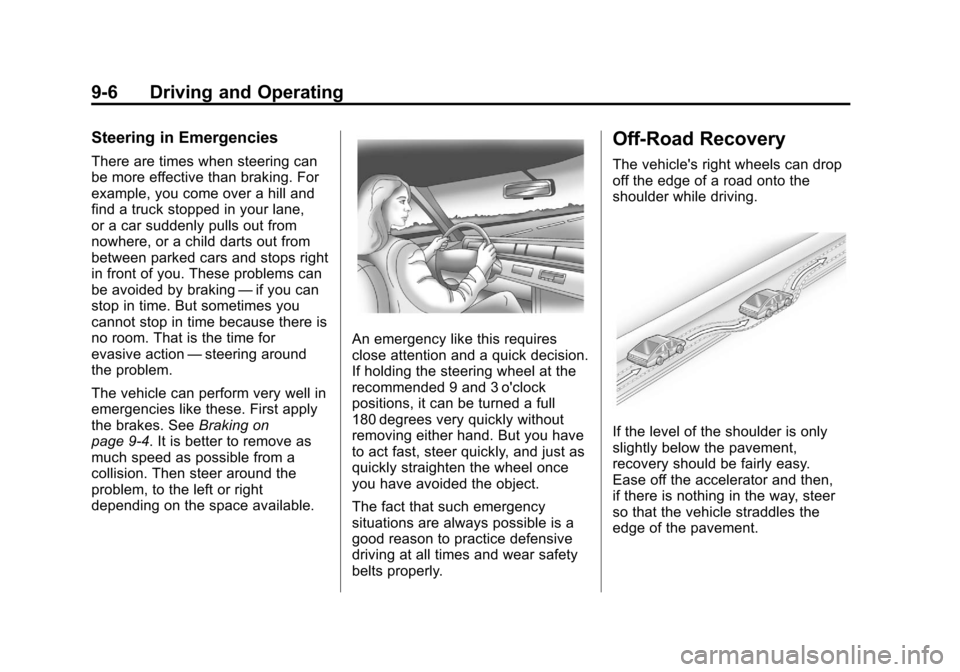
If holding the steering wheel at the
recommended 9 and 3 o'clock
positions, it can be turned a full
180 degrees very quickly without
removing either hand. But you have
to act fast, steer quickly, and just as
quickly straighten the wheel once
you have avoided the object.
The fact that such emergency
situations are always possible is a
good reason to practice defensive
driving at all times and wear safety
belts properly.
Off-Road Recovery
The vehicle's right wheels can drop
off the edge of a road onto the
shoulder while driving.
If the level of the shoulder is only
slightly below the pavement,
recovery should be fairly easy.
Ease off the accelerator and then,
if there is nothing in the way, steer
so that the vehicle straddles the
edge of the pavement.
Page 251 of 446
Black plate (13,1)Chevrolet Equinox Owner Manual - 2011
Driving and Operating 9-13
{WARNING
Turning or driving across steep
hills can be dangerous. You could
lose traction, slide sideways, and
possibly roll over. You could be
seriously injured or killed. When
driving up hills, always try to go
straight up.
.Try to drive straight up the hill if
at all possible. If the path twists
and turns, you might want to find
another route.
.Ease up on the speed as you
approach the top of the hill.
.Attach a flag to the vehicle to be
more visible to approaching
traffic on trails or hills.
.Sound the horn as you approach
the top of the hill to let opposing
traffic know you are there.
.Use headlamps even during the
day to make the vehicle more
visible to oncoming traffic.
{WARNING
Driving to the top (crest) of a
hill at full speed can cause an
accident. There could be a
drop-off, embankment, cliff,
or even another vehicle. You
could be seriously injured or
killed. As you near the top of a
hill, slow down and stay alert.
If the vehicle stalls, or is about to
stall, and you cannot make it up
the hill:
.Push the brake pedal to stop the
vehicle and keep it from rolling
backwards and apply the
parking brake.
.If the engine is still running, shift
the transmission to R (Reverse),
release the parking brake, and
slowly back down the hill in
R (Reverse).
.If the engine has stopped
running, you need to restart it.
With the brake pedal pressed
and the parking brake still
applied, shift the transmission to
P (Park) and restart the engine.
Then, shift to R (Reverse),
release the parking brake, and
slowly back down the hill as
straight as possible in
R (Reverse).
.While backing down the hill, put
your left hand on the steering
wheel at the 12 o'clock position
so you can tell if the wheels are
straight and can maneuver as
you back down. It is best to back
down the hill with the wheels
straight rather than in the left or
right direction. Turning the wheel
too far to the left or right will
increase the possibility of a
rollover.