2011 CHEVROLET EQUINOX stop start
[x] Cancel search: stop startPage 302 of 446
Black plate (64,1)Chevrolet Equinox Owner Manual - 2011
9-64 Driving and Operating
Leaving After Parking on a Hill
1. Apply and hold the brake pedal.
2. Start the engine.
3. Shift into a gear.
4. Release the parking brake.
5. Let up on the brake pedal.
6. Drive slowly until the trailer isclear of the chocks.
7. Stop and have someone pick up and store the chocks.
Maintenance When Trailer
Towing
The vehicle needs service more
often when pulling a trailer. See this
manual's Maintenance Schedule or
Index for more information. Things that are especially important
in trailer operation are automatic
transmission fluid, engine oil, axle
lubricant, belts, cooling system and
brake system. Inspect these before
and during the trip.
Check periodically to see that all
hitch nuts and bolts are tight.
Engine Cooling When Trailer
Towing
The cooling system may temporarily
overheat during severe operating
conditions. See
Engine Overheating
on page 10‑22.
Trailer Towing
Before pulling a trailer, there are
three important considerations that
have to do with weight:
.The weight of the trailer
.The weight of the trailer tongue
.The total weight on the vehicle's
tires
Weight of the Trailer
How heavy can a trailer safely be?
Speed, altitude, road grades,
outside temperature, special
equipment, and the amount of
tongue weight the vehicle can carry
must be considered. See “Weight of
the Trailer Tongue” later in this
section for more information.
Page 307 of 446
Black plate (1,1)Chevrolet Equinox Owner Manual - 2011
Vehicle Care 10-1
Vehicle Care
General Information
General Information . . . . . . . . . . 10-2
California Proposition65 Warning . . . . . . . . . . . . . . . . . 10-3
California Perchlorate Materials Requirements . . . . 10-3
Accessories and Modifications . . . . . . . . . . . . . . . 10-3
Vehicle Checks
Doing Your OwnService Work . . . . . . . . . . . . . . . 10-4
Hood . . . . . . . . . . . . . . . . . . . . . . . . 10-4
Engine Compartment Overview . . . . . . . . . . . . . . . . . . . 10-6
Engine Cover . . . . . . . . . . . . . . . 10-10
Engine Oil . . . . . . . . . . . . . . . . . . 10-10
Engine Oil Life System . . . . . 10-14
Automatic Transmission Fluid . . . . . . . . . . . . . . . . . . . . . . 10-15
Engine Air Cleaner/Filter . . . . 10-15 Cooling System . . . . . . . . . . . . 10-17
Engine Coolant . . . . . . . . . . . . . 10-18
Engine Overheating . . . . . . . . 10-22
Power Steering Fluid
(2.4L L4 Engine) . . . . . . . . . . 10-23
Power Steering Fluid (3.0L V6 Engine) . . . . . . . . . . 10-23
Washer Fluid . . . . . . . . . . . . . . . 10-24
Brakes . . . . . . . . . . . . . . . . . . . . . 10-25
Brake Fluid . . . . . . . . . . . . . . . . . 10-26
Battery . . . . . . . . . . . . . . . . . . . . . 10-27
All-Wheel Drive . . . . . . . . . . . . . 10-28
Starter Switch Check . . . . . . . 10-29
Automatic Transmission Shift Lock Control Function
Check . . . . . . . . . . . . . . . . . . . . . 10-29
Ignition Transmission Lock Check . . . . . . . . . . . . . . . . . . . . . 10-30
Park Brake and P (Park) Mechanism Check . . . . . . . . 10-30
Wiper Blade Replacement . . . . . . . . . . . . . . 10-31
Headlamp Aiming
Headlamp Aiming . . . . . . . . . . 10-33
Bulb Replacement
Bulb Replacement . . . . . . . . . . 10-35
Headlamps, Front TurnSignal, Sidemarker, and
Parking Lamps . . . . . . . . . . . . 10-35
Fog Lamps . . . . . . . . . . . . . . . . . 10-36
Taillamps, Turn Signal, Sidemarker, Stoplamps,
and Back-Up Lamps . . . . . . 10-36
License Plate Lamp . . . . . . . . 10-38
Replacement Bulbs . . . . . . . . . 10-39
Electrical System
Fuses . . . . . . . . . . . . . . . . . . . . . . 10-39
Engine Compartment Fuse Block . . . . . . . . . . . . . . . . 10-40
Instrument Panel Fuse Block . . . . . . . . . . . . . . . . 10-43
Page 327 of 446
Black plate (21,1)Chevrolet Equinox Owner Manual - 2011
Vehicle Care 10-21
Notice:In cold weather, water
can freeze and crack the engine,
radiator, heater core and other
parts. Use the recommended
coolant and the proper coolant
mixture.
1. Remove the coolant surge tank pressure cap when the cooling
system, including the coolant
surge tank pressure cap and
upper radiator hose, is no
longer hot.
Turn the pressure cap slowly
counterclockwise about
one-quarter of a turn. If you
hear a hiss, wait for that to stop.
This will allow any pressure still
left to be vented out the
discharge hose. 2. Keep turning the pressure cap
slowly, and remove it.
3. Fill the coolant surge tank withthe proper DEX-COOL coolant
mixture, to the COLD FILL line.
4. With the coolant surge tank pressure cap off, start the
engine and let it run until the
upper radiator hose can be felt
getting hot. Watch out for the
engine cooling fan. By this time, the coolant level
inside the coolant surge tank
may be lower. If the level is
lower, add more of the proper
DEX-COOL coolant mixture to
the coolant surge tank until the
level reaches the COLD
FILL line.
5. Replace the pressure cap. Be sure the pressure cap is
hand-tight.
Check the level in the coolant surge
tank when the cooling system has
cooled down. If the coolant is not at
the proper level, repeat Steps 1
through 3 and reinstall the pressure
cap. If the coolant still is not at the
proper level when the system cools
down again, see your dealer.
Page 361 of 446
Black plate (55,1)Chevrolet Equinox Owner Manual - 2011
Vehicle Care 10-55
As an added safety feature, your
vehicle has been equipped with a
tire pressure monitoring system
(TPMS) that illuminates a low tire
pressure telltale when one or
more of your tires is significantly
under‐inflated.
Accordingly, when the low tire
pressure telltale illuminates, you
should stop and check your tires as
soon as possible, and inflate them
to the proper pressure. Driving on a
significantly under‐inflated tire
causes the tire to overheat and can
lead to tire failure. Under‐inflation
also reduces fuel efficiency and tire
tread life, and may affect the
vehicle's handling and stopping
ability.
Please note that the TPMS is
not a substitute for proper tire
maintenance, and it is the driver's
responsibility to maintain correct tire
pressure, even if under‐inflation has
not reached the level to trigger
illumination of the TPMS low tire
pressure telltale.Your vehicle has also been
equipped with a TPMS malfunction
indicator to indicate when the
system is not operating properly.
The TPMS malfunction indicator is
combined with the low tire pressure
telltale. When the system detects a
malfunction, the telltale will flash for
approximately one minute and then
remain continuously illuminated.
This sequence will continue upon
subsequent vehicle start‐ups as
long as the malfunction exists.
When the malfunction indicator is
illuminated, the system may not be
able to detect or signal low tire
pressure as intended. TPMS
malfunctions may occur for a variety
of reasons, including the installation
of replacement or alternate tires or
wheels on the vehicle that prevent
the TPMS from functioning properly.
Always check the TPMS malfunction
telltale after replacing one or more
tires or wheels on your vehicle to
ensure that the replacement or
alternate tires and wheels allow the
TPMS to continue to function
properly.
See
Tire Pressure Monitor
Operation on page 10‑56 for
additional information.
Federal Communications
Commission (FCC) and
Industry Canada
See Radio Frequency Statement on
page 13‑17 for information
regarding Part 15 of the Federal
Communications Commission (FCC)
rules and Industry Canada
Standards RSS-210/220/310.
Page 362 of 446
Black plate (56,1)Chevrolet Equinox Owner Manual - 2011
10-56 Vehicle Care
Tire Pressure Monitor
Operation
This vehicle may have a Tire
Pressure Monitor System (TPMS).
The TPMS is designed to warn the
driver when a low tire pressure
condition exists. TPMS sensors are
mounted onto each tire and wheel
assembly, excluding the spare tire
and wheel assembly. The TPMS
sensors monitor the air pressure in
the vehicle's tires and transmits the
tire pressure readings to a receiver
located in the vehicle.
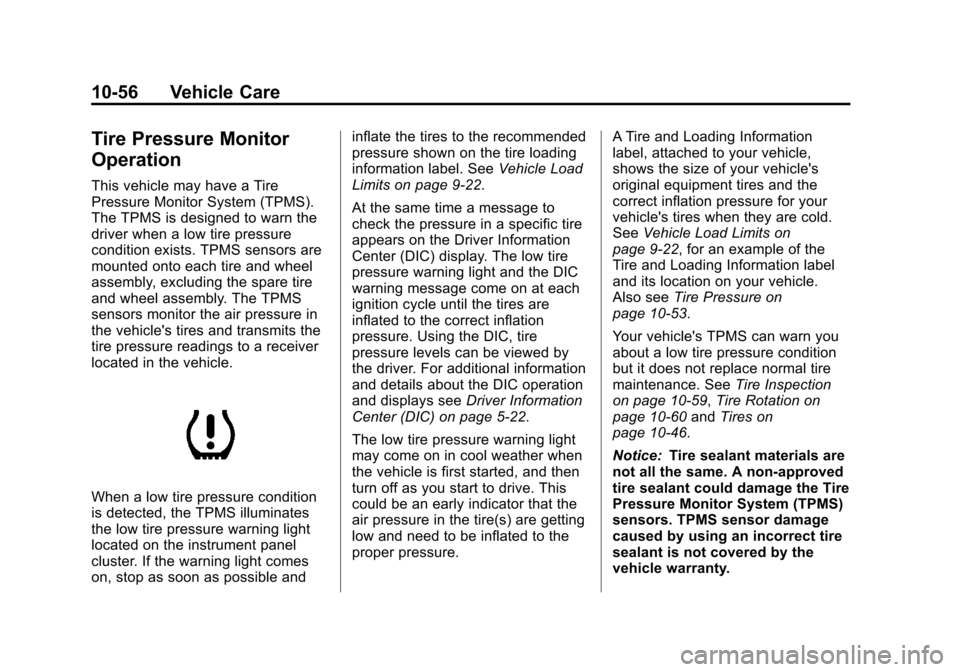
When a low tire pressure condition
is detected, the TPMS illuminates
the low tire pressure warning light
located on the instrument panel
cluster. If the warning light comes
on, stop as soon as possible andinflate the tires to the recommended
pressure shown on the tire loading
information label. See
Vehicle Load
Limits on page 9‑22.
At the same time a message to
check the pressure in a specific tire
appears on the Driver Information
Center (DIC) display. The low tire
pressure warning light and the DIC
warning message come on at each
ignition cycle until the tires are
inflated to the correct inflation
pressure. Using the DIC, tire
pressure levels can be viewed by
the driver. For additional information
and details about the DIC operation
and displays see Driver Information
Center (DIC) on page 5‑22.
The low tire pressure warning light
may come on in cool weather when
the vehicle is first started, and then
turn off as you start to drive. This
could be an early indicator that the
air pressure in the tire(s) are getting
low and need to be inflated to the
proper pressure. A Tire and Loading Information
label, attached to your vehicle,
shows the size of your vehicle's
original equipment tires and the
correct inflation pressure for your
vehicle's tires when they are cold.
See
Vehicle Load Limits on
page 9‑22, for an example of the
Tire and Loading Information label
and its location on your vehicle.
Also see Tire Pressure on
page 10‑53.
Your vehicle's TPMS can warn you
about a low tire pressure condition
but it does not replace normal tire
maintenance. See Tire Inspection
on page 10‑59, Tire Rotation on
page 10‑60 andTires on
page 10‑46.
Notice: Tire sealant materials are
not all the same. A non-approved
tire sealant could damage the Tire
Pressure Monitor System (TPMS)
sensors. TPMS sensor damage
caused by using an incorrect tire
sealant is not covered by the
vehicle warranty.
Page 364 of 446
Black plate (58,1)Chevrolet Equinox Owner Manual - 2011
10-58 Vehicle Care
TPMS Sensor Matching
Process
Each TPMS sensor has a unique
identification code. Any time you
rotate your vehicle's tires or replace
one or more of the TPMS sensors,
the identification codes will need to
be matched to the new tire/wheel
position. The sensors are matched
to the tire/wheel positions in the
following order: driver side front tire,
passenger side front tire, passenger
side rear tire, and driver side rear
tire using a TPMS diagnostic tool.
See your dealer for service.
The TPMS sensors can also be
matched to each tire/wheel position
by increasing or decreasing the
tire's air pressure. If increasing the
tire's air pressure, do not exceed
the maximum inflation pressure
indicated on the tire's sidewall.To decrease air-pressure out of a
tire you can use the pointed end of
the valve cap, a pencil-style air
pressure gage, or a key.
You have two minutes to match the
first tire/wheel position, and
five minutes overall to match all four
tire/wheel positions. If it takes longer
than two minutes, to match the first
tire and wheel, or more than
five minutes to match all four tire
and wheel positions the matching
process stops and you need to
start over.
The TPMS sensor matching process
is outlined below:
1. Set the parking brake.
2. Turn the ignition to ON/RUN with
the engine off.
3. Use the MENU button to select the Vehicle Information Menu in
the Driver Information Center
(DIC). Use the arrow keys to
scroll to the Tire Pressure
screen. 4. Press the SET/CLR button to
begin the sensor matching
process.
A message asking if you are
sure you want to begin this
process should appear.
5. Press the SET/CLR button again to confirm the selection.
The horn sounds twice to signal
the receiver is in relearn mode
and the TIRE LEARNING
ACTIVE message displays on
the DIC screen.
6. Start with the driver side front tire.
7. Remove the valve cap from the valve cap stem. Activate the
TPMS sensor by increasing or
decreasing the tire's air pressure
for five seconds, or until a horn
chirp sounds. The horn chirp,
which may take up to
30 seconds to sound, confirms
that the sensor identification
code has been matched to this
tire and wheel position.
Page 384 of 446
Black plate (78,1)Chevrolet Equinox Owner Manual - 2011
10-78 Vehicle Care
After installing the compact spare
on the vehicle, stop as soon as
possible and make sure the spare
tire is correctly inflated. The
compact spare is made to perform
well at speeds up to 105 km/h
(65 mph) for distances up to
5 000 km (3,000 miles), so you can
finish your trip and have the full-size
tire repaired or replaced at your
convenience. Of course, it is best to
replace the spare with a full-size tire
as soon as possible. The spare tire
will last longer and be in good
shape in case it is needed again.Notice:
When the compact spare
is installed, do not take the
vehicle through an automatic car
wash with guide rails. The
compact spare can get caught on
the rails which can damage the
tire, wheel and other parts of the
vehicle.
Do not use the compact spare on
other vehicles.
Do not mix the compact spare tire or
wheel with other wheels or tires.
They will not fit. Keep the spare tire
and its wheel together.
Notice: Tire chains will not fit the
compact spare. Using them can
damage the vehicle and can
damage the chains too. Do not
use tire chains on the compact
spare.Jump Starting
For more information about the
vehicle battery, see Battery on
page 10‑27.
Jump starting can be used on
vehicles with run‐down batteries by
using jumper cables and another
vehicle.
{WARNING
Batteries can hurt you. They can
be dangerous because:
.They contain acid that can
burn you.
.They contain gas that can
explode or ignite.
.They contain enough
electricity to burn you.
If you do not follow these steps
exactly, some or all of these
things can hurt you.
Page 404 of 446
Black plate (4,1)Chevrolet Equinox Owner Manual - 2011
11-4 Service and Maintenance
Additional Required Services
Every 12 000 km/7,500 Miles
.Rotate tires. Tires should be
rotated every 12 000 km/
7,500 miles. SeeTire Rotation
on page 10‑60.
At Each Fuel Stop
.Engine oil level check. See
Engine Oil on page 10‑10.
.Engine coolant level check. See
Engine Coolant on page 10‑18.
.Windshield washer fluid level
check. See Washer Fluid on
page 10‑24.
Once a Month
.Tire inflation check. See Tire
Pressure on page 10‑53.
.Tire wear inspection. See Tire
Inspection on page 10‑59.
.Sunroof track and seal
inspection, if equipped.
See Sunroof on page 2‑19. Once a Year
.See
Starter Switch Check on
page 10‑29.
.See Automatic Transmission
Shift Lock Control Function
Check on page 10‑29.
.See Ignition Transmission Lock
Check on page 10‑30.
.See Park Brake and P (Park)
Mechanism Check on
page 10‑30.
.Accelerator pedal check for
damage, high effort, or binding.
Replace if needed.
.Underbody flushing service.
.Hood/Decklid/Liftgate/Liftglass
Support Gas Strut Service:
Visually inspect gas strut,
if equipped, for signs of wear,
cracks, or other damage. Check
the hold open ability of the gas
strut. Contact your dealer if
service is required. First Engine Oil Change After
Every 40 000 km/25,000 Miles
.Passenger compartment air filter
replacement (or every
24 months, whichever occurs
first). More frequent replacement
may be needed if you drive in
areas with heavy traffic, areas
with poor air quality, or areas
with high dust levels.
Replacement may also be
needed if you notice reduced air
flow, windows fogging up,
or odors. Your dealer can help
you determine when it is the
right time to replace the filter.