2011 CHEVROLET CRUZE warning light
[x] Cancel search: warning lightPage 145 of 394
Black plate (33,1)Chevrolet Cruze Owner Manual - 2011
Instruments and Controls 5-33
Starting the Vehicle
Messages
TURN STEERING WHEEL
TURN KEY OFF THEN ON
This message is displays when the
steering column is locked. Try
turning the steering wheel while
turning the vehicle off and then back
on to unlock the steering column.
TURN STEERING WHEEL
START VEHICLE AGAIN
This message is displays when the
steering column is locked. Try
turning the steering wheel while
starting the vehicle to unlock the
steering column.
Tire Messages
SERVICE TIRE MONITOR
SYSTEM
This message displays if there is a
problem with the Tire Pressure
Monitor System (TPMS). SeeTire
Pressure Monitor Operation on
page 10‑53 for more information.
TIRE LEARNING ACTIVE
This message displays when the
system is learning new tires. See
Tire Pressure Monitor Operation on
page 10‑53for more information.
TIRE PRESSURE LOW ADD
AIR TO TIRE
On vehicles with the Tire Pressure
Monitor System (TPMS), this
message displays when the
pressure in one or more of the
vehicle's tires is low. There is also an icon with the
warning that will indicate the
location of the low tire
The low tire pressure warning light
will also come on. See
Tire
Pressure Light on page 5‑20.
If a tire pressure message appears
on the DIC, stop as soon as you
can. Inflate the tires by adding air
until the tire pressure is equal to the
values shown on the Tire and
Loading Information label. See Tires
on page 10‑42, Vehicle Load Limits
on page 9‑12, and Tire Pressure on
page 10‑50.
You can receive more than one tire
pressure message at a time. To
read the other messages that may
have been sent at the same time,
press the set/reset button. The DIC
also shows the tire pressure values.
See Driver Information Center (DIC)
on page 5‑24.
Page 153 of 394
Black plate (1,1)Chevrolet Cruze Owner Manual - 2011
Lighting 6-1
Lighting
Exterior Lighting
Exterior Lamp Controls . . . . . . . . 6-1
Headlamp High/Low-BeamChanger . . . . . . . . . . . . . . . . . . . . . 6-2
Flash-to-Pass . . . . . . . . . . . . . . . . . 6-2
Daytime Running Lamps (DRL) . . . . . . . . . . . . . . . . 6-2
Automatic Headlamp System . . . . . . . . . . . . . . . . . . . . . . 6-3
Hazard Warning Flashers . . . . . 6-3
Turn and Lane-Change Signals . . . . . . . . . . . . . . . . . . . . . . 6-4
Front Fog Lamps . . . . . . . . . . . . . . 6-4
Interior Lighting
Instrument Panel Illumination Control . . . . . . . . . . . . . . . . . . . . . . 6-5
Courtesy Lamps . . . . . . . . . . . . . . 6-5
Dome Lamps . . . . . . . . . . . . . . . . . 6-5
Reading Lamps . . . . . . . . . . . . . . . 6-6
Lighting Features
Entry Lighting . . . . . . . . . . . . . . . . . 6-6
Exit Lighting . . . . . . . . . . . . . . . . . . . 6-6
Battery Power Protection . . . . . . 6-6
Exterior Lighting
Exterior Lamp Controls
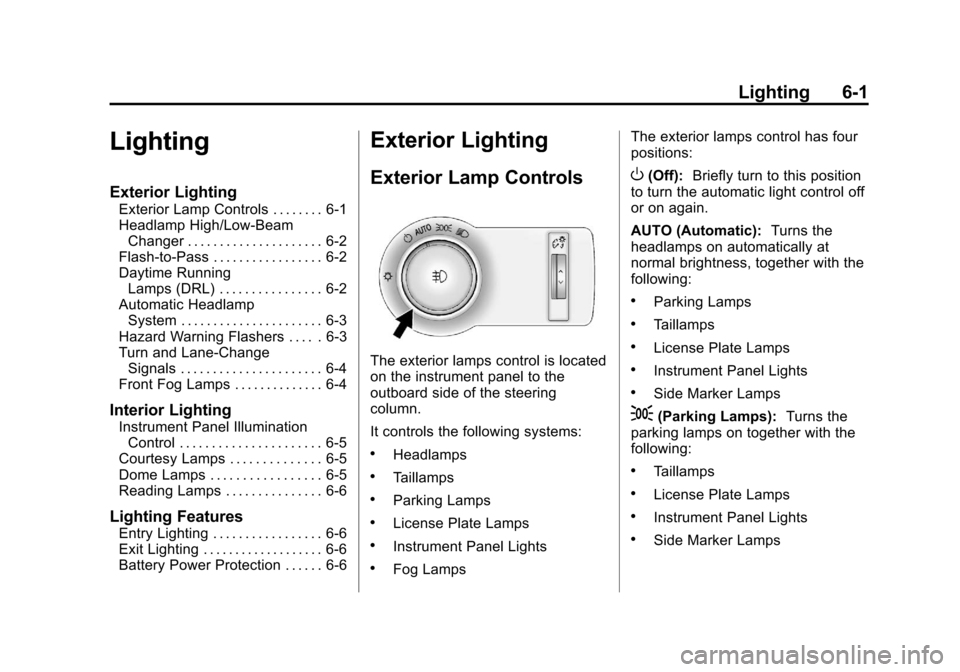
The exterior lamps control is located
on the instrument panel to the
outboard side of the steering
column.
It controls the following systems:
.Headlamps
.Taillamps
.Parking Lamps
.License Plate Lamps
.Instrument Panel Lights
.Fog Lamps The exterior lamps control has four
positions:
O(Off):
Briefly turn to this position
to turn the automatic light control off
or on again.
AUTO (Automatic): Turns the
headlamps on automatically at
normal brightness, together with the
following:
.Parking Lamps
.Taillamps
.License Plate Lamps
.Instrument Panel Lights
.Side Marker Lamps
;(Parking Lamps): Turns the
parking lamps on together with the
following:
.Taillamps
.License Plate Lamps
.Instrument Panel Lights
.Side Marker Lamps
Page 154 of 394
Black plate (2,1)Chevrolet Cruze Owner Manual - 2011
6-2 Lighting
5(Headlamps):Turns the
headlamps on together with the
lamps listed below. A warning chime
sounds if the driver door is opened
when the ignition switch is off and
the headlamps are on.
.Parking Lamps
.Taillamps
.License Plate Lamps
.Instrument Panel Lights
.Side Marker Lamps
#(Front Fog Lamps): For
vehicles with fog lamps, press to
turn the lamps on or off.
See Front Fog Lamps on page 6‑4.
When the lights are on,
;will be
lit. See Lamps On Reminder on
page 5‑23.
Headlamp High/
Low-Beam Changer
2 3Headlamp High/Low‐Beam
Changer: Push the turn signal/lane
change lever away from you to turn
the high beams on.
Pull the lever toward you to return to
low beams.
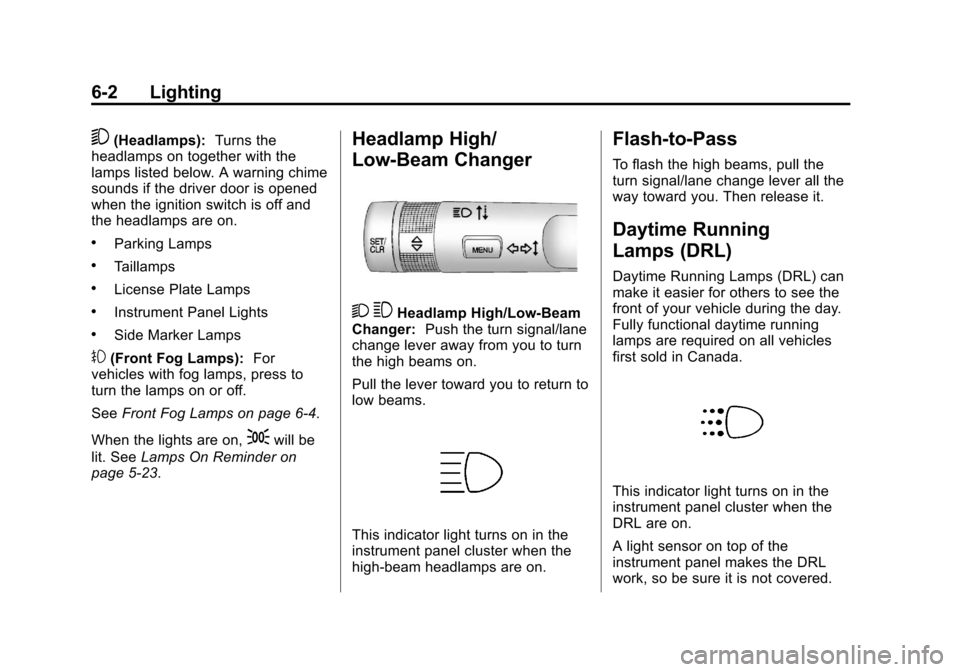
This indicator light turns on in the
instrument panel cluster when the
high‐beam headlamps are on.
Flash-to-Pass
To flash the high beams, pull the
turn signal/lane change lever all the
way toward you. Then release it.
Daytime Running
Lamps (DRL)
Daytime Running Lamps (DRL) can
make it easier for others to see the
front of your vehicle during the day.
Fully functional daytime running
lamps are required on all vehicles
first sold in Canada.
This indicator light turns on in the
instrument panel cluster when the
DRL are on.
A light sensor on top of the
instrument panel makes the DRL
work, so be sure it is not covered.
Page 155 of 394
Black plate (3,1)Chevrolet Cruze Owner Manual - 2011
Lighting 6-3
The DRL system makes the low‐
beam headlamps come on at a
reduced brightness when the
following conditions are met:
.The ignition is in the ON/
RUN mode.
.The exterior lamps control is
in AUTO.
.The engine is running.
When the DRL are on, only the low‐
beam headlamps, at a reduced level
of brightness, will be on. The
taillamps, sidemarker, instrument
panel, and other lamps will not
be on.
The headlamps automatically
change from DRL to the regular
headlamps depending on the
darkness of the surroundings. The
other lamps that come on with the
headlamps will also come on.
When it is bright enough outside,
the headlamps go off and the DRL
come on. To turn the DRL lamps off or on
again, turn the exterior lamps
control to the off position and then
release. For vehicles first sold in
Canada, the DRL lamps cannot be
turned off.
Automatic Headlamp
System
When it is dark enough outside and
the exterior lamps control is in the
automatic position, the headlamps
come on automatically. See
Exterior
Lamp Controls on page 6‑1.
The vehicle has a light sensor
located on top of the instrument
panel. Make sure it is not covered,
or the headlamps will be on when
they are not needed.
The system may also turn on the
headlamps when driving through a
parking garage or tunnel.
Hazard Warning Flashers
|
Hazard Warning Flasher:
Press and momentarily hold this
button located on the instrument
panel above the climate control
system, to make the front and rear
turn signal lamps flash on and off.
This warns others that you are
having trouble. Press and
momentarily hold again to turn the
flashers off.
Page 203 of 394

Black plate (3,1)Chevrolet Cruze Owner Manual - 2011
Driving and Operating 9-3
For persons under 21, it is against
the law in every U.S. state to drink
alcohol. There are good medical,
psychological, and developmental
reasons for these laws.
The obvious way to eliminate the
leading highway safety problem is
for people never to drink alcohol
and then drive.
Medical research shows that alcohol
in a person's system can make
crash injuries worse, especially
injuries to the brain, spinal cord,
or heart. This means that
when anyone who has been
drinking—driver or passenger —is
in a crash, that person's chance of
being killed or permanently disabled
is higher than if the person had not
been drinking.Control of a Vehicle
The following three systems
help to control the vehicle while
driving —brakes, steering, and
accelerator. At times, as when
driving on snow or ice, it is easy to
ask more of those control systems
than the tires and road can provide.
Meaning, you can lose control of the
vehicle.
Adding non‐dealer accessories can
affect vehicle performance. See
Accessories and Modifications on
page 10‑3.
Braking
See Brake System Warning Light on
page 5‑16.
Braking action involves perception
time and reaction time. Deciding to
push the brake pedal is perception
time. Actually doing it is
reaction time. Average reaction time is about
three‐fourths of a second. But that is
only an average. It might be less
with one driver and as long as
two or three seconds or more with
another. Age, physical condition,
alertness, coordination, and
eyesight all play a part. So do
alcohol, drugs, and frustration. But
even in three‐fourths of a second, a
vehicle moving at 100 km/h
(60 mph) travels 20 m (66 ft). That
could be a lot of distance in an
emergency, so keeping enough
space between the vehicle and
others is important.
And, of course, actual stopping
distances vary greatly with the
surface of the road, whether it is
pavement or gravel; the condition of
the road, whether it is wet, dry,
or icy; tire tread; the condition of the
brakes; the weight of the vehicle;
and the amount of brake force
applied.
Page 207 of 394
Black plate (7,1)Chevrolet Cruze Owner Manual - 2011
Driving and Operating 9-7
Driving on Wet Roads
Rain and wet roads can reduce
vehicle traction and affect your
ability to stop and accelerate.
Always drive slower in these types
of driving conditions and avoid
driving through large puddles and
deep‐standing or flowing water.{WARNING
Wet brakes can cause crashes.
They might not work as well in a
quick stop and could cause
pulling to one side. You could
lose control of the vehicle.
After driving through a large
puddle of water or a car/vehicle
wash, lightly apply the brake
pedal until the brakes work
normally.
Flowing or rushing water creates
strong forces. Driving through
flowing water could cause the
vehicle to be carried away. If this
happens, you and other vehicle
occupants could drown. Do not
ignore police warnings and be
very cautious about trying to drive
through flowing water.
Hydroplaning
Hydroplaning is dangerous. Water
can build up under the vehicle's
tires so they actually ride on the
water. This can happen if the road is
wet enough and you are going fast
enough. When the vehicle is
hydroplaning, it has little or no
contact with the road.
There is no hard and fast rule about
hydroplaning. The best advice is to
slow down when the road is wet.
Page 211 of 394
Black plate (11,1)Chevrolet Cruze Owner Manual - 2011
Driving and Operating 9-11
Run the engine for short periods
only as needed to keep warm, but
be careful.
To save fuel, run the engine for only
short periods as needed to warm
the vehicle and then shut the engine
off and close the window most of
the way to save heat. Repeat this
until help arrives but only when you
feel really uncomfortable from the
cold. Moving about to keep warm
also helps.
If it takes some time for help to
arrive, now and then when you run
the engine, push the accelerator
pedal slightly so the engine runs
faster than the idle speed. This
keeps the battery charged to restart
the vehicle and to signal for help
with the headlamps. Do this as little
as possible to save fuel.If the Vehicle is Stuck
Slowly and cautiously spin the
wheels to free the vehicle when
stuck in sand, mud, ice, or snow.
If stuck too severely for the traction
system to free the vehicle, turn the
traction system off and use the
rocking method.{WARNING
If the vehicle's tires spin at high
speed, they can explode, and you
or others could be injured. The
vehicle can overheat, causing an
engine compartment fire or other
damage. Spin the wheels as little
as possible and avoid going
above 55 km/h (35 mph).
For information about using tire
chains on the vehicle, see Tire
Chains on page 10‑65.
Page 212 of 394

Black plate (12,1)Chevrolet Cruze Owner Manual - 2011
9-12 Driving and Operating
Rocking the Vehicle to Get
it Out
Turn the steering wheel left and
right to clear the area around the
front wheels. Turn off any traction
system. Shift back and forth
between R (Reverse) and a forward
gear, or with a manual transmission,
between 1 (First) or 2 (Second) and
R (Reverse), spinning the wheels as
little as possible. To prevent
transmission wear, wait until the
wheels stop spinning before shifting
gears. Release the accelerator
pedal while shifting, and press
lightly on the accelerator pedal
when the transmission is in gear.
Slowly spinning the wheels in the
forward and reverse directions
causes a rocking motion that could
free the vehicle. If that does not get
the vehicle out after a few tries, it
might need to be towed out. If the
vehicle does need to be towed out,
seeTowing the Vehicle on
page 10‑87.
Vehicle Load Limits
It is very important to know how
much weight the vehicle can
carry. This weight is called the
vehicle capacity weight and
includes the weight of all
occupants, cargo and all
nonfactory‐installed options.
Two labels on the vehicle show
how much weight it may
properly carry, the Tire and
Loading Information label and
the Certification label.{WARNING
Do not load the vehicle any
heavier than the Gross
Vehicle Weight Rating
(GVWR), or either the
maximum front or rear Gross
Axle Weight Rating (GAWR).
If you do, parts on the vehicle
can break, and it can change
the way the vehicle handles.
These could cause you to lose
control and crash. Also,
overloading can shorten the
life of the vehicle.