2011 CHEVROLET CRUZE check engine
[x] Cancel search: check enginePage 249 of 394
Black plate (49,1)Chevrolet Cruze Owner Manual - 2011
Driving and Operating 9-49
Parking on Hills
{WARNING
Parking the vehicle on a hill with
the trailer attached can be
dangerous. If something goes
wrong, the rig could start to move.
People can be injured, and both
the vehicle and the trailer can be
damaged. When possible, always
park the rig on a flat surface.
If parking the rig on a hill:
1. Press the brake pedal, but do not shift into P (Park) yet for
vehicles with an automatic
transmission, or into gear for
vehicles with a manual
transmission. Turn the wheels
into the curb if facing downhill or
into traffic if facing uphill.
2. Have someone place chocks under the trailer wheels. 3. When the wheel chocks are in
place, release the brake pedal
until the chocks absorb the load.
4. Reapply the brake pedal. Then apply the parking brake and shift
into P (Park) for vehicles with an
automatic transmission or into
gear for vehicles with a manual
transmission.
5. Release the brake pedal.
Leaving After Parking on a Hill
1. Apply and hold the brake pedal while you:
.Start the engine,
.Shift into a gear, and
.Release the parking brake.
2. Let up on the brake pedal.
3. Drive slowly until the trailer is clear of the chocks.
4. Stop and have someone pick up and store the chocks.
Maintenance When Trailer
Towing
The vehicle needs service more
often when pulling a trailer. See this
manual's Maintenance Schedule or
Index for more information. Things
that are especially important in
trailer operation are automatic
transmission fluid, engine oil, axle
lubricant, belts, cooling system, and
brake system. It is a good idea to
inspect these before and during
the trip.
Check periodically to see that all
hitch nuts and bolts are tight.
Engine Cooling When Trailer
Towing
The cooling system may temporarily
overheat during severe operating
conditions. See Engine Overheating
on page 10‑20.
Page 253 of 394
Black plate (1,1)Chevrolet Cruze Owner Manual - 2011
Vehicle Care 10-1
Vehicle Care
General Information
General Information . . . . . . . . . . 10-2
California Proposition65 Warning . . . . . . . . . . . . . . . . . 10-3
California Perchlorate Materials Requirements . . . . 10-3
Accessories and Modifications . . . . . . . . . . . . . . . 10-3
Vehicle Checks
Doing Your OwnService Work . . . . . . . . . . . . . . . 10-4
Hood . . . . . . . . . . . . . . . . . . . . . . . . 10-4
Engine Compartment Overview . . . . . . . . . . . . . . . . . . . 10-6
Engine Oil . . . . . . . . . . . . . . . . . . . 10-9
Engine Oil Life System . . . . . 10-12
Automatic Transmission Fluid . . . . . . . . . . . . . . . . . . . . . . 10-13
Manual Transmission Fluid . . . . . . . . . . . . . . . . . . . . . . 10-14
Hydraulic Clutch . . . . . . . . . . . . 10-14
Engine Air Cleaner/Filter . . . . 10-15
Cooling System . . . . . . . . . . . . 10-16
Engine Coolant . . . . . . . . . . . . . 10-17
Engine Overheating . . . . . . . . 10-20 Overheated Engine
Protection
Operating Mode . . . . . . . . . . . 10-22
Power Steering Fluid . . . . . . . 10-22
Washer Fluid . . . . . . . . . . . . . . . 10-22
Brakes . . . . . . . . . . . . . . . . . . . . . 10-23
Brake Fluid . . . . . . . . . . . . . . . . . 10-24
Battery . . . . . . . . . . . . . . . . . . . . . 10-26
Starter Switch Check . . . . . . . 10-26
Automatic Transmission Shift Lock Control Function
Check . . . . . . . . . . . . . . . . . . . . . 10-27
Ignition Transmission Lock Check . . . . . . . . . . . . . . . . . . . . . 10-28
Park Brake and P (Park) Mechanism Check . . . . . . . . 10-28
Wiper Blade Replacement . . . . . . . . . . . . . . 10-29
Windshield Replacement . . . 10-29
Headlamp Aiming
Headlamp Aiming . . . . . . . . . . 10-30
Bulb Replacement
Bulb Replacement . . . . . . . . . . 10-30
Headlamps, Front Turn Signal, Sidemarker, and
Parking Lamps . . . . . . . . . . . . 10-30 Taillamps, Turn Signal,
Sidemarker, Stoplamps,
and Back-Up Lamps . . . . . . 10-32
License Plate Lamp . . . . . . . . 10-35
Replacement Bulbs . . . . . . . . . 10-36
Electrical System
Electrical System Overload . . . . . . . . . . . . . . . . . . 10-36
Fuses and Circuit Breakers . . . . . . . . . . . . . . . . . . 10-37
Engine Compartment Fuse Block . . . . . . . . . . . . . . . . . . . . . 10-37
Instrument Panel Fuse Block . . . . . . . . . . . . . . . . . . . . . 10-41
Wheels and Tires
Tires . . . . . . . . . . . . . . . . . . . . . . . . 10-42
Winter Tires . . . . . . . . . . . . . . . . 10-43
Low-Profile Tires . . . . . . . . . . . 10-44
Tire Sidewall Labeling . . . . . . 10-44
Tire Designations . . . . . . . . . . . 10-47
Tire Terminology andDefinitions . . . . . . . . . . . . . . . . 10-47
Tire Pressure . . . . . . . . . . . . . . . 10-50
Tire Pressure Monitor System . . . . . . . . . . . . . . . . . . . 10-52
Tire Pressure Monitor Operation . . . . . . . . . . . . . . . . . 10-53
Page 259 of 394

Black plate (7,1)Chevrolet Cruze Owner Manual - 2011
Vehicle Care 10-7
A.Engine Air Cleaner/Filter on
page 10‑15.
B. Engine Oil Dipstick. See “Checking Engine Oil” under
Engine Oil on page 10‑9.
C. Electric Engine Cooling Fans (Out of View). See Cooling
System on page 10‑16.
D. Engine Oil Fill Cap. See “When
to Add Engine Oil” under
Engine Oil on page 10‑9. E. Remote Negative (-) Terminal.
See Jump Starting on
page 10‑84.
F. Brake/Clutch Fluid Reservoir. See “Brake Fluid” underBrakes
on page 10‑23 andHydraulic
Clutch on page 10‑14.
G. Battery on page 10‑26 (Under
Cover).
H. Engine Coolant Surge Tank and Pressure Cap. See Engine
Coolant on page 10‑17. I. Remote Positive (+) Terminal.
See Jump Starting on
page 10‑84.
J. Engine Compartment Fuse
Block on page 10‑37.
K. Windshield Washer Fluid Reservoir. See “Adding Washer
Fluid” under Washer Fluid on
page 10‑22.
Page 261 of 394
Black plate (9,1)Chevrolet Cruze Owner Manual - 2011
Vehicle Care 10-9
A.Engine Air Cleaner/Filter on
page 10‑15.
B. Engine Oil Dipstick. See “Checking Engine Oil” under
Engine Oil on page 10‑9.
C. Engine Cooling Fans (Out of View). See Cooling System on
page 10‑16.
D. Engine Oil Fill Cap. See “When
to Add Engine Oil” under
Engine Oil on page 10‑9.
E. Remote Negative (-) Terminal. See Jump Starting on
page 10‑84.
F. Brake/Clutch Fluid Reservoir. See “Brake Fluid” underBrakes
on page 10‑23 andHydraulic
Clutch on page 10‑14. G.
Battery on page 10‑26 (Under
Cover).
H. Engine Coolant Surge Tank and Pressure Cap. See Cooling
System on page 10‑16.
I. Remote Positive (+) Terminal. See Jump Starting on
page 10‑84.
J. Engine Compartment Fuse
Block on page 10‑37.
K. Windshield Washer Fluid Reservoir. See “Adding Washer
Fluid” under Washer Fluid on
page 10‑22.Engine Oil
To ensure proper engine
performance and long life, careful
attention must be paid to engine oil.
Following these simple, but
important steps will help protect
your investment:
.Always use engine oil approved
to the proper specification and of
the proper viscosity grade. See
“Selecting the Right Engine Oil”
in this section.
.Check the engine oil level
regularly and maintain the
proper oil level. See “Checking
Engine Oil” and“When to Add
Engine Oil” in this section.
.Change the engine oil at the
appropriate time. See Engine Oil
Life System on page 10‑12.
.Always dispose of engine oil
properly. See “What to Do With
Used Oil” in this section.
Page 262 of 394
Black plate (10,1)Chevrolet Cruze Owner Manual - 2011
10-10 Vehicle Care
Checking Engine Oil
It is a good idea to check the engine
oil level at each fuel fill. In order to
get an accurate reading, the vehicle
must be on level ground. The
engine oil dipstick handle is a yellow
loop. SeeEngine Compartment
Overview on page 10‑6 for the
location of the engine oil dipstick.
Obtaining an accurate oil level
reading is essential:
1. If the engine has been running recently, turn off the engine and
allow several minutes for the oil
to drain back into the oil pan.
Checking the oil level too soon
after engine shut off will not
provide an accurate oil level
reading.
2. Pull out the dipstick and clean it with a paper towel or cloth, then
push it back in all the way.
Remove it again, keeping the tip
down, and check the level.
When to Add Engine Oil
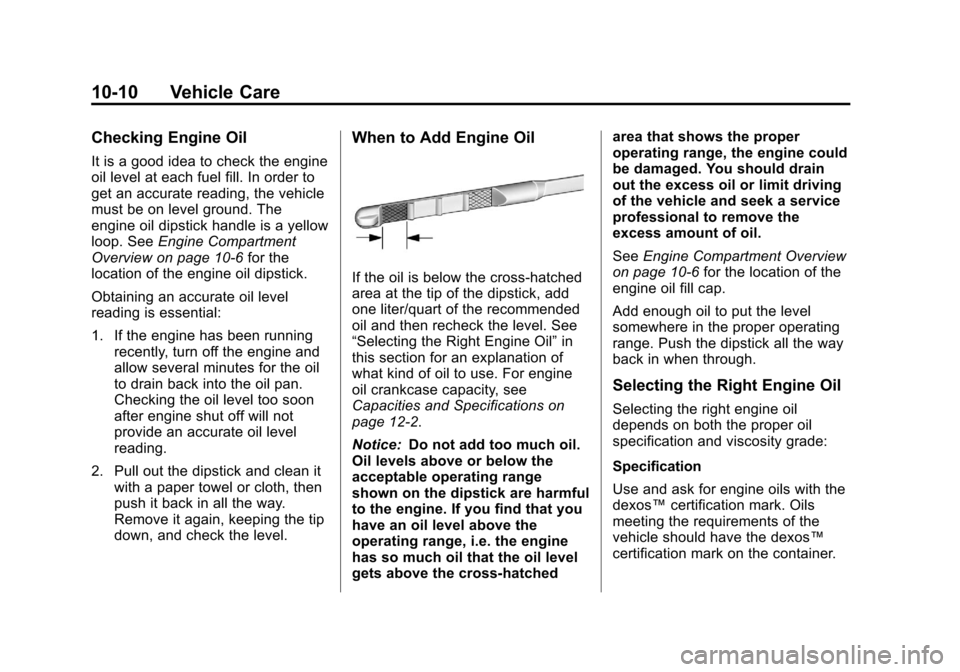
If the oil is below the cross-hatched
area at the tip of the dipstick, add
one liter/quart of the recommended
oil and then recheck the level. See
“Selecting the Right Engine Oil” in
this section for an explanation of
what kind of oil to use. For engine
oil crankcase capacity, see
Capacities and Specifications on
page 12‑2.
Notice: Do not add too much oil.
Oil levels above or below the
acceptable operating range
shown on the dipstick are harmful
to the engine. If you find that you
have an oil level above the
operating range, i.e. the engine
has so much oil that the oil level
gets above the cross-hatched area that shows the proper
operating range, the engine could
be damaged. You should drain
out the excess oil or limit driving
of the vehicle and seek a service
professional to remove the
excess amount of oil.
See
Engine Compartment Overview
on page 10‑6 for the location of the
engine oil fill cap.
Add enough oil to put the level
somewhere in the proper operating
range. Push the dipstick all the way
back in when through.
Selecting the Right Engine Oil
Selecting the right engine oil
depends on both the proper oil
specification and viscosity grade:
Specification
Use and ask for engine oils with the
dexos™ certification mark. Oils
meeting the requirements of the
vehicle should have the dexos™
certification mark on the container.
Page 265 of 394
Black plate (13,1)Chevrolet Cruze Owner Manual - 2011
Vehicle Care 10-13
It is possible that, if driving under
the best conditions, the oil life
system might indicate that an oil
change is not necessary for up to a
year. The engine oil and filter must
be changed at least once a year
and, at this time, the system must
be reset. Your dealer has trained
service people who will perform this
work and reset the system. It is also
important to check the oil regularly
over the course of an oil drain
interval and keep it at the proper
level.
If the system is ever reset
accidentally, the oil must be
changed at 5 000 km (3,000 mi)
since the last oil change.
Remember to reset the oil life
system whenever the oil is changed.How to Reset the Engine Oil
Life System
Reset the system whenever the
engine oil is changed so that the
system can calculate the next
engine oil change. To reset the
system:
1. Using the DIC MENU button andthumbwheel, scroll until you
reach REMAINING OIL LIFE on
the DIC (oil can symbol with
% sign for Canada).
2. Press the SET button to reset the oil life at 100%. When
prompted, use the thumbwheel
to highlight YES or NO. Press
the SET/CLEAR button to
confirm.
Be careful not to reset the oil life
display accidentally at any time
other than after the oil is changed.
It cannot be reset accurately.
If the CHANGE ENGINE OIL SOON
DIC message or Code 82 DIC
message comes back on when the vehicle is started, the engine oil life
system has not reset. Repeat the
procedure.
Automatic Transmission
Fluid
How to Check Automatic
Transmission Fluid
It is not necessary to check the
transmission fluid level.
A transmission fluid leak is the only
reason for fluid loss. If a leak
occurs, take the vehicle to your
dealer service department and have
it repaired as soon as possible.
The vehicle is not equipped with a
transmission fluid level dipstick.
There is a special procedure for
checking and changing the
transmission fluid. Because this
procedure is difficult, this should be
done at the dealer service
department. Contact the dealer for
additional information.
Page 266 of 394
Black plate (14,1)Chevrolet Cruze Owner Manual - 2011
10-14 Vehicle Care
Change the fluid and filter at the
intervals listed inScheduled
Maintenance on page 11‑2, and be
sure to use the fluid listed in
Recommended Fluids and
Lubricants on page 11‑6.
Manual Transmission
Fluid
How to Check Manual
Transmission Fluid
It is not necessary to check the
manual transmission fluid level.
A transmission fluid leak is the only
reason for fluid loss. If a leak
occurs, take the vehicle to your
dealer service department and have
it repaired as soon as possible. See
Recommended Fluids and
Lubricants on page 11‑6 for the
proper fluid to use.
Hydraulic Clutch
For vehicles with a manual
transmission, it is not necessary to
regularly check brake/clutch fluid
unless there is a leak suspected.
Adding fluid will not correct a leak.
A fluid loss in this system could
indicate a problem. Have the
system inspected and repaired.
When to Check and What
to Use
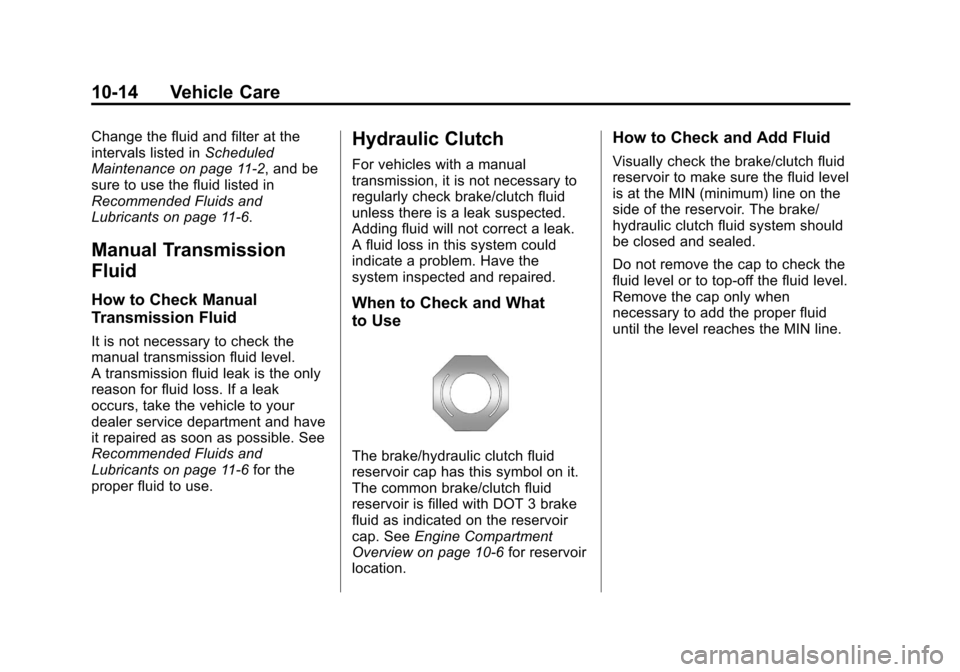
The brake/hydraulic clutch fluid
reservoir cap has this symbol on it.
The common brake/clutch fluid
reservoir is filled with DOT 3 brake
fluid as indicated on the reservoir
cap. See Engine Compartment
Overview on page 10‑6 for reservoir
location.
How to Check and Add Fluid
Visually check the brake/clutch fluid
reservoir to make sure the fluid level
is at the MIN (minimum) line on the
side of the reservoir. The brake/
hydraulic clutch fluid system should
be closed and sealed.
Do not remove the cap to check the
fluid level or to top‐off the fluid level.
Remove the cap only when
necessary to add the proper fluid
until the level reaches the MIN line.
Page 269 of 394
Black plate (17,1)Chevrolet Cruze Owner Manual - 2011
Vehicle Care 10-17
Notice:Using coolant other than
DEX-COOL®can cause premature
engine, heater core, or radiator
corrosion. In addition, the engine
coolant could require changing
sooner, at 50 000 km (30,000 mi)
or 24 months, whichever occurs
first. Any repairs would not be
covered by the vehicle warranty.
Always use DEX-COOL
(silicate-free) coolant in the
vehicle.
Engine Coolant
The cooling system in the vehicle is
filled with DEX-COOL engine
coolant. This coolant is designed to
remain in the vehicle for 5 years or
240 000 km (150,000 mi), whichever
occurs first.
The following explains the cooling
system and how to check and add
coolant when it is low. If there is a
problem with engine overheating,
see Engine Overheating on
page 10‑20.
What to Use
{WARNING
Adding only plain water or some
other liquid to the cooling system
can be dangerous. Plain water
and other liquids, can boil before
the proper coolant mixture will.
The vehicle coolant warning
system is set for the proper
coolant mixture. With plain water
or the wrong mixture, the engine
could get too hot but you would
not get the overheat warning. The
engine could catch fire and you or
others could be burned. Use a
50/50 mixture of clean, drinkable
water and DEX-COOL coolant. Use a 50/50 mixture of clean,
drinkable water and DEX-COOL
coolant. If using this mixture,
nothing else needs to be added.
This mixture:.Gives freezing protection down
to
−37°C (−34°F), outside
temperature.
.Gives boiling protection up to
129°C (265°F), engine
temperature.
.Protects against rust and
corrosion.
.Will not damage aluminum parts.
.Helps keep the proper engine
temperature.
Notice: If an improper coolant
mixture is used, the engine could
overheat and be badly damaged.
The repair cost would not be
covered by the vehicle warranty.
Too much water in the mixture
can freeze and crack the engine,
radiator, heater core, and other
parts.