2011 CHEVROLET CORVETTE center console
[x] Cancel search: center consolePage 14 of 428

Black plate (8,1)Chevrolet Corvette Owner Manual - 2011
1-8 In Brief
Reclining Seatbacks
To recline the seatback:
1. Lift the lever on the outboardside of the seat.
2. Move the seatback to the desired position, and then
release the lever to lock the
seatback in place.
3. Push and pull on the seatback to make sure it is locked.
See Reclining Seatbacks on
page 3‑6 for more information.
Heated Seats
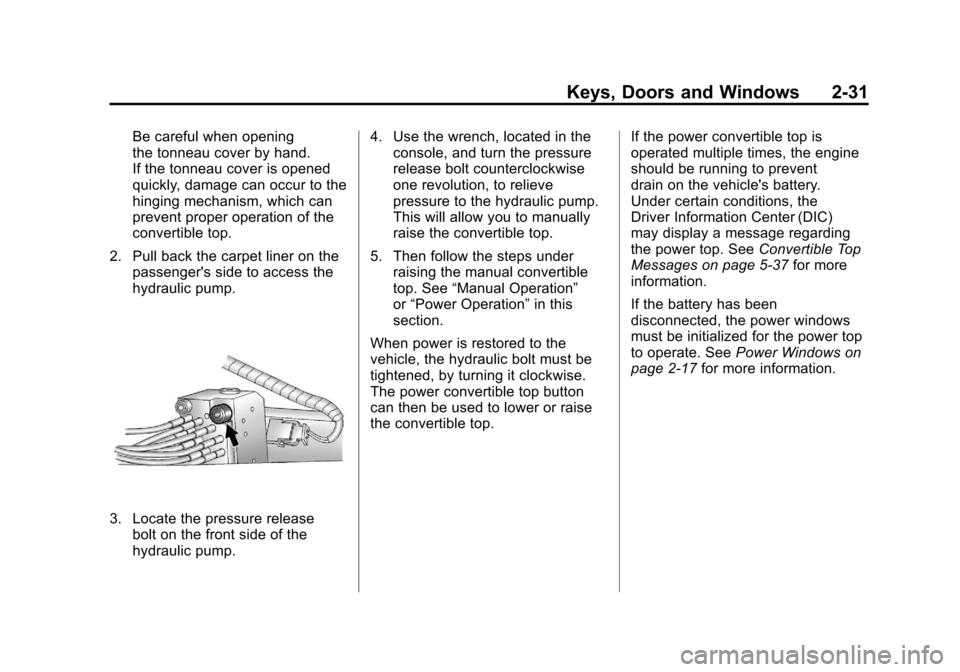
On vehicles with heated seats, the
buttons are on the center console.
The ignition must be on for this
feature to work.
L:Press to turn on the heated
seat at the high setting.
Press again to switch to the low
setting.
9: Press to turn the system off.
See Heated Front Seats on
page 3‑8 for more information.
Memory Features
On vehicles with the memory
feature, the controls on the driver
door are used to program and recall
memory settings for the driver seat,
outside mirrors, and the telescopic
steering column.
Page 26 of 428

Black plate (20,1)Chevrolet Corvette Owner Manual - 2011
1-20 In Brief
TRIP:Press to display your total
and trip distance driven, the elapsed
time function, your average speed,
and the engine oil life.
OPTION: Press to choose personal
options that are available on your
vehicle, depending on the options
your vehicle is equipped with, such
as door locks, easy entry seats, and
language.
RESET: Press, along with the other
buttons, to reset system functions,
select personal options, and turn
off or acknowledge messages on
the DIC.
For more information, see Driver
Information Center (DIC) on
page 5‑25.Vehicle Personalization
Some vehicle features can be
programmed by using the DIC
buttons on the left side of the
steering wheel. The features that
can be programmed include:
.Units
.Memory Features
.Lighting Features
.Lock and Unlock Feedback
.Door Lock and Unlock Settings
.Language
.Personalization Name
See Vehicle Personalization on
page 5‑55.
Power Outlets
The accessory power outlet can be
used to plug in electrical equipment,
such as a cell phone or MP3 player.
The accessory power outlet is
located inside the center console
storage compartment, on the
forward left side.
Remove the cover to access and
replace when not in use.
See Power Outlets on page 5‑6.
Roof Panel
On vehicles with a removable
roof panel, there are three release
latches. Two are located on the front
of the roof panel and the other is
located on the back of the roof
panel. See “Removing the Roof
Panel” underRoof Panel on
page 2‑18.
Page 63 of 428

Black plate (31,1)Chevrolet Corvette Owner Manual - 2011
Keys, Doors and Windows 2-31
Be careful when opening
the tonneau cover by hand.
If the tonneau cover is opened
quickly, damage can occur to the
hinging mechanism, which can
prevent proper operation of the
convertible top.
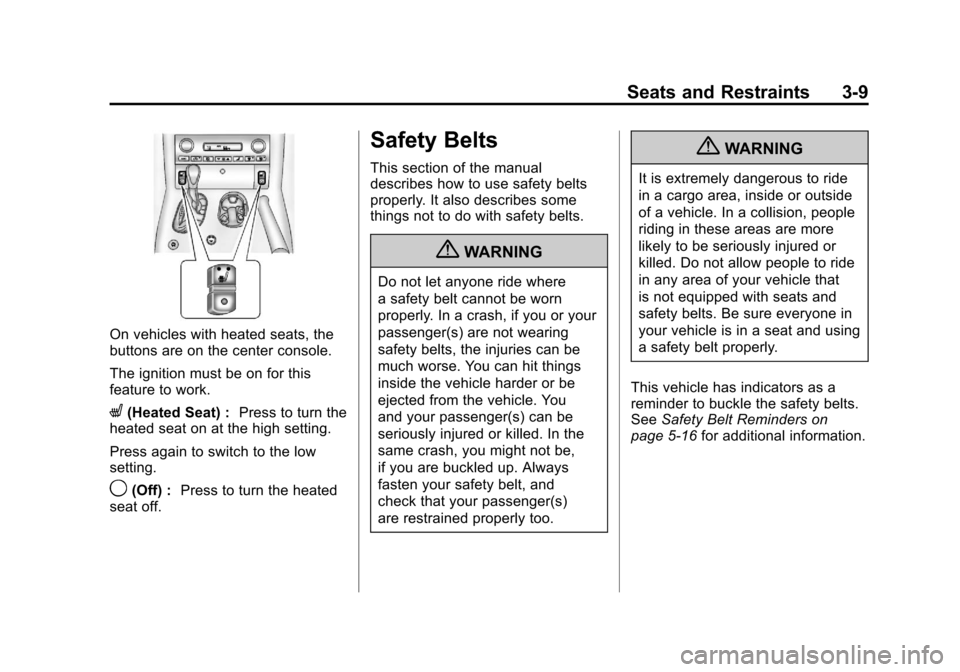
2. Pull back the carpet liner on the passenger's side to access the
hydraulic pump.
3. Locate the pressure releasebolt on the front side of the
hydraulic pump. 4. Use the wrench, located in the
console, and turn the pressure
release bolt counterclockwise
one revolution, to relieve
pressure to the hydraulic pump.
This will allow you to manually
raise the convertible top.
5. Then follow the steps under raising the manual convertible
top. See “Manual Operation”
or “Power Operation” in this
section.
When power is restored to the
vehicle, the hydraulic bolt must be
tightened, by turning it clockwise.
The power convertible top button
can then be used to lower or raise
the convertible top. If the power convertible top is
operated multiple times, the engine
should be running to prevent
drain on the vehicle's battery.
Under certain conditions, the
Driver Information Center (DIC)
may display a message regarding
the power top. See
Convertible Top
Messages on page 5‑37 for more
information.
If the battery has been
disconnected, the power windows
must be initialized for the power top
to operate. See Power Windows on
page 2‑17 for more information.
Page 73 of 428

Black plate (9,1)Chevrolet Corvette Owner Manual - 2011
Seats and Restraints 3-9
On vehicles with heated seats, the
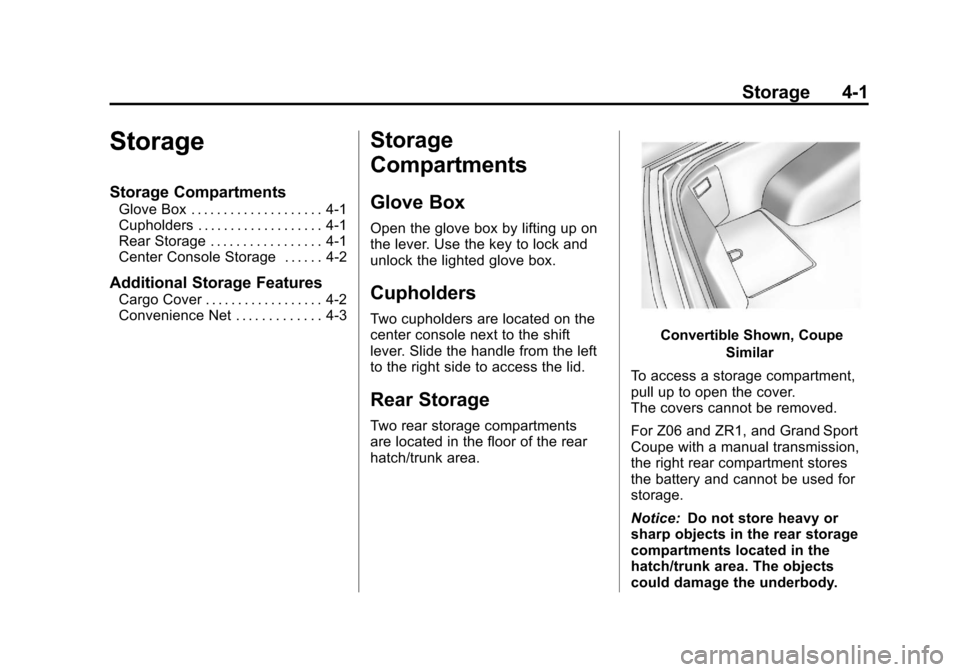
buttons are on the center console.
The ignition must be on for this
feature to work.
L(Heated Seat) :Press to turn the
heated seat on at the high setting.
Press again to switch to the low
setting.
9(Off) : Press to turn the heated
seat off.
Safety Belts
This section of the manual
describes how to use safety belts
properly. It also describes some
things not to do with safety belts.
{WARNING
Do not let anyone ride where
a safety belt cannot be worn
properly. In a crash, if you or your
passenger(s) are not wearing
safety belts, the injuries can be
much worse. You can hit things
inside the vehicle harder or be
ejected from the vehicle. You
and your passenger(s) can be
seriously injured or killed. In the
same crash, you might not be,
if you are buckled up. Always
fasten your safety belt, and
check that your passenger(s)
are restrained properly too.
{WARNING
It is extremely dangerous to ride
in a cargo area, inside or outside
of a vehicle. In a collision, people
riding in these areas are more
likely to be seriously injured or
killed. Do not allow people to ride
in any area of your vehicle that
is not equipped with seats and
safety belts. Be sure everyone in
your vehicle is in a seat and using
a safety belt properly.
This vehicle has indicators as a
reminder to buckle the safety belts.
See Safety Belt Reminders on
page 5‑16 for additional information.
Page 117 of 428

Black plate (1,1)Chevrolet Corvette Owner Manual - 2011
Storage 4-1
Storage
Storage Compartments
Glove Box . . . . . . . . . . . . . . . . . . . . 4-1
Cupholders . . . . . . . . . . . . . . . . . . . 4-1
Rear Storage . . . . . . . . . . . . . . . . . 4-1
Center Console Storage . . . . . . 4-2
Additional Storage Features
Cargo Cover . . . . . . . . . . . . . . . . . . 4-2
Convenience Net . . . . . . . . . . . . . 4-3
Storage
Compartments
Glove Box
Open the glove box by lifting up on
the lever. Use the key to lock and
unlock the lighted glove box.
Cupholders
Two cupholders are located on the
center console next to the shift
lever. Slide the handle from the left
to the right side to access the lid.
Rear Storage
Two rear storage compartments
are located in the floor of the rear
hatch/trunk area.
Convertible Shown, CoupeSimilar
To access a storage compartment,
pull up to open the cover.
The covers cannot be removed.
For Z06 and ZR1, and Grand Sport
Coupe with a manual transmission,
the right rear compartment stores
the battery and cannot be used for
storage.
Notice: Do not store heavy or
sharp objects in the rear storage
compartments located in the
hatch/trunk area. The objects
could damage the underbody.
Page 118 of 428

Black plate (2,1)Chevrolet Corvette Owner Manual - 2011
4-2 Storage
Rear Trunk Partition
For vehicles with the power
convertible top option only,
there is a trunk partition to keep
cargo from getting in the way of
the convertible top. The trunk
partition must be in place for the
convertible top to move. If the trunk
partition is not properly in place
the ATTACH TRUNK PARTITION
message displays. SeeConvertible
Top Messages on page 5‑37 for
more information.
The trunk partition is a flat carpeted
board with a horizontal flap that can
be attached to the top of the trunk to
divide the storage compartment or it
stores flat when not in use.
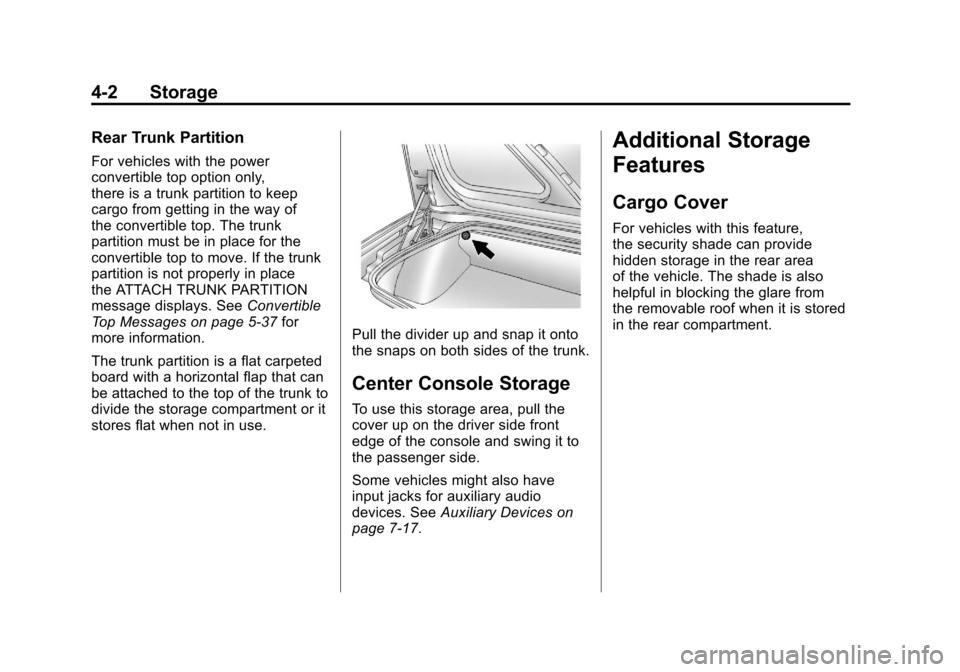
Pull the divider up and snap it onto
the snaps on both sides of the trunk.
Center Console Storage
To use this storage area, pull the
cover up on the driver side front
edge of the console and swing it to
the passenger side.
Some vehicles might also have
input jacks for auxiliary audio
devices. See Auxiliary Devices on
page 7‑17.
Additional Storage
Features
Cargo Cover
For vehicles with this feature,
the security shade can provide
hidden storage in the rear area
of the vehicle. The shade is also
helpful in blocking the glare from
the removable roof when it is stored
in the rear compartment.
Page 126 of 428

Black plate (6,1)Chevrolet Corvette Owner Manual - 2011
5-6 Instruments and Controls
Depending on the mirror, in order
to calibrate, CAL must be displayed
in the mirror compass windows.
If CAL is not displayed, press
Pfor
several seconds or until CAL is
displayed.
If the compass has map lamps, it
can be placed in calibration mode
by pressing and holding the left map
light button until a C appears on the
compass display.
The mirror compass can be
calibrated by driving the vehicle
in circles at 8 km/h (5 mph) or less
until the display reads a direction.
Compass Variance
The mirror is set to zone eight.
If you do not live in zone eight or
drive out of the area, the compass
variance needs to be changed to
the appropriate zone. To adjust for compass variance:
1. Find your current location and
variance zone number on the
zone map that follows.2. Press and holdPuntil a Z and
a zone number displays. The
compass is now in zone mode.
3. Once the zone number displays, press
Prepeatedly until you
reach the correct zone number.
Stop pressing
Pand the mirror
returns to normal operation.
Clock
To set the clock:
1. Press and hold H until the correct hour displays.
2. Press and hold M until the correct minute displays.
The clock mode automatically times
out with the changed display format
set as the current default setting.
Power Outlets
The accessory power outlet can be
used to plug in electrical equipment,
such as a cell phone or MP3 player.
The accessory power outlet is
located inside the center console
storage compartment, on the
forward left side.
Remove the cover to access and
replace when not in use.
Page 162 of 428

Black plate (42,1)Chevrolet Corvette Owner Manual - 2011
5-42 Instruments and Controls
LOW FUEL
This message displays when the
fuel tank is less than 10 percent
full and the display is turned off.
A sound will be heard when this
message is displayed. Refill the fuel
tank as soon as possible. SeeFuel
Gauge on page 5‑11.
SERVICE FUEL SYSTEM
This message displays if the
Powertrain Control Module (PCM)
has detected a problem within
the fuel system. Have the vehicle
serviced by your dealer. This
message also displays when the
cluster is not getting fuel information
from the PCM.
Key and Lock Messages
FOB AUTOLEARN WAIT
XX MINUTES
See “Matching Transmitter(s) to
Your Vehicle” underRemote
Keyless Entry (RKE) System
Operation on page 2‑3.
FOB BATTERY LOW
See “Battery Replacement” under
Remote Keyless Entry (RKE)
System Operation on page 2‑3.
KNOWN FOB
See “Matching Transmitter(s) to
Your Vehicle” underRemote
Keyless Entry (RKE) System
Operation on page 2‑3.
MAXIMUM NUMBER OF FOBS
LEARNED
See “Matching Transmitter(s) to
Your Vehicle” underRemote
Keyless Entry (RKE) System
Operation on page 2‑3.
NO FOBS DETECTED
This message displays if the vehicle
does not detect the presence of a
keyless access transmitter when
you have attempted to start the
vehicle or a vehicle door has just
closed. The following conditions
may cause this message to appear:
.Driver-added equipment plugged
into the accessory power outlet
on the center console is causing
interference. Examples of these
devices are cell phones and cell
phone chargers, two-way radios,
power inverters, or similar items.
Try moving the keyless access
transmitter away from these
devices when starting the
vehicle. In addition, PDA devices
and remote garage and gate
openers may also generate
Electromagnetic Interference
(EMI) that may interfere with
the keyless access transmitter.
Do not carry the keyless access
transmitter in the same pocket or
bag as these devices.