2011 CHEVROLET CORVETTE light
[x] Cancel search: lightPage 96 of 428

Black plate (32,1)Chevrolet Corvette Owner Manual - 2011
3-32 Seats and Restraints
For some children who have
outgrown child restraints and for
very small adults, the passenger
sensing system may or may not
turn off the right front passenger
frontal airbag and seat-mounted
side impact airbag, depending
upon the person's seating posture
and body build. Everyone in the
vehicle who has outgrown child
restraints should wear a safety belt
properly—whether or not there is
an airbag for that person.
{WARNING
If the airbag readiness light ever
comes on and stays on, it means
that something may be wrong
with the airbag system. To help
avoid injury to yourself or others,
have the vehicle serviced right
away. See Airbag Readiness
Light on page 5‑16 for more
information, including important
safety information.
If the On Indicator is Lit for a
Child Restraint
If a child restraint has been installed
and the on indicator is lit:
1. Turn the vehicle off.
2. Remove the child restraint from the vehicle.
3. Remove any additional items from the seat such as blankets,
cushions, seat covers, seat
heaters, or seat massagers.
4. Reinstall the child restraint following the directions
provided by the child restraint
manufacturer and refer to
Securing Child Restraints on
page 3‑48. 5. If, after reinstalling the child
restraint and restarting the
vehicle, the on indicator is
still lit, turn the vehicle off.
Then slightly recline the vehicle
seatback and adjust the seat
cushion, if adjustable, to make
sure that the vehicle seatback is
not pushing the child restraint
into the seat cushion.
6. Restart the vehicle. If the on indicator is still lit, do
not install a child restraint in this
vehicle and check with your
dealer.
Page 100 of 428

Black plate (36,1)Chevrolet Corvette Owner Manual - 2011
3-36 Seats and Restraints
Your dealer and the service manual
have information about the location
of the airbag sensors, sensing and
diagnostic module and airbag
wiring.
Airbag System Check
The airbag system does not need
regularly scheduled maintenance
or replacement. Make sure the
airbag readiness light is working.
SeeAirbag Readiness Light on
page 5‑16 for more information.
Notice: If an airbag covering is
damaged, opened, or broken,
the airbag may not work properly.
Do not open or break the airbag
coverings. If there are any
opened or broken airbag covers,
have the airbag covering and/or
airbag module replaced. For the
location of the airbag modules,
see What Makes an Airbag
Inflate? on page 3‑27. See your
dealer for service.
Replacing Airbag System
Parts After a Crash
{WARNING
A crash can damage the airbag
systems in your vehicle.
A damaged airbag system
may not work properly and
may not protect you and your
passenger(s) in a crash, resulting
in serious injury or even death.
To help make sure your airbag
systems are working properly
after a crash, have them
inspected and any necessary
replacements made as soon
as possible. If an airbag inflates, you will need
to replace airbag system parts.
See your dealer for service.
If the airbag readiness light stays on
after the vehicle is started or comes
on when you are driving, the airbag
system may not work properly.
Have the vehicle serviced right
away. See
Airbag Readiness Light
on page 5‑16 for more information.
Page 113 of 428

Black plate (49,1)Chevrolet Corvette Owner Manual - 2011
Seats and Restraints 3-49
WARNING (Continued)
Secure rear-facing child
restraints in a rear seat, even if
the airbag is off. If you secure a
forward-facing child restraint in
the right front seat, always move
the front passenger seat as far
back as it will go. It is better to
secure the child restraint in a
rear seat.
SeePassenger Sensing System
on page 3‑30 for additional
information.
Rear-facing child restraints should
not be installed in the vehicle, even
if the airbag(s) are off.
If the child restraint has the LATCH
system, see Lower Anchors and
Tethers for Children (LATCH
System) (Coupe and Convertible
Models Only) on page 3‑43 or
Lower Anchors and Tethers for Children (LATCH System) (Z06 and
ZR1 Models Only) on page 3‑44
for
how and where to install the child
restraint using LATCH. If a child
restraint is secured using a safety
belt and it uses a top tether, see
Lower Anchors and Tethers for
Children (LATCH System) (Coupe
and Convertible Models Only) on
page 3‑43 orLower Anchors and
Tethers for Children (LATCH
System) (Z06 and ZR1 Models
Only) on page 3‑44 for top tether
anchor locations.
Do not secure a child seat in a
position without a top tether anchor
if a national or local law requires
that the top tether be anchored, or if
the instructions that come with the
child restraint say that the top strap
must be anchored.
In Canada, the law requires that
forward-facing child restraints have
a top tether, and that the tether be
attached. You will be using the lap-shoulder
belt to secure the child restraint in
this position. Follow the instructions
that came with the child restraint.
1. Move the seat as far back as
it will go before securing the
forward-facing child restraint.
When the passenger sensing
system has turned off the right
front passenger frontal airbag
and seat-mounted side impact
airbag (if equipped), the off
indicator on the passenger
airbag status indicator should
light and stay lit when you start
the vehicle. See Passenger
Airbag Status Indicator on
page 5‑17.
2. Put the child restraint on the seat.
3. Pick up the latch plate, and run the lap and shoulder portions of
the vehicle’ s safety belt through
or around the restraint. The child
restraint instructions will show
you how.
Page 117 of 428

Black plate (1,1)Chevrolet Corvette Owner Manual - 2011
Storage 4-1
Storage
Storage Compartments
Glove Box . . . . . . . . . . . . . . . . . . . . 4-1
Cupholders . . . . . . . . . . . . . . . . . . . 4-1
Rear Storage . . . . . . . . . . . . . . . . . 4-1
Center Console Storage . . . . . . 4-2
Additional Storage Features
Cargo Cover . . . . . . . . . . . . . . . . . . 4-2
Convenience Net . . . . . . . . . . . . . 4-3
Storage
Compartments
Glove Box
Open the glove box by lifting up on
the lever. Use the key to lock and
unlock the lighted glove box.
Cupholders
Two cupholders are located on the
center console next to the shift
lever. Slide the handle from the left
to the right side to access the lid.
Rear Storage
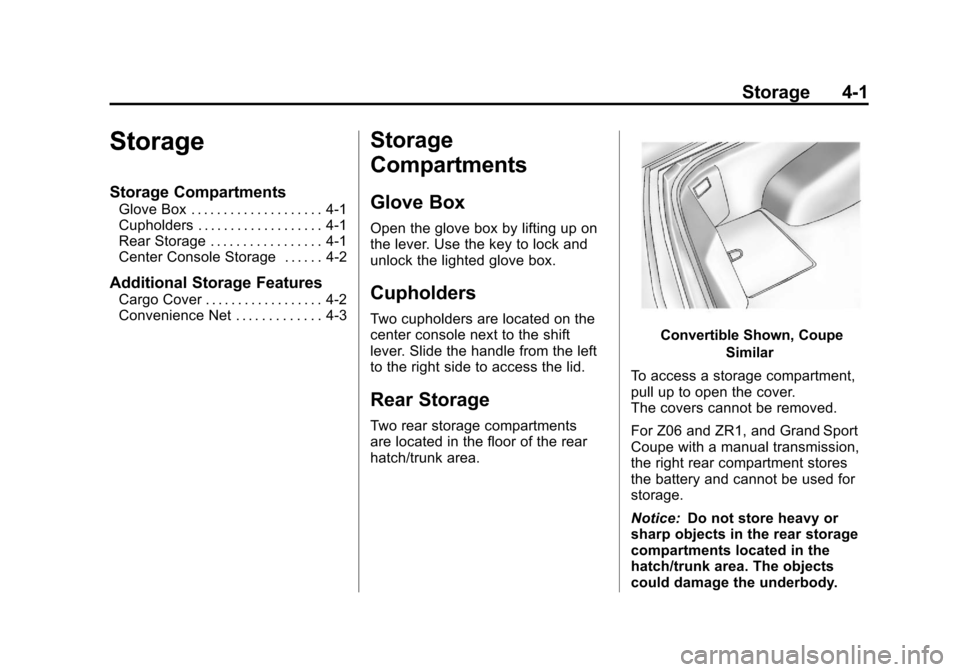
Two rear storage compartments
are located in the floor of the rear
hatch/trunk area.
Convertible Shown, CoupeSimilar
To access a storage compartment,
pull up to open the cover.
The covers cannot be removed.
For Z06 and ZR1, and Grand Sport
Coupe with a manual transmission,
the right rear compartment stores
the battery and cannot be used for
storage.
Notice: Do not store heavy or
sharp objects in the rear storage
compartments located in the
hatch/trunk area. The objects
could damage the underbody.
Page 121 of 428

Black plate (1,1)Chevrolet Corvette Owner Manual - 2011
Instruments and Controls 5-1
Instruments and
Controls
Controls
Steering Wheel Adjustment . . . 5-2
Steering Wheel Controls . . . . . . 5-3
Horn . . . . . . . . . . . . . . . . . . . . . . . . . . 5-4
Windshield Wiper/Washer . . . . . 5-4
Compass . . . . . . . . . . . . . . . . . . . . . 5-5
Clock . . . . . . . . . . . . . . . . . . . . . . . . . 5-6
Power Outlets . . . . . . . . . . . . . . . . . 5-6
Cigarette Lighter . . . . . . . . . . . . . . 5-7
Ashtrays . . . . . . . . . . . . . . . . . . . . . . 5-8
Warning Lights, Gauges, and
Indicators
Warning Lights, Gauges, andIndicators . . . . . . . . . . . . . . . . . . . . 5-8
Instrument Cluster . . . . . . . . . . . . 5-9
Speedometer . . . . . . . . . . . . . . . . 5-11
Odometer . . . . . . . . . . . . . . . . . . . . 5-11
Tachometer . . . . . . . . . . . . . . . . . . 5-11
Fuel Gauge . . . . . . . . . . . . . . . . . . 5-11
Boost Gauge (ZR1) . . . . . . . . . . 5-12
Engine Oil Pressure Gauge . . . . . . . . . . . . . . . . . . . . . . 5-13 Engine Coolant Temperature
Gauge . . . . . . . . . . . . . . . . . . . . . . 5-15
Voltmeter Gauge . . . . . . . . . . . . . 5-15
Safety Belt Reminders . . . . . . . 5-16
Airbag Readiness Light . . . . . . 5-16
Passenger Airbag Status Indicator . . . . . . . . . . . . . . . . . . . . 5-17
Malfunction Indicator Lamp . . . . . . . . . . . . . 5-18
Brake System Warning Light . . . . . . . . . . . . . . . . . . . . . . . 5-21
Antilock Brake System (ABS) Warning Light . . . . . . . . . . . . . . 5-22
One-to-Four Shift Light (Manual Transmission) . . . . . 5-22
Active Handling System Light . . . . . . . . . . . . . . . . . . . . . . . 5-23
Traction Control System (TCS) Warning Light . . . . . . . 5-23
Tire Pressure Light . . . . . . . . . . 5-24
Security Light . . . . . . . . . . . . . . . . 5-24
High-Beam on Light . . . . . . . . . 5-25
Front Fog Lamp Light . . . . . . . . 5-25
Lamps on Reminder . . . . . . . . . 5-25
Information Displays
Driver Information Center (DIC) . . . . . . . . . . . . . . . 5-25
Head-Up Display (HUD) . . . . . 5-31
Vehicle Messages
Vehicle Messages . . . . . . . . . . . 5-35
Battery Voltage and Charging Messages . . . . . . . . . . . . . . . . . . 5-35
Brake System Messages . . . . 5-36
Convertible Top Messages . . . 5-37
Cruise Control Messages . . . . 5-38
Door Ajar Messages . . . . . . . . . 5-39
Engine Cooling System Messages . . . . . . . . . . . . . . . . . . 5-39
Engine Oil Messages . . . . . . . . 5-40
Engine Power Messages . . . . 5-41
Fuel System Messages . . . . . . 5-41
Key and Lock Messages . . . . . 5-42
Lamp Messages . . . . . . . . . . . . . 5-44
Ride Control System Messages . . . . . . . . . . . . . . . . . . 5-44
Safety Belt Messages . . . . . . . 5-49
Anti-Theft Alarm System Messages . . . . . . . . . . . . . . . . . . 5-50
Service Vehicle Messages . . . 5-50
Starting the Vehicle Messages . . . . . . . . . . . . . . . . . . 5-50
Tire Messages . . . . . . . . . . . . . . . 5-51
Transmission Messages . . . . . 5-53
Vehicle Reminder Messages . . . . . . . . . . . . . . . . . . 5-54
Washer Fluid Messages . . . . . 5-54
Page 126 of 428

Black plate (6,1)Chevrolet Corvette Owner Manual - 2011
5-6 Instruments and Controls
Depending on the mirror, in order
to calibrate, CAL must be displayed
in the mirror compass windows.
If CAL is not displayed, press
Pfor
several seconds or until CAL is
displayed.
If the compass has map lamps, it
can be placed in calibration mode
by pressing and holding the left map
light button until a C appears on the
compass display.
The mirror compass can be
calibrated by driving the vehicle
in circles at 8 km/h (5 mph) or less
until the display reads a direction.
Compass Variance
The mirror is set to zone eight.
If you do not live in zone eight or
drive out of the area, the compass
variance needs to be changed to
the appropriate zone. To adjust for compass variance:
1. Find your current location and
variance zone number on the
zone map that follows.2. Press and holdPuntil a Z and
a zone number displays. The
compass is now in zone mode.
3. Once the zone number displays, press
Prepeatedly until you
reach the correct zone number.
Stop pressing
Pand the mirror
returns to normal operation.
Clock
To set the clock:
1. Press and hold H until the correct hour displays.
2. Press and hold M until the correct minute displays.
The clock mode automatically times
out with the changed display format
set as the current default setting.
Power Outlets
The accessory power outlet can be
used to plug in electrical equipment,
such as a cell phone or MP3 player.
The accessory power outlet is
located inside the center console
storage compartment, on the
forward left side.
Remove the cover to access and
replace when not in use.
Page 127 of 428

Black plate (7,1)Chevrolet Corvette Owner Manual - 2011
Instruments and Controls 5-7
{WARNING
Power is always supplied to the
outlets. Do not leave electrical
equipment plugged in when the
vehicle is not in use because the
vehicle could catch fire and cause
injury or death.
Notice: Leaving electrical
equipment plugged in for an
extended period of time while
the vehicle is off will drain the
battery. Always unplug electrical
equipment when not in use and
do not plug in equipment that
exceeds the maximum 20 ampere
rating. Certain electrical accessories
may not be compatible with the
accessory power outlet and could
overload vehicle or adapter fuses.
If a problem is experienced, see
your dealer.
When adding electrical equipment,
be sure to follow the proper
installation instructions included
with the equipment. See
Add-On
Electrical Equipment on page 9‑54.
It is recommended that a qualified
technician or dealer be seen for
the proper installation of your
equipment.
Notice: Hanging heavy
equipment from the power
outlet can cause damage not
covered by the vehicle warranty.
The power outlets are designed
for accessory power plugs only,
such as cell phone charge cords.
Cigarette Lighter
To use the cigarette lighter, push it
in all the way and let go. When it is
ready, it will pop back out by itself.
Notice: Holding a cigarette lighter
in while it is heating does not let
the lighter back away from the
heating element when it is hot.
Damage from overheating can
occur to the lighter or heating
element, or a fuse could be
blown. Do not hold a cigarette
lighter in while it is heating.
Page 128 of 428

Black plate (8,1)Chevrolet Corvette Owner Manual - 2011
5-8 Instruments and Controls
Ashtrays
The ashtray and cigarette lighter are
located on the instrument panel, in
front of the shift lever. To use the
ashtray, press on the indentation
at the top of the door.
Notice:If papers, pins, or other
flammable items are put in the
ashtray, hot cigarettes or other
smoking materials could ignite
them and possibly damage the
vehicle. Never put flammable
items in the ashtray.
Loose objects, such as paper clips,
can lodge behind and beneath the
ashtray lid and prevent movement
of the lid. You should avoid putting
small, loose objects near the
ashtray.
Warning Lights,
Gauges, and
Indicators
Warning lights and gauges can
signal that something is wrong
before it becomes serious enough
to cause an expensive repair or
replacement. Paying attention to
the warning lights and gauges could
prevent injury.
Warning lights come on when there
could be a problem with a vehicle
function. Some warning lights come
on briefly when the engine is started
to indicate they are working. Gauges can indicate when there
could be a problem with a vehicle
function. Often gauges and warning
lights work together to indicate a
problem with the vehicle.
When one of the warning lights
comes on and stays on while
driving, or when one of the gauges
shows there may be a problem,
check the section that explains what
to do. Follow this manual's advice.
Waiting to do repairs can be costly
and even dangerous.