2011 CHEVROLET COLORADO transmission oil
[x] Cancel search: transmission oilPage 113 of 392
Black plate (1,1)Chevrolet Colorado Owner Manual - 2011
Instruments and Controls 5-1
Instruments and
Controls
Controls
Steering Wheel Adjustment . . . 5-2
Horn . . . . . . . . . . . . . . . . . . . . . . . . . . 5-2
Windshield Wiper/Washer . . . . . 5-2
Compass . . . . . . . . . . . . . . . . . . . . . 5-3
Clock . . . . . . . . . . . . . . . . . . . . . . . . . 5-4
Power Outlets . . . . . . . . . . . . . . . . . 5-5
Cigarette Lighter . . . . . . . . . . . . . . 5-5
Ashtrays . . . . . . . . . . . . . . . . . . . . . . 5-6
Warning Lights, Gauges, and
Indicators
Warning Lights, Gauges, andIndicators . . . . . . . . . . . . . . . . . . . . 5-6
Chime Level Adjustment . . . . . . 5-6
Instrument Cluster . . . . . . . . . . . . 5-7
Speedometer . . . . . . . . . . . . . . . . . 5-8
Odometer . . . . . . . . . . . . . . . . . . . . . 5-8
Trip Odometer . . . . . . . . . . . . . . . . . 5-8 Tachometer . . . . . . . . . . . . . . . . . . . 5-8
Fuel Gauge . . . . . . . . . . . . . . . . . . . 5-8
Engine Coolant Temperature
Gauge . . . . . . . . . . . . . . . . . . . . . . . 5-9
Safety Belt Reminders . . . . . . . . 5-9
Airbag Readiness Light . . . . . . 5-10
Passenger Airbag Status
Indicator . . . . . . . . . . . . . . . . . . . . 5-11
Charging System Light . . . . . . 5-12
Malfunction Indicator Lamp . . . . . . . . . . . . . 5-12
Brake System Warning Light . . . . . . . . . . . . . . . . . . . . . . . 5-15
Antilock Brake System (ABS) Warning Light . . . . . . . . . . . . . . 5-16
Up-Shift Light . . . . . . . . . . . . . . . . 5-16
Traction Control System (TCS)/StabiliTrak®Light . . . . 5-17
Tire Pressure Light . . . . . . . . . . 5-17
Engine Oil Pressure Light . . . . 5-18
Security Light . . . . . . . . . . . . . . . . 5-18
High-Beam On Light . . . . . . . . . 5-19
Cruise Control Light . . . . . . . . . 5-19
Information Displays
Driver Information Center (DIC) . . . . . . . . . . . . . . . 5-19
Vehicle Messages
Vehicle Messages . . . . . . . . . . . 5-22
Battery Voltage and ChargingMessages . . . . . . . . . . . . . . . . . . 5-23
Brake System Messages . . . . 5-23
Door Ajar Messages . . . . . . . . . 5-24
Engine Cooling System Messages . . . . . . . . . . . . . . . . . . 5-24
Engine Oil Messages . . . . . . . . 5-24
Engine Power Messages . . . . 5-24
Fuel System Messages . . . . . . 5-25
Lamp Messages . . . . . . . . . . . . . 5-25
Ride Control System Messages . . . . . . . . . . . . . . . . . . 5-25
Service Vehicle Messages . . . 5-26
Tire Messages . . . . . . . . . . . . . . . 5-26
Transmission Messages . . . . . 5-26
Page 202 of 392
Black plate (28,1)Chevrolet Colorado Owner Manual - 2011
9-28 Driving and Operating
B (ACC/ACCESSORY) :This is
the position in which you can
operate the electrical accessories or
items plugged into the accessory
power outlets. On automatic
transmission vehicles, this position
unlocks the ignition. On manual
transmission vehicles, it unlocks the
ignition and steering wheel. Use this
position if the vehicle must be
pushed or towed.
C (ON/RUN): This position can
be used to operate the electrical
accessories and to display some
instrument panel cluster warning
and indicator lights. The switch
stays in this position when the
engine is running. The transmission
is also unlocked in this position on
automatic transmission vehicles.
If you leave the key in the ACC/
ACCESSORY or ON/RUN position
with the engine off, the battery could
be drained. You may not be able to
start your vehicle if the battery is
allowed to drain for an extended
period of time. D (START):
This is the position that
starts the engine. When the engine
starts, release the key. The ignition
switch returns to ON/RUN for
driving.
A warning tone will sound when the
driver door is opened, the ignition is
in ACC/ACCESSORY or LOCK/OFF
and the key is in the ignition.
Starting the Engine
Place the transmission in the
proper gear.
Automatic Transmission
Move the shift lever to P (Park) or
N (Neutral). The engine will not start
in any other position. To restart the
vehicle when it is already moving,
use N (Neutral) only.
Notice: Do not try to shift to
P (Park) if the vehicle is moving.
If you do, you could damage the
transmission. Shift to P (Park)
only when the vehicle is stopped.
Manual Transmission
The shift lever should be in
N (Neutral) and the parking brake
engaged. Hold the clutch pedal
down to the floor and start the
engine. The vehicle will not start if
the clutch pedal is not all the
way down.
Starting Procedure
1. With your foot off the accelerator pedal, turn the ignition key to
START. When the engine starts,
let go of the key. The idle speed
will go down as the engine
warms. Do not race the engine
immediately after starting it.
Operate the engine and
transmission gently to allow the
oil to warm up and lubricate all
moving parts.
The vehicle has a
Computer-Controlled Cranking
System. This feature assists in
starting the engine and protects
components. If the ignition key is
turned to the START position,
and then released when the
Page 203 of 392
Black plate (29,1)Chevrolet Colorado Owner Manual - 2011
Driving and Operating 9-29
engine begins cranking, the
engine will continue cranking for
a few seconds or until the
vehicle starts. If the engine does
not start and the key is held in
START for many seconds,
cranking will be stopped after
15 seconds to prevent cranking
motor damage. To prevent gear
damage, this system also
prevents cranking if the engine
is already running. Engine
cranking can be stopped by
turning the ignition switch to
ACC/ACCESSORY or
LOCK/OFF.
Notice: Cranking the engine for
long periods of time, by returning
the key to the START position
immediately after cranking has
ended, can overheat and damage
the cranking motor, and drain the
battery. Wait at least 15 seconds
between each try, to let the
cranking motor cool down.
2. If the engine does not start after 5‐10 seconds, especially in very
cold weather (below 0°F or −18°C), it could be flooded with
too much gasoline. Push the
accelerator pedal all the way to
the floor and holding it there as
you hold the key in START for a
maximum of 15 seconds. Wait at
least 15 seconds between each
try, to allow the cranking motor
to cool. When the engine starts,
let go of the key and accelerator.
If the vehicle starts briefly but
then stops again, repeat the
procedure. This clears the extra
gasoline from the engine. Do not
race the engine immediately
after starting it. Operate the
engine and transmission gently
until the oil warms up and
lubricates all moving parts.
Notice: The engine is designed to
work with the electronics in the
vehicle. If you add electrical parts
or accessories, you could change
the way the engine operates.
Before adding electrical
equipment, check with your
dealer. If you do not, the engine might not perform properly. Any
resulting damage would not be
covered by the vehicle warranty.
Engine Heater
The engine coolant heater can
provide easier starting and better
fuel economy during engine
warm-up in cold weather conditions
at or below
−18°C (0°F). Vehicles
with an engine coolant heater
should be plugged in at least
four hours before starting. An
internal thermostat in the plug-end
of the cord may exist which will
prevent engine coolant heater
operation at temperatures above
−18°C (0°F).
To Use the Engine Heater
1. Turn off the engine.
2. Open the hood and unwrap the electrical cord. The cord is
located in the engine
compartment behind the
underhood fuse block on the
driver side of the vehicle.
Page 232 of 392
Black plate (58,1)Chevrolet Colorado Owner Manual - 2011
9-58 Driving and Operating
Following Distance
Stay at least twice as far behind the
vehicle ahead as you would when
driving the vehicle without a trailer.
This can help to avoid situations
that require heavy braking and
sudden turns.
Passing
More passing distance is needed
when towing a trailer. Because the
rig is longer, it is necessary to go
much farther beyond the passed
vehicle before returning to the lane.
Backing Up
Hold the bottom of the steering
wheel with one hand. Then, to move
the trailer to the left, move that hand
to the left. To move the trailer to the
right, move your hand to the right.
Always back up slowly and,
if possible, have someone
guide you.
Making Turns
Notice:Making very sharp turns
while trailering could cause the
trailer to come in contact with the
vehicle. The vehicle could be
damaged. Avoid making very
sharp turns while trailering.
When turning with a trailer, make
wider turns than normal. Do this so
the trailer will not strike soft
shoulders, curbs, road signs, trees
or other objects. Avoid jerky or
sudden maneuvers. Signal well in
advance.
Turn Signals When Towing a
Trailer
The arrows on the instrument panel
flash whenever signaling a turn or
lane change. Properly hooked up,
the trailer lamps also flash, telling
other drivers the vehicle is turning,
changing lanes or stopping.
When towing a trailer, the arrows on
the instrument panel flash for turns
even if the bulbs on the trailer are
burned out. For this reason you may think other drivers are seeing the
signal when they are not. It is
important to check occasionally to
be sure the trailer bulbs are still
working.
Driving On Grades
Reduce speed and shift to a lower
gear
before starting down a long
or steep downgrade. If the
transmission is not shifted down, the
brakes might have to be used so
much that they would get hot and no
longer work well.
Vehicles with automatic
transmissions can tow in D (Drive),
but you may want to shift to a lower
gear selection if the transmission
shifts too often (e.g., under heavy
loads and/or hilly conditions). If the
vehicle has a manual transmission it
is better not to use the highest gear.
When towing at high altitude on
steep uphill grades, consider the
following: Engine coolant will boil at
a lower temperature than at normal
altitudes. If the engine is turned off
immediately after towing at high
Page 234 of 392
Black plate (60,1)Chevrolet Colorado Owner Manual - 2011
9-60 Driving and Operating
Maintenance When Trailer
Towing
The vehicle needs service more
often when pulling a trailer. See
Scheduled Maintenance on
page 11‑2or the Index for more
information. Things that are
especially important in trailer
operation are automatic
transmission fluid, engine oil, axle
lubricant, belts, cooling system and
brake system. It is a good idea to
inspect these before and during
the trip.
Check periodically to see that all
hitch nuts and bolts are tight.
Trailer Towing
{WARNING
The driver can lose control when
pulling a trailer if the correct
equipment is not used or the
vehicle is not driven properly. For
(Continued)
WARNING (Continued)
example, if the trailer is too
heavy, the brakes may not work
well—or even at all. The driver
and passengers could be
seriously injured. The vehicle may
also be damaged; the resulting
repairs would not be covered by
the vehicle warranty. Pull a trailer
only if all the steps in this section
have been followed. Ask your
dealer for advice and information
about towing a trailer with the
vehicle.
Notice: Pulling a trailer
improperly can damage the
vehicle and result in costly
repairs not covered by the vehicle
warranty. To pull a trailer
correctly, follow the advice in this
section and see your dealer for
important information about
towing a trailer with the vehicle. To identify the trailering capacity of
the vehicle, read the information in
“Weight of the Trailer”
that appears
later in this section.
Trailering is different than just
driving the vehicle by itself.
Trailering means changes in
handling, acceleration, braking,
durability and fuel economy.
Successful, safe trailering takes
correct equipment, and it has to be
used properly.
The following information has many
time-tested, important trailering tips
and safety rules. Many of these are
important for your safety and that of
your passengers. So please read
this section carefully before pulling a
trailer.
Page 241 of 392
Black plate (1,1)Chevrolet Colorado Owner Manual - 2011
Vehicle Care 10-1
Vehicle Care
General Information
General Information . . . . . . . . . . 10-3
California Proposition 65Warning . . . . . . . . . . . . . . . . . . . . 10-3
California Perchlorate Materials Requirements . . . . 10-3
Accessories and Modifications . . . . . . . . . . . . . . . 10-4
Vehicle Checks
Doing Your OwnService Work . . . . . . . . . . . . . . . 10-4
Hood . . . . . . . . . . . . . . . . . . . . . . . . 10-5
Engine Compartment Overview . . . . . . . . . . . . . . . . . . . 10-6
Engine Oil . . . . . . . . . . . . . . . . . . . 10-9
Engine Oil Life System . . . . . 10-12 Automatic Transmission
Fluid . . . . . . . . . . . . . . . . . . . . . . 10-13
Manual Transmission Fluid . . . . . . . . . . . . . . . . . . . . . . 10-16
Hydraulic Clutch . . . . . . . . . . . . 10-17
Engine Air Cleaner/Filter . . . . 10-17
Cooling System . . . . . . . . . . . . 10-18
Engine Coolant . . . . . . . . . . . . . 10-19
Engine Overheating . . . . . . . . 10-23
Engine Fan . . . . . . . . . . . . . . . . . 10-25
Power Steering Fluid . . . . . . . 10-25
Washer Fluid . . . . . . . . . . . . . . . 10-26
Brakes . . . . . . . . . . . . . . . . . . . . . 10-27
Brake Fluid . . . . . . . . . . . . . . . . . 10-28
Battery . . . . . . . . . . . . . . . . . . . . . 10-30
Four-Wheel Drive . . . . . . . . . . . 10-30
Front Axle . . . . . . . . . . . . . . . . . . 10-31
Rear Axle . . . . . . . . . . . . . . . . . . 10-31
Starter Switch Check . . . . . . . 10-32
Automatic Transmission Shift
Lock Control Function
Check . . . . . . . . . . . . . . . . . . . . . 10-33 Ignition Transmission Lock
Check . . . . . . . . . . . . . . . . . . . . . 10-33
Park Brake and P (Park) Mechanism Check . . . . . . . . 10-33
Wiper Blade
Replacement . . . . . . . . . . . . . . 10-34
Headlamp Aiming
Headlamp Aiming . . . . . . . . . . 10-35
Bulb Replacement
Bulb Replacement . . . . . . . . . . 10-36
Halogen Bulbs . . . . . . . . . . . . . . 10-36
Headlamps . . . . . . . . . . . . . . . . . 10-36
Front Turn Signal, Parking,and Daytime Running
Lamps (DRL) . . . . . . . . . . . . . 10-37
Taillamps, Turn Signal, Stoplamps, and Back-Up
Lamps . . . . . . . . . . . . . . . . . . . . 10-37
Center High-Mounted Stoplamp (CHMSL) . . . . . . . 10-38
License Plate Lamp . . . . . . . . 10-39
Replacement Bulbs . . . . . . . . . 10-39
Page 247 of 392
Black plate (7,1)Chevrolet Colorado Owner Manual - 2011
Vehicle Care 10-7
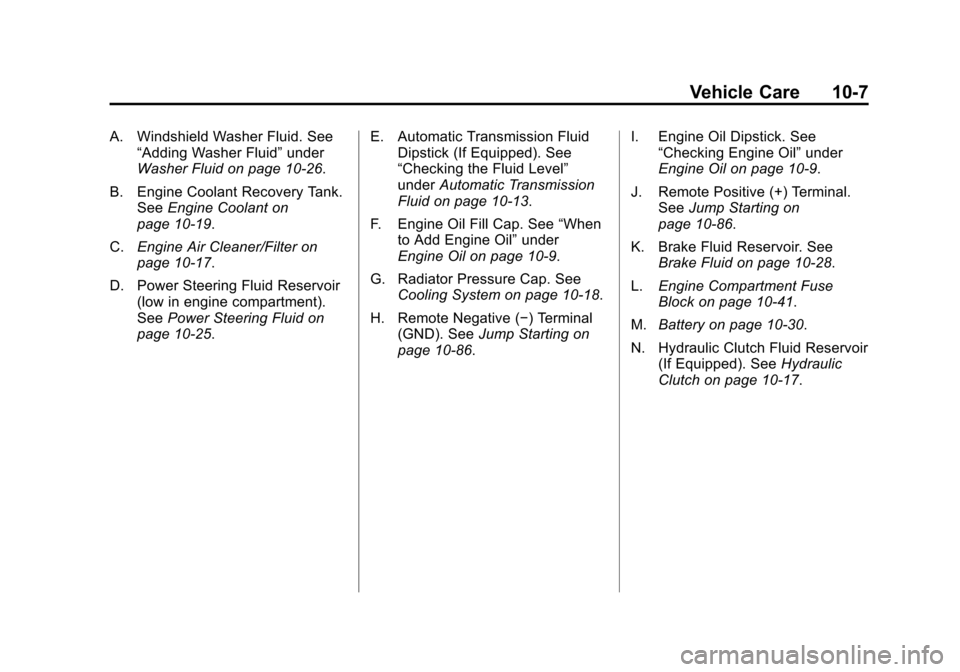
A. Windshield Washer Fluid. See“Adding Washer Fluid” under
Washer Fluid on page 10‑26.
B. Engine Coolant Recovery Tank. See Engine Coolant on
page 10‑19.
C. Engine Air Cleaner/Filter on
page 10‑17.
D. Power Steering Fluid Reservoir (low in engine compartment).
See Power Steering Fluid on
page 10‑25. E. Automatic Transmission Fluid
Dipstick (If Equipped). See
“Checking the Fluid Level”
under Automatic Transmission
Fluid on page 10‑13.
F. Engine Oil Fill Cap. See “When
to Add Engine Oil” under
Engine Oil on page 10‑9.
G. Radiator Pressure Cap. See Cooling System on page 10‑18.
H. Remote Negative (−) Terminal (GND). See Jump Starting on
page 10‑86. I. Engine Oil Dipstick. See
“Checking Engine Oil” under
Engine Oil on page 10‑9.
J. Remote Positive (+) Terminal. See Jump Starting on
page 10‑86.
K. Brake Fluid Reservoir. See Brake Fluid on page 10‑28.
L. Engine Compartment Fuse
Block on page 10‑41.
M. Battery on page 10‑30.
N. Hydraulic Clutch Fluid Reservoir (If Equipped). See Hydraulic
Clutch on page 10‑17.
Page 249 of 392

Black plate (9,1)Chevrolet Colorado Owner Manual - 2011
Vehicle Care 10-9
A.Engine Air Cleaner/Filter on
page 10‑17.
B. Air Filter Restriction Indicator (If Equipped). See Engine Air
Cleaner/Filter on page 10‑17.
C. Windshield Washer Fluid Reservoir. See “Adding Washer
Fluid” under Washer Fluid on
page 10‑26.
D. Engine Coolant Recovery Tank. See Engine Coolant on
page 10‑19.
E. Automatic Transmission Fluid Dipstick (If Equipped). See
“Checking the Fluid Level”
under Automatic Transmission
Fluid on page 10‑13.
F. Engine Oil Dipstick. See “Checking Engine Oil” under
Engine Oil on page 10‑9.
G. Engine Oil Fill Cap. See “When
to Add Engine Oil” under
Engine Oil on page 10‑9.
H. Brake Fluid Reservoir. See Brake Fluid on page 10‑28. I.
Battery on page 10‑30.
J. Power Steering Fluid Reservoir. See Power Steering Fluid on
page 10‑25.
K. Engine Compartment Fuse
Block on page 10‑41.
L. Radiator Pressure Cap. See Cooling System on page 10‑18.
Engine Oil
To ensure proper engine
performance and long life, careful
attention must be paid to engine oil.
Following these simple, but
important steps will help protect
your investment:
.Always use engine oil approved
to the proper specification and of
the proper viscosity grade. See
“Selecting the Right Engine Oil.”
.Check the engine oil level
regularly and maintain the
proper oil level. See “Checking
Engine Oil” and“When to Add
Engine Oil.”
.Change the engine oil at the
appropriate time. See Engine Oil
Life System on page 10‑12.
.Always dispose of engine oil
properly. See “What to Do With
Used Oil.”
Checking Engine Oil
It is a good idea to check the engine
oil level at each fuel fill. In order to
get an accurate reading, the vehicle
must be on level ground. The
engine oil dipstick handle is a yellow
loop. See Engine Compartment
Overview on page 10‑6 for the
location of the engine oil dipstick.
Obtaining an accurate oil level
reading is essential:
1. If the engine has been running recently, turn off the engine and
allow several minutes for the oil
to drain back into the oil pan.
Checking your oil level too soon
after engine shut off will not
provide an accurate oil level
reading.