2011 CADILLAC ESCALADE EXT interior
[x] Cancel search: interiorPage 1 of 508

Black plate (1,1)Cadillac Escalade EXT Owner Manual - 2011
2011 Cadillac Escalade EXT Owner ManualM
In Brief. . . . . . . . . . . . . . . . . . . . . . . . 1-1
Instrument Panel . . . . . . . . . . . . . . 1-2
Initial Drive Information . . . . . . . . 1-4
Vehicle Features . . . . . . . . . . . . . 1-15
Performance and Maintenance . . . . . . . . . . . . . . . . 1-20
Keys, Doors and Windows . . . 2-1
Keys and Locks . . . . . . . . . . . . . . . 2-2
Doors . . . . . . . . . . . . . . . . . . . . . . . . . . 2-9
Vehicle Security . . . . . . . . . . . . . . 2-16
Exterior Mirrors . . . . . . . . . . . . . . . 2-19
Interior Mirrors . . . . . . . . . . . . . . . . 2-21
Windows . . . . . . . . . . . . . . . . . . . . . 2-22
Roof . . . . . . . . . . . . . . . . . . . . . . . . . . 2-25
Seats and Restraints . . . . . . . . . 3-1
Head Restraints . . . . . . . . . . . . . . . 3-2
Front Seats . . . . . . . . . . . . . . . . . . . . 3-3
Rear Seats . . . . . . . . . . . . . . . . . . . . 3-8
Safety Belts . . . . . . . . . . . . . . . . . . 3-10
Airbag System . . . . . . . . . . . . . . . . 3-25
Child Restraints . . . . . . . . . . . . . . 3-40 Storage
. . . . . . . . . . . . . . . . . . . . . . . 4-1
Storage Compartments . . . . . . . . 4-1
Luggage/Load Locations . . . . . . . 4-2
Additional Storage
Features . . . . . . . . . . . . . . . . . . . . . 4-6
Roof Rack System . . . . . . . . . . . 4-12
Instruments and Controls . . . . 5-1
Controls . . . . . . . . . . . . . . . . . . . . . . . 5-2
Warning Lights, Gauges, and Indicators . . . . . . . . . . . . . . . . . . . . 5-9
Information Displays . . . . . . . . . . 5-23
Vehicle Messages . . . . . . . . . . . . 5-27
Vehicle Personalization . . . . . . . 5-35
Universal Remote System . . . . 5-44
Lighting . . . . . . . . . . . . . . . . . . . . . . . 6-1
Exterior Lighting . . . . . . . . . . . . . . . 6-1
Interior Lighting . . . . . . . . . . . . . . . . 6-8
Lighting Features . . . . . . . . . . . . . 6-10
Infotainment System . . . . . . . . . 7-1
Introduction . . . . . . . . . . . . . . . . . . . . 7-1
Radio . . . . . . . . . . . . . . . . . . . . . . . . . . 7-9
Audio Players . . . . . . . . . . . . . . . . 7-17 Rear Seat Infotainment . . . . . . . 7-31
Navigation . . . . . . . . . . . . . . . . . . . . 7-42
Voice Recognition . . . . . . . . . . . . 7-80
Phone . . . . . . . . . . . . . . . . . . . . . . . . 7-83
Climate Controls . . . . . . . . . . . . . 8-1
Climate Control Systems . . . . . . 8-1
Air Vents . . . . . . . . . . . . . . . . . . . . . . . 8-6
Driving and Operating . . . . . . . . 9-1
Driving Information . . . . . . . . . . . . . 9-2
Starting and Operating . . . . . . . 9-30
Engine Exhaust . . . . . . . . . . . . . . 9-37
Automatic Transmission . . . . . . 9-38
Drive Systems . . . . . . . . . . . . . . . . 9-43
Brakes . . . . . . . . . . . . . . . . . . . . . . . 9-43
Ride Control Systems . . . . . . . . 9-45
Cruise Control . . . . . . . . . . . . . . . . 9-49
Object Detection Systems . . . . 9-52
Fuel . . . . . . . . . . . . . . . . . . . . . . . . . . 9-58
Towing . . . . . . . . . . . . . . . . . . . . . . . 9-64
Conversions and Add-Ons . . . 9-75
Page 7 of 508

Black plate (1,1)Cadillac Escalade EXT Owner Manual - 2011
In Brief 1-1
In Brief
Instrument Panel
Instrument Panel . . . . . . . . . . . . . . 1-2
Initial Drive Information
Initial Drive Information . . . . . . . . 1-4
Remote Keyless Entry (RKE)System . . . . . . . . . . . . . . . . . . . . . . 1-4
Remote Vehicle Start . . . . . . . . . 1-4
Door Locks . . . . . . . . . . . . . . . . . . . 1-5
Midgate
®. . . . . . . . . . . . . . . . . . . . . . 1-5
Tailgate . . . . . . . . . . . . . . . . . . . . . . . 1-5
Windows . . . . . . . . . . . . . . . . . . . . . . 1-6
Seat Adjustment . . . . . . . . . . . . . . 1-6
Memory Features . . . . . . . . . . . . . 1-7
Second Row Seats . . . . . . . . . . . 1-8
Heated and Ventilated Seats . . . . . . . . . . . . . . . . . . . . . . . . 1-9
Head Restraint Adjustment . . . . 1-9 Safety Belts . . . . . . . . . . . . . . . . . . . 1-9
Sensing System for
Passenger Airbag . . . . . . . . . . 1-10
Mirror Adjustment . . . . . . . . . . . . 1-10
Steering Wheel Adjustment . . . . . . . . . . . . . . . . . 1-11
Throttle and Brake Pedal Adjustment . . . . . . . . . . . . . . . . . 1-11
Interior Lighting . . . . . . . . . . . . . . 1-12
Exterior Lighting . . . . . . . . . . . . . 1-12
Windshield Wiper/Washer . . . . 1-13
Climate Controls . . . . . . . . . . . . . 1-14
Transmission . . . . . . . . . . . . . . . . 1-14
Vehicle Features
Radio(s) . . . . . . . . . . . . . . . . . . . . . 1-15
Satellite Radio . . . . . . . . . . . . . . . 1-15
Portable Audio Devices . . . . . . 1-15
Bluetooth
®. . . . . . . . . . . . . . . . . . . 1-16
Steering Wheel Controls . . . . . 1-16
Cruise Control . . . . . . . . . . . . . . . 1-17 Navigation System . . . . . . . . . . . 1-17
Driver Information
Center (DIC) . . . . . . . . . . . . . . . 1-18
Rear Vision Camera (RVC) . . . . . . . . . . . . . 1-19
Ultrasonic Parking Assist . . . . 1-19
Power Outlets . . . . . . . . . . . . . . . 1-19
Universal Remote System . . . . . . . . . . . . . . . . . . . . . 1-20
Performance and Maintenance
StabiliTrak®System . . . . . . . . . 1-20
Tire Pressure Monitor . . . . . . . . 1-21
Engine Oil Life System . . . . . . 1-21
Fuel E85 (85% Ethanol) . . . . . 1-21
Driving for Better Fuel Economy . . . . . . . . . . . . . . . . . . . 1-22
Roadside Service . . . . . . . . . . . . 1-22
OnStar
®. . . . . . . . . . . . . . . . . . . . . 1-23
Page 17 of 508

Black plate (11,1)Cadillac Escalade EXT Owner Manual - 2011
In Brief 1-11
Power Foldaway Mirrors
To fold the mirrors:
1. Press (C) to fold the mirrors outto the driving position.
2. Press (D) to fold the mirrors in to the folded position.
See Power Mirrors on page 2‑19.
Interior Mirror
The automatic dimming rearview
mirror reduces the glare of lights
from behind the vehicle. The
dimming feature comes on and the
indicator light illuminates each time
the vehicle is started.
O:Press to turn the dimming
feature on or off.
See Automatic Dimming Rearview
Mirror on page 2‑21 for more
information.
Steering Wheel
Adjustment
The power tilt wheel control is
located on the left side of the
steering column.
Push the control up or down to tilt
the steering wheel up or down.
To set the memory position, see
“Memory Features” inPower Seat
Adjustment on page 3‑3.
Throttle and Brake Pedal
Adjustment
The vehicle has adjustable throttle
and brake pedals that allow you to
change their positions.
The switch used to adjust the
pedals is located on the center
console below the climate control
system.
Press the right and left arrows to
move the pedals either closer or
further from your body.
Adjustable Throttle and Brake Pedal
on page 9‑30.
Page 18 of 508

Black plate (12,1)Cadillac Escalade EXT Owner Manual - 2011
1-12 In Brief
Interior Lighting
Dome Lamps
The dome lamps are located in the
overhead console.
They come on when any door is
opened and turn off after all the
doors are closed.
Turn the instrument panel
brightness knob located below
the dome lamp override button,
clockwise to the farthest position to
manually turn on the dome lamps.
The dome lamps remain on until the
knob is turned counterclockwise.
Dome Lamp Override
The dome lamp override button is
located next to the exterior lamps
control.
k:Press the button in and the
dome lamps remain off when a door
is opened. Press the button again to
return it to the extended position so
that the dome lamps come on when
a door is opened.
Reading Lamps
For vehicles with reading lamps in
the overhead console, press the
button located next to the lamp to
turn it on or off.
The vehicle may also have reading
lamps in other locations. The lamps
cannot be adjusted. For more information about interior
lamps, see:
.Dome Lamps on page 6‑9.
.Reading Lamps on page 6‑9.
.Instrument Panel Illumination
Control on page 6‑8.
Exterior Lighting
The exterior lamps control is located
on the instrument panel to the left of
the steering wheel.
Page 31 of 508
Black plate (1,1)Cadillac Escalade EXT Owner Manual - 2011
Keys, Doors and Windows 2-1
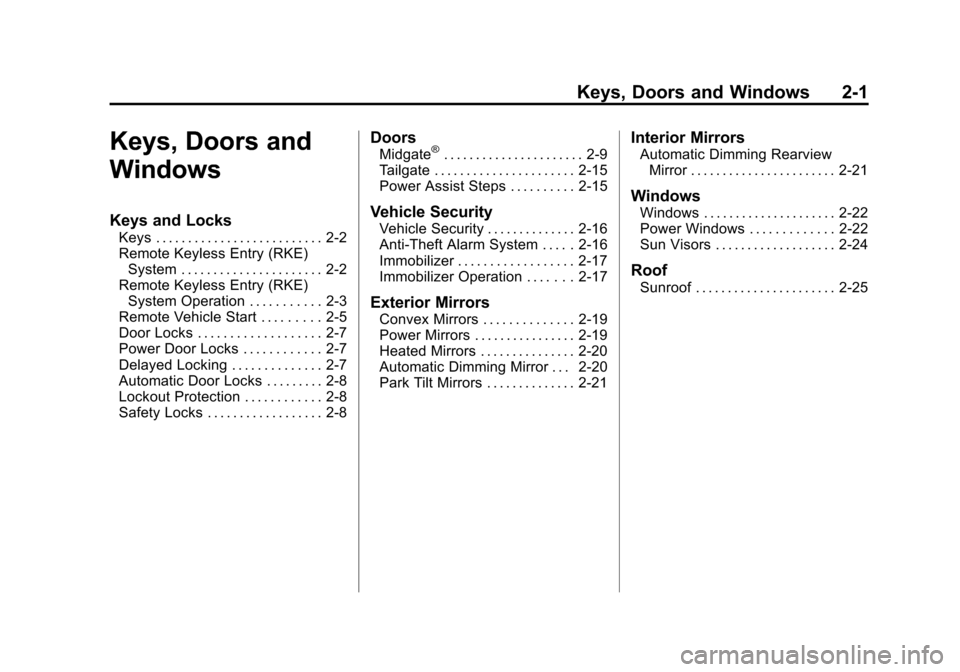
Keys, Doors and
Windows
Keys and Locks
Keys . . . . . . . . . . . . . . . . . . . . . . . . . . 2-2
Remote Keyless Entry (RKE)System . . . . . . . . . . . . . . . . . . . . . . 2-2
Remote Keyless Entry (RKE) System Operation . . . . . . . . . . . 2-3
Remote Vehicle Start . . . . . . . . . 2-5
Door Locks . . . . . . . . . . . . . . . . . . . 2-7
Power Door Locks . . . . . . . . . . . . 2-7
Delayed Locking . . . . . . . . . . . . . . 2-7
Automatic Door Locks . . . . . . . . . 2-8
Lockout Protection . . . . . . . . . . . . 2-8
Safety Locks . . . . . . . . . . . . . . . . . . 2-8
Doors
Midgate®. . . . . . . . . . . . . . . . . . . . . . 2-9
Tailgate . . . . . . . . . . . . . . . . . . . . . . 2-15
Power Assist Steps . . . . . . . . . . 2-15
Vehicle Security
Vehicle Security . . . . . . . . . . . . . . 2-16
Anti-Theft Alarm System . . . . . 2-16
Immobilizer . . . . . . . . . . . . . . . . . . 2-17
Immobilizer Operation . . . . . . . 2-17
Exterior Mirrors
Convex Mirrors . . . . . . . . . . . . . . 2-19
Power Mirrors . . . . . . . . . . . . . . . . 2-19
Heated Mirrors . . . . . . . . . . . . . . . 2-20
Automatic Dimming Mirror . . . 2-20
Park Tilt Mirrors . . . . . . . . . . . . . . 2-21
Interior Mirrors
Automatic Dimming Rearview Mirror . . . . . . . . . . . . . . . . . . . . . . . 2-21
Windows
Windows . . . . . . . . . . . . . . . . . . . . . 2-22
Power Windows . . . . . . . . . . . . . 2-22
Sun Visors . . . . . . . . . . . . . . . . . . . 2-24
Roof
Sunroof . . . . . . . . . . . . . . . . . . . . . . 2-25
Page 33 of 508

Black plate (3,1)Cadillac Escalade EXT Owner Manual - 2011
Keys, Doors and Windows 2-3
.Check the transmitter's battery.
See“Battery Replacement” later
in this section.
.If the transmitter is still not
working correctly, see your
dealer or a qualified technician
for service.
Remote Keyless Entry
(RKE) System Operation
The Remote Keyless Entry (RKE)
transmitter functions work up to
60 m (195 ft) away from the vehicle.
There are other conditions which
can affect the performance of the
transmitter. See Remote Keyless
Entry (RKE) System on page 2‑2.
/(Remote Vehicle Start): Press
to start the engine from outside the
vehicle using the RKE transmitter.
See Remote Vehicle Start on
page 2‑5 for additional information.
Q(Lock):Press to lock all the
doors, including the tailgate.
If enabled through the Driver
Information Center (DIC), the turn
signal lamps flash once to indicate
locking has occurred. If enabled
through the DIC, the horn chirps
when
Qis pressed again within three seconds. See
Vehicle
Personalization on page 5‑35 for
additional information.
Pressing
Qarms the content
theft‐deterrent system. See
Anti-Theft Alarm System on
page 2‑16.
K(Unlock): Press once to unlock
only the driver door. If
Kis pressed
again within three seconds, all
remaining doors, including the
tailgate unlock.
The interior lamps come on and
stay on for 20 seconds or until the
ignition is turned on. If enabled
through the DIC, the turn signal
lamps flash twice to indicate
unlocking has occurred. See Vehicle
Personalization on page 5‑35.
If enabled through the DIC, the
exterior lamps turn on briefly if
it is dark enough outside. See
“Approach Lighting” underVehicle
Personalization on page 5‑35.
Page 51 of 508

Black plate (21,1)Cadillac Escalade EXT Owner Manual - 2011
Keys, Doors and Windows 2-21
Park Tilt Mirrors
If the vehicle has the memory
package, the passenger and/or
driver mirror tilts to a preselected
position when the vehicle is in
R (Reverse). This feature lets the
driver view the curb when parallel
parking. The mirror(s) return to the
original position when the vehicle
is shifted out of R (Reverse), or
the ignition is turned off or to
OFF/LOCK.
Turn this feature on or off through
the Driver Information Center (DIC).
SeeDriver Information Center (DIC)
on page 5‑23 for more information.
Interior Mirrors
Automatic Dimming
Rearview Mirror
Automatic dimming reduces the
glare of lights from behind the
vehicle. The dimming feature comes
on and the indicator light illuminates
each time the vehicle is started.
O(On/Off):Press to turn the
dimming feature on or off.
The vehicle may have IntelliBeam
®.
For more information on IntelliBeam,
see “IntelliBeam Intelligent
High‐Beam Headlamp Control
System” underExterior Lamp
Controls on page 6‑1. Vehicles with OnStar
®have
three additional control buttons
located at the bottom of the
mirror. See your dealer for more
information about OnStar and how
to subscribe to it. See the OnStar
Owner's Guide for more information
about the services OnStar provides.
Cleaning the Mirror
Do not spray glass cleaner directly
on the mirror. Use a soft towel
dampened with water.
Page 79 of 508

Black plate (23,1)Cadillac Escalade EXT Owner Manual - 2011
Seats and Restraints 3-23
To remove and store the comfort
guide, squeeze the belt edges
together so that the safety belt can
be removed from the guide. Slide
the guide into its storage clip on the
interior body or storage pocket on
the side of the seat.
Safety Belt Use During
Pregnancy
Safety belts work for everyone,
including pregnant women. Like all
occupants, they are more likely to
be seriously injured if they do not
wear safety belts.
A pregnant woman should wear
a lap-shoulder belt, and the lap
portion should be worn as low as
possible, below the rounding,
throughout the pregnancy.
The best way to protect the fetus is
to protect the mother. When a safety
belt is worn properly, it is more likely
that the fetus will not be hurt in a
crash. For pregnant women, as for
anyone, the key to making safety
belts effective is wearing them
properly.
Safety Belt Extender
If the vehicle's safety belt will fasten
around you, you should use it.
But if a safety belt is not long
enough, your dealer will order you
an extender. When you go in to
order it, take the heaviest coat you
will wear, so the extender will be
long enough for you. To help avoid
personal injury, do not let someone
else use it, and use it only for the
seat it is made to fit. The extender
has been designed for adults. Never
use it for securing child seats. To
wear it, attach it to the regular safety
belt. For more information, see the
instruction sheet that comes with
the extender.