2011 BMW M3 SEDAN light
[x] Cancel search: lightPage 33 of 278

Controls
31Reference
At a glance
Driving tips
Communications
Navigation
Entertainment
Mobility
Unlocking and opening doors
>Either unlock the doors together using the
button for the central locking system and
then pull the door handle above the armrest
or
>pull on the door handle of each door twice:
the first time unlocks the door, the second
time opens it.
Locking
>Use the central locking button to lock all of
the doors simultaneously, or
>press down the safety lock button of a door.
To prevent you from being locked out, the
open driver's door cannot be locked using
the lock button.
Persons or animals in a parked vehicle
could lock the doors from the inside. You
should therefore take the remote control with
you when you leave the vehicle so that the latter
can be opened from outside.<
Trunk lid
In order to avoid damage, make sure there
is sufficient clearance before opening the
trunk lid.<
Opening from inside
Press the button: the trunk lid opens unless it
has been locked.
Opening from outside
Press the button, see arrow, or the button
on the remote control for a longer period. The
trunk lid will open slightly. It can now be swung
upwards.
In the event of a malfunction, please con-
tact your BMW center or a workshop that
works according to BMW repair procedures
with correspondingly trained personnel.<
Coupe: locking or unlocking separately
The switch is located in the glove compartment.
1Locking the trunk lid
2Unlocking the trunk lid
Locking separately
Push the switch in the direction of arrow 1.
The trunk lid is locked and cannot be unlocked
using the central locking system.
If you give the remote control without the inte-
grated key to someone else while the glove
compartment is locked, the trunk lid cannot be
opened. This is an advantage when valet park-
ing, for example. Locking the glove compart-
ment, refer to page114.
Page 34 of 278

Opening and closing
32
Unlocking separately
Push the switch in the direction of arrow 2.
Emergency release
Pull the lever in the cargo area. The trunk lid is
unlocked.
Closing
The handle recesses on the interior trim of the
trunk lid make it easier to pull down.
Make sure that the closing path of the
trunk lid is clear; otherwise, injuries may
result.<
Coupe
Convertible
To close the trunk lid, press it down
lightly. The lid is closed automatically.<
Alarm system*
The concept
The vehicle alarm system responds:
>When a door, the hood or the trunk lid is
opened
>To movements inside the vehicle: Interior
motion sensor, refer to page33
>When the car's inclination changes, for
instance if an attempt is made to jack it up
and steal the wheels or to raise it prior to
towing away
>When there has been an interruption of
power supply from the battery
The alarm system signals unauthorized entry
attempts for a short time by means of:
>An acoustic alarm
>Switching on the hazard warning flashers
>Flashing the high beams
Arming and disarming
When you lock or unlock the vehicle, either with
the remote control or at the door lock, the alarm
system is armed or disarmed at the same time.
You can open the trunk lid even when the alarm
system is armed, by pressing the button on
the remote control, refer to page28. The lid is
locked and monitored again as soon as you
close it.
Panic mode*
You can trigger the alarm system if you find
yourself in a dangerous situation:
Press the button for at least three seconds.
To switch off the alarm: press any button.
Switching off an alarm
>Unlock the car with the remote control,
refer to page27.
>Insert the remote control all the way into the
ignition lock.
Page 35 of 278

Controls
33Reference
At a glance
Driving tips
Communications
Navigation
Entertainment
Mobility
Indicator lamp displays
>The indicator lamp under the inside rear-
view mirror flashes continuously: the sys-
tem is armed.
>The indicator lamp flashes after locking:
doors, hood or trunk lid are not properly
closed. Even if you do not close the alerted
area, the system begins to monitor the
remaining areas, and the indicator lamp
flashes continuously after approx.
10 seconds. The interior m o t i o n s e n s o r a n d
the tilt alarm sensor are not activated.
>The indicator lamp goes out after unlocking:
your vehicle has not been disturbed while
you were away.
>If the indicator lamp flashes after unlocking
until the remote control is inserted in the
ignition, but for no longer than approx.
5 minutes: your vehicle has been disturbed
while you were away.
Tilt alarm sensor
The tilt of the vehicle is monitored. The alarm
system reacts, e.g. to attempts to steal a wheel
or tow the vehicle.
Interior motion sensor
Coupe
In order for the interior motion sensor to func-
tion properly, the windows and glass roof must
be completely closed
*.
Convertible
The interior of the car is monitored up to the
height of the seat cushions. Thus the alarm sys-
tem is activated together with the interior
motion sensor even if the hardtop is open. The
alarm can be triggered unintentionally by falling
objects such as leaves, refer to Avoiding unin-
tentional alarms.
Avoiding unintentional alarms
The tilt alarm sensor and interior motion sensor
may be switched off at the same time. This pre-
vents unintentional alarms, e.g. in the following
situations:
>In duplex garages
>During transport on car-carrying trains,
boats/ships or on a trailer
>When animals are to remain in the vehicle
Switching off tilt alarm sensor and
interior motion sensor
Press the button on the remote control
again as soon as the vehicle is locked.
The indicator lamp lights up briefly and then
flashes continuously. The tilt alarm sensor and
the interior motion sensor are switched off until
the next time the vehicle is unlocked and subse-
quently locked again.
Comfort Access*
Comfort Access enables you to enter your vehi-
cle without needing to hold the remote control
in your hand. All you need to do is wear the
remote control close to your body, e.g. in your
jacket pocket. The vehicle detects the corre-
sponding remote control within the immediate
vicinity or in the passenger compartment.
Comfort Access supports the following func-
tions:
>Unlocking/locking the vehicle
>Unlocking the trunk lid separately
>Engine starting
>Convenient closing
Page 37 of 278

Controls
35Reference
At a glance
Driving tips
Communications
Navigation
Entertainment
Mobility
Switching off the engine in cars with
automatic transmission
The engine can only be switched off when the
selector lever is in position P, refer to page57.
To switch the engine off when the selector lever
is in position N, the remote control must be in
the ignition lock.
Malfunction
Comfort Access may malfunction due to local
radio waves. If this happens, open or close the
vehicle via the buttons on the remote control or
using the integrated key. To start the engine
afterward, insert the remote control into the
ignition lock.
Warning lamps
The warning lamp in the instrument
cluster lights up when you attempt to
start the engine: the engine cannot
be started. The remote control is not inside the
vehicle or is malfunctioning.
Take the remote control with you inside the
vehicle or have it checked. If necessary, insert
another remote control into the ignition lock.
The warning lamp in the instrument
cluster lights up while the engine is
running: the remote control is no
longer inside the vehicle. After the engine is
switched off, the engine can only be restarted
within approx. 10 seconds.
The indicator lamp in the instrument
cluster comes on and a message
appears on the Control Display:
replace the battery in the remote control.
Replacing the battery
The remote control for Comfort Access con-
tains a battery that will need to be replaced from
time to time.
1.Take the integrated key out of the remote
control, refer to page26.
2.Remove the cover.
3.Insert the new battery with the plus side fac-
ing up.
4.Press the cover on to close.
Take the old battery to a battery collec-
tion point or to your BMW center.<
Windows
To prevent injuries, watch the windows
while closing them.
Take the remote control with you when you
leave the car; otherwise, children could operate
the electric windows and possibly injure them-
selves.<
Page 38 of 278

Opening and closing
36
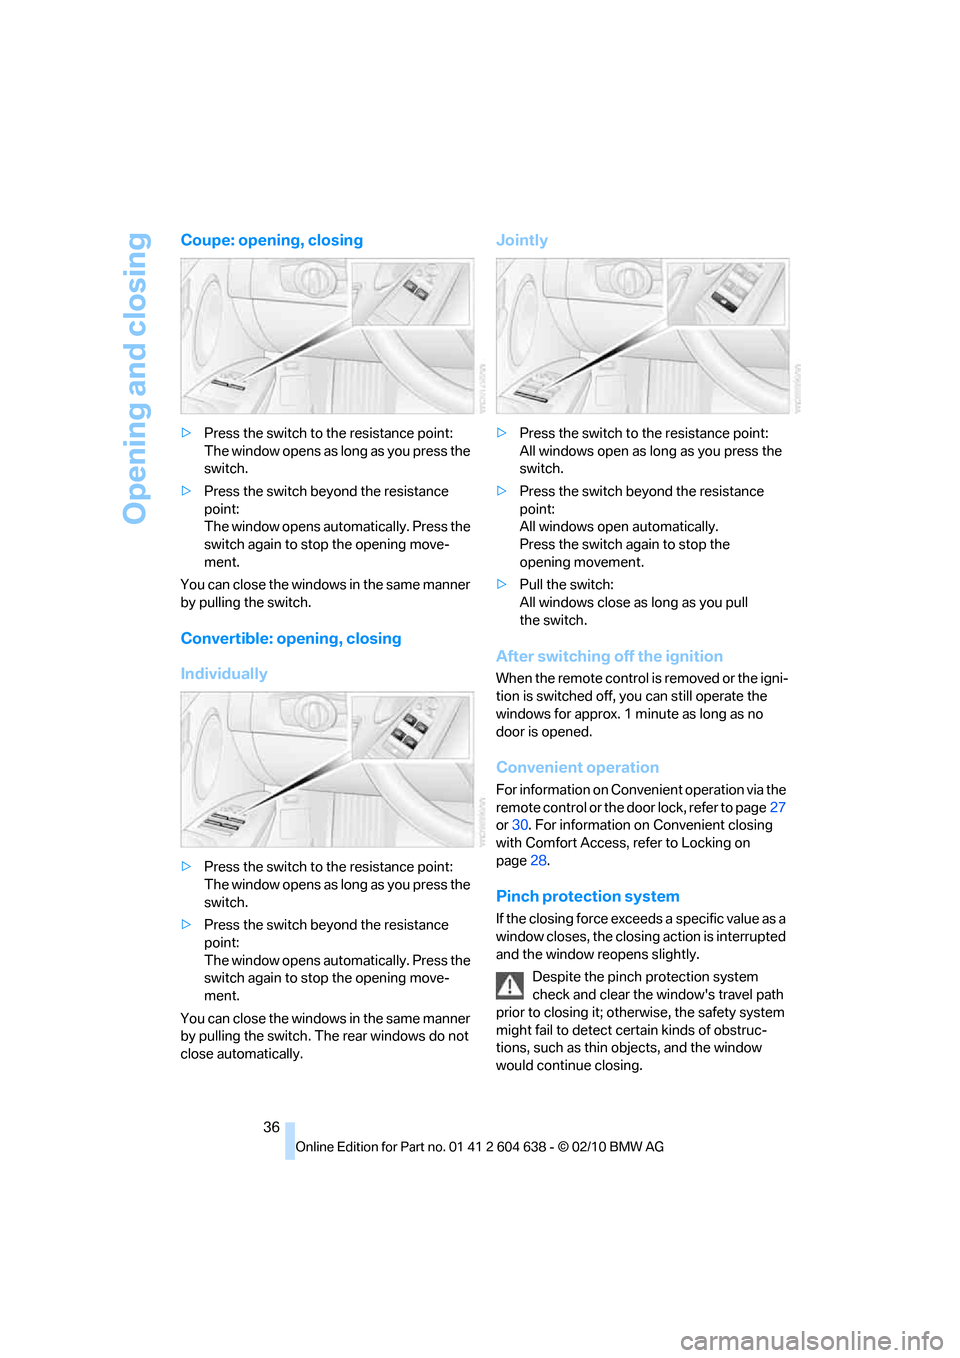
Coupe: opening, closing
>Press the switch to the resistance point:
The window opens as long as you press the
switch.
>Press the switch beyond the resistance
point:
The window opens automatically. Press the
switch again to stop the opening move-
ment.
You can close the windows in the same manner
by pulling the switch.
Convertible: opening, closing
Individually
>Press the switch to the resistance point:
The window opens as long as you press the
switch.
>Press the switch beyond the resistance
point:
The window opens automatically. Press the
switch again to stop the opening move-
ment.
You can close the windows in the same manner
by pulling the switch. The rear windows do not
close automatically.
Jointly
>Press the switch to the resistance point:
All windows open as long as you press the
switch.
>Press the switch beyond the resistance
point:
All windows open automatically.
Press the switch again to stop the
opening movement.
>Pull the switch:
All windows close as long as you pull
the switch.
After switching off the ignition
When the remote control is removed or the igni-
tion is switched off, you can still operate the
windows for approx. 1 minute as long as no
door is opened.
Convenient operation
For information on Convenient operation via the
remote control or the door lock, refer to page27
or30. For information on Convenient closing
with Comfort Access, refer to Locking on
page28.
Pinch protection system
If the closing force exceeds a specific value as a
window closes, the closing action is interrupted
and the window reopens slightly.
Despite the pinch protection system
check and clear the window's travel path
prior to closing it; otherwise, the safety system
might fail to detect certain kinds of obstruc-
tions, such as thin objects, and the window
would continue closing.
Page 39 of 278

Controls
37Reference
At a glance
Driving tips
Communications
Navigation
Entertainment
Mobility
Do not install any accessories that might inter-
fere with window movement. Otherwise, the
pinch protection system could be impaired.
Convertible: the rear windows are not equipped
with pinch protection. Therefore, watch them
closely when closing to avoid personal injury.<
Closing without pinch protection
If there is an external danger, or if ice on the win-
dows, etc., prevents you from closing the win-
dows normally, proceed as follows:
1.Pull the switch past the resistance point and
hold it there. Pinch protection is limited and
the window reopens slightly if the closing
force exceeds a certain value.
2.Pull the switch again past the resistance
point within approx. 4 seconds and hold it
there. The window closes without pinch
protection.
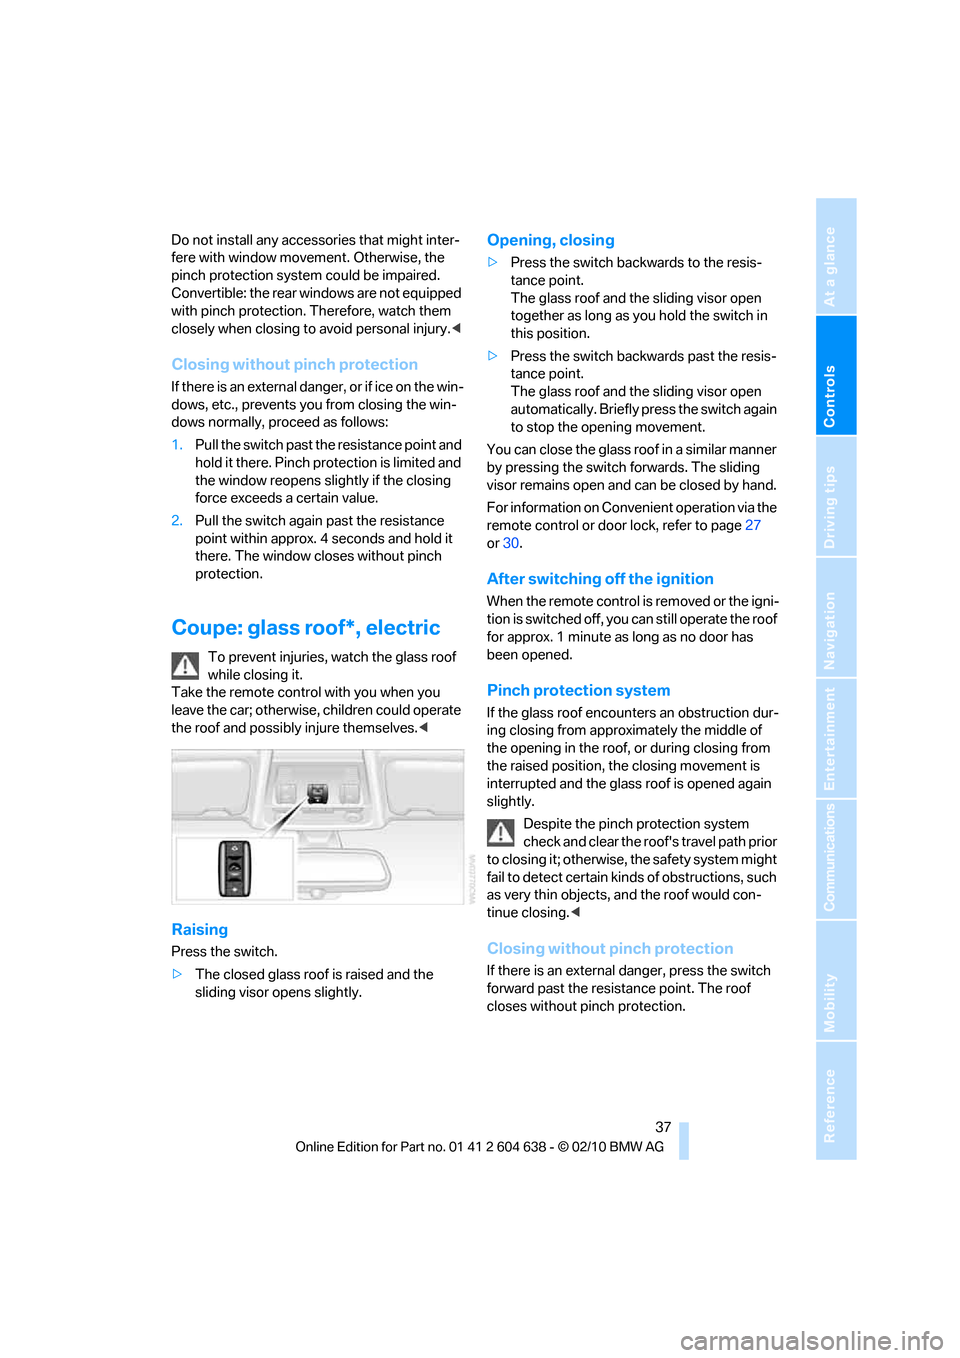
Coupe: glass roof*, electric
To prevent injuries, watch the glass roof
while closing it.
Take the remote control with you when you
leave the car; otherwise, children could operate
the roof and possibly injure themselves.<
Raising
Press the switch.
>The closed glass roof is raised and the
sliding visor opens slightly.
Opening, closing
>Press the switch backwards to the resis-
tance point.
The glass roof and the sliding visor open
together as long as you hold the switch in
this position.
>Press the switch backwards past the resis-
tance point.
The glass roof and the sliding visor open
automatically. Briefly press the switch again
to stop the opening movement.
You can close the glass roof in a similar manner
by pressing the switch forwards. The sliding
visor remains open and can be closed by hand.
For information on Convenient operation via the
remote control or door lock, refer to page27
or30.
After switching off the ignition
When the remote control is removed or the igni-
tion is switched off, you can still operate the roof
for approx. 1 minute as long as no door has
been opened.
Pinch protection system
If the glass roof encounters an obstruction dur-
ing closing from approximately the middle of
the opening in the roof, or during closing from
the raised position, the closing movement is
interrupted and the glass roof is opened again
slightly.
Despite the pinch protection system
check and clear the roof's travel path prior
to closing it; otherwise, the safety system might
fail to detect certain kinds of obstructions, such
as very thin objects, and the roof would con-
tinue closing.<
Closing without pinch protection
If there is an external danger, press the switch
forward past the resistance point. The roof
closes without pinch protection.
Page 41 of 278

Controls
39Reference
At a glance
Driving tips
Communications
Navigation
Entertainment
Mobility
>If you open the hardtop while it is wet, e.g.
after driving in the rain, water may drip into
the cargo area. If necessary, remove items
from the cargo area beforehand to avoid
water stains or soiling.
Do not place any objects on the retract-
able hardtop or on the trunk lid; other-
wise, they could fall during movements of the
retractable hardtop and cause damage or injury.
Never move the retractable hardtop when the
rollover protection system is in the activated
position.
Driving when the hardtop is not fully opened or
closed may result in damage or injury.
Do not reach into the mechanism during the
opening or closing procedure. Keep children
away from the swiveling area of the retractable
hardtop.<
The retractable hardtop cannot be moved
at temperatures below + 147/–106. A
message appears on the Control Display.<
The retractable hardtop can only be
opened and closed when the vehicle is
stationary. To avoid causing damage, do not
drive off until the hardtop has stopped mov-
ing.<
Before opening and closing
>Comply with the safety precautions
described above.
>Ensure that the cargo area partition is
folded down and engaged on both sides,
refer to page119; otherwise, it will not be
possible to open the retractable hardtop.
>Do not place any objects next to or on the
cargo area partition and close the storage
compartment on the left side of the cargo
area.
>Do not exceed the maximum loading height
under the cargo area partition; refer to the
label in the cargo area showing a line indi-
cating the maximum height.
>Ensure that the trunk lid is closed.
>The vehicle should be parked on fairly
level ground. Excessive angle is indicated
by a lamp.
Opening and closing
When the vehicle is stationary and at radio
readiness or beyond, refer to page55:
If possible, conserve the battery by only
operating the retractable hardtop when
the engine is running.
Before closing the retractable hardtop, remove
all foreign objects from the windshield frame as
these could prevent the hardtop from closing
properly.<
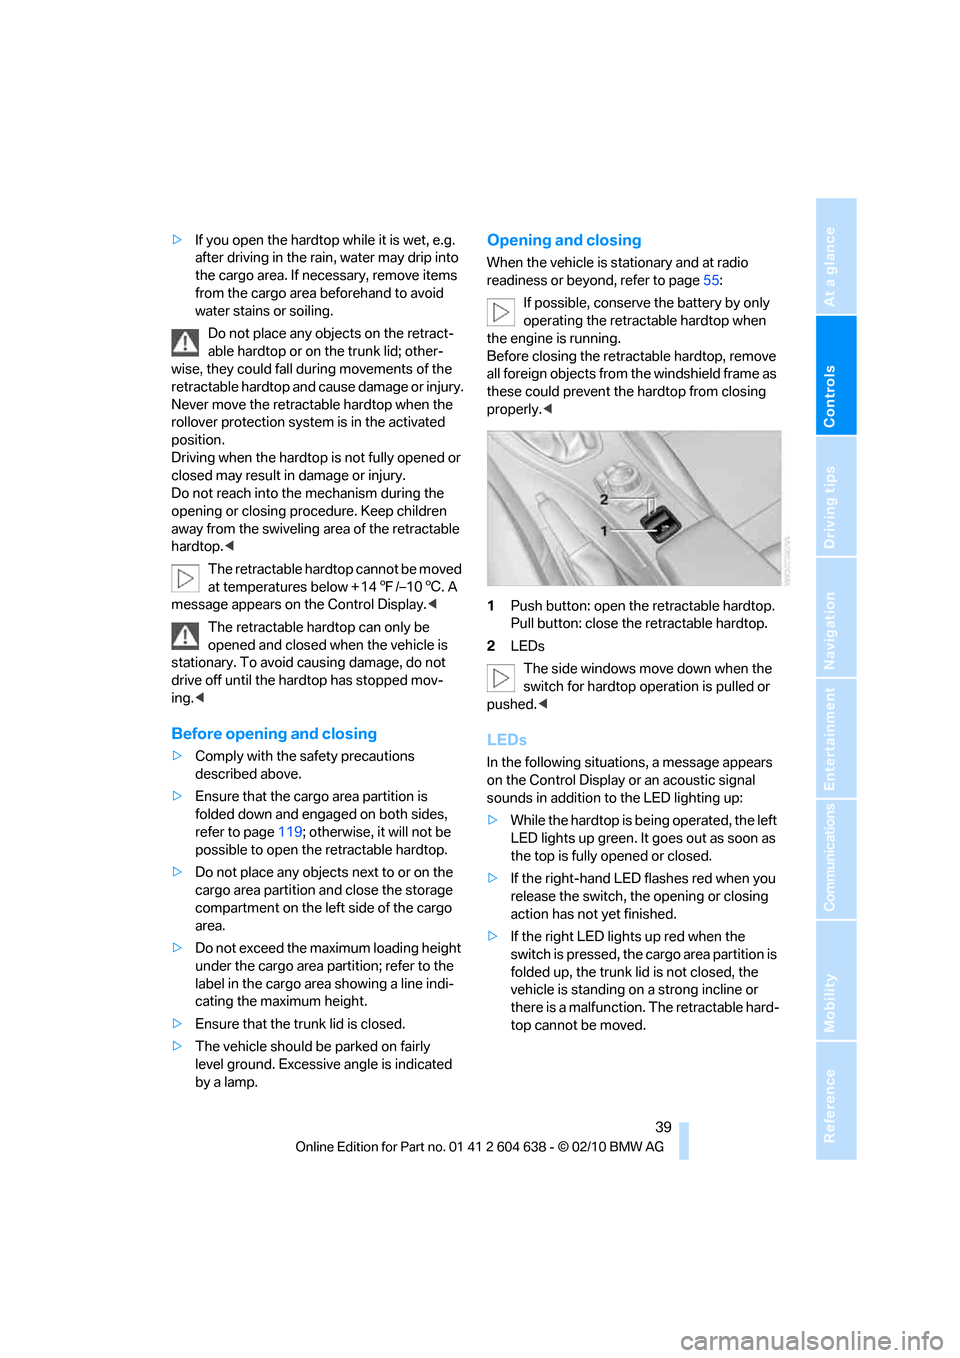
1Push button: open the retractable hardtop.
Pull button: close the retractable hardtop.
2LEDs
The side windows move down when the
switch for hardtop operation is pulled or
pushed.<
LEDs
In the following situations, a message appears
on the Control Display or an acoustic signal
sounds in addition to the LED lighting up:
>While the hardtop is being operated, the left
LED lights up green. It goes out as soon as
the top is fully opened or closed.
>If the right-hand LED flashes red when you
release the switch, the opening or closing
action has not yet finished.
>If the right LED lights up red when the
switch is pressed, the cargo area partition is
folded up, the trunk lid is not closed, the
vehicle is standing on a strong incline or
there is a malfunction. The retractable hard-
top cannot be moved.
Page 48 of 278

Adjustments
46
Adjusting the distance to the back of
the head
>Forward: pull up.
>Back: press the button and push the head
cushion toward the rear.
Do not insert objects behind the head
cushion; otherwise, the head restraint
may not function properly.<
Coupe: rear seats
Height adjustment
>To raise: pull up.
>To lower: press the button, arrow1, and
slide the head restraint down.
Removing
1.Pull up as far as it will go.
2.Press the button, arrow 1, tilt the rear seat
backrest slightly forward and pull the head
restraint all the way out.
Only remove the head restraints if no pas-
sengers will be sitting in the rear. Reinstall
head restraints before transporting passengers
in the rear.<
Entering the rear seats
Coupe: seat with manual longitudinal
adjustment
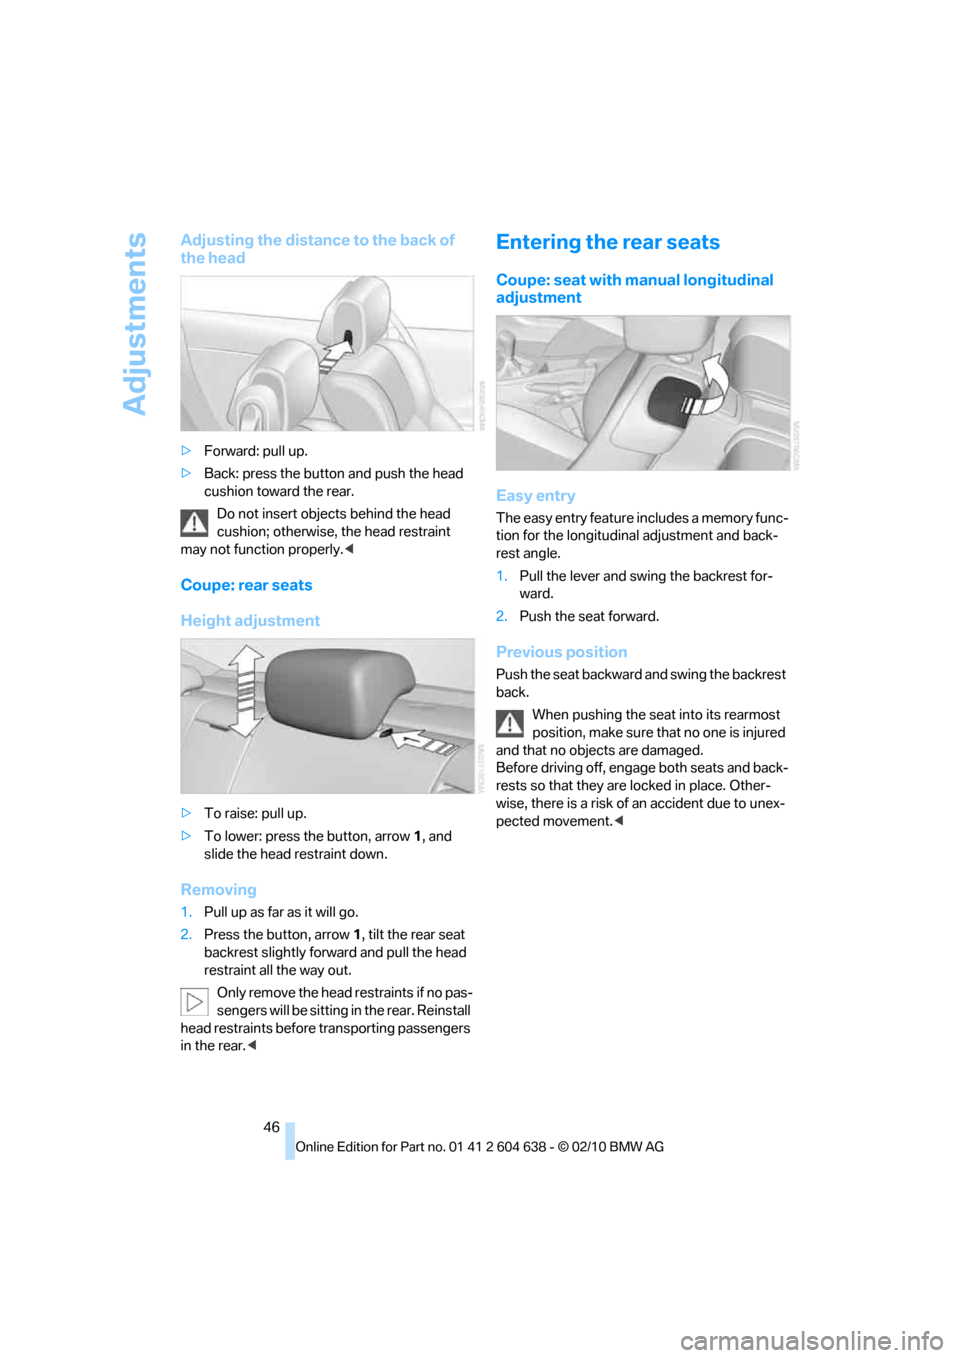
Easy entry
The easy entry feature includes a memory func-
tion for the longitudinal adjustment and back-
rest angle.
1.Pull the lever and swing the backrest for-
ward.
2.Push the seat forward.
Previous position
Push the seat backward and swing the backrest
back.
When pushing the seat into its rearmost
position, make sure that no one is injured
and that no objects are damaged.
Before driving off, engage both seats and back-
rests so that they are locked in place. Other-
wise, there is a risk of an accident due to unex-
pected movement.<