2011 BMW ACTIVEHYBRID X6 reset
[x] Cancel search: resetPage 104 of 312
Technology for comfort, convenience and safety
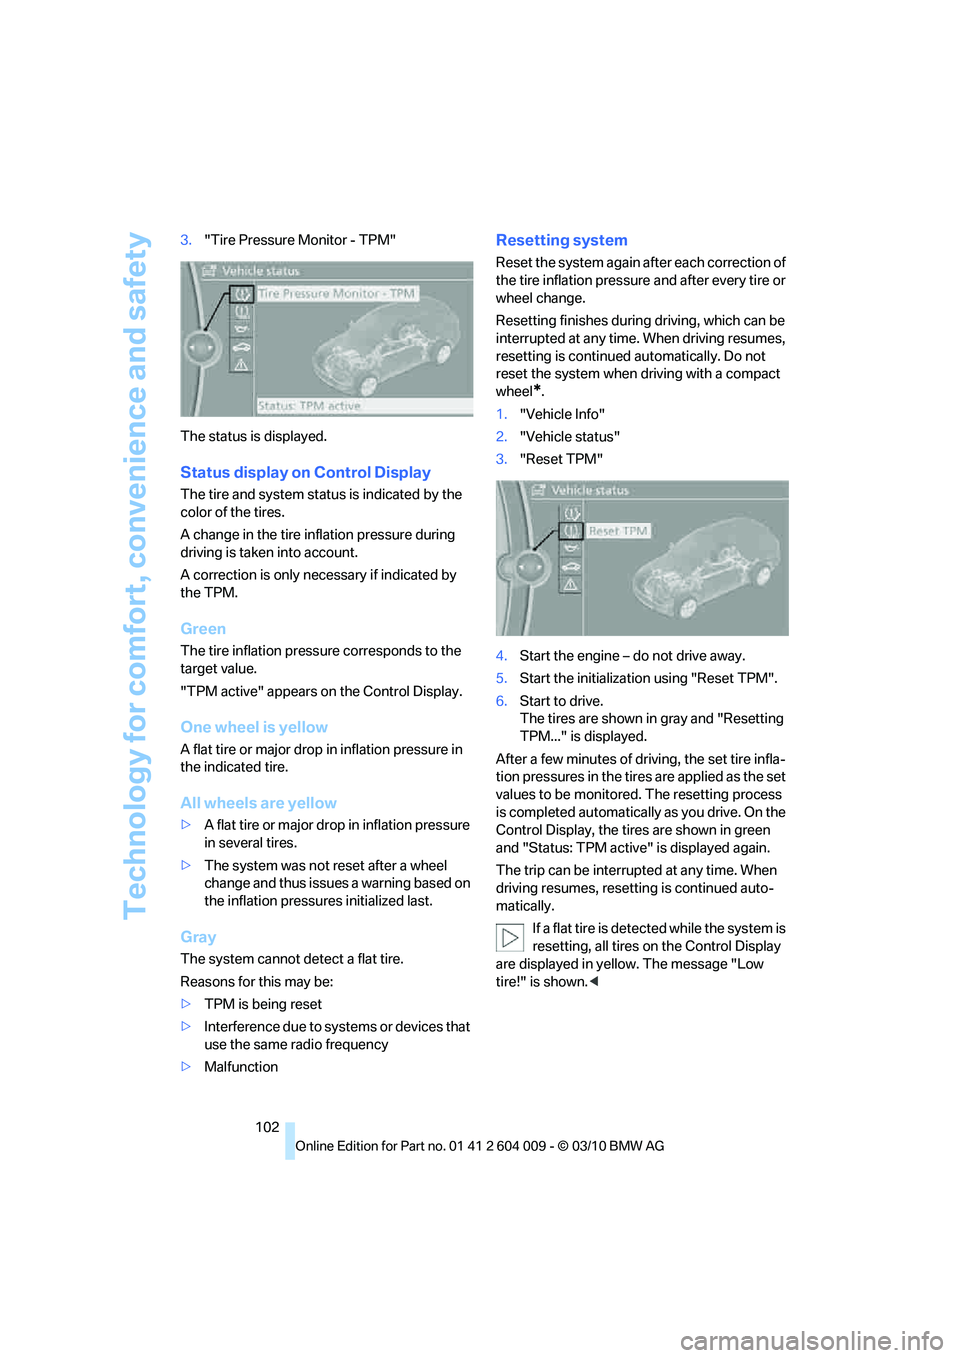
102 3."Tire Pressure Monitor - TPM"
The status is displayed.
Status display on Control Display
The tire and system status is indicated by the
color of the tires.
A change in the tire inflation pressure during
driving is taken into account.
A correction is only necessary if indicated by
the TPM.
Green
The tire inflation pressure corresponds to the
target value.
"TPM active" appears on the Control Display.
One wheel is yellow
A flat tire or major drop in inflation pressure in
the indicated tire.
All wheels are yellow
>A flat tire or major drop in inflation pressure
in several tires.
>The system was not reset after a wheel
change and thus issues a warning based on
the inflation pressures initialized last.
Gray
The system cannot detect a flat tire.
Reasons for this may be:
>TPM is being reset
>Interference due to systems or devices that
use the same radio frequency
>Malfunction
Resetting system
Reset the system again after each correction of
the tire inflation pressure and after every tire or
wheel change.
Resetting finishes during driving, which can be
interrupted at any time. When driving resumes,
resetting is continued automatically. Do not
reset the system when driving with a compact
wheel
*.
1."Vehicle Info"
2."Vehicle status"
3."Reset TPM"
4.Start the engine – do not drive away.
5.Start the initialization using "Reset TPM".
6.Start to drive.
The tires are shown in gray and "Resetting
TPM..." is displayed.
After a few minutes of driving, the set tire infla-
tion pressures in the tires are applied as the set
values to be monitored. The resetting process
is completed automatically as you drive. On the
Control Display, the tires are shown in green
and "Status: TPM active" is displayed again.
The trip can be interrupted at any time. When
driving resumes, resetting is continued auto-
matically.
If a flat tire is detected while the system is
resetting, all tires on the Control Display
are displayed in yellow. The message "Low
tire!" is shown.<
Page 105 of 312

Controls
103Reference
At a glance
Driving tips
Communications
Navigation
Entertainment
Mobility
Message with low tire inflation
pressure
The warning lamp lights up yellow. A
message appears on the Control Dis-
play. In addition, an acoustic signal
sounds.
>There is a flat tire or a major loss in tire infla-
tion pressure.
>The system was not reset after a wheel
change and thus issues a warning based on
the inflation pressures initialized last.
Cautiously reduce speed to below 50 mph/
80 km/h. Avoid sudden braking and steering
maneuvers. Do not exceed a speed of 50 mph/
80 km/h.
If the vehicle is not equipped with run-flat
tires as provided at the factory, refer to
page249, do not continue driving. Continuing
to drive with a flat tire could cause severe acci-
dents.<
Continued driving with a flat tire
Possible driving distance with complete loss of
tire inflation pressure:
>With a light load:
1 to 2 persons without luggage:
Approx. 155 miles/250 km
>With a medium load:
2 persons, cargo area full, or
4 persons without luggage:
Approx. 95 miles/150 km
>With a full load:
4 or more persons, cargo area full:
Approx. 30 miles/50 km
Drive reservedly and do not exceed a
speed of 50 mph/80 km/h.
A loss of tire inflation pressure results in a
change in the handling characteristics, e.g.
reduced lane stability during braking, a longer
braking distance and altered self-steering prop-
erties.<
Vibrations or loud noises while driving can
indicate complete failure of the tire.
Reduce your speed and stop; otherwise, pieces
of the tire could come loose and cause an acci-dent. Do not continue driving, and contact your
BMW Sports Activity Vehicle Center.<
Message when not reset
The yellow warning lamp lights up. A
message appears on the Control Dis-
play.
The system is not reset, e.g. after a wheel
change.
Check the tire inflation pressure and reset the
system, refer to page102.
Malfunction
The yellow warning lamp flashes and
then lights up continuously. The tires
are displayed in gray on the Control
Display. No flat tire can be detected.
Display in the following situations:
>Malfunction:
Have the system checked
>If a wheel without TPM electronics is
mounted, e.g. a compact wheel
*
>Interference due to systems or devices that
use the same radio frequency:
The system automatically reactivates once
it is outside of the field of interference.
Explanation according to the NHTSA/
FMVSS 138 Tire Pressure Monitoring
Systems
Each tire, including the spare (if provided),
should be checked monthly when cold and
inflated to the inflation pressure recommended
by the vehicle manufacturer on the vehicle plac-
ard or tire inflation pressure label. (If your vehi-
cle has tires of a different size than the size indi-
cated on the vehicle placard or tire inflation
pressure label, you should determine the
proper tire inflation pressure for those tires.)
As an added safety feature, your vehicle has
been equipped with a tire pressure monitoring
system (TPMS) that illuminates a low tire pres-
sure telltale when one or more of your tires is
significantly underinflated. Accordingly, when
the low tire pressure telltale illuminates, you
should stop and check your tires as soon as
Page 172 of 312
On/off and tone
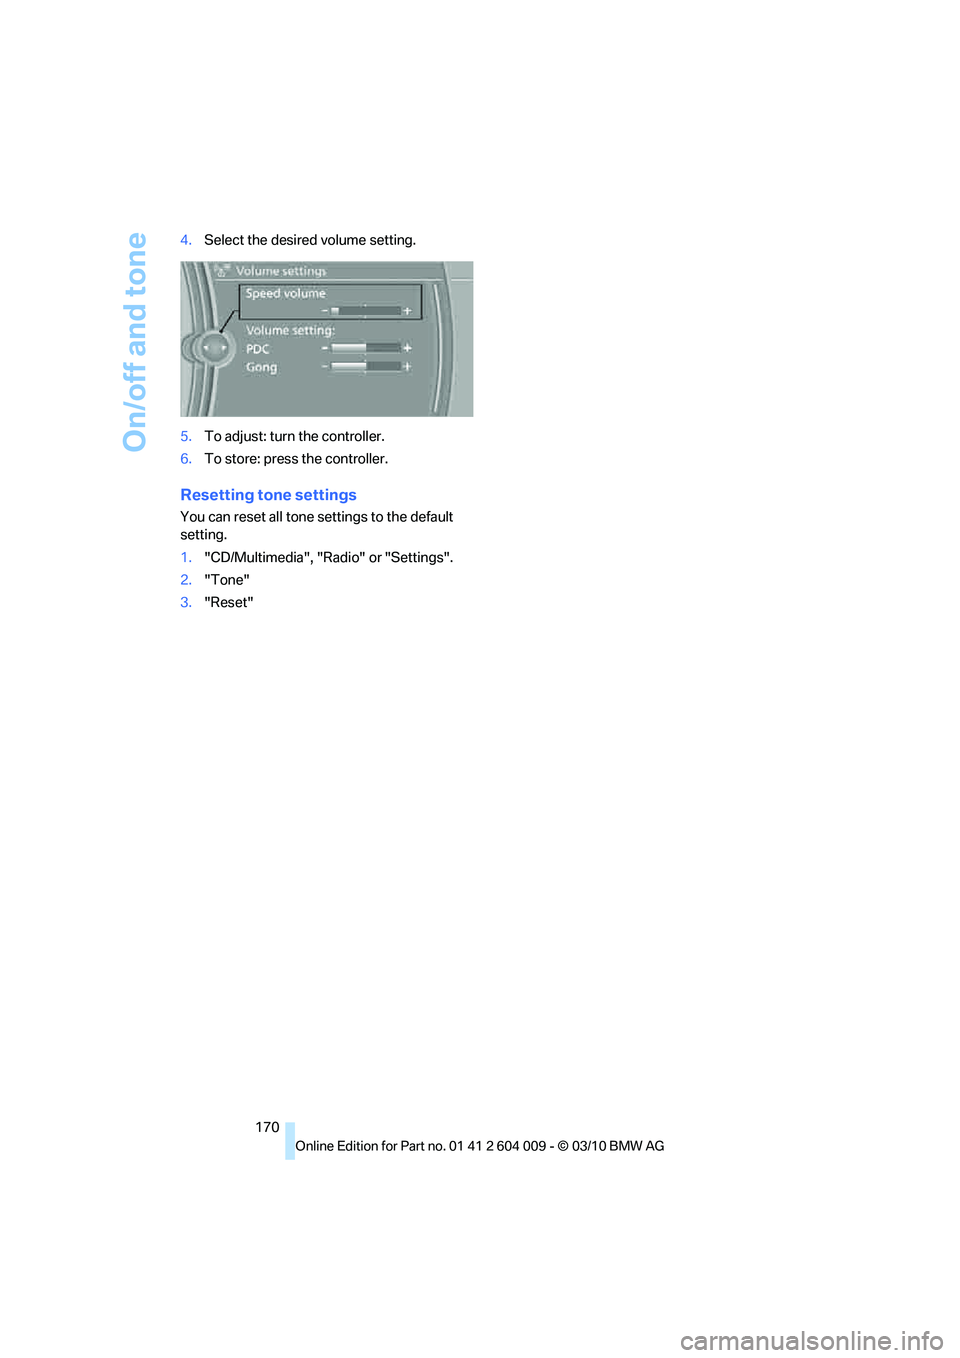
170 4.Select the desired volume setting.
5.To adjust: turn the controller.
6.To store: press the controller.
Resetting tone settings
You can reset all tone settings to the default
setting.
1."CD/Multimedia", "Radio" or "Settings".
2."Tone"
3."Reset"
Page 175 of 312
Navigation
Entertainment
Driving tips
173Reference
At a glance
Controls
Communications
Mobility
Displaying additional information
Some stations broadcast additional information
on the current track, such as the name of the
artist.
1.Select the desired station.
2.Open "Options".
3."Station info"
Selecting a substation
This symbol indicates that a main station also
broadcasts additional substations. The station
name of the main station ends in HD1. The sta-
tion names of the substations end in HD2, HD3,
etc.
1.Select the desired station.
2.Press the controller.
3.Select the substation.
When reception is poor, the substation is muted
for several seconds. If reception is interrupted
for an extended period, the radio switches back
to the main station.
Stored stations
It is possible to store up to 40 stations.
Selecting a station
1."Radio"
2."Presets"
3.Select the desired station.
Storing a station
The station currently selected is stored.
1."Radio"
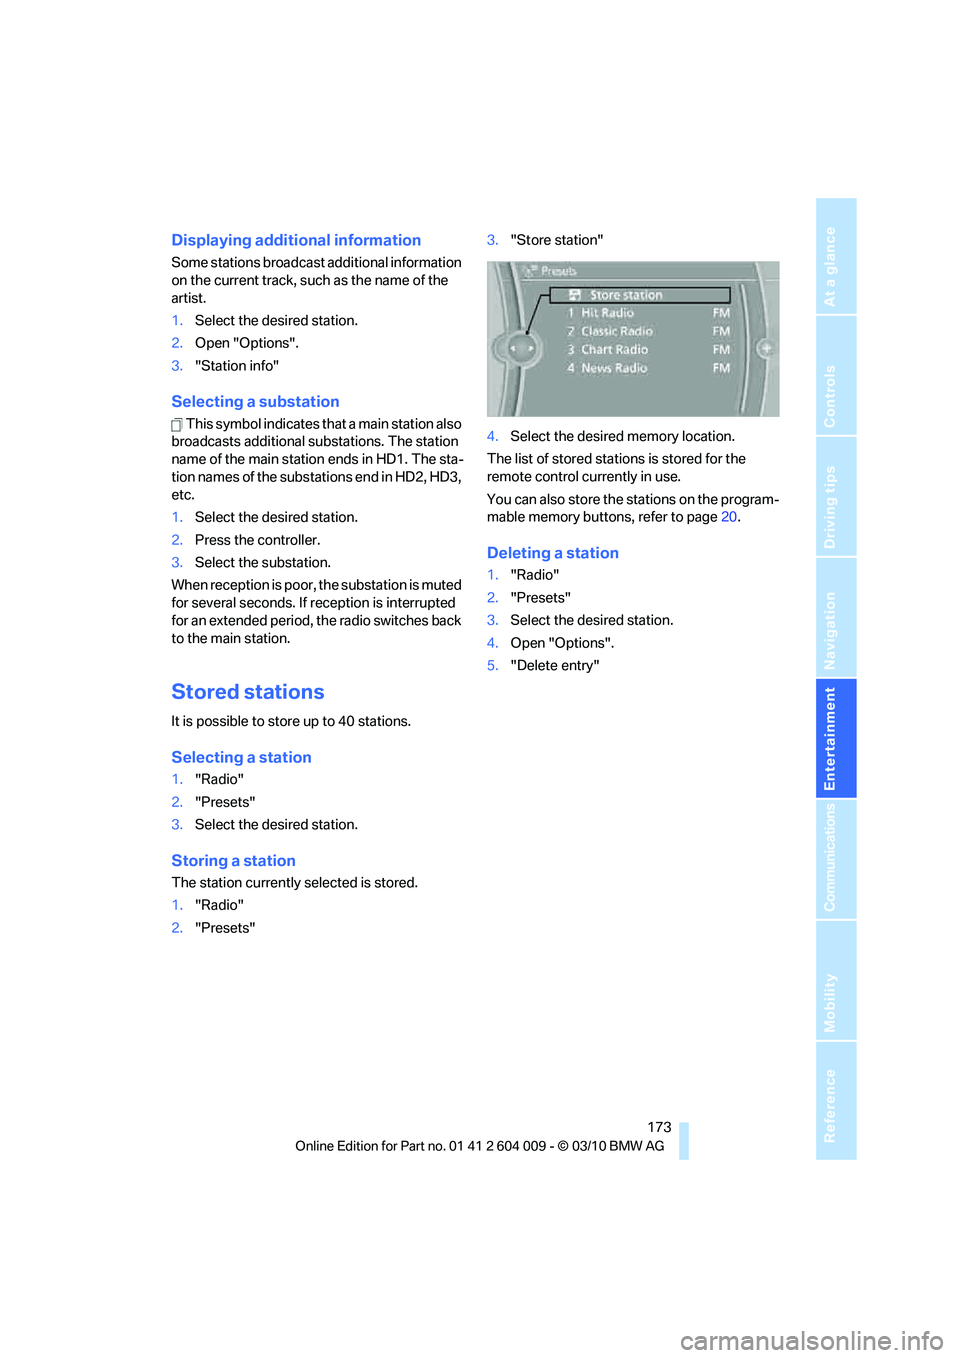
2."Presets"3."Store station"
4.Select the desired memory location.
The list of stored stations is stored for the
remote control currently in use.
You can also store the stations on the program-
mable memory buttons, refer to page20.
Deleting a station
1."Radio"
2."Presets"
3.Select the desired station.
4.Open "Options".
5."Delete entry"
Page 203 of 312
Navigation
Entertainment
Driving tips
201Reference
At a glance
Controls
Communications
Mobility
The system language of the DVD sys-
tem
"Display": background brightness of
screen.
>"Tone":
>"Treble / Bass" and "Balance": sepa-
rately adjustable for the left and right-
hand headphones and the infrared head-
phones.
>"Reset":
The settings are reset to the default
value.
>"DVD format":
>"Standard"
>"Zoom": full-screen playback
>"Language":
Language of the DVD playback. The lan-
guage advances one setting each time the
menu item is selected.
>"Subtitles":
Language of the subtitles
or turn off the subtitles
>"Title":
Select individual tracks on the DVD
>"Angle of view":
Camera angle
Notes or symbols that appear during the
playback of a film generally point out differ-
ent camera angles. These are usually only
briefly available.
>"Menu":
Call up the DVD-specific menu.
>"Return":
Exit the menu, or:
Press the buttons on the remote con-
trol.
Many DVDs offer dialogs and subtitles in vari-
ous languages or scene descriptions for the
hearing impaired. These functions are stored
on the DVD.
With some DVDs, it is only possible to
select language, subtitles, camera angle,
or title by using the DVD-specific menu.
Consult the information accompanying your
DVD.
It is thus possible, for example, to select from
among several possible actions or to access
information about the film.
1.Press the button on the remote con-
trol during playback.
2.Select "Menu".
3.Press the button.
On some DVDs, you can use "Main
menu" and "Title" to access addi-
tional menus in which you can select music
scenes, for example.<
To make a selection:
1.Select the symbol.
2.Press the button until the desired func-
tion is selected.
3.Select the arrow.
4.Press the button.
To return to the start menu:
1.Select the arrow.
2.Press the button.
You can also select language, subtitles,
camera angle, or title in the DVD-specific
menu.
Consult the information accompanying your
DVD.<
Compressed video files
Playback
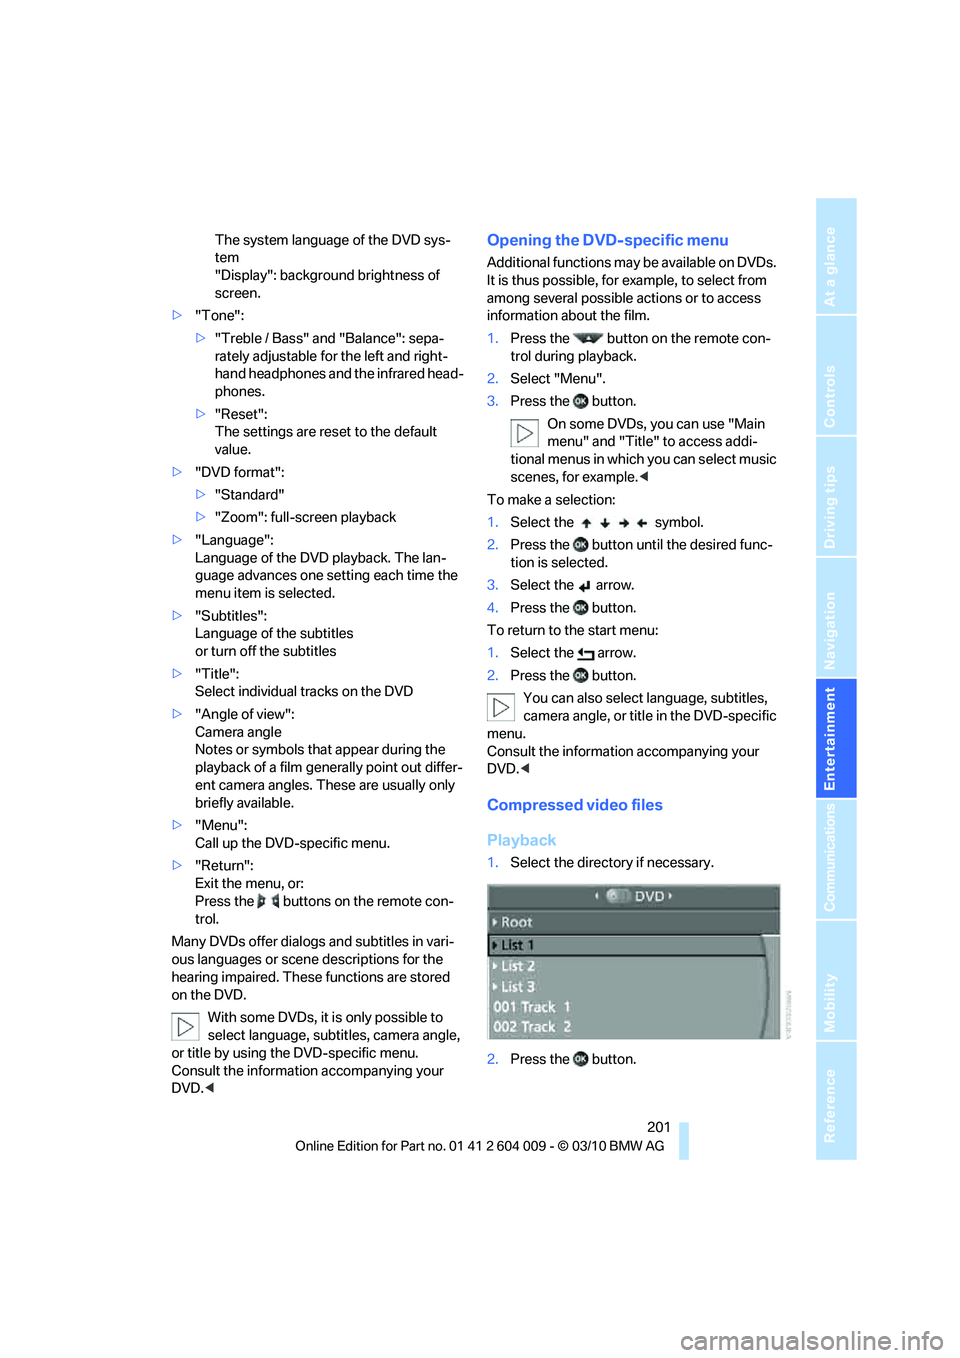
1.Select the directory if necessary.
2.Press the button.
Page 205 of 312
Navigation
Entertainment
Driving tips
203Reference
At a glance
Controls
Communications
Mobility
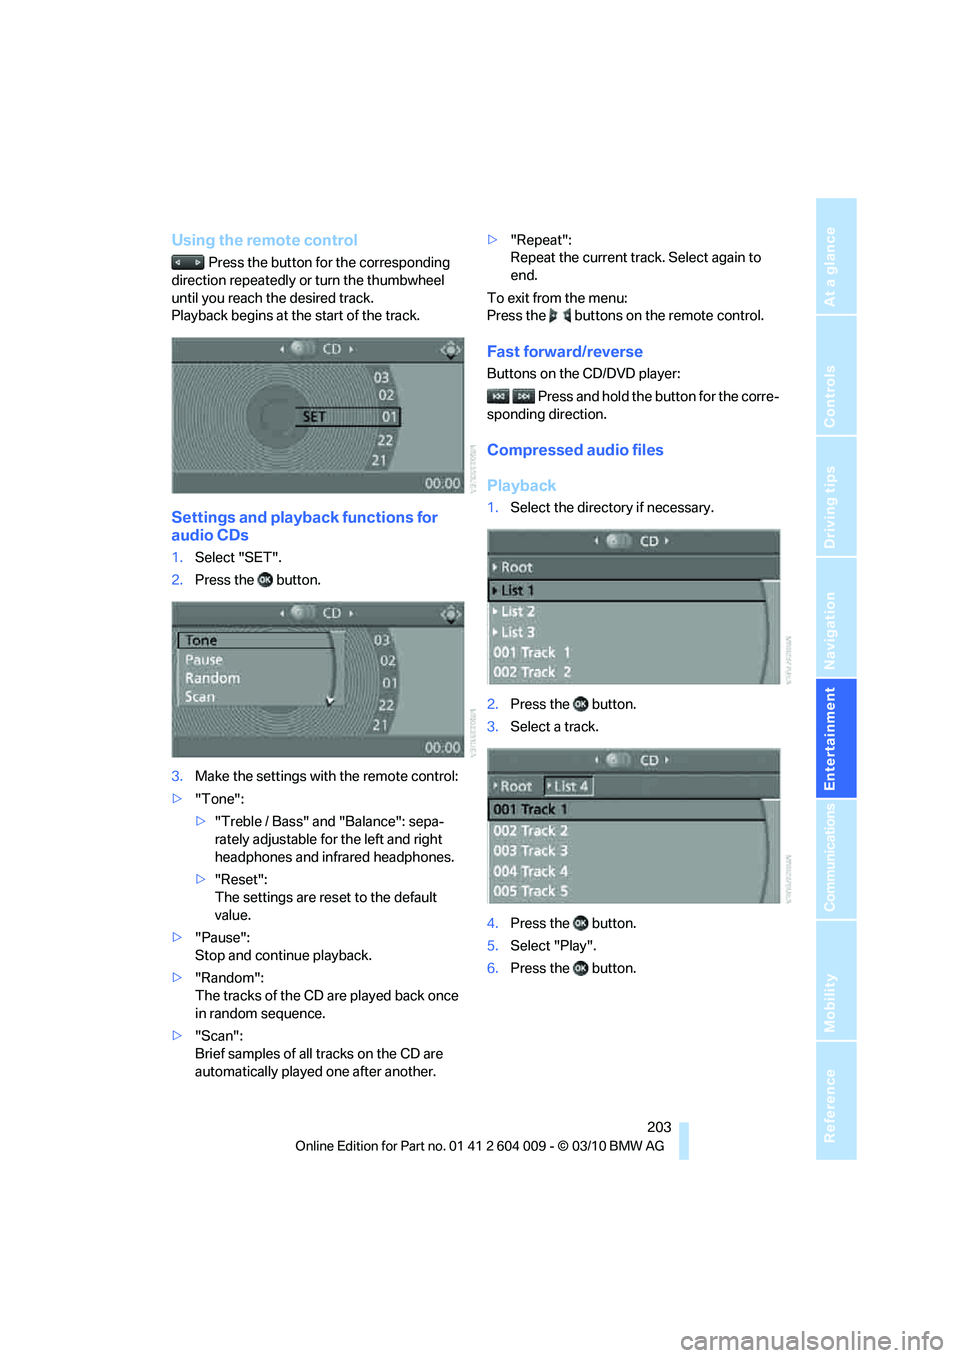
Using the remote control
Press the button for the corresponding
direction repeatedly or turn the thumbwheel
until you reach the desired track.
Playback begins at the start of the track.
Settings and playback functions for
audio CDs
1.Select "SET".
2.Press the button.
3.Make the settings with the remote control:
>"Tone":
>"Treble / Bass" and "Balance": sepa-
rately adjustable for the left and right
headphones and infrared headphones.
>"Reset":
The settings are reset to the default
value.
>"Pause":
Stop and continue playback.
>"Random":
The tracks of the CD are played back once
in random sequence.
>"Scan":
Brief samples of all tracks on the CD are
automatically played one after another.>"Repeat":
Repeat the current track. Select again to
end.
To exit from the menu:
Press the buttons on the remote control.
Fast forward/reverse
Buttons on the CD/DVD player:
Press and hold the button for the corre-
sponding direction.
Compressed audio files
Playback
1.Select the directory if necessary.
2.Press the button.
3.Select a track.
4.Press the button.
5.Select "Play".
6.Press the button.
Page 206 of 312
DVD system in rear
204 To change the directory:
1.Select the directory.
2.Press the button.
Settings and playback functions for
compressed audio files
1.Select a track.
2.Press the button.
3.Make the settings with the remote control:
>"Tone":
>"Treble / Bass" and "Balance": sepa-
rately adjustable for the left and right-
hand headphones and the infrared head-
phones.
>"Reset":
The settings are reset to the default
value.
>"Pause":
Stop and continue playback.
>"Scan directory":
Briefly sample the tracks in the current
directory.
>"Scan all":
Briefly sample all tracks.
>"Random directory":
Play the tracks in the current directory in a
random sequence.
>"Random all":
Play all tracks in a random sequence.
>"Repeat track":
Repeat the selected track.
>"Repeat directory":
Repeat the tracks in the current directory.>"Details":
Display any stored information on the cur-
rent track.
To exit from the menu:
Press the buttons on the remote control.
Displaying images from
CD/DVD
1.Push the CD/DVD into the drive with the
labeled side facing upward.
The CD/DVD is automatically pulled in.
2.Open the start menu with the remote con-
trol.
3.Select "Photo".
4.Press the button.
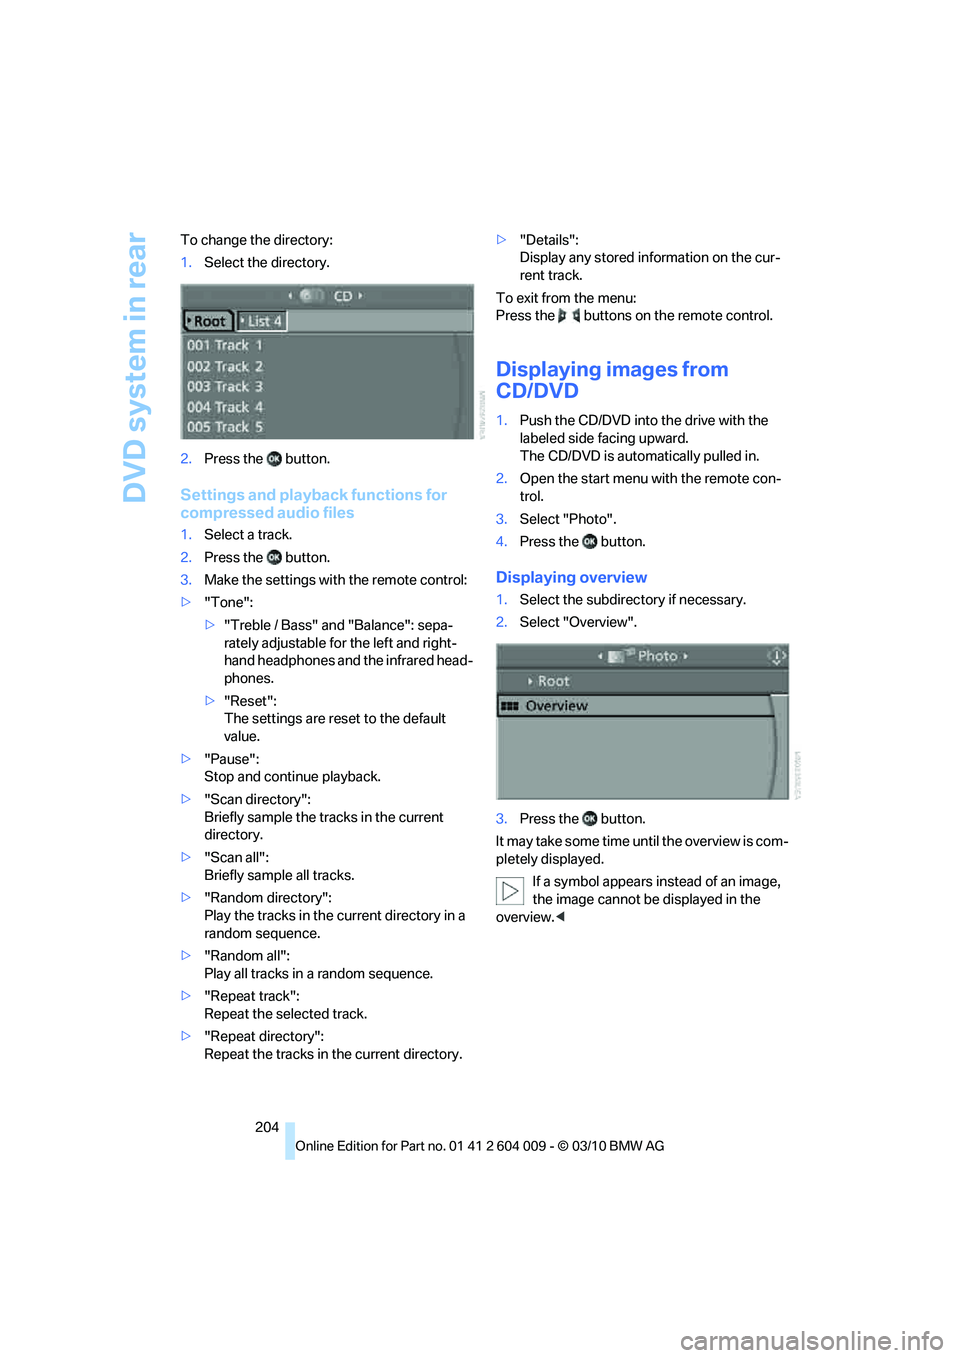
Displaying overview
1.Select the subdirectory if necessary.
2.Select "Overview".
3.Press the button.
It may take some time until the overview is com-
pletely displayed.
If a symbol appears instead of an image,
the image cannot be displayed in the
overview.<
Page 209 of 312
Navigation
Entertainment
Driving tips
207Reference
At a glance
Controls
Communications
Mobility
some CDs/DVDs cannot be played, can only be
played to a limited degree, or cause the system
to switch off. In this case, wait a short while and
then switch the system back on again. Then
remove the CD/DVD from the drive.
CDs/DVDs with compressed audio files
If the language set for the CD/DVD player does
not match the language of the music track, the
music tracks may be displayed incorrectly.
Care instructions
More information about this can be found under
Care, starting on page258.
External device
Connecting
1Connections for audio/video cables:
Watch the colors of the sockets when con-
necting.
Yellow socket: video
White socket: audio left
Red socket: audio right
2Power supply for external device: socket
with removable cap, also refer to page130.
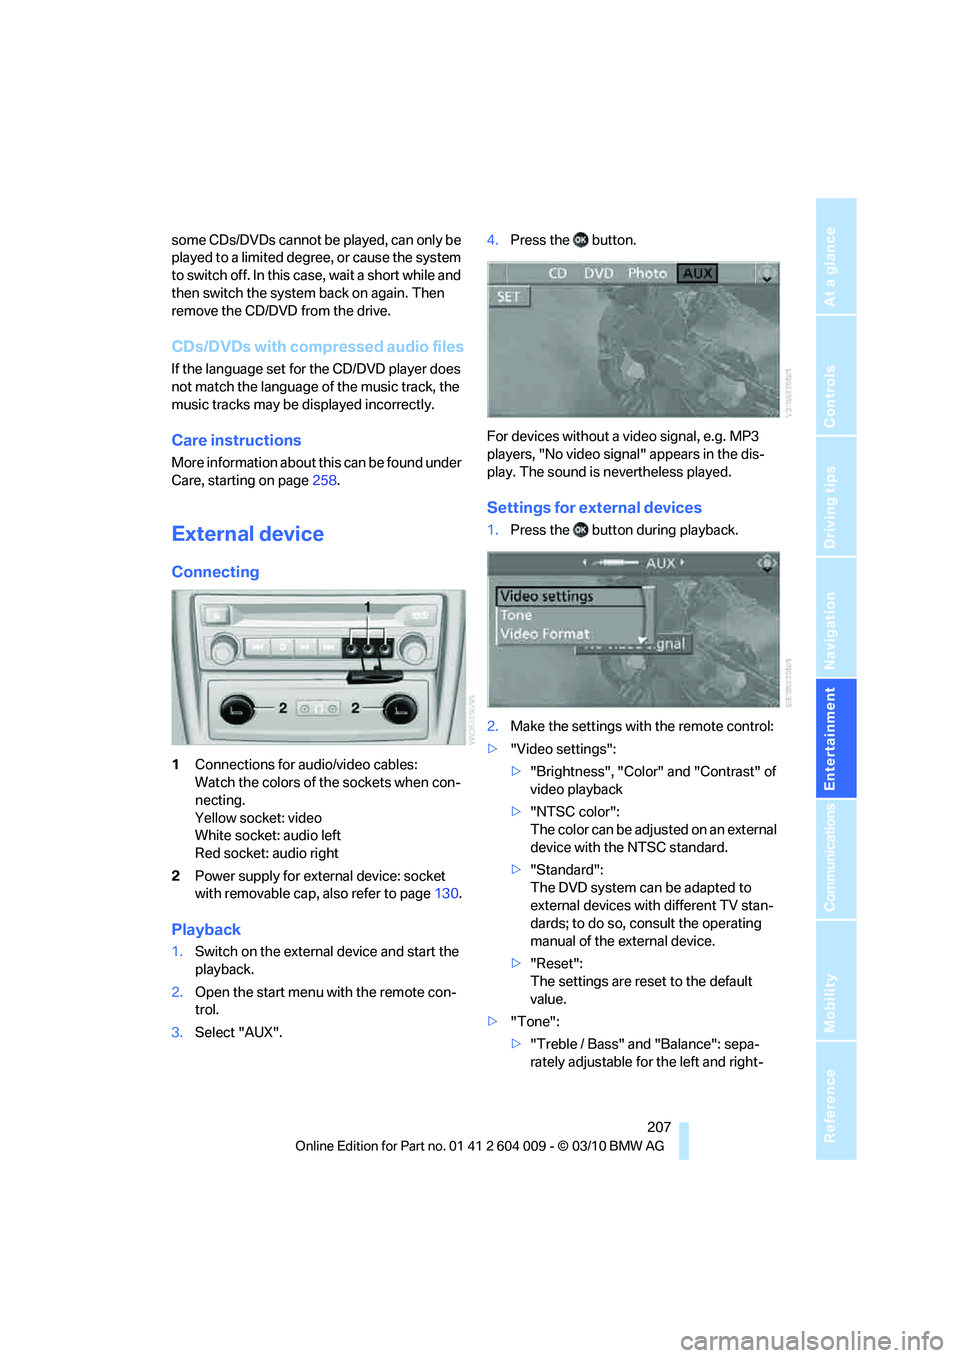
Playback
1.Switch on the external device and start the
playback.
2.Open the start menu with the remote con-
trol.
3.Select "AUX".4.Press the button.
For devices without a video signal, e.g. MP3
players, "No video signal" appears in the dis-
play. The sound is nevertheless played.
Settings for external devices
1.Press the button during playback.
2.Make the settings with the remote control:
>"Video settings":
>"Brightness", "Color" and "Contrast" of
video playback
>"NTSC color":
The color can be adjusted on an external
device with the NTSC standard.
>"Standard":
The DVD system can be adapted to
external devices with different TV stan-
dards; to do so, consult the operating
manual of the external device.
>"Reset":
The settings are reset to the default
value.
>"Tone":
>"Treble / Bass" and "Balance": sepa-
rately adjustable for the left and right-