2011 BMW ACTIVEHYBRID X6 battery
[x] Cancel search: batteryPage 60 of 312

Driving
58
Driving
Ignition lock
Inserting remote control into ignition
lock
Insert the remote control as far as possible into
the ignition lock.
Radio readiness switches on. Some electronic
systems/consumers are ready for operation.
Comfort Access*
With Comfort Access, only insert the remote
control into the ignition lock in exceptional
cases, refer to page35.
Removing remote control from ignition
lock
Do not pull the remote control out of the
ignition lock using force, as otherwise
damage may result.<
Before removing the remote control, first press
it in as far as possible to release the locking
device.
The ignition is switched off if it was still
switched on.
Start/Stop button
Pressing the Start/Stop button switches the
radio readiness or the ignition on and off.
Pressing the Start/Stop button with the
brake pedal depressed starts the
engine.<
Radio readiness
Some electronic systems/consumers are ready
for operation. The time and outside tempera-
ture are displayed in the instrument panel.
Radio readiness is automatically switched off:
>When the remote control is removed from
the ignition lock
>With Comfort Access
* by touching the sen-
sitive surface above the door lock, refer to
Locking on page36
Ignition on
All electronic systems/consumers are ready for
operation. The odometer and the trip odometer
are displayed in the instrument panel, refer to
page76.
Please switch off the ignition and the
electronic systems/consumers which are
not required when the engine is not running to
save the battery.<
Radio readiness and ignition off
All indicator lamps, warning lamps, and displays
in the instrument panel go out.
Page 113 of 312

Controls
111Reference
At a glance
Driving tips
Communications
Navigation
Entertainment
Mobility
Lamps
Parking lamps/low beams
0Lights off and daytime driving lamps*
1Parking lamps and daytime driving lamps*
2Low beams and welcome lamps
3Automatic headlamp control
*, daytime
driving lamps
*, welcome lamps, Adaptive
Light Control
* and high-beam assistant*
If you open the driver's door with the ignition
switched off, the exterior lighting is automati-
cally switched off when the light switch is in
position0, 2 or 3.
If necessary, switch on the parking lamps,
switch position1.
Parking lamps
In switch position1, the front, rear and side
vehicle lighting is switched on. You can use the
parking lamps for parking.
The parking lamps drain the battery. Do
not leave them switched on for long peri-
ods of time, otherwise it may no longer be pos-
sible to start the engine. It is better to switch on
the roadside parking lamps on one side, refer to
page113.<
Low beams
The low beams light up when the light switch is
in position 2 and the ignition is on.
Automatic headlamp control*
In switch position3, the system activates the
low beams and switches them on or off in response to changes in ambient light condi-
tions, for instance, in a tunnel, at dawn and dusk
and in case of precipitation. Adaptive Light
Control
* is active. The LED next to the symbol
lights up when the low beams are on. You can
activate the daytime driving lamps, refer to
page112. In the situations named above, the
system then automatically switches over to the
low beams.
A blue sky with the sun low on the horizon can
cause the lights to be switched on.
The low beams remain switched on inde-
pendent of the ambient lighting condi-
tions when you switch on the fog lamps
*.<
The automatic headlamp control cannot
serve as a substitute for your personal
judgment in determining when the lamps
should be switched on in response to ambient
lighting conditions. For example, the sensors
cannot detect fog or hazy weather. To avoid
safety risks, you should always switch on the
low beams manually under these conditions.<
Welcome lamps
When parking the vehicle, if you leave the light
switch in position2 or3, the parking lamps and
the interior lamps light up briefly when the vehi-
cle is unlocked.
Activating/deactivating welcome
lamps
1."Settings"
2."Lighting"
3."Welcome light"
Page 117 of 312

Controls
115Reference
At a glance
Driving tips
Communications
Navigation
Entertainment
Mobility
Instrument lighting
You can control the lighting intensity by using
the thumbwheel.
Interior lamps
The interior lamps, footwell lamps*, door entry
lighting
*, cargo area lamps, and the courtesy
lamps
* are controlled automatically.
With the courtesy lamps, LED lights are located
in the door handles to illuminate the exterior
area before the doors.
To protect the battery, all lamps in the
vehicle are switched off approx.
15 minutes after radio readiness is switched off,
refer to Start/Stop button on page58.<
Switching interior lamps on and off
manually
Press the button.
If you wish the interior lamps, footwell lamps,
door entry lighting and courtesy lamps to
remain switched off all the time, press the but-
ton for approx. 3 seconds.
Reading lamps
Reading lamps are provided in the front and
rear
* adjacent to the interior lamps. Press the
button to switch the lamps on and off.
Page 121 of 312

Controls
119Reference
At a glance
Driving tips
Communications
Navigation
Entertainment
Mobility
Selecting program
Press the button repeatedly until
the desired program is shown on
the Control Display.
1Air toward the windshield and side windows
2Air for the upper body
3Air to footwell
Pressing the AUTO button cancels the
manual air distribution settings.<
The automatic mode for the air volume remains
effective with manual air distribution.
Switching cooling function on and off
The cooling function cools and
dehumidifies the incoming air
before also reheating it as
required, according to the temperature setting.
This function is only available when the engine
is running.
The cooling function helps to avoid condensa-
tion on the window surfaces or to quickly
remove them.
Depending on the weather, the windshield may
fog over briefly when the engine is started.
The cooling function is switched on automati-
cally with the AUTO program.
Maximum cooling
Maximally cooled air is obtained as
quickly as possible at an outside
temperature above approx. 327/
06 and with the engine running.
The automatic climate control switches into the
recirculated-air mode at the lowest tempera-
ture. The maximum air volume flows out of the air vents for the upper body. Therefore, open
these vents for maximum cooling.
AUC Automatic recirculated-air
control/recirculated-air mode
You can respond to pollutants or
unpleasant odors in the immediate
environment by suspending the
supply of outside air. The system
then recirculates the air currently within the
vehicle. During AUC operation, a sensor
detects pollutants in the outside air and con-
trols the shut-off automatically.
By pressing the button repeatedly, you can
request three operating modes:
>LED off: outside air flows in continuously.
>Left LED on, AUC mode: the system
detects pollutants in the outside air and
shuts off the supply as needed.
>Right LED on, recirculated-air mode: the
supply of outside air is permanently shut off.
Should the windows fog up in the recircu-
lated-air mode, press the AUTO button or
switch off the recirculated-air mode and
increase the air volume if necessary.
The recirculated-air mode should not be used
without interruption over an extended period of
time, as the air quality inside the vehicle deteri-
orates continuously.<
Residual heat
The heat stored in the engine is used to heat the
passenger compartment, e.g. while stopped at
a school to pick up a child.
Switching on
Pressing the right side switches on
the residual heat utilization when
the following conditions are met:
>Up to 15 minutes after switching off the
engine
>With the engine at operating temperature
>With sufficient battery voltage
>At an outside temperature below 777/
256
Page 124 of 312

Climate
122
Air volume, manual
You can vary the air volume by
pressing on the corresponding
side. You can reactivate the auto-
matic mode for the air volume with the AUTO
button.
Switching off rear automatic climate
control
You can select the lowest blower
speed by pressing and holding the
left side. Pressing again switches
off the automatic climate control.
The automatic climate control can also be
switched off with iDrive. To switch on the
automatic climate control again, the system
must first be reactivated, refer to Activating/
deactivating.<
Y o u s w i t c h o n t h e s y s t e m a g a i n b y p r e s s i n g a n y
button of the rear automatic climate control.
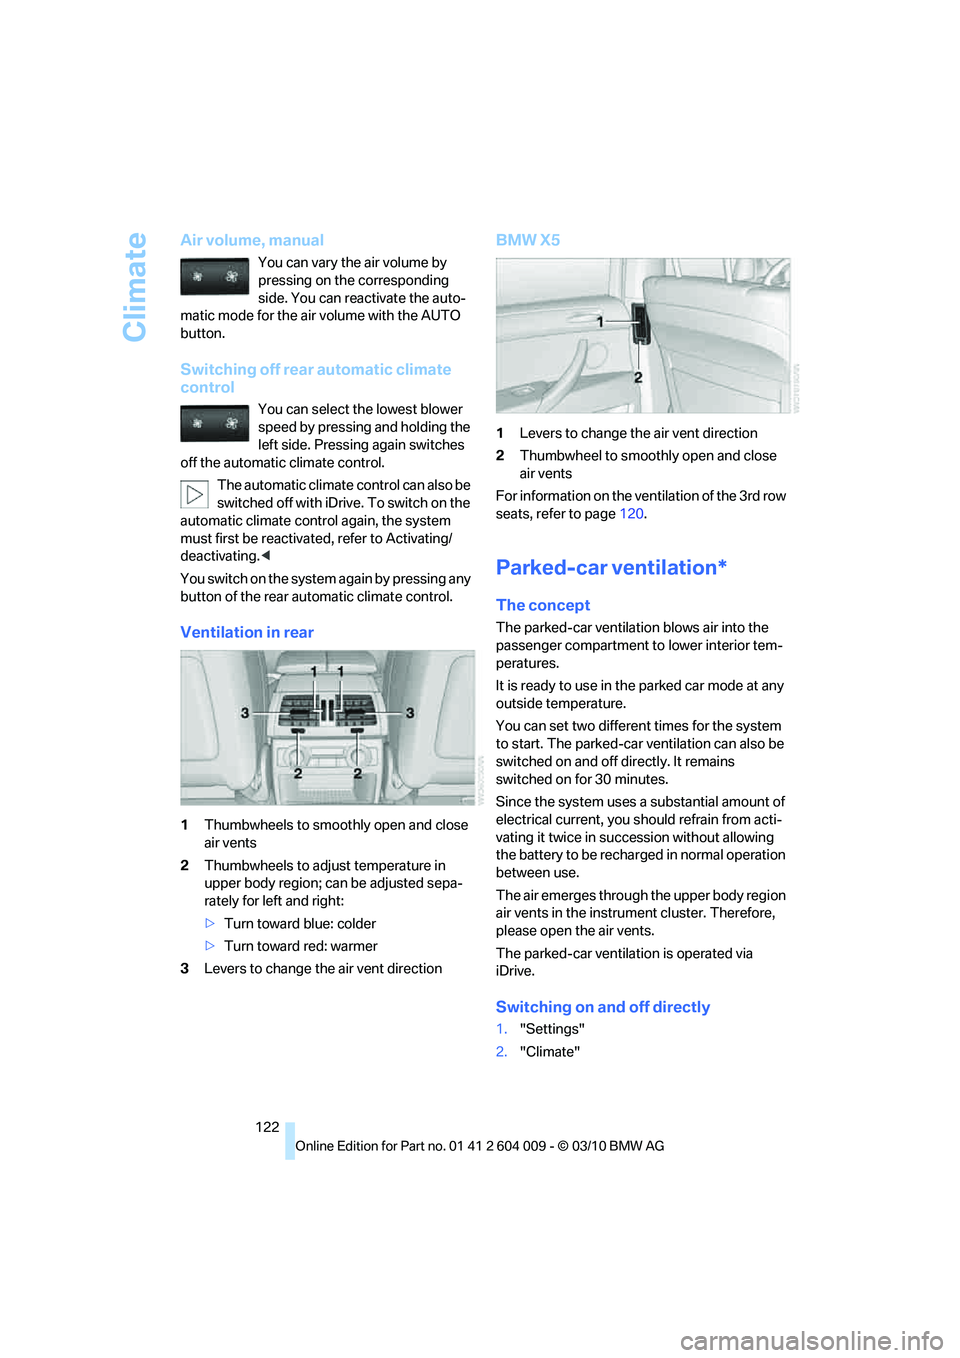
Ventilation in rear
1Thumbwheels to smoothly open and close
air vents
2Thumbwheels to adjust temperature in
upper body region; can be adjusted sepa-
rately for left and right:
>Turn toward blue: colder
>Turn toward red: warmer
3Levers to change the air vent direction
BMW X5
1Levers to change the air vent direction
2Thumbwheel to smoothly open and close
air vents
For information on the ventilation of the 3rd row
seats, refer to page120.
Parked-car ventilation*
The concept
The parked-car ventilation blows air into the
passenger compartment to lower interior tem-
peratures.
It is ready to use in the parked car mode at any
outside temperature.
You can set two different times for the system
to start. The parked-car ventilation can also be
switched on and off directly. It remains
switched on for 30 minutes.
Since the system uses a substantial amount of
electrical current, you should refrain from acti-
vating it twice in succession without allowing
the battery to be recharged in normal operation
between use.
The air emerges through the upper body region
air vents in the instrument cluster. Therefore,
please open the air vents.
The parked-car ventilation is operated via
iDrive.
Switching on and off directly
1."Settings"
2."Climate"
Page 200 of 312

DVD system in rear
198 >Press the arrow buttons:
To switch between windows.
>Press the button:
To activate the menu item.
The transmission time of the remote control is
limited in accordance with legal guidelines. A
function can be repeated by pressing or turning
the appropriate button or knob.
Changing batteries
1.Press the detent and remove the cover.
2.Change the batteries. The type and installa-
tion position are marked on the bottom of
the battery compartment.
3.Close the cover.
Return old batteries to a recycling center
or to your BMW Sports Activity Vehicle
Center.<
Setting the language of the
DVD system
1.Select a CD/DVD track.
2.Press the button.
3.Select "Tone".
4.Press the button.
5.Switch to the top window.
6.Select "Language".
7.Press the button.
8.Select the desired language.
9.Press the button.
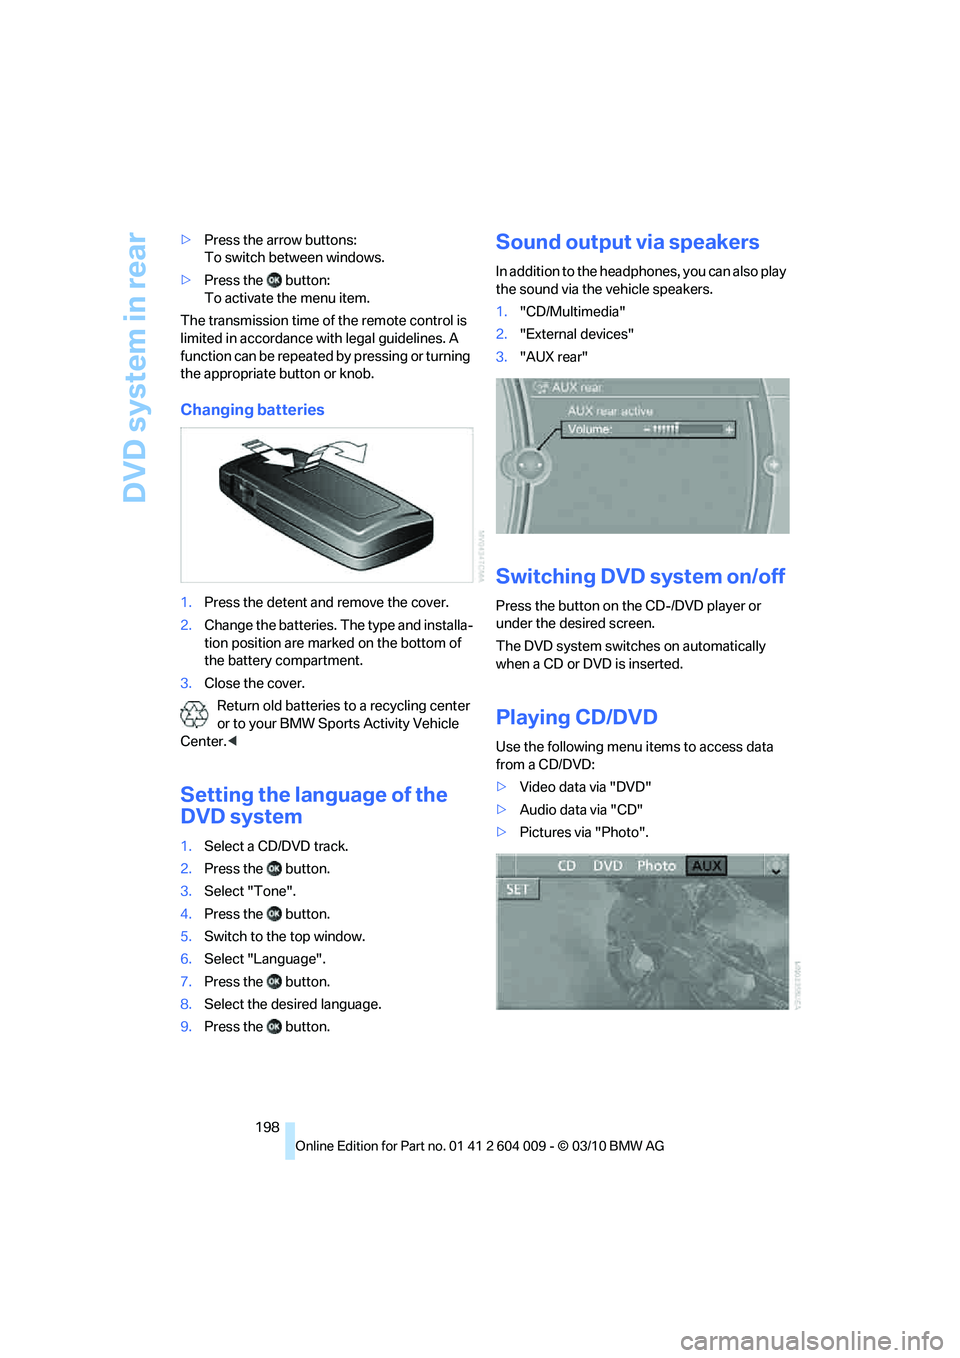
Sound output via speakers
In addition to the headphones, you can also play
the sound via the vehicle speakers.
1."CD/Multimedia"
2."External devices"
3."AUX rear"
Switching DVD system on/off
Press the button on the CD-/DVD player or
under the desired screen.
The DVD system switches on automatically
when a CD or DVD is inserted.
Playing CD/DVD
Use the following menu items to access data
from a CD/DVD:
>Video data via "DVD"
>Audio data via "CD"
>Pictures via "Photo".
Page 214 of 312

Telephone
212
Telephone
The concept
Your BMW is equipped with a full preparation
package mobile phone. After pairing a suitable
mobile phone with the vehicle once, you can
operate the mobile phone using iDrive, the but-
tons on the steering wheel, or voice com-
mands
*.
Once a mobile phone has been paired with your
vehicle, it is automatically recognized as soon
as it is inside the vehicle while the engine is run-
ning or the ignition is switched on. The pairing
data of up to four mobile phones can be stored
simultaneously. If several mobile phones are
detected simultaneously, the respective last
mobile phone paired can be operated via the
vehicle.
Using a phone in your vehicle
Using snap-in adapter*
The so-called snap-in adapter, a mobile phone
cradle, enables the battery to be charged and
the mobile phone to be connected to the exter-
nal antenna of your vehicle. This ensures
improved network reception and a consistent
voice reproduction quality. Ask your BMW
Sports Activity Vehicle Center which mobile
phones snap-in adapters are offered for.
For your safety
A car phone makes life more convenient in
many ways, and can even save lives in an emer-
gency. While you should consult your mobile
phone's separate operating instructions for a
detailed description of safety precautions and
information, we request that you direct your
particular attention to the following:
Only make entries when the traffic situa-
tion allows you to do so. Do not hold the
mobile phone in your hand while you are driving;
use the hands-free system instead. If you do
not observe this precaution, your being dis-tracted can endanger vehicle occupants and
other road users.<
Suitable mobile phones
Please ask your BMW Sports Activity Vehicle
Center which mobile phones with Bluetooth
interface are supported by the mobile phone
preparation package and which mobile phones
are compatible with the snap-in adapter. By vir-
tue of their particular software versions, these
mobile phones support the functions described
in this Owner's Manual. Malfunctions can occur
with other mobile phones.
Operating options
You can operate the mobile phone using:
>Buttons on the steering wheel, refer to
page10
>iDrive, refer to page16
>Voice commands
*, refer to page219
>Programmable memory buttons, refer to
page20
Avoid operating a mobile phone detected by
the vehicle with the keypad of the mobile
phone, otherwise malfunctions can occur.
Commissioning
Pairing mobile phone in vehicle
The following prerequisites must be met:
>Compatible mobile phone: the mobile
phone is supported by the full mobile phone
preparation package. Information on this
subject is also provided on the Internet at:
www.bmw.com/bluetooth
>The mobile phone is ready to operate.
>Bluetooth has been activated in the vehicle,
refer to page214, and on the mobile phone.
*
Page 225 of 312

223
Entertainment
Reference
At a glance
Controls
Driving tips Communications
Navigation
Mobility
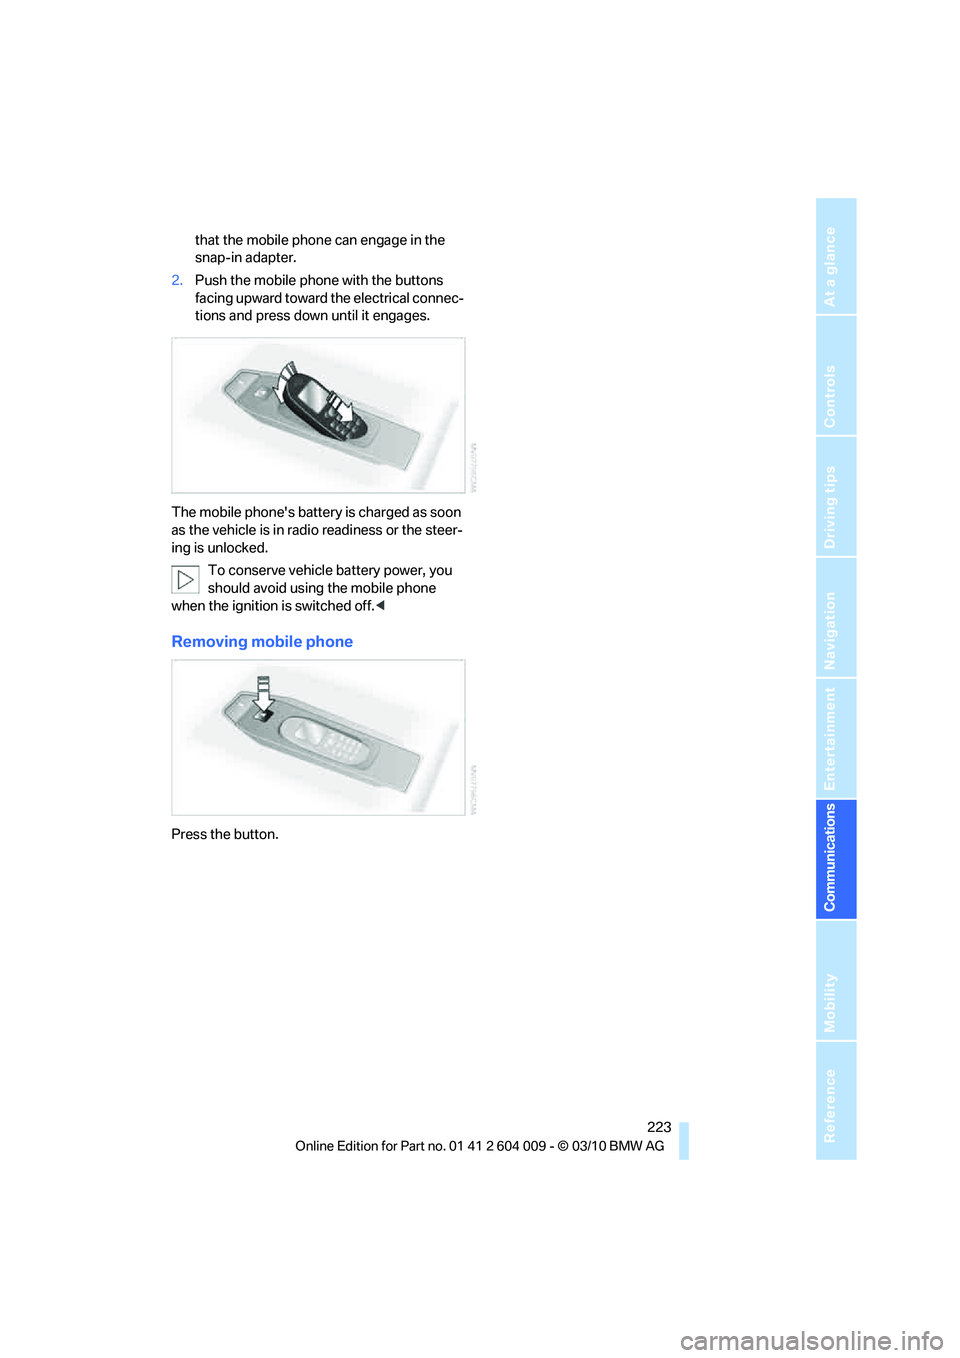
that the mobile phone can engage in the
snap-in adapter.
2.Push the mobile phone with the buttons
facing upward toward the electrical connec-
tions and press down until it engages.
The mobile phone's battery is charged as soon
as the vehicle is in radio readiness or the steer-
ing is unlocked.
To conserve vehicle battery power, you
should avoid using the mobile phone
when the ignition is switched off.<
Removing mobile phone
Press the button.