2011 BMW 750LI light
[x] Cancel search: lightPage 177 of 299
Storing the league or team
Leagues
or teams can be added to the favorites
from a selection list.
1. "Radio"
2. "Satellite radio"
3. "Manage favorites"
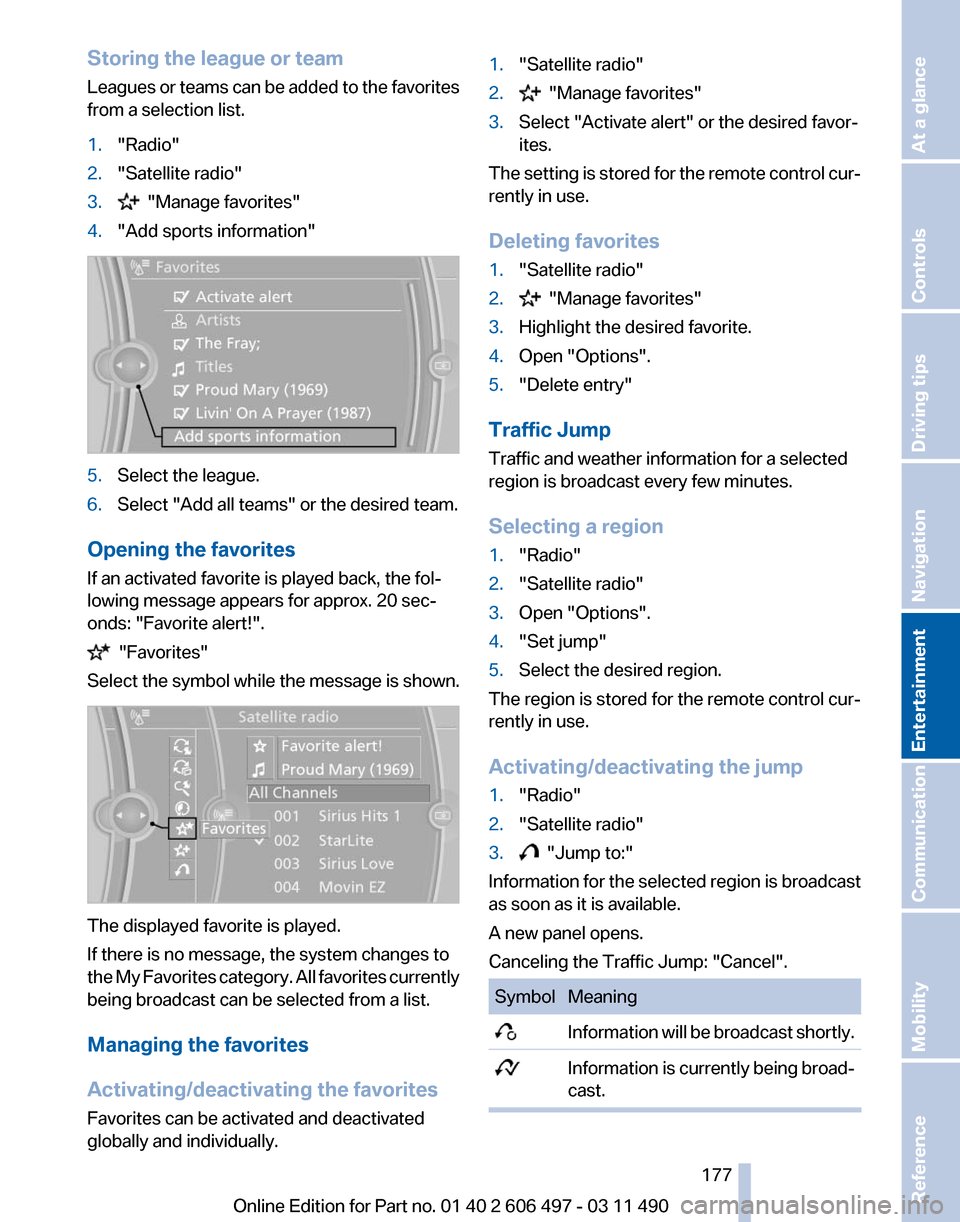
4. "Add sports information" 5.
Select the league.
6. Select "Add all teams" or the desired team.
Opening the favorites
If an activated favorite is played back, the fol‐
lowing message appears for approx. 20 sec‐
onds: "Favorite alert!". "Favorites"
Select the symbol while the message is shown. The displayed favorite is played.
If there is no message, the system changes to
the
My Favorites category. All favorites currently
being broadcast can be selected from a list.
Managing the favorites
Activating/deactivating the favorites
Favorites can be activated and deactivated
globally and individually. 1.
"Satellite radio"
2. "Manage favorites"
3. Select "Activate alert" or the desired favor‐
ites.
The setting is stored for the remote control cur‐
rently in use.
Deleting favorites
1. "Satellite radio"
2. "Manage favorites"
3. Highlight the desired favorite.
4. Open "Options".
5. "Delete entry"
Traffic Jump
Traffic and weather information for a selected
region is broadcast every few minutes.
Selecting a region
1. "Radio"
2. "Satellite radio"
3. Open "Options".
4. "Set jump"
5. Select the desired region.
The region is stored for the remote control cur‐
rently in use.
Activating/deactivating the jump
1. "Radio"
2. "Satellite radio"
3. "Jump to:"
Information for the selected region is broadcast
as soon as it is available.
A new panel opens.
Canceling the Traffic Jump: "Cancel". Symbol Meaning
Information will be broadcast shortly.
Information is currently being broad‐
cast. Seite 177
177Online Edition for Part no. 01 40 2 606 497 - 03 11 490
Reference Mobility Communication
Entertainment Navigation Driving tips Controls At a glance
Page 185 of 299

1.
"CD/Multimedia"
2. "CD/DVD"
3. Select the desired DVD.
4. Open "Options".
5. "Audio/language"
6. Select the desired language.
Notes
CD/DVD player and changer Do not remove the cover
BMW CD/DVD players and changers are
officially designated Class 1 laser products. Do
not operate if the cover is damaged; otherwise,
severe eye damage may occur.◀
CDs and DVDs
Use of CDs/DVDs
▷Do not use self-recorded CDs/DVDs
with labels applied, as these can be‐
come detached during playback due
to
heat buildup and can cause irrepar‐
able damage to the device.
▷ Only use round CDs/DVDs with a standard
diameter of 4.7 in/12 cm and do not play
CDs/DVDs
with an adapter, e.g., single CDs;
otherwise, the CDs or the adapter may jam
and no longer eject.
▷ Do not use combined CDs/DVDs, e.g., DVD
Plus, as the CDs/DVDs can jam and will no
longer eject.◀
General malfunctions
▷ CD/DVD changers and players have been
optimized for performance in vehicles. In
some
instances they may be more sensitive
to faulty CDs/DVDs than stationary devices
would be.
▷ If a CD/DVD cannot be played, first check
whether it has been inserted correctly. Humidity
High
levels of humidity can lead to condensation
on the CD/DVD or the laser's scan lens, and
temporarily prevent playback.
Malfunctions involving individual CDs/
DVDs
If malfunctions occur only with particular CDs/
DVDs, this can be due to one of the following
causes:
Home-recorded CDs/DVDs
▷ Possible reasons for malfunctions with
home-recorded
CDs/DVDs are inconsistent
data creation or recording processes, or
poor quality or old age of the blank CD/DVD.
▷ Only label CDs/DVDs on the upper side with
a pen intended for this purpose.
Damage
▷ Avoid fingerprints, dust, scratches and
moisture.
▷ Store CDs/DVDs in a sleeve.
▷ Do not subject CDs/DVDs to temperatures
over 122 ℉/50 ℃, high humidity or direct
sunlight.
CDs/DVDs with copy protection
CDs/DVDs are often provided with a copy pro‐
tection feature by the manufacturer. This can
mean
that some CDs/DVDs cannot be played or
can only be played to a limited extent.
MACROVISION
This product contains copyrighted technology
that is based on multiple registered US patents
and the intellectual property of the Macrovision
Corporation and other manufacturers. The use
of this copy protection must be approved by
Macrovision. Media protected by this product -
unless otherwise agreed with Macrovision - may
only be used for private purposes. Copying of
this technology is prohibited.
Seite 185
185Online Edition for Part no. 01 40 2 606 497 - 03 11 490
Reference Mobility Communication
Entertainment Navigation Driving tips Controls At a glance
Page 189 of 299
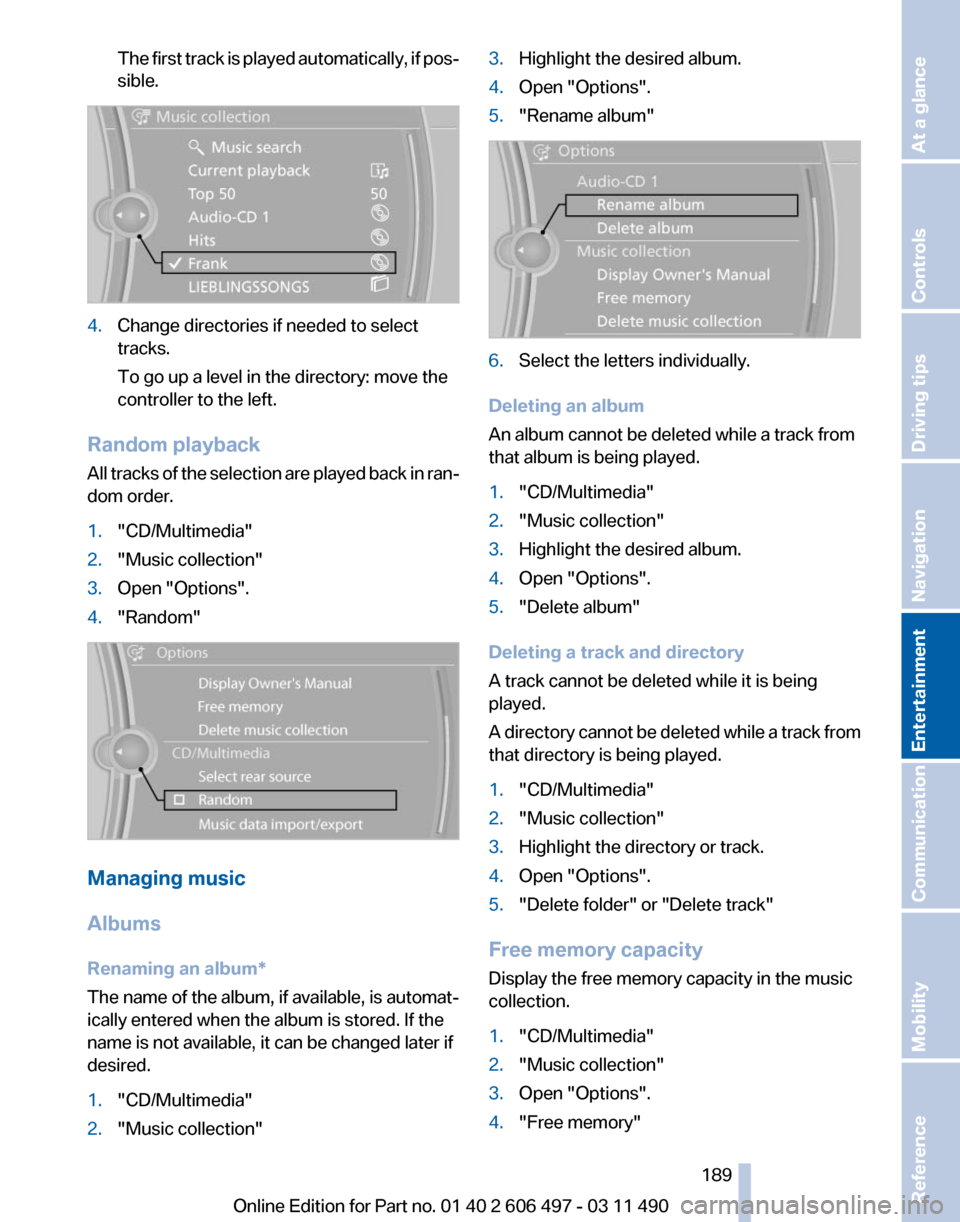
The first track is played automatically, if pos‐
sible.
4.
Change directories if needed to select
tracks.
To go up a level in the directory: move the
controller to the left.
Random playback
All tracks of the selection are played back in ran‐
dom order.
1. "CD/Multimedia"
2. "Music collection"
3. Open "Options".
4. "Random" Managing music
Albums
Renaming an album
*
The name of the album, if available, is automat‐
ically entered when the album is stored. If the
name is not available, it can be changed later if
desired.
1. "CD/Multimedia"
2. "Music collection" 3.
Highlight the desired album.
4. Open "Options".
5. "Rename album" 6.
Select the letters individually.
Deleting an album
An album cannot be deleted while a track from
that album is being played.
1. "CD/Multimedia"
2. "Music collection"
3. Highlight the desired album.
4. Open "Options".
5. "Delete album"
Deleting a track and directory
A track cannot be deleted while it is being
played.
A
directory cannot be deleted while a track from
that directory is being played.
1. "CD/Multimedia"
2. "Music collection"
3. Highlight the directory or track.
4. Open "Options".
5. "Delete folder" or "Delete track"
Free memory capacity
Display the free memory capacity in the music
collection.
1. "CD/Multimedia"
2. "Music collection"
3. Open "Options".
4. "Free memory"
Seite 189
189Online Edition for Part no. 01 40 2 606 497 - 03 11 490
Reference Mobility Communication
Entertainment Navigation Driving tips Controls At a glance
Page 196 of 299

4. Select the symbol.
5.
Select the desired track from the list, if nec‐
essary.
Playback menu*
Depending on the particular device, some of the
functions may not be available. Symbol Function
Next track
Fast forward: press and hold the
symbol. Previous music track
Reverse: press and hold the symbol. Disconnecting the audio connection
1.
"CD/Multimedia"
2. "Bluetooth® (audio)"
3. Highlight the desired device.
4. Open "Options".
5. "Configure phone" 6.
"Audio"
7. "OK" Unpairing a device
1.
"CD/Multimedia"
2. "Bluetooth® (audio)"
3. If necessary, "Bluetooth® audio".
4. Highlight the device that is to be unpaired.
5. Open "Options".
6. "Remove phone from list"
What to do if...
Information
on suitable devices can be found at
www.bmwusa.com/bluetooth.
Suitable mobile phones, refer to page 212.
The device is not supported by the vehicle.
▷ Perform a software update*, refer to
page 197, if needed.
The device could not be paired or connected.
▷ Do the Bluetooth passkeys on the device
and the vehicle match? Enter the same
passkey on the device and via iDrive.
▷ Did it take longer than 30 seconds to enter
the
passkey? Repeat the pairing procedure.
▷ Are too many Bluetooth devices connected
to
the device or vehicle? Delete connections
with other devices if necessary.
▷ Is the mobile phone in power-save mode or
does
it have only a limited remaining battery
life? Charge the mobile phone in the snap-
in adapter or via the charging cable.
▷ Depending on the mobile phone, it is possi‐
ble that only one device can be connected
to the vehicle. Unpair the connected device
from the vehicle and pair and connect only
one device.
▷ The device no longer reacts? Switch the de‐
vice off and on again.
▷ Repeat the pairing procedure.
Music cannot be played back.
▷ Start the program for playing back music
data on the device and select a track on the
device if necessary.
▷ Switch the radio off and on again.
Music files can only be played back softly.
Seite 196
196 Online Edition for Part no. 01 40 2 606 497 - 03 11 490
CD/multimedia
Page 200 of 299
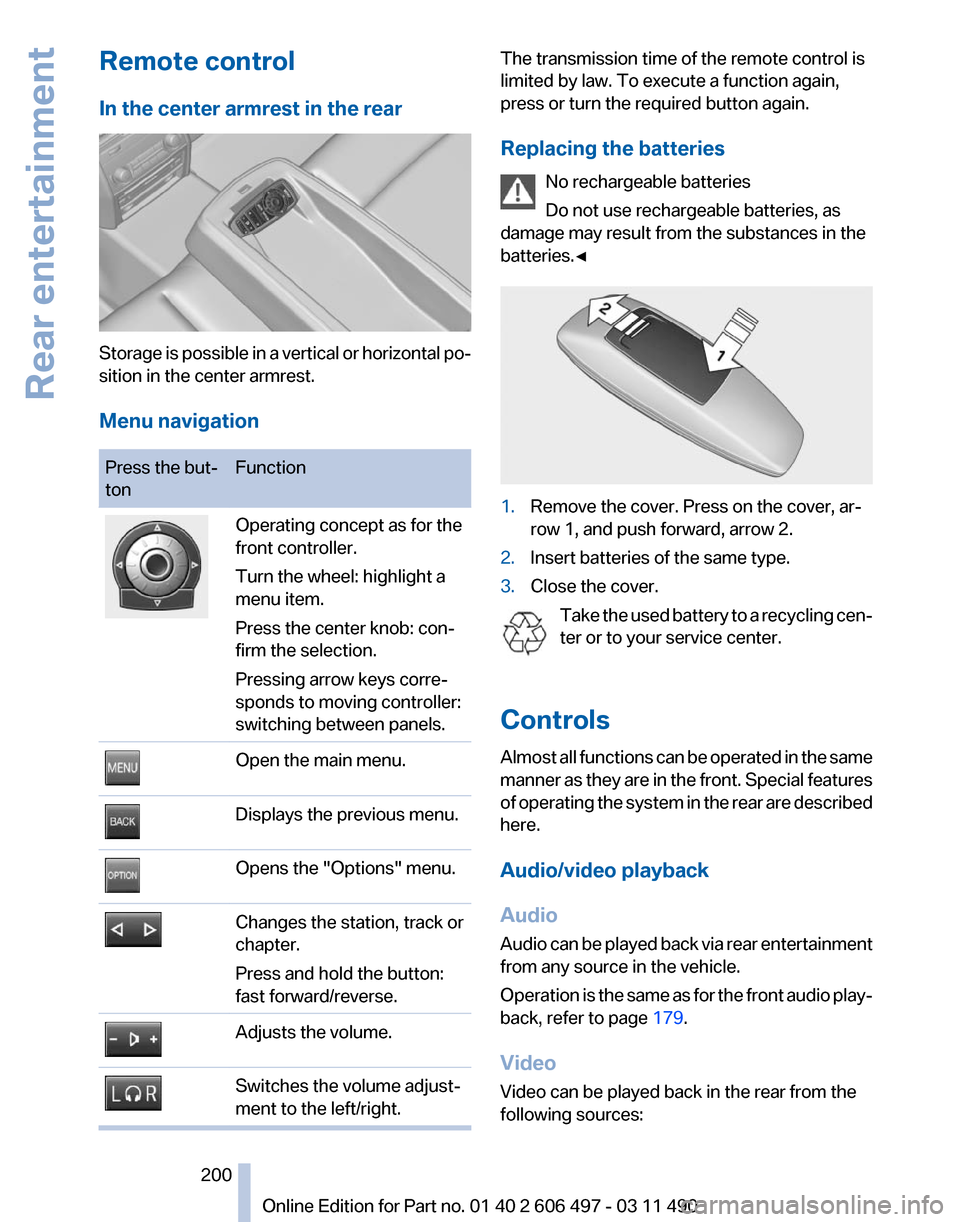
Remote control
In the center armrest in the rear
Storage is possible in a vertical or horizontal po‐
sition in the center armrest.
Menu navigation
Press the but‐
ton
Function Operating concept as for the
front controller.
Turn the wheel: highlight a
menu item.
Press the center knob: con‐
firm the selection.
Pressing arrow keys corre‐
sponds to moving controller:
switching between panels.
Open the main menu.
Displays the previous menu.
Opens the "Options" menu.
Changes the station, track or
chapter.
Press and hold the button:
fast forward/reverse.
Adjusts the volume.
Switches the volume adjust‐
ment to the left/right. The transmission time of the remote control is
limited by law. To execute a function again,
press or turn the required button again.
Replacing the batteries
No rechargeable batteries
Do not use rechargeable batteries, as
damage may result from the substances in the
batteries.◀ 1.
Remove the cover. Press on the cover, ar‐
row 1, and push forward, arrow 2.
2. Insert batteries of the same type.
3. Close the cover.
Take the used battery to a recycling cen‐
ter or to your service center.
Controls
Almost
all functions can be operated in the same
manner as they are in the front. Special features
of operating the system in the rear are described
here.
Audio/video playback
Audio
Audio can be played back via rear entertainment
from any source in the vehicle.
Operation is the same as for the front audio play‐
back, refer to page 179.
Video
Video can be played back in the rear from the
following sources: Seite 200
200 Online Edition for Part no. 01 40 2 606 497 - 03 11 490
Rear entertainment
Page 202 of 299
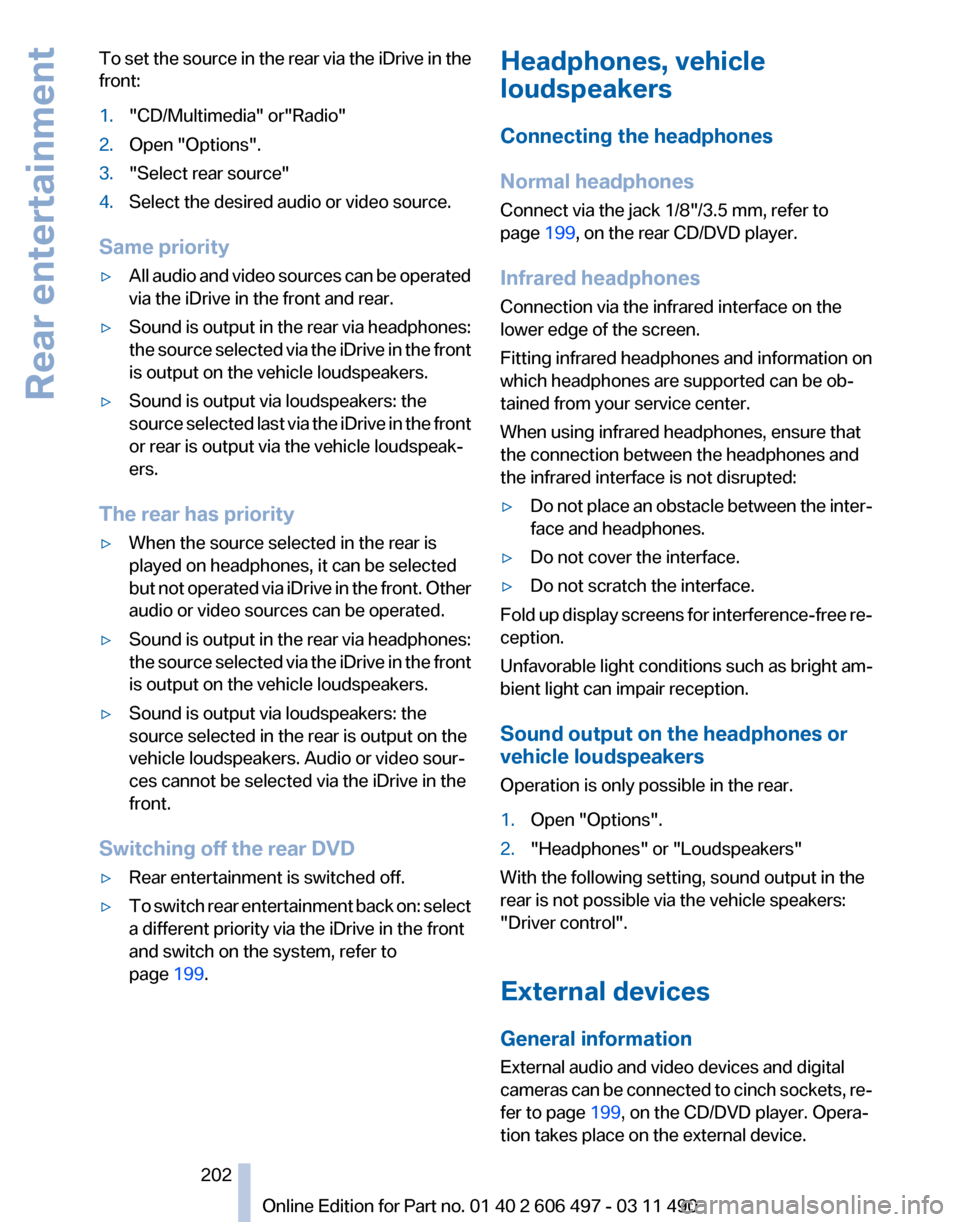
To set the source in the rear via the iDrive in the
front:
1.
"CD/Multimedia" or"Radio"
2. Open "Options".
3. "Select rear source"
4. Select the desired audio or video source.
Same priority
▷ All audio and video sources can be operated
via the iDrive in the front and rear.
▷ Sound is output in the rear via headphones:
the
source selected via the iDrive in the front
is output on the vehicle loudspeakers.
▷ Sound is output via loudspeakers: the
source
selected last via the iDrive in the front
or rear is output via the vehicle loudspeak‐
ers.
The rear has priority
▷ When the source selected in the rear is
played on headphones, it can be selected
but
not operated via iDrive in the front. Other
audio or video sources can be operated.
▷ Sound is output in the rear via headphones:
the
source selected via the iDrive in the front
is output on the vehicle loudspeakers.
▷ Sound is output via loudspeakers: the
source selected in the rear is output on the
vehicle loudspeakers. Audio or video sour‐
ces cannot be selected via the iDrive in the
front.
Switching off the rear DVD
▷ Rear entertainment is switched off.
▷ To switch rear entertainment back on: select
a different priority via the iDrive in the front
and switch on the system, refer to
page 199. Headphones, vehicle
loudspeakers
Connecting the headphones
Normal headphones
Connect via the jack 1/8"/3.5 mm, refer to
page
199, on the rear CD/DVD player.
Infrared headphones
Connection via the infrared interface on the
lower edge of the screen.
Fitting infrared headphones and information on
which headphones are supported can be ob‐
tained from your service center.
When using infrared headphones, ensure that
the connection between the headphones and
the infrared interface is not disrupted:
▷ Do not place an obstacle between the inter‐
face and headphones.
▷ Do not cover the interface.
▷ Do not scratch the interface.
Fold up display screens for interference-free re‐
ception.
Unfavorable light conditions such as bright am‐
bient light can impair reception.
Sound output on the headphones or
vehicle loudspeakers
Operation is only possible in the rear.
1. Open "Options".
2. "Headphones" or "Loudspeakers"
With the following setting, sound output in the
rear is not possible via the vehicle speakers:
"Driver control".
External devices
General information
External audio and video devices and digital
cameras
can be connected to cinch sockets, re‐
fer to page 199, on the CD/DVD player. Opera‐
tion takes place on the external device.
Seite 202
202 Online Edition for Part no. 01 40 2 606 497 - 03 11 490
Rear entertainment
Page 207 of 299
The rear has priority
▷
When the source selected in the rear is
played on headphones, it can be selected
but
not operated via iDrive in the front. Other
audio or video sources can be operated.
▷ Sound is output in the rear via headphones:
the
source selected via the iDrive in the front
is output on the vehicle loudspeakers.
▷ Sound is output via loudspeakers: the
source selected in the rear is output on the
vehicle loudspeakers. Audio or video sour‐
ces cannot be selected via the iDrive in the
front.
Switching off the rear DVD
▷ Rear entertainment is switched off.
▷ To switch rear entertainment back on: select
a different priority via the iDrive in the front
and switch on the system, refer to
page 204.
Headphones, vehicle
loudspeakers
Connecting the headphones
Normal headphones
Connect via the jack 1/8"/3.5 mm, refer to
page 204, on the rear CD/DVD player.
Infrared headphones
Connection via the infrared interface on the
lower edge of the screen.
Fitting infrared headphones and information on
which headphones are supported can be ob‐
tained from your service center.
When using infrared headphones, ensure that
the connection between the headphones and
the infrared interface is not disrupted:
▷ Do not place an obstacle between the inter‐
face and headphones.
▷ Do not cover the interface.
▷ Do not scratch the interface. Fold up display screens for interference-free re‐
ception.
Unfavorable light conditions such as bright am‐
bient light can impair reception.
Sound output on the headphones or
vehicle loudspeakers
Operation is only possible in the rear.
1.
Open "Options".
2. "Headphones" or "Loudspeakers"
With the following setting, sound output in the
rear is not possible via the vehicle speakers:
"Driver control".
External devices
General information
External audio and video devices and digital
cameras
can be connected to cinch sockets, re‐
fer to page 204, on the CD/DVD player. Opera‐
tion takes place on the external device.
Due to the large number of different audio and
video devices available on the market, it cannot
be ensured that every audio and video device
will be displayed correctly on the screen.
Connecting an external device
1. Fold down the cover in front of the cinch
sockets on the CD/DVD player.
2. Connect the external device to the RCA
sockets.
▷Video: yellow socket.
▷ Audio: white and red socket.
Starting playback
1. "CD/Multimedia"
2. "External devices"
3. Select the or symbol.
Volume
The volume of the sound output is dependent
on the audio device. If this volume differs mark‐
Seite 207
207Online Edition for Part no. 01 40 2 606 497 - 03 11 490
Reference Mobility Communication
Entertainment Navigation Driving tips Controls At a glance
Page 214 of 299
If the pairing was successful, the mobile phone
appears at the top of the list of mobile phones.
The functions supported by the mobile phone
and
audio device are displayed as symbols when
paired.
White symbol: the function is active.
Gray symbol: the function is inactive. Symbol Function
Telephone.
Additional telephone.
Audio source. Four devices can be paired with the vehicle at
once.
Three devices can be connected with the
vehicle at once.
If pairing was unsuccessful: What to do if..., refer
to page 214.
Following the initial pairing
▷ The mobile phone is detected/connected in
the vehicle within a short period of time
when
the engine is running or the ignition is
switched on.
▷ The phone book entries of the telephone
stored
on the SIM card* or mobile phone are
transmitted to the vehicle after detection,
depending on the mobile phone.
▷ Four devices can be paired.
▷ Specific settings may be necessary in some
mobile phones, e.g., authorization or a se‐
cure connection; refer to the mobile phone
operating instructions.
Connecting a specific device
If
more than one device is detected by the vehi‐
cle, the device at the top of the list is connected.
A different device can be connected by select‐
ing it.
1. "Telephone"
2. "Bluetooth® (phone)"
3. Select the device that is to be connected. The functions that were assigned to the device
before unpairing are assigned to the device
when it is reconnected. If the device is already
connected, these functions are deactivated.
Configuring the devices
Additional functions can be activated or deacti‐
vated for paired and connected devices.
1.
"Telephone"
2. "Bluetooth® (phone)"
3. Highlight the device to be configured.
4. Open "Options".
5. "Configure phone"
6. At least one function must be selected.
▷"Telephone"
▷ "Additional telephone"
▷ "Audio"
7. "OK"
If a function is assigned to a device, the function
will be deactivated where appropriate for a de‐
vice
that is already connected and the device will
be unpaired.
Swapping the telephone and additional
telephone
The function of the telephone and additional tel‐
ephone can be swapped automatically.
1. "Telephone"
2. "Bluetooth® (phone)"
3. "Swap phone/addit. phone"
Unpairing a device
1. "Telephone"
2. "Bluetooth® (phone)"
3. Highlight the device that is to be unpaired.
4. Open "Options".
5. "Remove phone from list"
What to do if...
Information on suitable mobile phones, refer to
page 212.
Seite 214
214 Online Edition for Part no. 01 40 2 606 497 - 03 11 490
Telephone