2011 BMW 740LI seats
[x] Cancel search: seatsPage 89 of 299

▷
There should be no people, animals, or ob‐
jects between an airbag and a person.
▷ Do not use the cover of the front airbag on
the front passenger side as a storage area.
▷ Keep the dashboard and window on the
front
passenger side clear, i.e., do not cover
with adhesive labels or coverings, and do not
attach holders such as for navigation instru‐
ments and mobile phones.
▷ Make sure that the front passenger is sitting
correctly, i.e., keeps his or her feet and legs
in the footwell; otherwise, leg injuries can
occur if the front airbag is triggered.
▷ Do not place slip covers, seat cushions or
other objects on the front passenger seat
that are not approved specifically for seats
with integrated side airbags.
▷ Do not hang pieces of clothing, such as jack‐
ets, over the backrests.
▷ Make sure that occupants keep their heads
away from the side airbag and do not rest
against the head airbag; otherwise, injuries
can occur if the airbags are triggered.
▷ Do not remove the airbag restraint system.
▷ Do not remove the steering wheel.
▷ Do not apply adhesive materials to the air‐
bag cover panels, cover them or modify
them in any way.
▷ Never modify either the individual compo‐
nents
or the wiring in the airbag system. This
also applies to steering wheel covers, the
dashboard, the seats, the roof pillars and the
sides of the headliner.◀
Even when all instructions are followed closely,
injury from contact with the airbags cannot be
ruled out in certain situations.
The ignition and inflation noise may lead to
short-term
and, in most cases, temporary hear‐
ing impairment in sensitive individuals.
In the case of a malfunction, deactivation
and after triggering of the airbags
Do not touch the individual components imme‐
diately after the system has been triggered; oth‐
erwise, there is the danger of burns. Only have the airbags checked, repaired or dis‐
mantled and the airbag generator scrapped by
your service center or a workshop that has the
necessary
authorization for handling explosives.
Non-professional attempts to service the sys‐
tem could lead to failure in an emergency or un‐
desired triggering of the airbag, either of which
could result in injury.◀
Warnings and information on the airbags are
also found on the sun visors.
Functional readiness of the airbag
system When the ignition is switch on, the warn‐
ing lamp in the instrument cluster lights
up briefly and thereby indicates the op‐
erational readiness of the entire airbag system
and the belt tensioner.
Airbag system malfunctioning
▷ In radio ready state, the warning lamp does
not come on.
▷ The warning lamp lights up continuously.
When there is a malfunction, have the air‐
bag system checked immediately
When there is a malfunction, have the airbag
system checked immediately; otherwise, there
is
a risk that the system does not function as ex‐
pected in the event of an accident despite cor‐
responding severity of the accident.◀
Automatic deactivation of the front
passenger airbags
The system determines whether the front pas‐
senger seat is occupied by measuring the re‐
sistance of the human body.
The front, knee, and side airbag on the front
passenger side are activated or deactivated ac‐
cordingly.
Leave feet in the footwell
Make sure that the front passenger keeps
his or her feet in the footwell; otherwise, the front
passenger airbags may not function properly.◀ Seite 89
89Online Edition for Part no. 01 40 2 606 497 - 03 11 490
Reference Mobility Communication Entertainment Navigation Driving tips
Controls At a glance
Page 90 of 299

Child restraint fixing system in the front
passenger seat
Before
transporting a child on the front passen‐
ger seat, see the safety notes and instructions
under Children on the front passenger seat.◀
Malfunction of the automatic
deactivation system
When transporting older children and adults, the
front passenger airbags may be deactivated in
certain sitting positions. In this case, the indica‐
tor lamp for the front passenger airbags lights
up.
In this case, change the sitting position so that
the front passenger airbags are activated and
the indicator lamp goes out.
If it is not possible to activate the airbags, have
the person sit in the rear.
To make sure that the occupied seat cushion
can be evaluated correctly
▷ Do not attach covers, cushions, ball mats or
other items to the front passenger seat un‐
less they are specifically recommended by
the manufacturer of your vehicle.
▷ Do not place any objects on the front pas‐
senger seat.
▷ Do not place objects under the seat that
could press against the seat from below.
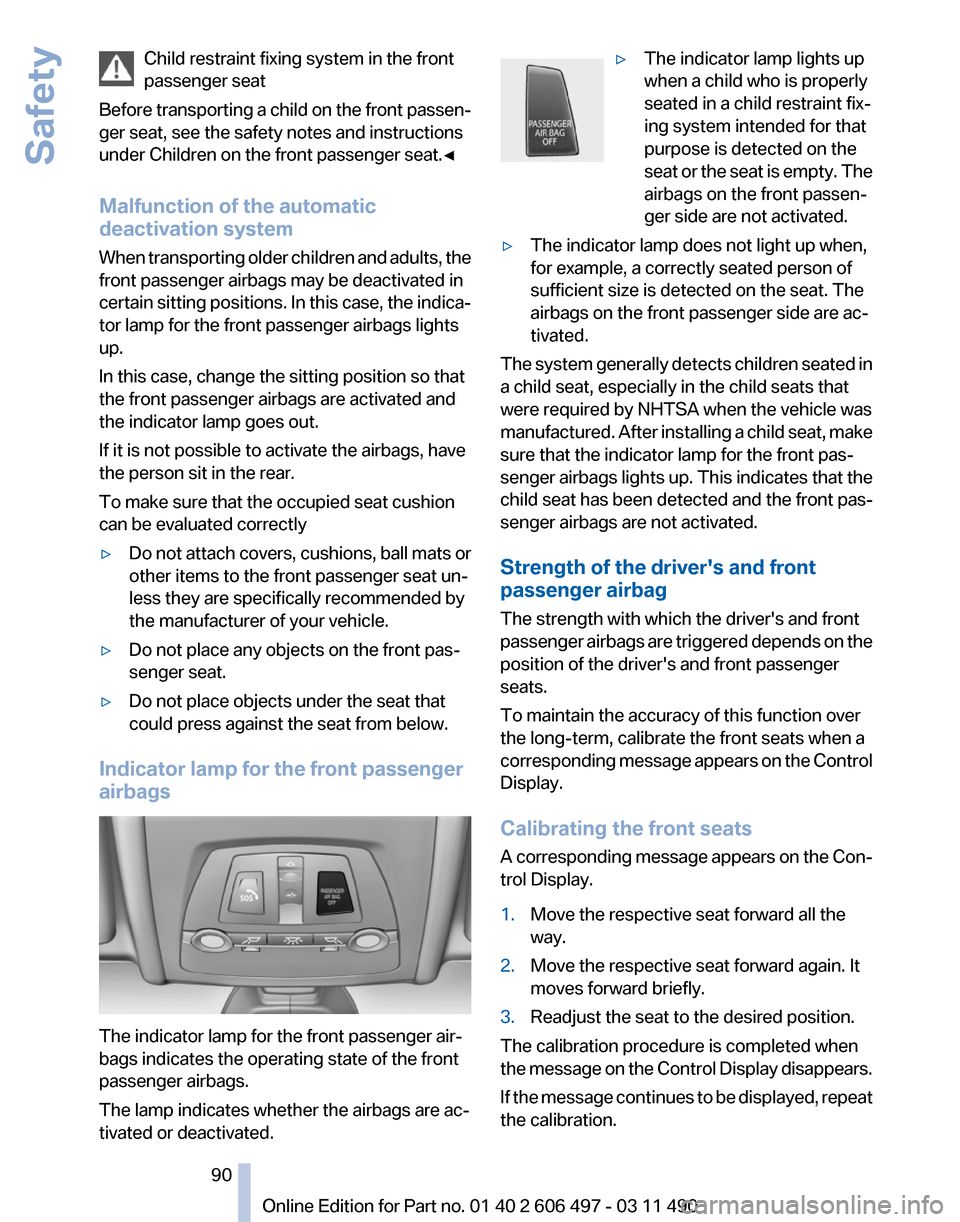
Indicator lamp for the front passenger
airbags The indicator lamp for the front passenger air‐
bags indicates the operating state of the front
passenger airbags.
The lamp indicates whether the airbags are ac‐
tivated or deactivated. ▷
The indicator lamp lights up
when a child who is properly
seated in a child restraint fix‐
ing system intended for that
purpose is detected on the
seat
or the seat is empty. The
airbags on the front passen‐
ger side are not activated.
▷ The indicator lamp does not light up when,
for example, a correctly seated person of
sufficient size is detected on the seat. The
airbags on the front passenger side are ac‐
tivated.
The system generally detects children seated in
a child seat, especially in the child seats that
were required by NHTSA when the vehicle was
manufactured.
After installing a child seat, make
sure that the indicator lamp for the front pas‐
senger airbags lights up. This indicates that the
child seat has been detected and the front pas‐
senger airbags are not activated.
Strength of the driver's and front
passenger airbag
The strength with which the driver's and front
passenger airbags are triggered depends on the
position of the driver's and front passenger
seats.
To maintain the accuracy of this function over
the long-term, calibrate the front seats when a
corresponding message appears on the Control
Display.
Calibrating the front seats
A corresponding message appears on the Con‐
trol Display.
1. Move the respective seat forward all the
way.
2. Move the respective seat forward again. It
moves forward briefly.
3. Readjust the seat to the desired position.
The calibration procedure is completed when
the
message on the Control Display disappears.
If the message continues to be displayed, repeat
the calibration. Seite 90
90 Online Edition for Part no. 01 40 2 606 497 - 03 11 490
Safety
Page 91 of 299

If the message does not disappear after a repeat
calibration,
have the system checked as soon as
possible.
Unobstructed area of movement
Ensure that the area of movement of the
seats is unobstructed to avoid personal injury or
damage to objects.◀
Tire Pressure Monitor TPM*
The concept
The tire inflation pressure is measured in the
four mounted tires. The system notifies you if
there is a significant loss of pressure in one or
more tires.
Functional requirements
The system must have been reset when the in‐
flation pressure was correct; otherwise, reliable
signaling of a flat tire is not ensured. Always use
wheels with TPM electronics to ensure that the
system will operate properly. Reset the system
after each correction of the tire inflation pres‐
sure and after every tire or wheel change.
System limits
Sudden tire damage
Sudden serious tire damage caused by
external influences cannot be indicated in ad‐
vance.◀
The system does not operate correctly if it has
not been reset. For example, a flat tire may be
indicated despite correct tire inflation pres‐
sures.
The system is inactive and cannot indicate a flat
tire:
▷ For a mounted wheel without TPM electron‐
ics.
▷ When the TPM is disturbed by other sys‐
tems or devices with the same radio fre‐
quency. Status display
The
current status of the Tire Pressure Monitor
TPM can be displayed on the Control Display,
e.g., whether or not the TPM is active.
1. "Vehicle Info"
2. "Vehicle status"
3. "Tire Pressure Monitor - TPM"
The status is displayed.
Status display
The tire and system status is indicated by the
color of the tires.
A change in the tire inflation pressure during
driving is taken into account.
A
correction is only necessary if this is indicated
by the TPM
Wheels, green
The tire inflation pressure is equal to the target
state.
One wheel is yellow
A flat tire or major drop in inflation pressure in
the indicated tire.
All wheels are yellow
▷ A flat tire or major drop in inflation pressure
in several tires.
▷ The system was not reset after a wheel
change and thus warns based on the infla‐
tion pressures initialized last.
▷ A flat tire in one or more tires while the sys‐
tem is being reset.
Wheels, gray
The
system cannot detect a flat tire. Reasons for
this may be:
▷ TPM is being reset.
▷ Disturbance by systems or devices with the
same radio frequency.
▷ Malfunction.
Seite 91
91Online Edition for Part no. 01 40 2 606 497 - 03 11 490
Reference Mobility Communication Entertainment Navigation Driving tips
Controls At a glance
Page 138 of 299

Storage compartments
Storage compartments
The following storage compartments are avail‐
able in the vehicle interior:
▷
Glove compartment on the driver's and front
passenger side, refer to page 138.
▷ Storage compartment in the center armrest,
refer to page 139, in the front and rear.
▷ Compartments in the doors.
▷ Pockets on the backrests of the front seats*.
▷ Net in the front passenger footwell*.
No loose objects in the passenger com‐
partment
Do not stow any objects in the passenger com‐
partment without securing them; otherwise,
they may present a danger to occupants for in‐
stance during braking and avoidance maneu‐
vers.◀
Glove compartment
Front passenger side
Opening Pull the handle.
The
light in the glove compartment switches on.
Close the glove compartment again im‐
mediately
Close the glove compartment immediately after
use while driving; otherwise, injury may occur
during accidents.◀ Closing
Fold up the cover.
Opening the top cover
Press the button.
The top cover opens automatically.
Closing the top cover
Press the cover closed.
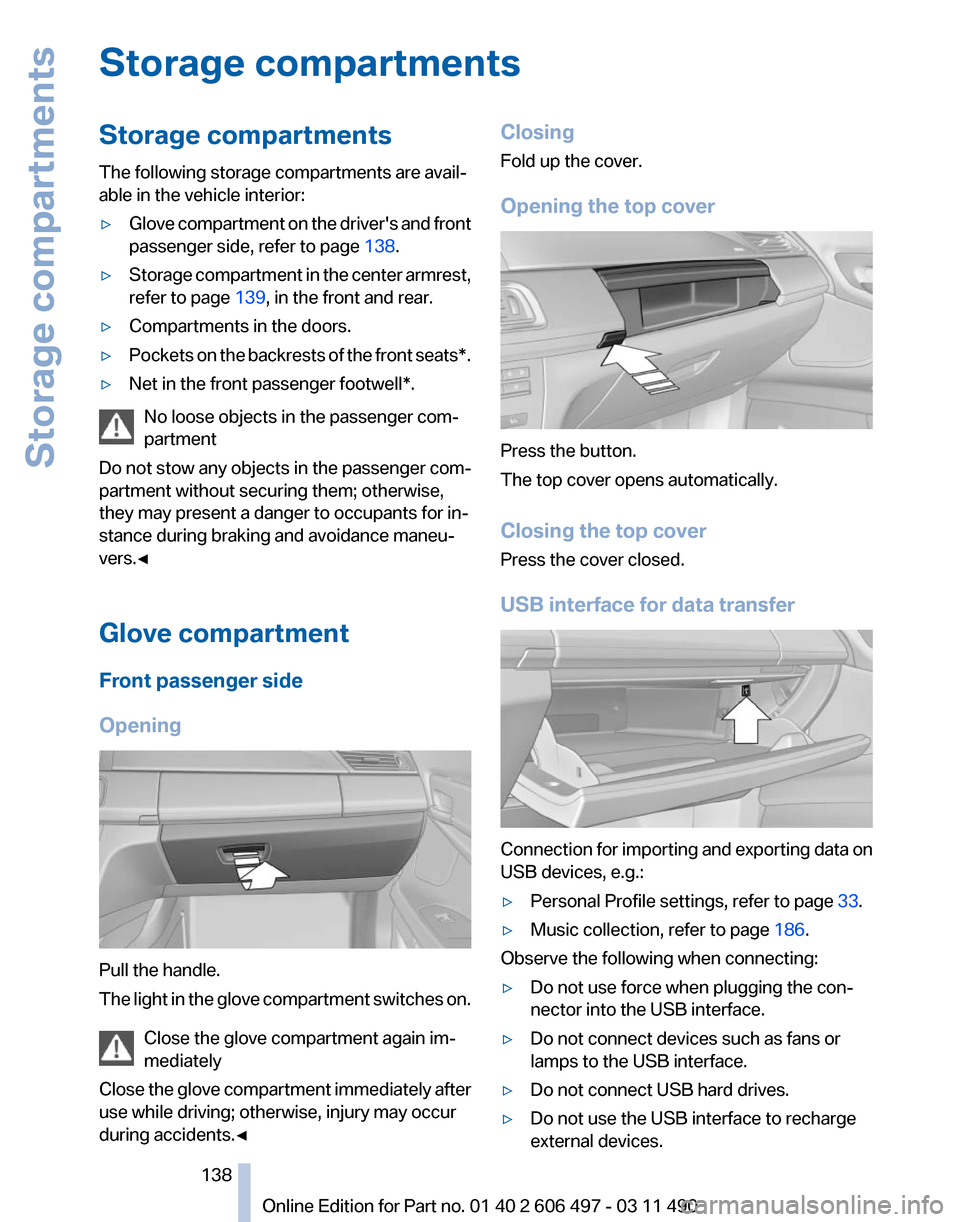
USB interface for data transfer
Connection for importing and exporting data on
USB devices, e.g.:
▷
Personal Profile settings, refer to page 33.
▷ Music collection, refer to page 186.
Observe the following when connecting:
▷ Do not use force when plugging the con‐
nector into the USB interface.
▷ Do not connect devices such as fans or
lamps to the USB interface.
▷ Do not connect USB hard drives.
▷ Do not use the USB interface to recharge
external devices.
Seite 138
138 Online Edition for Part no. 01 40 2 606 497 - 03 11 490
Storage compartments
Page 139 of 299

Driver's side
Opening
Pull the handle.
Close the glove compartment again im‐
mediately
Close
the glove compartment immediately after
use while driving; otherwise, injury may occur
during accidents.◀
Closing
Fold up the cover.
Center armrest
Front
A storage compartment is located in the center
armrest between the front seats.
Opening Press the buttons next to the lock. Locking the storage compartment
The storage compartment in the armrest can be
locked with an integrated key to separately se‐
cure
the trunk lid, refer to page 41, for example.
After the storage compartment is locked, the re‐
mote control can be handed out without the
integrated key, refer to page 32, for instance at
a hotel.
This prevents access to the storage compart‐
ment and to the cargo area.
Connection for an external audio
device This can be used to connect an external audio
device, such as a CD or MP3 player.
▷
AUX-IN port, refer to page 190.
▷ USB audio interface*, refer to page 191.
Rear
A storage compartment is located in the center
armrest between the seats.
Opening
Depending
on the equipment in your vehicle, the
button is in the depression at the front of the
center armrest or on top of the center armrest.
Seite 139
139Online Edition for Part no. 01 40 2 606 497 - 03 11 490
Reference Mobility Communication Entertainment Navigation Driving tips
Controls At a glance
Page 199 of 299

Rear entertainment*
Controls
1
Screen, left
2 Screen, right
3 Center armrest, remote control
4 CD/DVD player
Rear CD/DVD player 1
CD/DVD slot
2 Eject CD/DVD
3 On/off, right
4 Headphone connection, right
5 RCA sockets
6 Headphone connection, left
7 On/off, left
Switching the system on/off Press the left or right side of the button
on the CD/DVD player in the rear for the
respective page. Rear entertainment and screens are switched
on/off.
After
switching off the ignition, the system must
be switched on again.
Screens
Adjusting
Danger of burns when screen is folded out
Do not reach behind the screen; other‐
wise, there is the danger of getting burned. The
back of the screen can become very hot.◀ ▷
To fold out: pull at the bottom edge.
▷ To fold in: press against the bottom edge.
Notes
▷ Do not cover lower screen edge, since this
is where the sensors and the infrared inter‐
face are installed.
▷ When loading the rear seats and adjusting
the backrest of the front seat, fold in the
screens.
▷ When cleaning the screen, follow the care
instructions, refer to page 273. Seite 199
199Online Edition for Part no. 01 40 2 606 497 - 03 11 490
Reference Mobility Communication
Entertainment Navigation Driving tips Controls At a glance
Page 204 of 299

Professional rear entertainment*
Controls
1
Screen, left
2 Screen, right
3 Controller with buttons
4 CD/DVD player
Rear CD/DVD player 1
CD/DVD slot
2 Eject CD/DVD
3 On/off, right
4 Headphone connection, right
5 RCA sockets
6 Headphone connection, left
7 On/off, left
Switching the system on/off Press the left or right side of the button
on the CD/DVD player in the rear for the
respective page. Rear entertainment and screens are switched
on/off.
After
switching off the ignition, the system must
be switched on again.
Screens
Adjusting
Danger of burns when screen is folded out
Do not reach behind the screen; other‐
wise, there is the danger of getting burned. The
back of the screen can become very hot.◀ ▷
To fold out: pull at the bottom edge.
▷ To fold in: press against the bottom edge.
Notes
▷ Do not cover lower screen edge, since this
is where the sensors and the infrared inter‐
face are installed.
▷ When loading the rear seats and adjusting
the backrest of the front seat, fold in the
screens.
▷ When cleaning the screen, follow the care
instructions, refer to page 273. Seite 204
204 Online Edition for Part no. 01 40 2 606 497 - 03 11 490
Professional rear entertainment
Page 288 of 299

Everything from A to Z
Index
A
ABS, Antilock Brake Sys‐
tem 98
ACC, Active Cruise Control with Stop & Go 105
Activated-charcoal filter 128
Active Blind Spot Detec‐ tion 95
Active Cruise Control with Stop & Go, ACC 105
Active seat, front 50
Active seat ventilation, front 51
Active seat ventilation, rear 53
Active Steering, integral 101
Adaptive brake assistant 98
Adaptive brake lights, refer to Brake force display 97
Adaptive drive 100
Adaptive light control 85
Adaptive
light control, bulb re‐
placement 261
Additional telephone 212
Additives, oil 256
Adjustments, seats/head re‐ straints 48
Airbags 88
Airbags, indicator/warning light 89
Air circulation, refer to Recir‐ culated-air mode 126
Air distribution, manual 125
Air drying, refer to Cooling function 127
Air pressure, tires 244
Air vents, refer to Ventila‐ tion 128
Air volume, automatic climate control 126
Alarm system 43
Alarm, unintentional 44 All around the center con‐
sole 17
All around the headliner 18
All around the steering wheel 12
ALL program, automatic cli‐ mate control 127
All-season tires, refer to Win‐ ter tires 251
All-wheel-drive 99
Alternating-code hand-held transmitter 133
Alternative oil types 256
AM/FM station 172
Announcement, navigation, refer to Spoken instruc‐
tions 161
Antifreeze, washer fluid 72
Antilock Brake System, ABS 98
Anti-slip control, refer to DSC 98
Appointments 228
Approved engine oils 256
Apps 238
Armrest, refer to Center arm‐ rest 139
Arrival time 79
Ashtray 134
Assist 234
Assistance, Roadside Assis‐ tance 267
Assistance when driving off 98
Audio playback 179
Audio playback, Blue‐ tooth 194
Audio remote control 198
AUTO intensity 126
Automatic car wash 271
Automatic climate con‐ trol 125 Automatic Cruise Control with
Stop & Go 105
Automatic Curb Monitor 59
Automatic deactivation, front passenger airbags 89
Automatic headlamp con‐ trol 85
Automatic Hold 68
Automatic locking 39
Automatic recirculated-air control 126
Automatic Soft Closing, doors 39
Automatic Soft Closing, trunk lid 40
Automatic transmission with Steptronic 72
Automatic trunk lid 40
AUTO program, automatic cli‐ mate control 126
AUTO program, intensity 126
AUX-IN port 190
Average fuel consumption 78
Average speed 78
Axle loads, weights 278
B
Backrest curvature, refer to Lumbar support 49
Backrest, seats 48
Backrest, width 49
Back seats, adjusting 51
Backup camera 116
Backup lamps, bulb replace‐ ment 263
Balance 170
Band-Aids, refer to First aid kit 267
Bar for tow-starting/tow‐ ing 269
Basic position, rear seats 52
Bass 170
Seite 288
288 Online Edition for Part no. 01 40 2 606 497 - 03 11 490
Everything from A to Z