2011 BMW 740I Speakers
[x] Cancel search: SpeakersPage 171 of 299

When surround is activated, multi-channel play‐
back is simulated when a stereo audio track is
played.
Volume
▷
"Speed volume": speed-dependent volume
control.
▷ "PDC": volume of the PDC signal* com‐
pared to the entertainment sound output.
▷ "Gong": volume of the signal, such as the
safety belt reminder, compared to the en‐
tertainment sound output.
▷ "Microphone": volume of the microphone*
during a phone call.
▷ "Loudspeak.":
volume of the loudspeakers*
during a phone call.
The following volumes are only stored for the
respective paired telephone:
"Microphone",
"Loudspeak.".
Adjusting the volume
1. "CD/Multimedia", "Radio" or "Settings"
2. "Tone"
3. "Volume settings"
4. Select the desired volume setting. 5.
To adjust: turn the controller.
6. To store: press the controller.
Resetting the tone settings
1. "CD/Multimedia", "Radio" or "Settings"
2. "Tone"
3. "Reset" Opening the tone settings in
the Options menu
*
1. "CD/Multimedia" or "Radio"
2. If necessary, select additional entries, for ex‐
ample, "FM" or
"CD/DVD".
3. Open "Options".
4. "Tone"
5. Set the desired tone.
Seite 171
171Online Edition for Part no. 01 40 2 606 497 - 03 11 490
Reference Mobility Communication
Entertainment Navigation Driving tips Controls At a glance
Page 190 of 299

Music collection
Backing up the music collection
The entire music collection can be stored on a
USB device. Make sure there is enough free
memory capacity on the USB device.
Depending
on the number of tracks, backing up
the music collection may take several hours.
Therefore, it is best to perform the backup dur‐
ing a long trip.
1. Starting the engine.
2. Connect the USB device to the USB inter‐
face in the glove compartment.
3. "CD/Multimedia"
4. "Music collection"
5. Open "Options".
6. "Music data import/export" 7.
"Backup music on USB" Storing the music collection in the vehicle
When
storing from the USB device, the existing
music collection in the vehicle is replaced.
1. "CD/Multimedia"
2. "Music collection"
3. Open "Options". 4.
"Music data import/export"
5. "Restore music from USB"
Deleting the music collection
1. "CD/Multimedia"
2. "Music collection"
3. Open "Options".
4. "Delete music collection"
External devices
At a glance Symbol Meaning
AUX-IN port
USB audio interface*
Mobile phone audio interface*
Bluetooth audio*
Rear AUX-IN port* on the left
Rear AUX-IN port* on the right
AUX-IN port
At a glance
▷
For connecting audio devices, e.g., MP3
player. The sound is output on the vehicle
loudspeakers.
▷ Recommendation: use medium tone and
volume settings on the audio device. The
tone depends on the quality of the audio
files.
Seite 190
190 Online Edition for Part no. 01 40 2 606 497 - 03 11 490
CD/multimedia
Page 191 of 299

Connecting
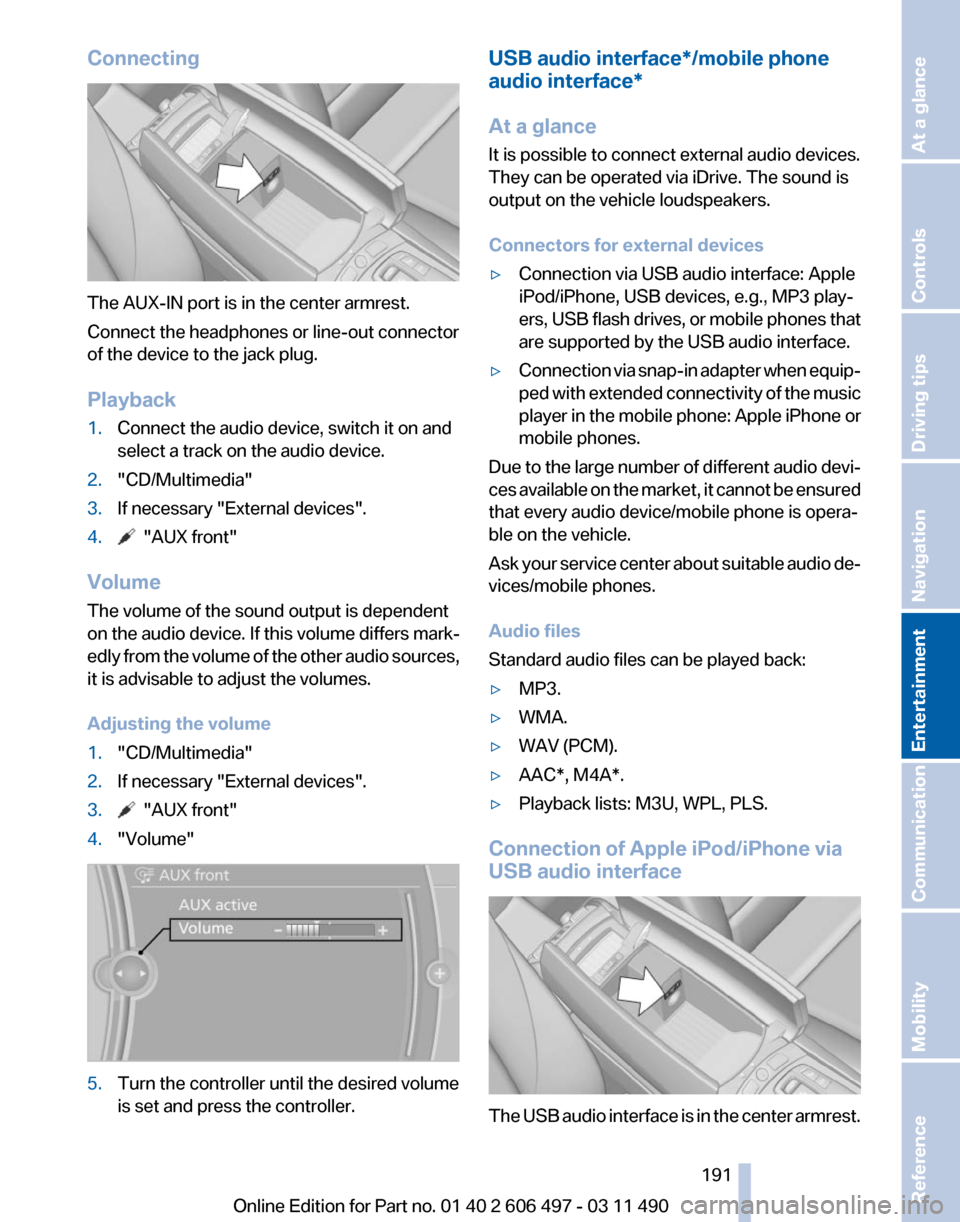
The AUX-IN port is in the center armrest.
Connect the headphones or line-out connector
of the device to the jack plug.
Playback
1.
Connect the audio device, switch it on and
select a track on the audio device.
2. "CD/Multimedia"
3. If necessary "External devices".
4. "AUX front"
Volume
The volume of the sound output is dependent
on the audio device. If this volume differs mark‐
edly
from the volume of the other audio sources,
it is advisable to adjust the volumes.
Adjusting the volume
1. "CD/Multimedia"
2. If necessary "External devices".
3. "AUX front"
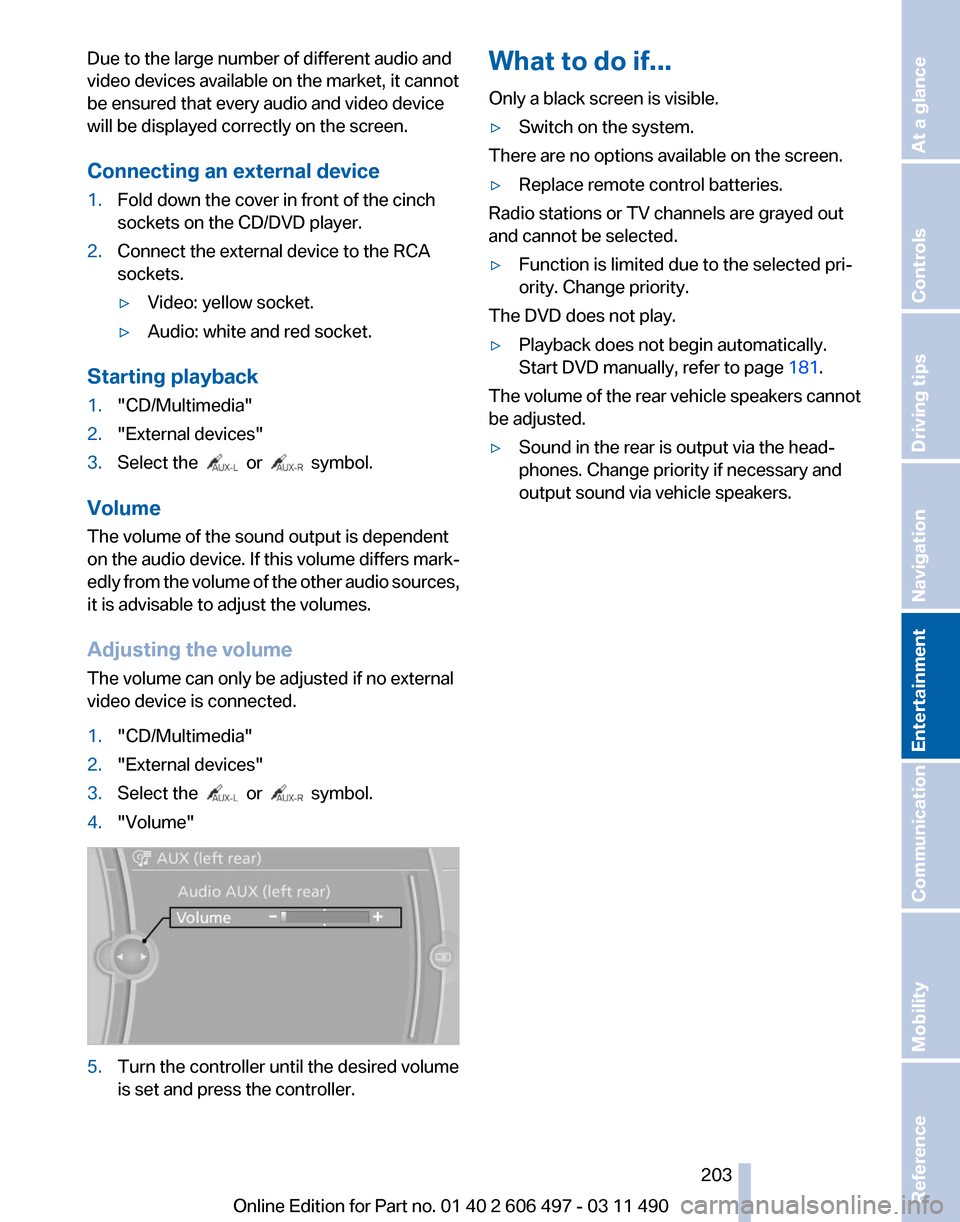
4. "Volume" 5.
Turn the controller until the desired volume
is set and press the controller. USB audio interface*/mobile phone
audio interface
*
At a glance
It is possible to connect external audio devices.
They can be operated via iDrive. The sound is
output on the vehicle loudspeakers.
Connectors for external devices
▷ Connection via USB audio interface: Apple
iPod/iPhone, USB devices, e.g., MP3 play‐
ers,
USB flash drives, or mobile phones that
are supported by the USB audio interface.
▷ Connection via snap-in adapter when equip‐
ped
with extended connectivity of the music
player in the mobile phone: Apple iPhone or
mobile phones.
Due to the large number of different audio devi‐
ces
available on the market, it cannot be ensured
that every audio device/mobile phone is opera‐
ble on the vehicle.
Ask your service center about suitable audio de‐
vices/mobile phones.
Audio files
Standard audio files can be played back:
▷ MP3.
▷ WMA.
▷ WAV (PCM).
▷ AAC*, M4A*.
▷ Playback lists: M3U, WPL, PLS.
Connection of Apple iPod/iPhone via
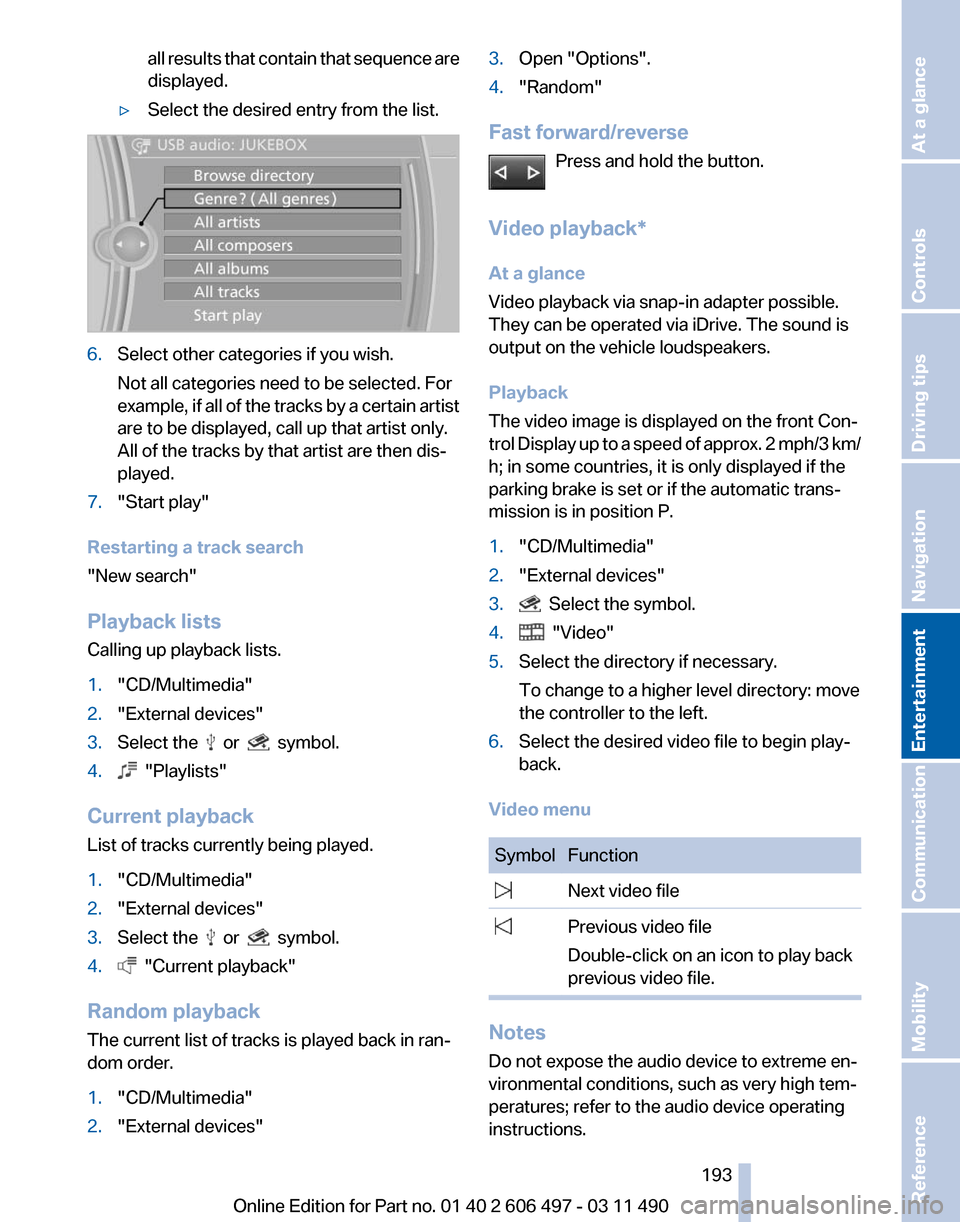
USB audio interface The USB audio interface is in the center armrest.
Seite 191
191Online Edition for Part no. 01 40 2 606 497 - 03 11 490
Reference Mobility Communication
Entertainment Navigation Driving tips Controls At a glance
Page 193 of 299

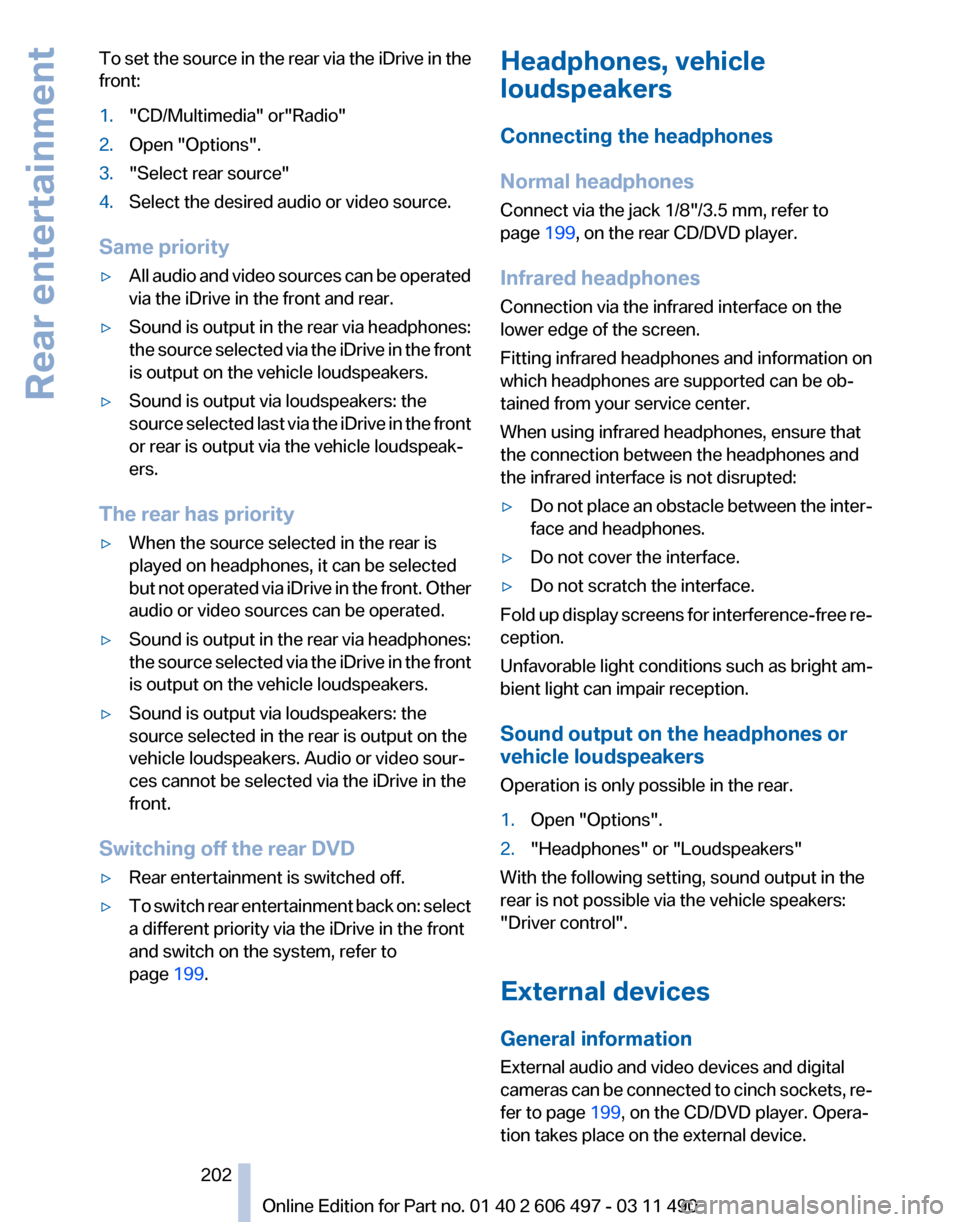
all results that contain that sequence are
displayed.
▷ Select the desired entry from the list. 6.
Select other categories if you wish.
Not all categories need to be selected. For
example,
if all of the tracks by a certain artist
are to be displayed, call up that artist only.
All of the tracks by that artist are then dis‐
played.
7. "Start play"
Restarting a track search
"New search"
Playback lists
Calling up playback lists.
1. "CD/Multimedia"
2. "External devices"
3. Select the or symbol.
4. "Playlists"
Current playback
List of tracks currently being played.
1. "CD/Multimedia"
2. "External devices"
3. Select the or symbol.
4. "Current playback"
Random playback
The current list of tracks is played back in ran‐
dom order.
1. "CD/Multimedia"
2. "External devices" 3.
Open "Options".
4. "Random"
Fast forward/reverse Press and hold the button.
Video playback*
At a glance
Video playback via snap-in adapter possible.
They can be operated via iDrive. The sound is
output on the vehicle loudspeakers.
Playback
The video image is displayed on the front Con‐
trol
Display up to a speed of approx. 2 mph/3 km/
h; in some countries, it is only displayed if the
parking brake is set or if the automatic trans‐
mission is in position P.
1. "CD/Multimedia"
2. "External devices"
3. Select the symbol.
4. "Video"
5. Select the directory if necessary.
To change to a higher level directory: move
the controller to the left.
6. Select the desired video file to begin play‐
back.
Video menu Symbol Function
Next video file
Previous video file
Double-click on an icon to play back
previous video file. Notes
Do not expose the audio device to extreme en‐
vironmental conditions, such as very high tem‐
peratures; refer to the audio device operating
instructions. Seite 193
193Online Edition for Part no. 01 40 2 606 497 - 03 11 490
Reference Mobility Communication
Entertainment Navigation Driving tips Controls At a glance
Page 194 of 299

Depending on the configuration of the audio
files, e.g., bit rates greater than 256 kbit/s, the
files may not play back correctly in each case.
Information on connection
▷
The connected audio device is supplied with
a
max. power of 500 mA if supported by the
device. Therefore, do not additionally con‐
nect the device to a socket in the vehicle;
otherwise, playback may be compromised.
▷ Do not use force when plugging the con‐
nector into the USB interface.
▷ Do not connect devices such as fans or
lamps to the USB audio interface.
▷ Do not connect USB hard drives.
▷ Do not use the USB audio interface to re‐
charge external devices.
Bluetooth audio*
At a glance
▷ Music files on external devices such as audio
devices or mobile phones can be played
back via Bluetooth.
Use of a mobile phone as an audio source,
refer to page 213.
▷ The sound is output on the vehicle loud‐
speakers.
▷ The volume of the sound output is depend‐
ent on the device. If necessary, adjust the
volume on the device.
▷ Up to four external devices can be paired
with the vehicle.
Requirements
▷ The device is suitable. Information under
www.bmwusa.com/bluetooth.
▷ The device is ready for operation.
▷ The ignition is switched on.
▷ Bluetooth is activated on the vehicle, refer to
page 213, and on the device.
▷ Bluetooth presettings must be made on the
device, such as for a connection without confirmation or visibility; refer to the device
operating instructions.
▷ A number with at least four and a maximum
of
16 digits is defined as the Bluetooth pass‐
key. It is only required once for pairing.
Pairing and connecting Pairing a device
To
avoid becoming distracted and posing
an unnecessary hazard both to your own vehi‐
cle's occupants and to other road users, only
pair the device while the vehicle is stationary.◀
1. "CD/Multimedia"
2. "Bluetooth® (audio)"
3. If necessary, "Bluetooth® audio".
4. "Add new phone"
The Bluetooth name of the vehicle is dis‐
played. 5.
Perform additional steps on the device, refer
to the device operating instructions: for in‐
stance, search for or connect the Bluetooth
device or a new device.
The Bluetooth name of the vehicle appears
on the device display.
6. Select the Bluetooth name of the vehicle on
the device display.
Prompt via iDrive or the device to enter the
same Bluetooth passkey. Seite 194
194 Online Edition for Part no. 01 40 2 606 497 - 03 11 490
CD/multimedia
Page 201 of 299

▷
DVD changer*.
▷ Rear CD/DVD player.
▷ External device in rear.
If a video image is being played back in the rear,
the rear CD/DVD player cannot be selected in
the front.
Operation
is the same as for the front video play‐
back, refer to page 181.
Radio
When the same radio source is selected in the
front and rear (e.g., FM/AM), the same radio sta‐
tion is played.
Operation is the same as for the front radio, refer
to page 172.
CD/multimedia
CD/DVD
When the same audio source (front CD/DVD
player, rear CD/DVD player, DVD changer) is se‐
lected in the front and rear, the same material is
played.
Operation is the same as for the front CD/DVD,
refer to page 179.
Notes on CDs/DVDs, refer to page 185.
Music collection*
Music can only be stored and data can only be
exported and imported via the front CD/DVD
player or the USB interface in the glove com‐
partment.
When music collections are selected in the front
and rear, they are played back separately.
Operation is the same as for the front music col‐
lection, refer to page 186.
Tone
Only treble and bass can be set in the rear. The
settings are made separately for the left and
right headphones.
Operation is the same as for the front tone, refer
to page 170. Adjusting
The following settings are available:
▷
"Rear displays"
▷ "Language/Units": language can be set
globally for all screens.
▷ "Tone"
Options menu
The split screen is not available and there is no
Integrated Owner's Manual.
Operation
is the same as for the front menu op‐
tions, refer to page 21.
Enabling
Enabling operation in the rear
Only possible via the iDrive in the front.
1. "Settings"
2. "Allow rear control"
3. Select the desired priority. Priority options
The driver has priority
▷
The source selected via iDrive in the front is
output
on the vehicle loudspeakers and can
be selected but not operated from the rear.
Other audio or video sources can be oper‐
ated.
▷ Sound can only be output in the rear via
headphones.
▷ The source that is to be displayed in the rear
can be set via the iDrive in the front.
Seite 201
201Online Edition for Part no. 01 40 2 606 497 - 03 11 490
Reference Mobility Communication
Entertainment Navigation Driving tips Controls At a glance
Page 202 of 299

To set the source in the rear via the iDrive in the
front:
1.
"CD/Multimedia" or"Radio"
2. Open "Options".
3. "Select rear source"
4. Select the desired audio or video source.
Same priority
▷ All audio and video sources can be operated
via the iDrive in the front and rear.
▷ Sound is output in the rear via headphones:
the
source selected via the iDrive in the front
is output on the vehicle loudspeakers.
▷ Sound is output via loudspeakers: the
source
selected last via the iDrive in the front
or rear is output via the vehicle loudspeak‐
ers.
The rear has priority
▷ When the source selected in the rear is
played on headphones, it can be selected
but
not operated via iDrive in the front. Other
audio or video sources can be operated.
▷ Sound is output in the rear via headphones:
the
source selected via the iDrive in the front
is output on the vehicle loudspeakers.
▷ Sound is output via loudspeakers: the
source selected in the rear is output on the
vehicle loudspeakers. Audio or video sour‐
ces cannot be selected via the iDrive in the
front.
Switching off the rear DVD
▷ Rear entertainment is switched off.
▷ To switch rear entertainment back on: select
a different priority via the iDrive in the front
and switch on the system, refer to
page 199. Headphones, vehicle
loudspeakers
Connecting the headphones
Normal headphones
Connect via the jack 1/8"/3.5 mm, refer to
page
199, on the rear CD/DVD player.
Infrared headphones
Connection via the infrared interface on the
lower edge of the screen.
Fitting infrared headphones and information on
which headphones are supported can be ob‐
tained from your service center.
When using infrared headphones, ensure that
the connection between the headphones and
the infrared interface is not disrupted:
▷ Do not place an obstacle between the inter‐
face and headphones.
▷ Do not cover the interface.
▷ Do not scratch the interface.
Fold up display screens for interference-free re‐
ception.
Unfavorable light conditions such as bright am‐
bient light can impair reception.
Sound output on the headphones or
vehicle loudspeakers
Operation is only possible in the rear.
1. Open "Options".
2. "Headphones" or "Loudspeakers"
With the following setting, sound output in the
rear is not possible via the vehicle speakers:
"Driver control".
External devices
General information
External audio and video devices and digital
cameras
can be connected to cinch sockets, re‐
fer to page 199, on the CD/DVD player. Opera‐
tion takes place on the external device.
Seite 202
202 Online Edition for Part no. 01 40 2 606 497 - 03 11 490
Rear entertainment
Page 203 of 299

Due to the large number of different audio and
video devices available on the market, it cannot
be ensured that every audio and video device
will be displayed correctly on the screen.
Connecting an external device
1.
Fold down the cover in front of the cinch
sockets on the CD/DVD player.
2. Connect the external device to the RCA
sockets.
▷Video: yellow socket.
▷ Audio: white and red socket.
Starting playback
1. "CD/Multimedia"
2. "External devices"
3. Select the or symbol.
Volume
The volume of the sound output is dependent
on the audio device. If this volume differs mark‐
edly
from the volume of the other audio sources,
it is advisable to adjust the volumes.
Adjusting the volume
The volume can only be adjusted if no external
video device is connected.
1. "CD/Multimedia"
2. "External devices"
3. Select the or symbol.
4. "Volume" 5.
Turn the controller until the desired volume
is set and press the controller. What to do if...
Only a black screen is visible.
▷
Switch on the system.
There are no options available on the screen.
▷ Replace remote control batteries.
Radio stations or TV channels are grayed out
and cannot be selected.
▷ Function is limited due to the selected pri‐
ority. Change priority.
The DVD does not play.
▷ Playback does not begin automatically.
Start DVD manually, refer to page 181.
The volume of the rear vehicle speakers cannot
be adjusted.
▷ Sound in the rear is output via the head‐
phones. Change priority if necessary and
output sound via vehicle speakers.
Seite 203
203Online Edition for Part no. 01 40 2 606 497 - 03 11 490
Reference Mobility Communication
Entertainment Navigation Driving tips Controls At a glance