2011 BMW 550I XDRIVE steering
[x] Cancel search: steeringPage 110 of 304
3
Store speed*
4 Store, maintain/change speed
Switching on Press the button on the steering wheel.
The marking in the speedometer is set to the
current speed.
Cruise control can be used.
Switching off Deactivated or interrupted system
If the system is deactivated or interrupted,
actively intervene by braking and, if necessary,
with evasive maneuvers; otherwise, there is the
danger of an accident occurring.◀
Press the button.
▷ If active: press twice.
▷ If interrupted: press once.
The displays go out. The stored desired speed
is deleted.
Interrupting When active, press the button.
The system is automatically interrupted if:
▷ The brakes are applied.
▷ The clutch pedal is depressed.
▷ Transmission position D is disengaged.
▷ DTC Dynamic Traction Control is activated
or DSC is deactivated.
▷ DSC is actively controlling stability.
▷ HDC is activated.
Maintaining/storing the current speed Press the button.
When the system is switched on, the current
speed is maintained and stored as the desired
speed. It is displayed in the speedometer and briefly
displayed in the instrument cluster, Displays in
the speedometer, refer to page
111.
When cruise control is maintained or stored,
DSC
Dynamic Stability Control is switched on, if
necessary.
Change, maintain speed
The rocker switch can be pressed while inter‐
rupted to maintain and store the current speed.
Adapting the desired speed
Adapt the desired speed to the road con‐
ditions and be ready to brake at all times; other‐
wise, there is the danger of an accident occur‐
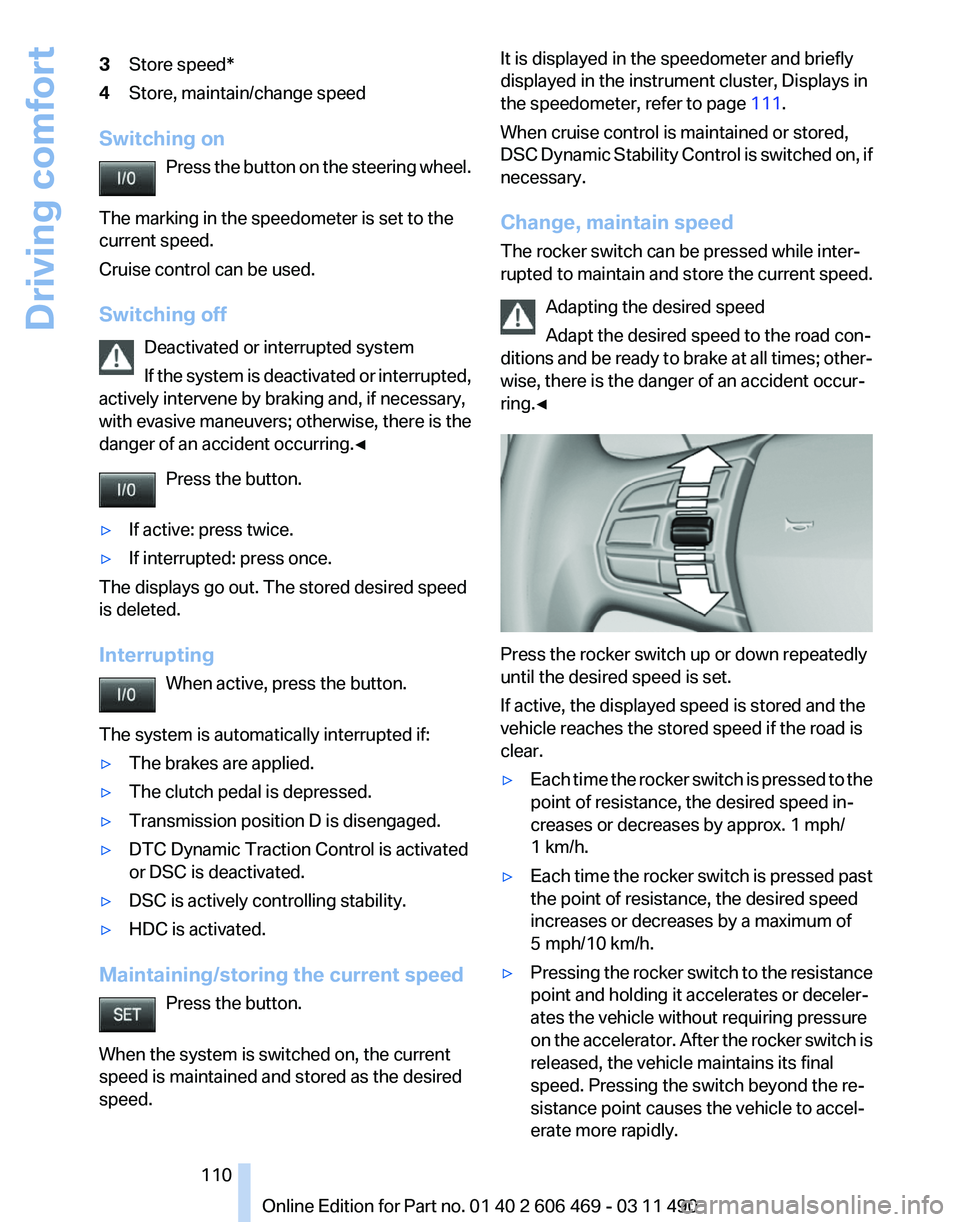
ring.◀ Press the rocker switch up or down repeatedly
until the desired speed is set.
If active, the displayed speed is stored and the
vehicle reaches the stored speed if the road is
clear.
▷
Each time the rocker switch is pressed to the
point of resistance, the desired speed in‐
creases or decreases by approx. 1 mph/
1 km/h.
▷ Each time the rocker switch is pressed past
the point of resistance, the desired speed
increases or decreases by a maximum of
5 mph/10 km/h.
▷ Pressing the rocker switch to the resistance
point and holding it accelerates or deceler‐
ates the vehicle without requiring pressure
on
the accelerator. After the rocker switch is
released, the vehicle maintains its final
speed. Pressing the switch beyond the re‐
sistance point causes the vehicle to accel‐
erate more rapidly. Seite 110
110 Online Edition for Part no. 01 40 2 606 469 - 03 11 490
Driving comfort
Page 114 of 304
Detection of objects
High, protruding objects such as ledges
may not be detected by the backup camera.
◀
Switching on automatically
Select transmission position R with the engine
running.
The backup camera image is displayed if the
system was switched on via the iDrive.
Switching off automatically
The system switches off and the LED goes out:
▷ After approx. 33 ft/10 m when driving for‐
ward.
▷ Above approx. 9 mph/15 km/h when driving
forward.
Switch on the system again if necessary.
Switching on/off manually Press the button.
▷ On: the LED lights up.
▷ Off: the LED goes out.
The PDC is shown on the Control Display.
Switch
on the backup camera via the iDrive, refer
to page 115.
Assistance functions
Functional requirement
▷ The backup camera is switched on.
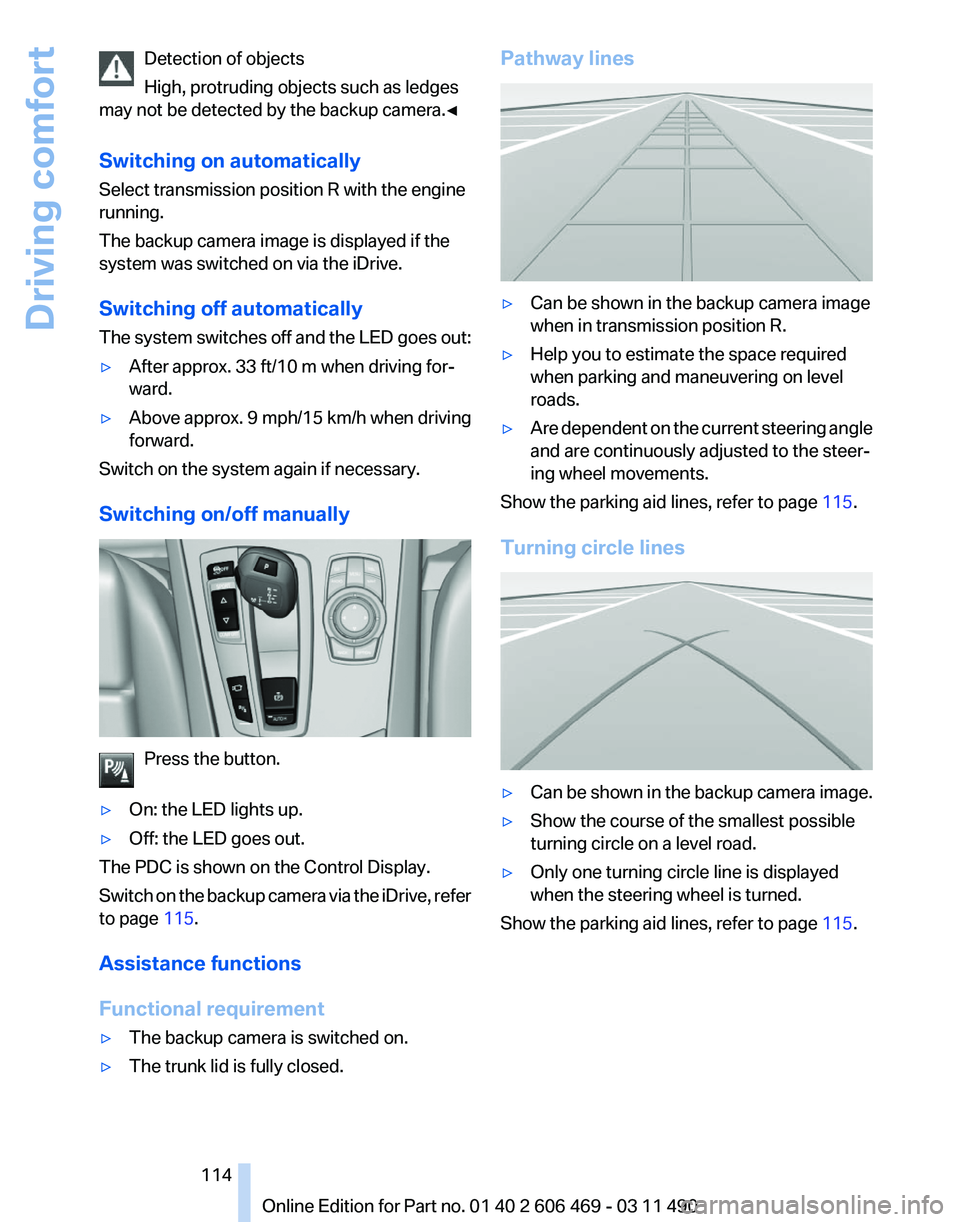
▷ The trunk lid is fully closed. Pathway lines
▷
Can be shown in the backup camera image
when in transmission position R.
▷ Help you to estimate the space required
when parking and maneuvering on level
roads.
▷ Are dependent on the current steering angle
and are continuously adjusted to the steer‐
ing wheel movements.
Show the parking aid lines, refer to page 115.
Turning circle lines ▷
Can be shown in the backup camera image.
▷ Show the course of the smallest possible
turning circle on a level road.
▷ Only one turning circle line is displayed
when the steering wheel is turned.
Show the parking aid lines, refer to page 115.
Seite 114
114 Online Edition for Part no. 01 40 2 606 469 - 03 11 490
Driving comfort
Page 115 of 304
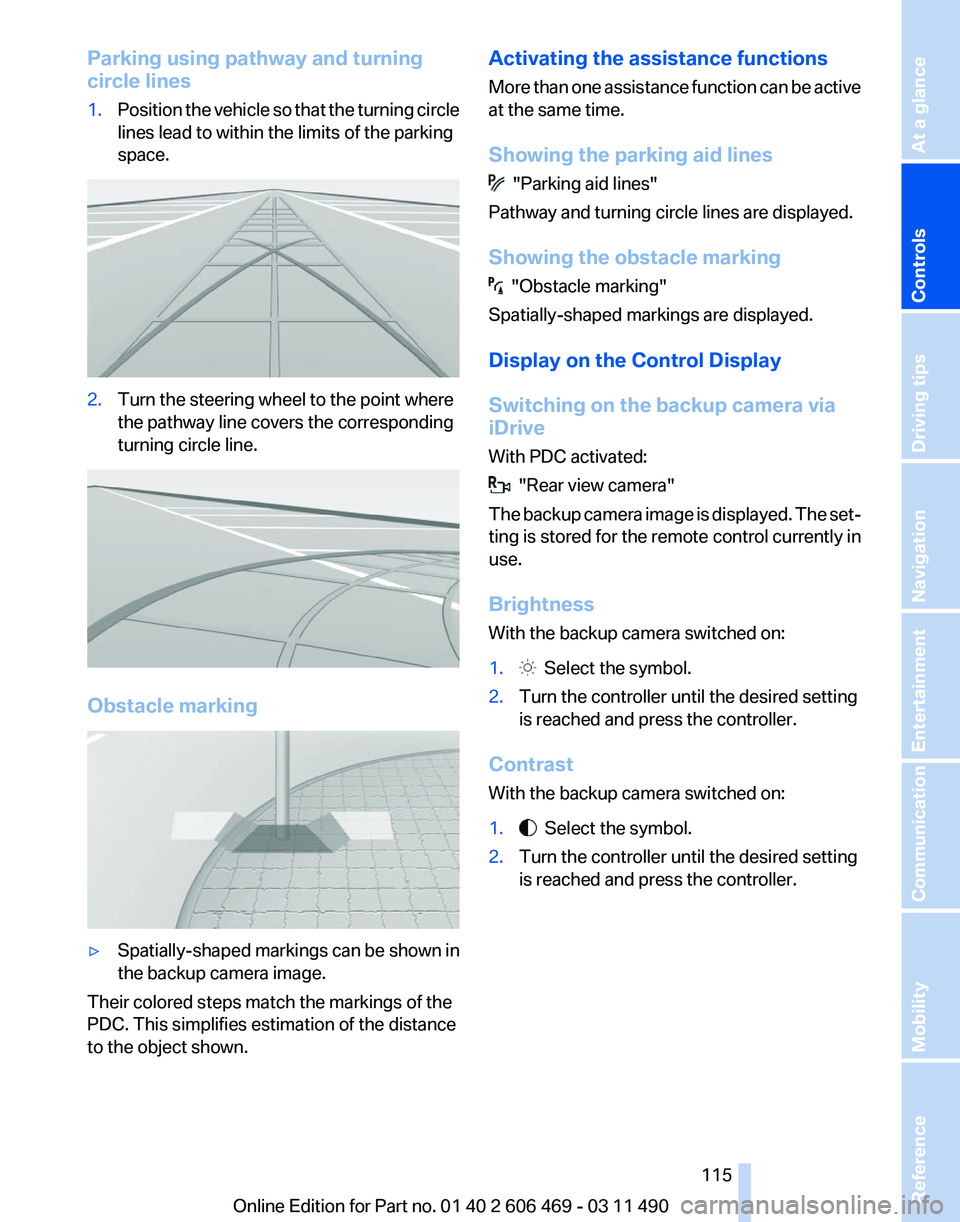
Parking using pathway and turning
circle lines
1.
Position the vehicle so that the turning circle
lines lead to within the limits of the parking
space. 2.
Turn the steering wheel to the point where
the pathway line covers the corresponding
turning circle line. Obstacle marking
▷
Spatially-shaped markings can be shown in
the backup camera image.
Their colored steps match the markings of the
PDC. This simplifies estimation of the distance
to the object shown. Activating the assistance functions
More
than one assistance function can be active
at the same time.
Showing the parking aid lines "Parking aid lines"
Pathway and turning circle lines are displayed.
Showing the obstacle marking "Obstacle marking"
Spatially-shaped markings are displayed.
Display on the Control Display
Switching on the backup camera via
iDrive
With PDC activated: "Rear view camera"
The
backup camera image is displayed. The set‐
ting is stored for the remote control currently in
use.
Brightness
With the backup camera switched on:
1. Select the symbol.
2. Turn the controller until the desired setting
is reached and press the controller.
Contrast
With the backup camera switched on:
1. Select the symbol.
2. Turn the controller until the desired setting
is reached and press the controller.
Seite 115
115Online Edition for Part no. 01 40 2 606 469 - 03 11 490
Reference Mobility Communication Entertainment Navigation Driving tips
Controls At a glance
Page 117 of 304
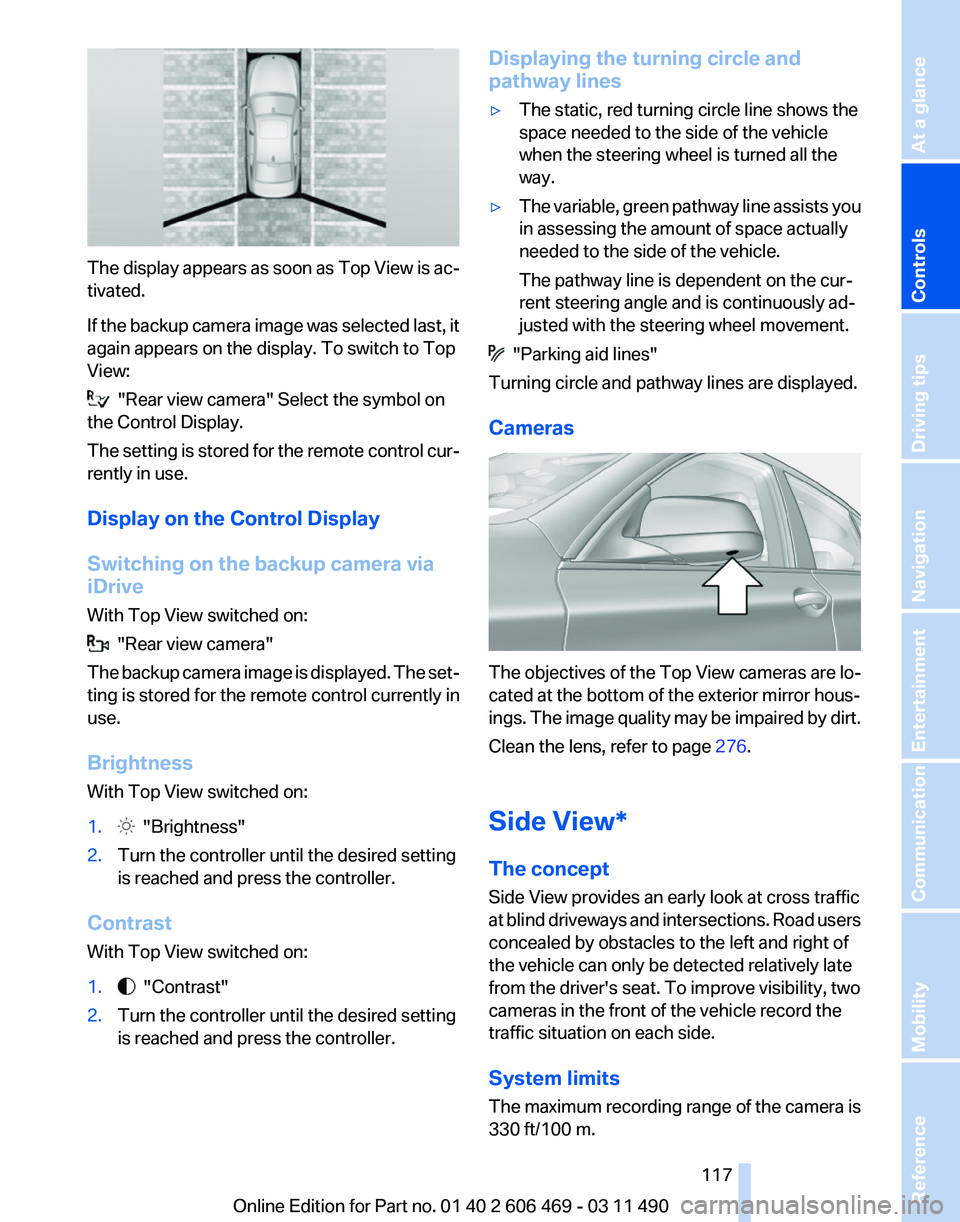
The display appears as soon as Top View is ac‐
tivated.
If
the backup camera image was selected last, it
again appears on the display. To switch to Top
View: "Rear view camera" Select the symbol on
the Control Display.
The
setting is stored for the remote control cur‐
rently in use.
Display on the Control Display
Switching on the backup camera via
iDrive
With Top View switched on: "Rear view camera"
The
backup camera image is displayed. The set‐
ting is stored for the remote control currently in
use.
Brightness
With Top View switched on:
1. "Brightness"
2. Turn the controller until the desired setting
is reached and press the controller.
Contrast
With Top View switched on:
1. "Contrast"
2. Turn the controller until the desired setting
is reached and press the controller. Displaying the turning circle and
pathway lines
▷
The static, red turning circle line shows the
space needed to the side of the vehicle
when the steering wheel is turned all the
way.
▷ The variable, green pathway line assists you
in assessing the amount of space actually
needed to the side of the vehicle.
The pathway line is dependent on the cur‐
rent steering angle and is continuously ad‐
justed with the steering wheel movement. "Parking aid lines"
Turning circle and pathway lines are displayed.
Cameras The objectives of the Top View cameras are lo‐
cated at the bottom of the exterior mirror hous‐
ings.
The image quality may be impaired by dirt.
Clean the lens, refer to page 276.
Side View*
The concept
Side View provides an early look at cross traffic
at blind driveways and intersections. Road users
concealed by obstacles to the left and right of
the vehicle can only be detected relatively late
from the driver's seat. To improve visibility, two
cameras in the front of the vehicle record the
traffic situation on each side.
System limits
The maximum recording range of the camera is
330 ft/100 m.
Seite 117
117Online Edition for Part no. 01 40 2 606 469 - 03 11 490
Reference Mobility Communication Entertainment Navigation Driving tips
Controls At a glance
Page 119 of 304
Ultrasound sensors measure parking spaces on
both sides of the vehicle.
The parking assistant calculates the best pos‐
sible parking line and takes control of steering
during the parking procedure.
When parking, also take note of the visual and
acoustic
information issued by the PDC and the
parking assistant and accelerate or brake ac‐
cordingly.
A component of the parking assistant is the PDC
Park Distance Control*, refer to page 111.
Personal responsibility
The parking assistant does not relieve the
driver of responsibility for the vehicle during the
parking procedure.
Watch the parking space and parking procedure
closely and intervene if necessary; otherwise,
there is the danger of an accident.◀
Requirements
For measuring parking spaces
▷ Maximum speed while driving forward ap‐
prox. 22 mph/35 km/h.
▷ Maximum distance to row of parked vehi‐
cles: 5 ft/1.5 m.
Suitable parking space
▷ Gap between two objects with a minimum
length of approx. 5 ft/1.5 m.
▷ Minimum length: own vehicle length plus
approx. 4 ft/1.2 m.
▷ Minimum depth: approx. 5 ft/1.5 m.
For parking procedure
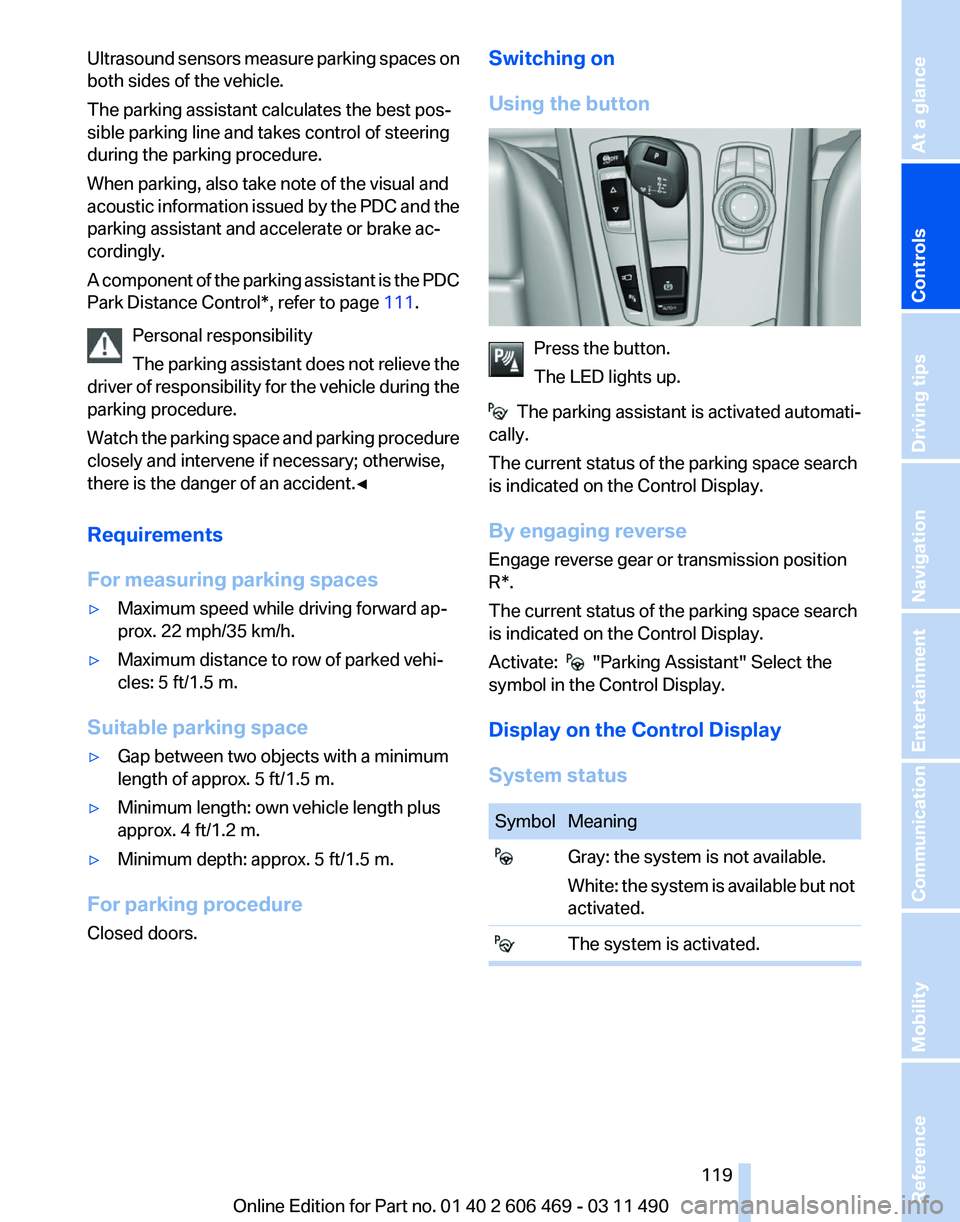
Closed doors. Switching on
Using the button
Press the button.
The LED lights up.
The parking assistant is activated automati‐
cally.
The current status of the parking space search
is indicated on the Control Display.
By engaging reverse
Engage reverse gear or transmission position
R*.
The current status of the parking space search
is indicated on the Control Display.
Activate: "Parking Assistant" Select the
symbol in the Control Display.
Display on the Control Display
System status Symbol Meaning
Gray: the system is not available.
White:
the system is available but not
activated. The system is activated. Seite 119
119Online Edition for Part no. 01 40 2 606 469 - 03 11 490
Reference Mobility Communication Entertainment Navigation Driving tips
Controls At a glance
Page 120 of 304
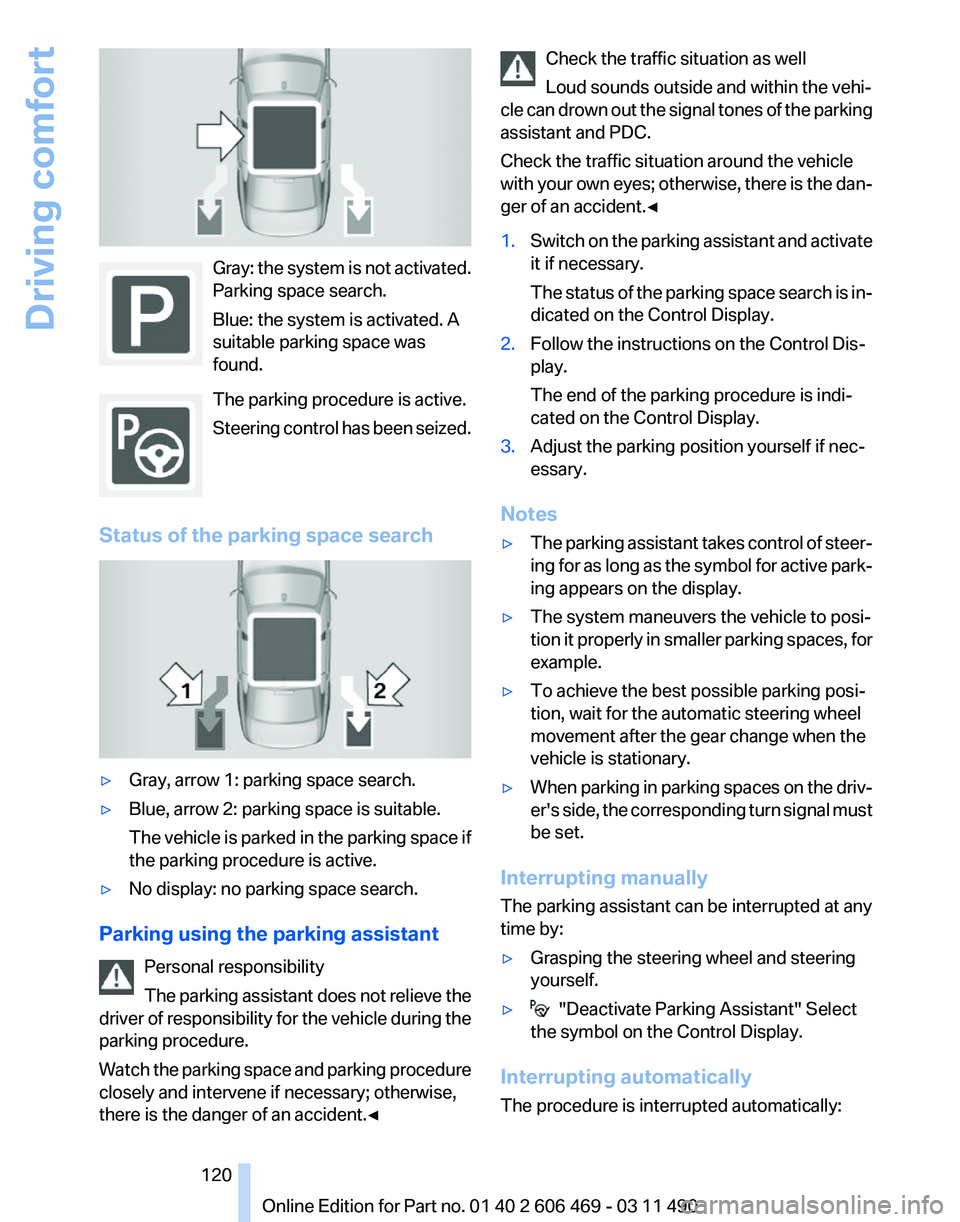
Gray: the system is not activated.
Parking space search.
Blue: the system is activated. A
suitable parking space was
found.
The parking procedure is active.
Steering
control has been seized.
Status of the parking space search ▷
Gray, arrow 1: parking space search.
▷ Blue, arrow 2: parking space is suitable.
The
vehicle is parked in the parking space if
the parking procedure is active.
▷ No display: no parking space search.
Parking using the parking assistant Personal responsibility
The
parking assistant does not relieve the
driver of responsibility for the vehicle during the
parking procedure.
Watch the parking space and parking procedure
closely and intervene if necessary; otherwise,
there is the danger of an accident.◀ Check the traffic situation as well
Loud sounds outside and within the vehi‐
cle
can drown out the signal tones of the parking
assistant and PDC.
Check the traffic situation around the vehicle
with your own eyes; otherwise, there is the dan‐
ger of an accident.◀
1. Switch on the parking assistant and activate
it if necessary.
The
status of the parking space search is in‐
dicated on the Control Display.
2. Follow the instructions on the Control Dis‐
play.
The end of the parking procedure is indi‐
cated on the Control Display.
3. Adjust the parking position yourself if nec‐
essary.
Notes
▷ The parking assistant takes control of steer‐
ing
for as long as the symbol for active park‐
ing appears on the display.
▷ The system maneuvers the vehicle to posi‐
tion
it properly in smaller parking spaces, for
example.
▷ To achieve the best possible parking posi‐
tion, wait for the automatic steering wheel
movement after the gear change when the
vehicle is stationary.
▷ When parking in parking spaces on the driv‐
er's
side, the corresponding turn signal must
be set.
Interrupting manually
The parking assistant can be interrupted at any
time by:
▷ Grasping the steering wheel and steering
yourself.
▷ "Deactivate Parking Assistant" Select
the symbol on the Control Display.
Interrupting automatically
The procedure is interrupted automatically: Seite 120
120 Online Edition for Part no. 01 40 2 606 469 - 03 11 490
Driving comfort
Page 123 of 304
If pedestrian detection is not available, a symbol
is displayed in the heat image.
This symbol disappears when the function be‐
comes available again.
Warning of people in danger
If the system detects a person in the defined
area
in front of the vehicle and if there is the dan‐
ger of a collision with this person, a warning
symbol appears in the Control Display and
Head-up Display*.
Although both the shape and the heat radiation
are analyzed, false warnings cannot be ruled out.
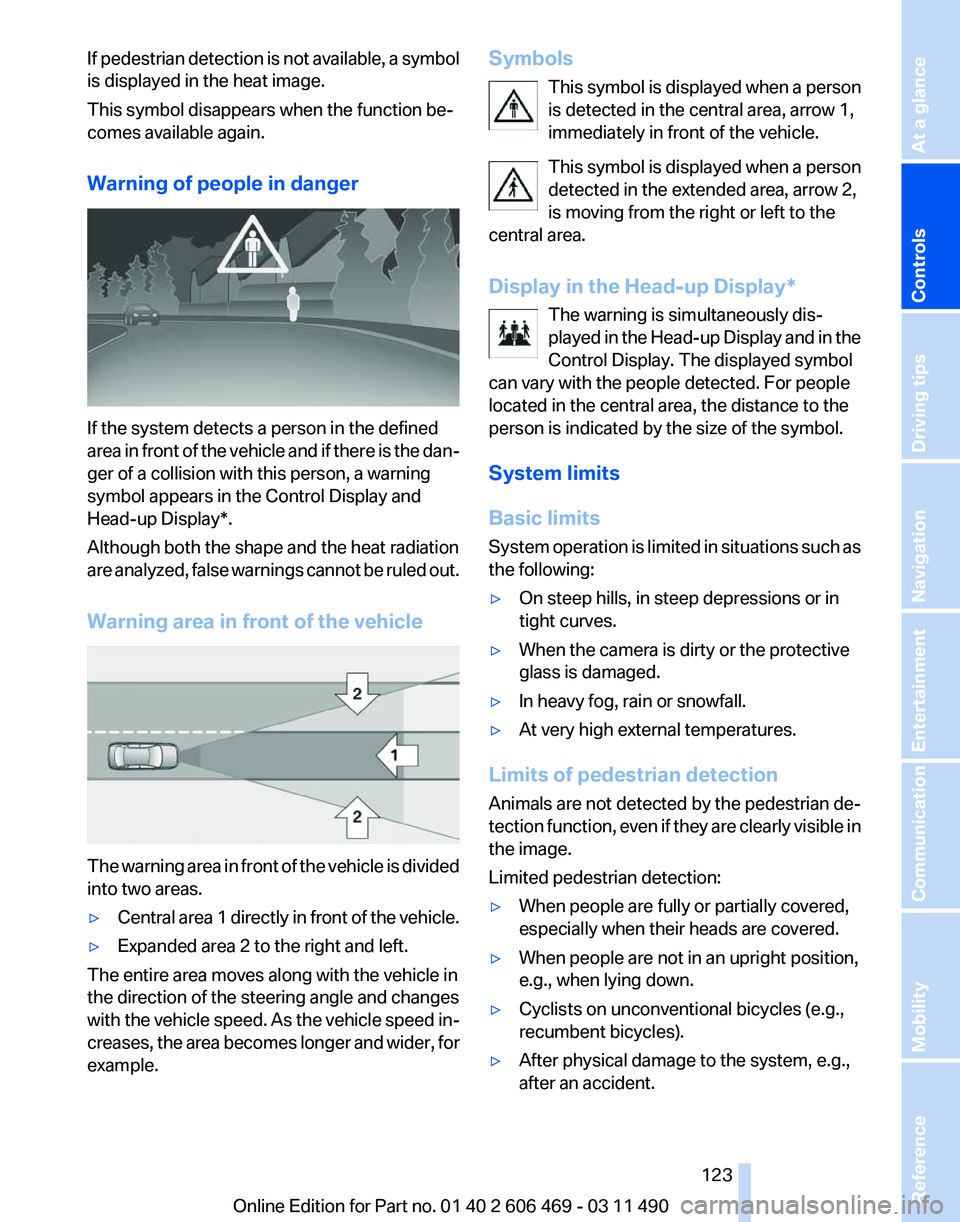
Warning area in front of the vehicle The warning area in front of the vehicle is divided
into two areas.
▷
Central area 1 directly in front of the vehicle.
▷ Expanded area 2 to the right and left.
The entire area moves along with the vehicle in
the direction of the steering angle and changes
with
the vehicle speed. As the vehicle speed in‐
creases, the area becomes longer and wider, for
example. Symbols
This
symbol is displayed when a person
is detected in the central area, arrow 1,
immediately in front of the vehicle.
This symbol is displayed when a person
detected in the extended area, arrow 2,
is moving from the right or left to the
central area.
Display in the Head-up Display*
The warning is simultaneously dis‐
played in the Head-up Display and in the
Control Display. The displayed symbol
can vary with the people detected. For people
located in the central area, the distance to the
person is indicated by the size of the symbol.
System limits
Basic limits
System operation is limited in situations such as
the following:
▷ On steep hills, in steep depressions or in
tight curves.
▷ When the camera is dirty or the protective
glass is damaged.
▷ In heavy fog, rain or snowfall.
▷ At very high external temperatures.
Limits of pedestrian detection
Animals are not detected by the pedestrian de‐
tection
function, even if they are clearly visible in
the image.
Limited pedestrian detection:
▷ When people are fully or partially covered,
especially when their heads are covered.
▷ When people are not in an upright position,
e.g., when lying down.
▷ Cyclists on unconventional bicycles (e.g.,
recumbent bicycles).
▷ After physical damage to the system, e.g.,
after an accident. Seite 123
123Online Edition for Part no. 01 40 2 606 469 - 03 11 490
Reference Mobility Communication Entertainment Navigation Driving tips
Controls At a glance
Page 147 of 304
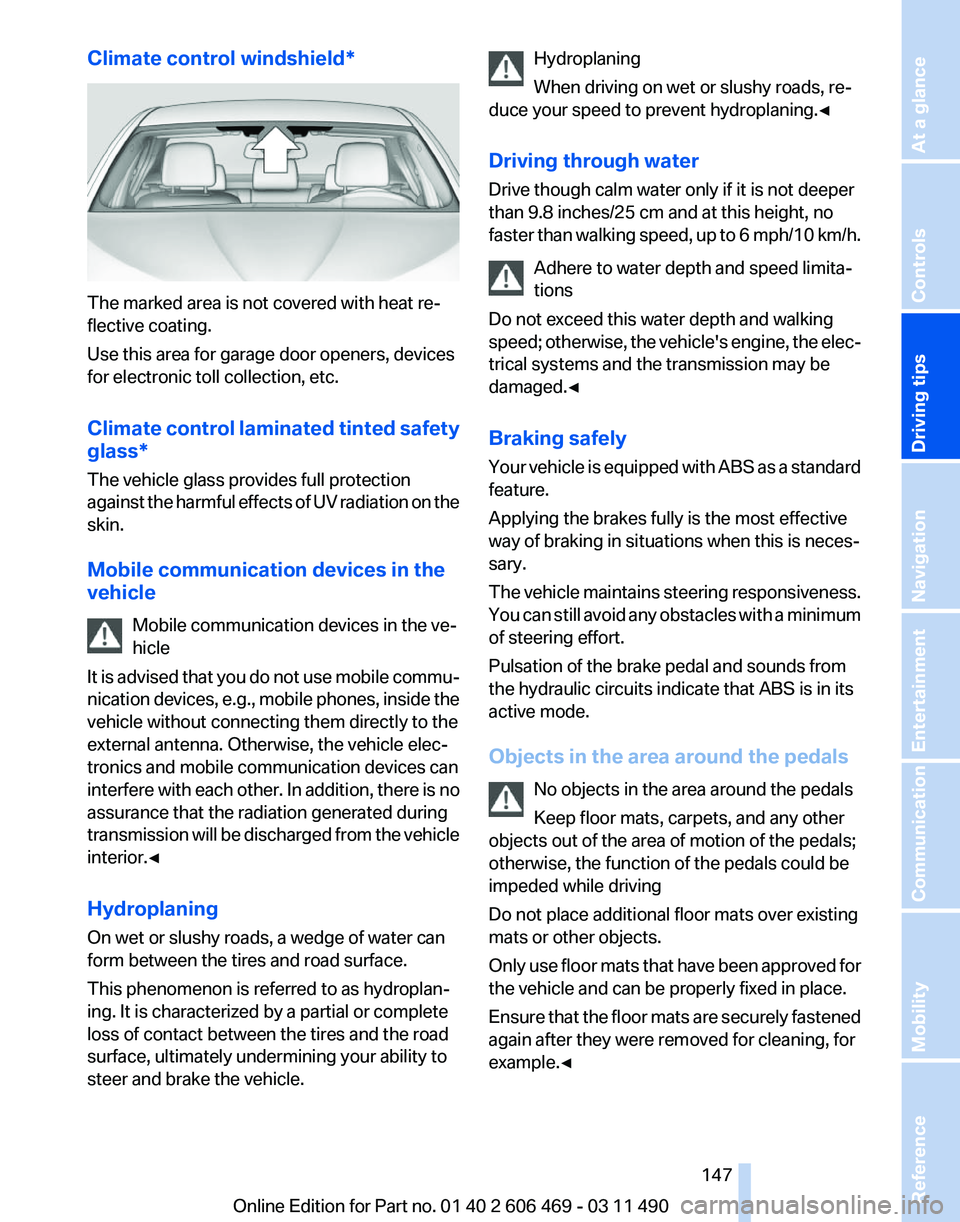
Climate control windshield*
The marked area is not covered with heat re‐
flective coating.
Use this area for garage door openers, devices
for electronic toll collection, etc.
Climate
control laminated tinted safety
glass*
The vehicle glass provides full protection
against the harmful effects of UV radiation on the
skin.
Mobile communication devices in the
vehicle
Mobile communication devices in the ve‐
hicle
It is advised that you do not use mobile commu‐
nication devices, e.g., mobile phones, inside the
vehicle without connecting them directly to the
external antenna. Otherwise, the vehicle elec‐
tronics and mobile communication devices can
interfere with each other. In addition, there is no
assurance that the radiation generated during
transmission will be discharged from the vehicle
interior.◀
Hydroplaning
On wet or slushy roads, a wedge of water can
form between the tires and road surface.
This phenomenon is referred to as hydroplan‐
ing. It is characterized by a partial or complete
loss of contact between the tires and the road
surface, ultimately undermining your ability to
steer and brake the vehicle. Hydroplaning
When driving on wet or slushy roads, re‐
duce your speed to prevent hydroplaning.
◀
Driving through water
Drive though calm water only if it is not deeper
than 9.8 inches/25 cm and at this height, no
faster than walking speed, up to 6 mph/10 km/h. Adhere to water depth and speed limita‐
tions
Do not exceed this water depth and walking
speed; otherwise, the vehicle's engine, the elec‐
trical systems and the transmission may be
damaged.◀
Braking safely
Your vehicle is equipped with ABS as a standard
feature.
Applying the brakes fully is the most effective
way of braking in situations when this is neces‐
sary.
The vehicle maintains steering responsiveness.
You can still avoid any obstacles with a minimum
of steering effort.
Pulsation of the brake pedal and sounds from
the hydraulic circuits indicate that ABS is in its
active mode.
Objects in the area around the pedals
No objects in the area around the pedals
Keep floor mats, carpets, and any other
objects out of the area of motion of the pedals;
otherwise, the function of the pedals could be
impeded while driving
Do not place additional floor mats over existing
mats or other objects.
Only use floor mats that have been approved for
the vehicle and can be properly fixed in place.
Ensure that the floor mats are securely fastened
again after they were removed for cleaning, for
example.◀ Seite 147
147Online Edition for Part no. 01 40 2 606 469 - 03 11 490
Reference Mobility Communication Entertainment Navigation
Driving tips Controls At a glance