2011 BMW 535I Straps
[x] Cancel search: StrapsPage 137 of 304

Ensure that the lock is securely en‐
gaged
When
folding back the backrest, be sure that
it locks in place securely. If it is not properly
engaged, transported cargo could enter the
passenger compartment during braking or
evasive maneuvers and endanger the vehi‐
cle occupants.◀ 2.
Release the latch plate from the fixture on
the rear window shelf and insert it into the
belt
lock of the center safety belt. Make sure
you hear the latch plate engage.
To secure cargo, refer to page 149,
with nets or
draw straps, the cargo area is fitted with lashing
eyes.
Ski bag*
Capacity
The ski bag can be used to transport up to four
pairs of skis with a length of up to 6 ft/2.10 m or,
depending on the binding, up to two snow‐
boards with a length of up to 5 ft/1.60 m.
Preparing and loading the ski bag
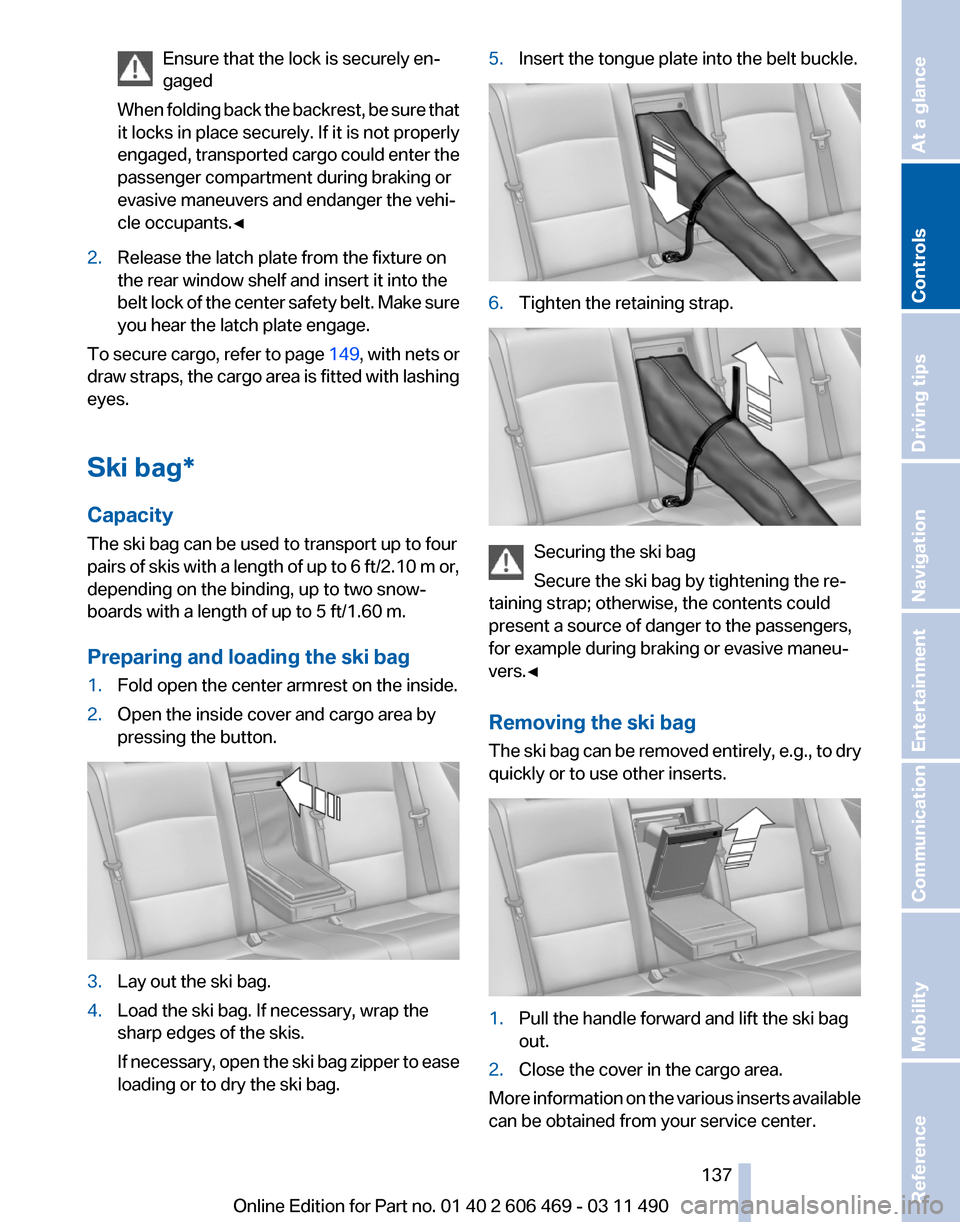
1. Fold open the center armrest on the inside.
2. Open the inside cover and cargo area by
pressing the button. 3.
Lay out the ski bag.
4. Load the ski bag. If necessary, wrap the
sharp edges of the skis.
If
necessary, open the ski bag zipper to ease
loading or to dry the ski bag. 5.
Insert the tongue plate into the belt buckle. 6.
Tighten the retaining strap. Securing the ski bag
Secure the ski bag by tightening the re‐
taining strap; otherwise, the contents could
present a source of danger to the passengers,
for example during braking or evasive maneu‐
vers.◀
Removing the ski bag
The
ski bag can be removed entirely, e.g., to dry
quickly or to use other inserts. 1.
Pull the handle forward and lift the ski bag
out.
2. Close the cover in the cargo area.
More information on the various inserts available
can be obtained from your service center. Seite 137
137Online Edition for Part no. 01 40 2 606 469 - 03 11 490
Reference Mobility Communication Entertainment Navigation Driving tips
Controls At a glance
Page 149 of 304

hicle and unstable driving situations may
result.
2. Determine the combined weight of the
driver and passengers that will be riding in
your vehicle.
3. Subtract the combined weight of the driver
and
passengers from XXX kilograms or YYY
pounds.
4. The resulting figure equals the available
amount
of cargo and luggage load capacity.
For example, if the YYY amount equals
1,000 lbs and there will be four 150 lbs pas‐
sengers in your vehicle, the amount of avail‐
able cargo and luggage load capacity is
400 lbs: 1,000 lbs minus 600 lbs = 400 lbs.
5. Determine the combined weight of luggage
and
cargo being loaded on the vehicle. That
weight may not safely exceed the available
cargo and luggage load capacity calculated
in Step 4.
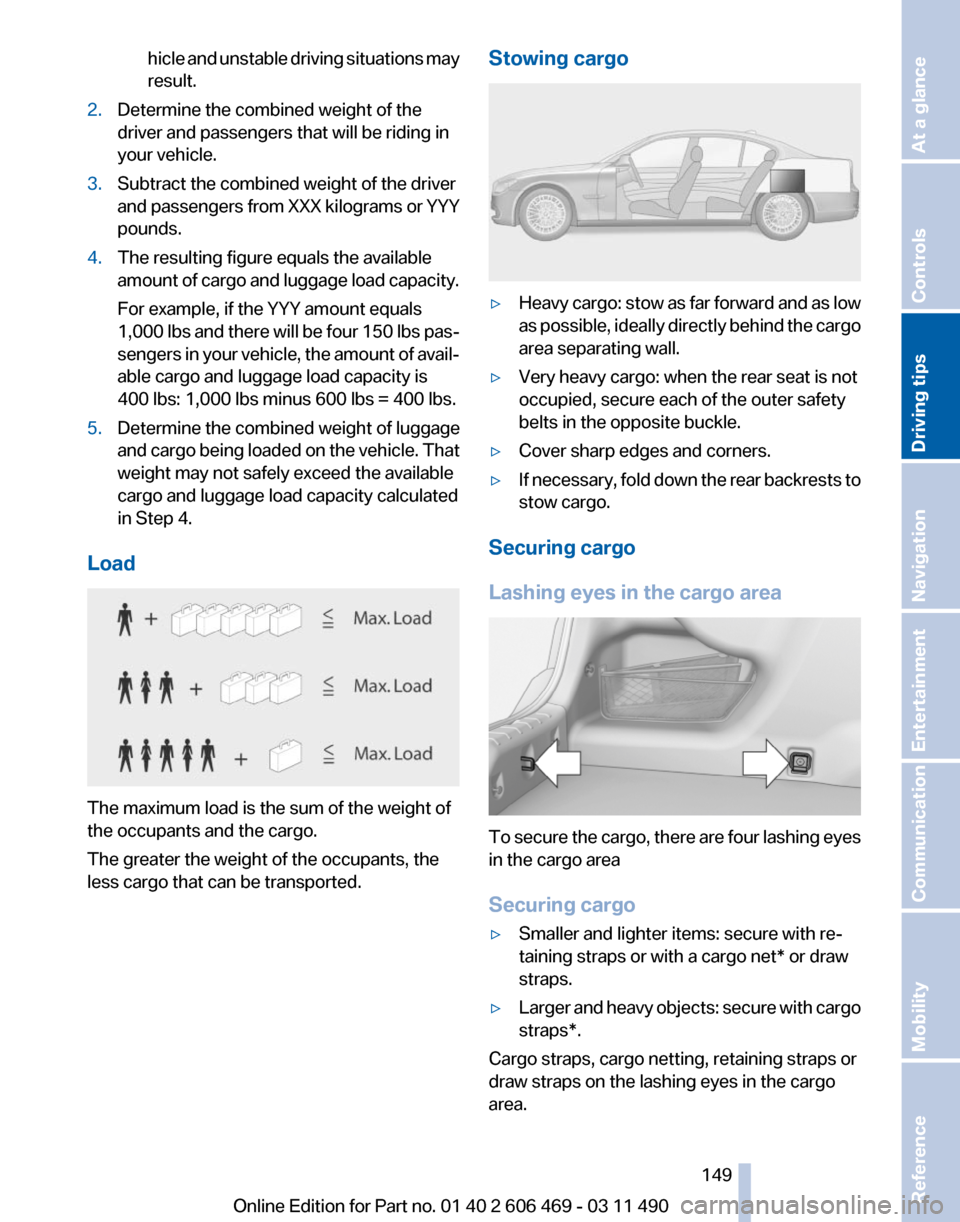
Load The maximum load is the sum of the weight of
the occupants and the cargo.
The greater the weight of the occupants, the
less cargo that can be transported. Stowing cargo ▷
Heavy cargo: stow as far forward and as low
as
possible, ideally directly behind the cargo
area separating wall.
▷ Very heavy cargo: when the rear seat is not
occupied, secure each of the outer safety
belts in the opposite buckle.
▷ Cover sharp edges and corners.
▷ If necessary, fold down the rear backrests to
stow cargo.
Securing cargo
Lashing eyes in the cargo area To secure the cargo, there are four lashing eyes
in the cargo area
Securing cargo
▷
Smaller and lighter items: secure with re‐
taining straps or with a
cargo net* or draw
straps.
▷ Larger and heavy objects: secure with cargo
straps*.
Cargo straps, cargo netting, retaining straps or
draw straps on the lashing eyes in the cargo
area.
Seite 149
149Online Edition for Part no. 01 40 2 606 469 - 03 11 490
Reference Mobility Communication Entertainment Navigation
Driving tips Controls At a glance
Page 150 of 304

Securing cargo
Always position and secure the cargo as
described
above; otherwise, it can endanger the
car's occupants if sudden braking or swerving
becomes necessary.
Heavy or hard objects should not be carried
loose inside the car; otherwise, they could be
thrown around as a result of hard braking, sud‐
den swerves, etc., and endanger the occu‐
pants.◀
Roof-mounted luggage rack
Note
Roof racks are available as special accessories.
Attachment
Follow the installation instructions of the roof
rack.
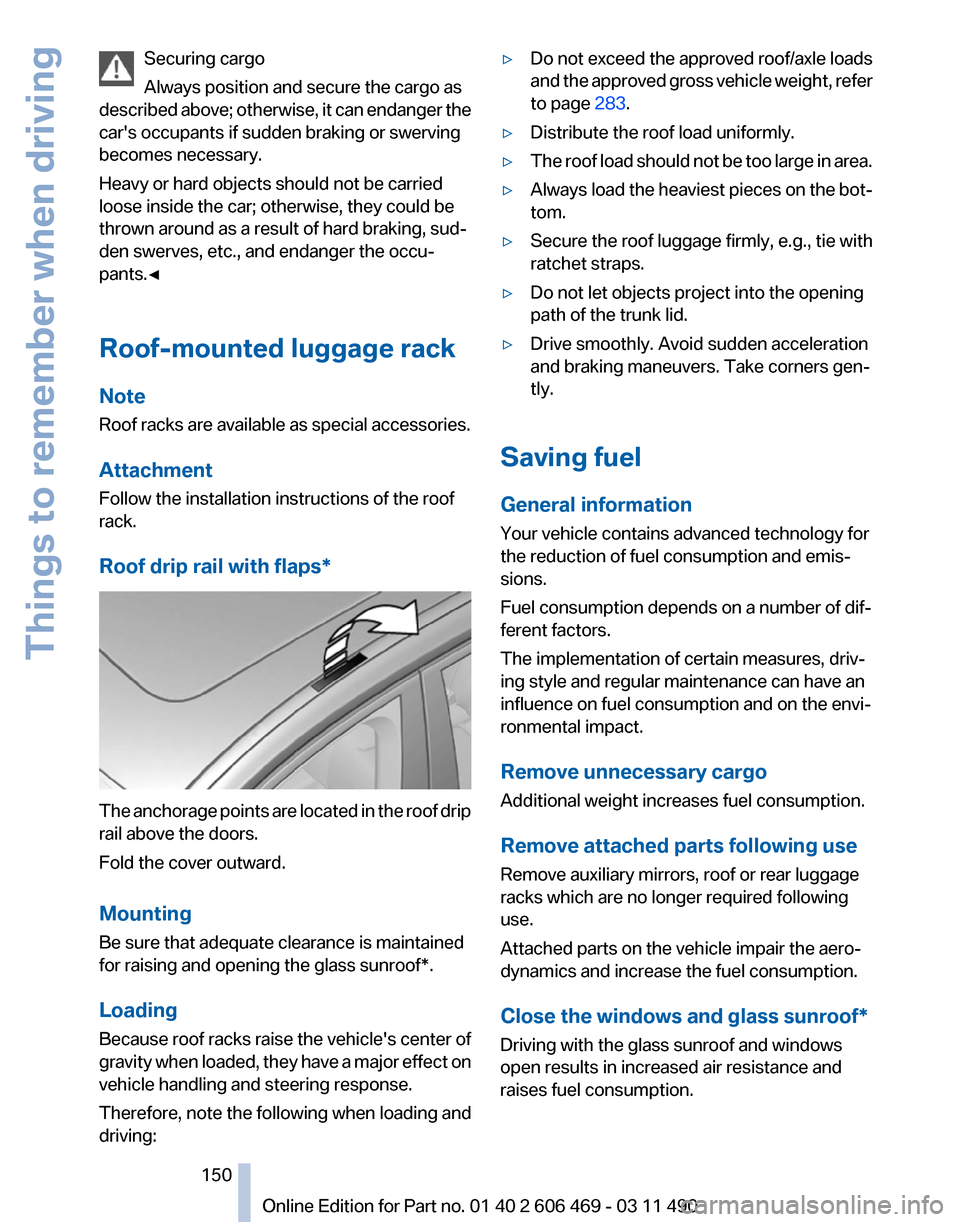
Roof drip rail with flaps* The anchorage points are located in the roof drip
rail above the doors.
Fold the cover outward.
Mounting
Be sure that adequate clearance is maintained
for raising and opening the
glass sunroof*.
Loading
Because roof racks raise the vehicle's center of
gravity when loaded, they have a major effect on
vehicle handling and steering response.
Therefore, note the following when loading and
driving: ▷
Do not exceed the approved roof/axle loads
and
the approved gross vehicle weight, refer
to page 283.
▷ Distribute the roof load uniformly.
▷ The roof load should not be too large in area.
▷ Always load the heaviest pieces on the bot‐
tom.
▷ Secure the roof luggage firmly, e.g., tie with
ratchet straps.
▷ Do not let objects project into the opening
path of the trunk lid.
▷ Drive smoothly. Avoid sudden acceleration
and braking maneuvers. Take corners gen‐
tly.
Saving fuel
General information
Your vehicle contains advanced technology for
the reduction of fuel consumption and emis‐
sions.
Fuel consumption depends on a number of dif‐
ferent factors.
The implementation of certain measures, driv‐
ing style and regular maintenance can have an
influence on fuel consumption and on the envi‐
ronmental impact.
Remove unnecessary cargo
Additional weight increases fuel consumption.
Remove attached parts following use
Remove auxiliary mirrors, roof or rear luggage
racks which are no longer required following
use.
Attached parts on the vehicle impair the aero‐
dynamics and increase the fuel consumption.
Close the windows and glass sunroof
*
Driving with the glass sunroof and windows
open results in increased air resistance and
raises fuel consumption.
Seite 150
150 Online Edition for Part no. 01 40 2 606 469 - 03 11 490
Things to remember when driving
Page 273 of 304

▷
Maneuvering capability is limited during cor‐
nering.
▷ The tow bar will generate lateral forces if it
is secured with an offset.
Tow rope
When starting to tow the vehicle, make sure that
the tow rope is taut.
To avoid jerking and the associated stresses on
the vehicle components when towing, always
use nylon ropes or nylon straps.
Attaching the tow rope correctly
Only secure the tow rope on the tow fit‐
ting; otherwise, damage can occur when it is se‐
cured on other parts of the vehicle.◀
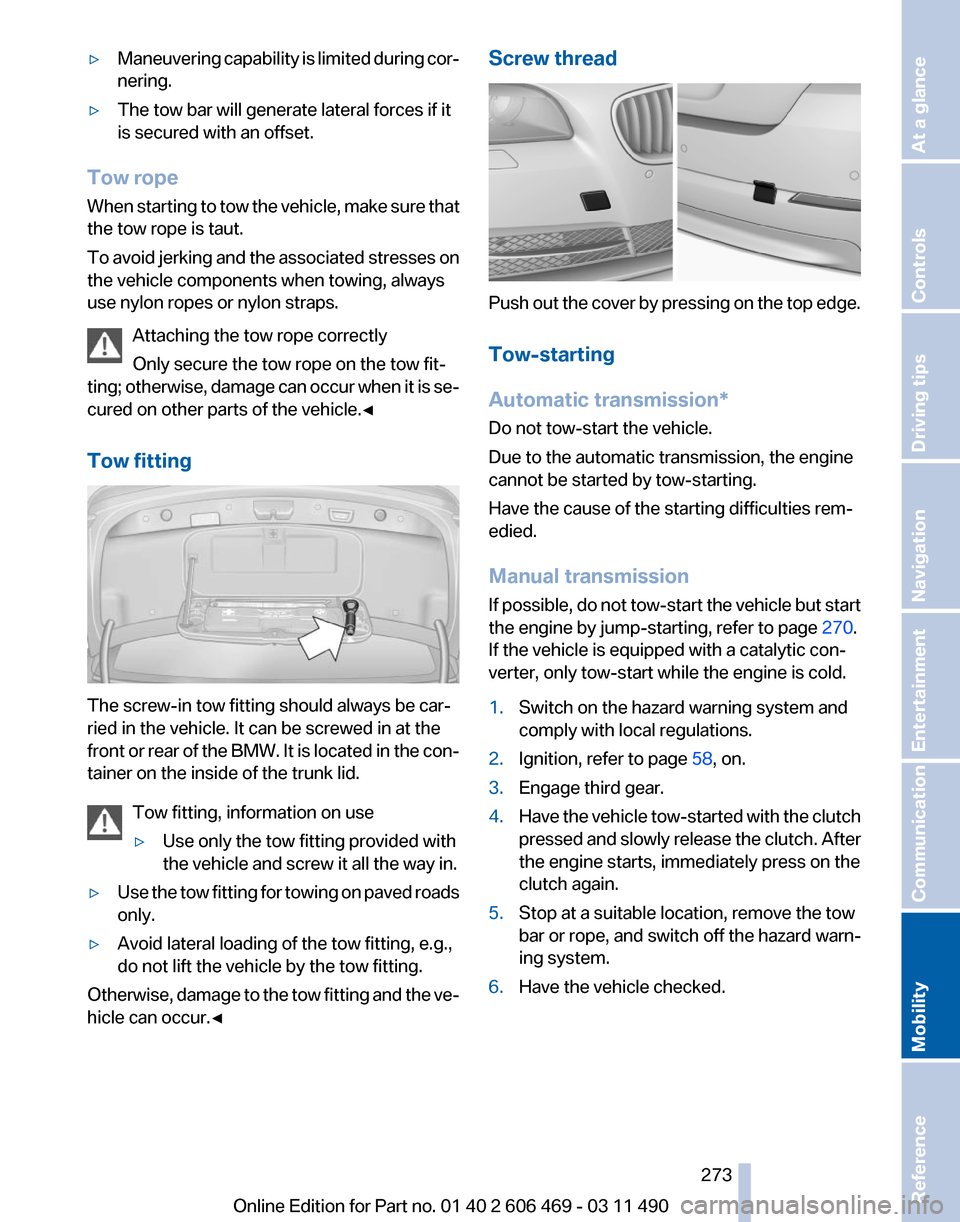
Tow fitting The screw-in tow fitting should always be car‐
ried in the vehicle. It can be screwed in at the
front
or rear of the BMW. It is located in the con‐
tainer on the inside of the trunk lid.
Tow fitting, information on use
▷Use only the tow fitting provided with
the vehicle and screw it all the way in.
▷ Use the tow fitting for towing on paved roads
only.
▷ Avoid lateral loading of the tow fitting, e.g.,
do not lift the vehicle by the tow fitting.
Otherwise, damage to the tow fitting and the ve‐
hicle can occur.◀ Screw thread
Push out the cover by pressing on the top edge.
Tow-starting
Automatic transmission
*
Do not tow-start the vehicle.
Due to the automatic transmission, the engine
cannot be started by tow-starting.
Have the cause of the starting difficulties rem‐
edied.
Manual transmission
If possible, do not tow-start the vehicle but start
the engine by jump-starting, refer to page 270.
If the vehicle is equipped with a catalytic con‐
verter, only tow-start while the engine is cold.
1. Switch on the hazard warning system and
comply with local regulations.
2. Ignition, refer to page 58, on.
3. Engage third gear.
4. Have the vehicle tow-started with the clutch
pressed
and slowly release the clutch. After
the engine starts, immediately press on the
clutch again.
5. Stop at a suitable location, remove the tow
bar or rope, and switch off the hazard warn‐
ing system.
6. Have the vehicle checked.
Seite 273
273Online Edition for Part no. 01 40 2 606 469 - 03 11 490
Reference
Mobility Communication Entertainment Navigation Driving tips Controls At a glance
Page 276 of 304

water, possibly with shampoo added, particu‐
larly
when they have been exposed to road salt.
Rubber components
Aside from water, treat only with rubber cleans‐
ers.
When cleaning rubber seals, do not use any sil‐
icon-containing car care products in order to
avoid damage or reduced noise damping.
Fine wood parts*
Clean fine wood facing and fine wood compo‐
nents only with a moist rag. Then dry with a soft
cloth.
Plastic components
These include:
▷ Imitation leather surfaces.
▷ Headliner.
▷ Lamp lenses.
▷ Instrument cluster cover.
▷ Matte black spray-coated components.
Clean with a microfiber cloth.
Moisten the cloth lightly and use plastic
cleanser, if necessary.
Do not soak the headliner.
Do not use cleansers that contain alcohol
or solvents
Do
not use cleansers that contain alcohol or sol‐
vents, such as lacquer thinners, heavy-duty
grease removers, fuel, or such; this could lead to
surface damage.◀
Safety belts
Dirty belt straps impede the reeling action and
thus have a negative impact on safety.
Chemical cleaning
Do not clean chemically; this can destroy
the webbing.◀
Use only a mild soapy solution, with the safety
belts clipped into their buckles. Do not allow the reels to retract the safety belts
until they are dry.
Floor carpets and floor mats*
No objects in the area around the pedals
Keep floor mats, carpets, and any other
objects out of the area of motion of the pedals;
otherwise, the function of the pedals could be
impeded while driving
Do not place additional floor mats over existing
mats or other objects.
Only
use floor mats that have been approved for
the vehicle and can be properly fixed in place.
Ensure that the floor mats are securely fastened
again after they were removed for cleaning, for
example.◀
Floor mats can be removed from the passenger
compartment for cleaning.
If the floor carpets are very dirty, clean with a
microfiber cloth and water or a textile cleaner. To
prevent matting of the carpet, rub back and forth
in the direction of travel only.
Sensors/cameras
To clean sensors and cameras, use a cloth mois‐
tened with a small amount of glass cleaner.
Displays/screens
Clean the displays with a microfiber cloth.
Cleaning displays
Do not use chemical or household cleans‐
ers.
Keep all fluids and moisture away from the unit.
Otherwise, they could affect or damage surfa‐
ces or electrical components.
Avoid pressing too hard when cleaning and do
not use abrasive materials; otherwise, damage
can result.◀
Long-term vehicle storage
Your service center can advise you on what to
consider when storing the vehicle for longer
than three months. Seite 276
276 Online Edition for Part no. 01 40 2 606 469 - 03 11 490
Care
Page 295 of 304

Before entering the car
wash 274
Belts, safety belts 48
Beverage holder, cu‐ pholder 140
Blinds, sun protection 41
Bluetooth audio 196
BMW Apps 236
BMW Apps, video play‐ back 195
BMW Assist 232
BMW EfficientDynamics, refer to Saving fuel 150
BMW homepage 6
BMW Internet page 6
BMW Maintenance Sys‐ tem 260
BMW Online 234
Bottle holder, refer to Cu‐ pholder 140
Brake assistant 95
Brake assistant, adaptive 95
Brake discs, breaking in 146
Brake force display 94
Brake lamps, brake force dis‐ play 94
Brake lamps, bulb replace‐ ment 266
Brake lights, adaptive 94
Brake pads, breaking in 146
Braking, notes 147
Breakdown assis‐ tance 269, 270
Breaking in 146
Brightness of Control Dis‐ play 79
Bulb replacement 262
Bulb replacement, front 263
Bulb replacement, rear 265
Bulbs and lamps 262
Button, RES 104
Button, Start/Stop 58
Bypassing, refer to starting aid 270
C
Calendar 226 California Proposition 65
Warning 7
Camera, backup camera 116
Camera, care 276
Camera, Side View 118
Camera, Top View 117
Can holder, refer to Cu‐ pholder 140
Car battery 267
Car care products 275
Care, displays 276
Care, vehicle 275
Cargo 148
Cargo area, enlarging 136
Cargo area lid 35
Cargo area, storage compart‐ ments 141
Cargo straps, securing cargo 149
Car key, refer to Remote con‐ trol 28
Carpet, care 276
Car wash 274
Catalytic converter, refer to Hot exhaust system 146
CBS Condition Based Serv‐ ice 260
CD/DVD 181
CD/DVD player, rear 201
CDs, storing 188
Cell phone 210
Center armrest 139
Center console 14
Central locking system 31
Central
screen, refer to Control
Display 16
Changes, technical, refer to Safety 7
Changing parts 262
Changing wheels/tires 251
Check Control 70
Children, seating position 54
Children, transporting safely 54
Child restraint fixing sys‐ tem 54
Child restraint fixing system LATCH 55 Child restraint fixing systems,
mounting 54
Child-safety locks 57
Child seat, mounting 54
Child seats 54
Chrome parts, care 275
Cigarette lighter 134
Cleaning, displays 276
Climate control 126
Climate control wind‐ shield 147
Clock 73
Closing/opening from in‐ side 35
Closing/opening via door lock 34
Closing/opening with remote control 32
Clothes hooks 141
Collision warning 108
Combination switch, refer to Turn signals 62
Combination switch, refer to Wiper system 62
Comfort Access 37
COMFORT
program, Dynamic
Driving Control 100
Computer 75
Concierge service 233
Condensation on win‐ dows 127
Condensation under the vehi‐ cle 148
Condition Based Service CBS 260
Confirmation signal 33
Contacts 221, 230
Control Display 16
Control Display, settings 78
Controller 16
Control systems, driving sta‐ bility 95
Convenient opening 32
Coolant 258
Coolant temperature 72
Cooling function 128
Cooling, maximum 127
Cooling system 258
Seite 295
295Online Edition for Part no. 01 40 2 606 469 - 03 11 490
Reference Mobility Communication Entertainment Navigation Driving tips Controls At a glance
Page 300 of 304

Power sunroof, glass 41
Power windows
40
Pressure, tire air pres‐ sure 242
Profile, refer to Personal Pro‐ file 29
Programmable memory but‐ tons, iDrive 20
Protective
function, glass sun‐
roof 42
Protective function, win‐ dows 40
Push-and-turn switch, refer to Controller 16
R
Radiator fluid 258
Radio 174
Radio-operated key, refer to Remote control 28
Radio ready state 58
Rain sensor 63
Random 182
Random playback 182
RDS 175
Reading out loud 228
Rear automatic climate con‐ trol 130
Rear axle steering 98
Rear entertainment 201
Rear lamps 265
Rear socket 136
Rear source, selecting for rear entertainment 204
Rearview mirror 51
Rear window defroster 128
Recirculated-air mode 127
Recommended tire brands 252
Refueling 240
Remaining range 73
Reminders 227
Remote control/key 28
Remote control, malfunc‐ tion 33
Remote control, rear enter‐ tainment 202 Remote control, universal
132
Replacement fuse 268
Replacing parts 262
Replacing wheels/tires 251
Reporting safety defects 8
RES button 104
Reserve warning, refer to Range 73
Resetting,
Tire Pressure Mon‐
itor TPM 89
Residual heat, automatic cli‐ mate control 128
Retaining straps, securing cargo 149
Retreaded tires 252
Roadside Assistance 233
Roadside parking lamps 81
Roller sunblinds 41
Roll stabilization, refer to Adaptive Drive 97
Roll stabilization, refer to Dy‐ namic Drive 98
Roof load capacity 283
Roof-mounted luggage rack 150
Rope for tow-starting/tow‐ ing 273
Route 162
Route criteria, route 161
Route, displaying 162
Routes, avoiding 162
Route section, bypassing 163
RPM, engine 281
RSC Runflat System Compo‐ nent, refer to Run-flat
tires 252
Rubber components, care 276
Run-flat tires 252
S
Safe braking 147
Safety 7
Safety belt reminder 48
Safety belts 48
Safety belts, care 276
Safety switch, windows 41 Safety systems, airbags
85
Satellite radio 176
Saving fuel 150
Scale, changing during navi‐ gation 164
Screen, refer to Control Dis‐ play 16
Screwdriver 262
Screw thread for tow fit‐ ting 273
Seat belts, refer to Safety belts 48
Seat heating, front 47
Seat heating, rear 47
Seating position for chil‐ dren 54
Seat, mirror, and steering wheel memory 51
Seats 44
Seat ventilation, front 47
Selection list in instrument cluster 75
Selector lever, automatic transmission 65
Sensors, care 276
Service and warranty 7
Service requirements, CBS Condition Based Serv‐
ice 260
Service requirements, dis‐ play 74
Service, Roadside Assis‐ tance 270
Settings on Control Dis‐ play 78
Settings, storing for seat, mir‐ rors, steering wheel 51
Shifting, automatic transmis‐ sion 65
Shifting, manual transmis‐ sion 64
Shift paddles on steering wheel 66
Short commands 285
Shoulder support 46
Side airbags 85
Side View 117
Signaling, horn 12
Seite 300
300 Online Edition for Part no. 01 40 2 606 469 - 03 11 490
Everything from A to Z