2011 BMW 335I XDRIVE SEDAN towing
[x] Cancel search: towingPage 35 of 286
Controls
33Reference
At a glance
Driving tips
Communications
Navigation
Entertainment
Mobility
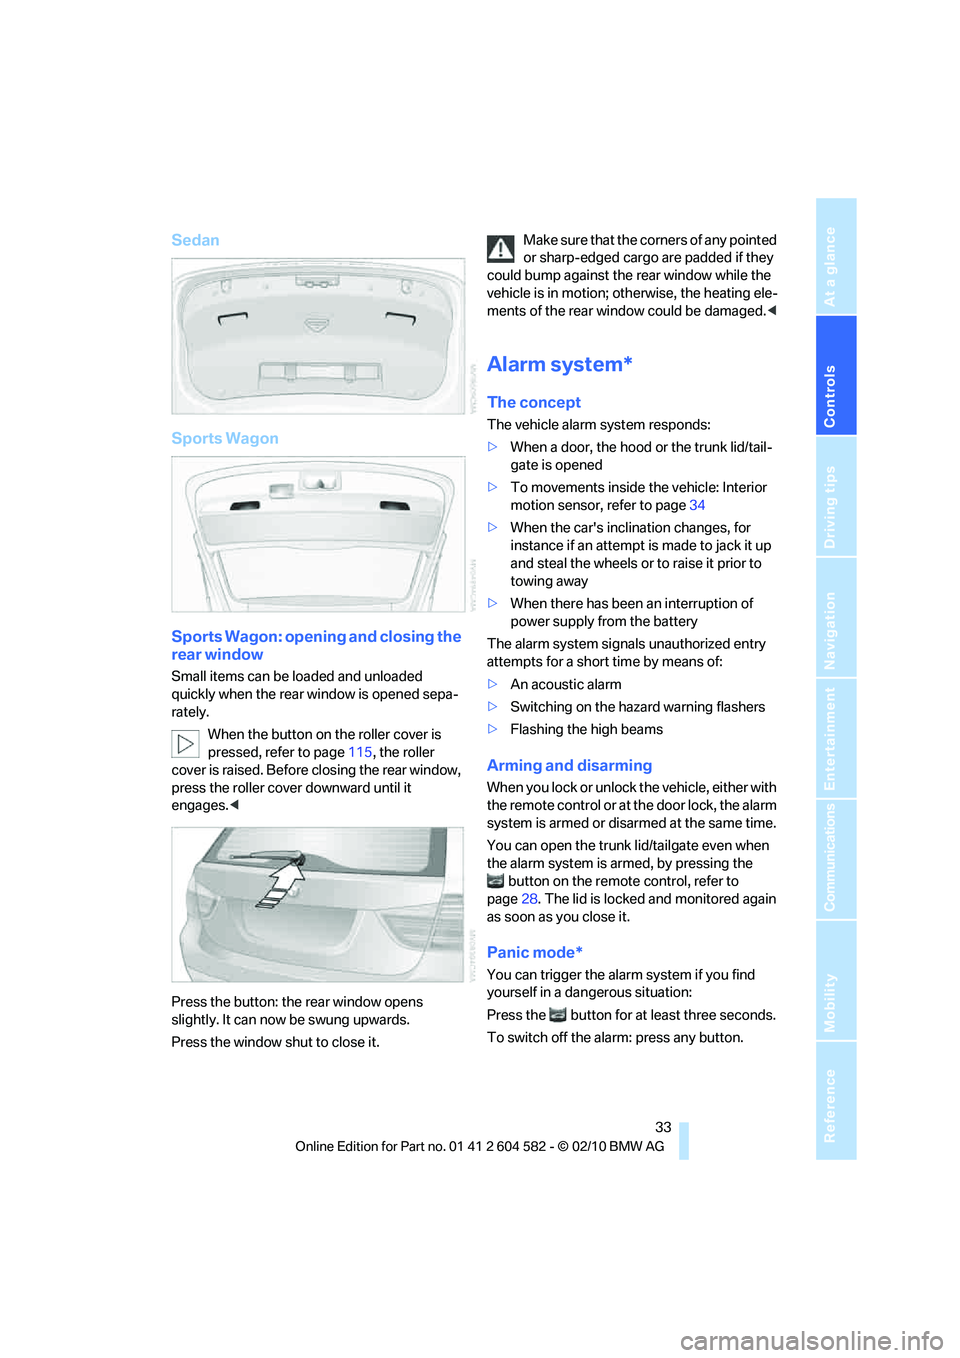
Sedan
Sports Wagon
Sports Wagon: opening and closing the
rear window
Small items can be loaded and unloaded
quickly when the rear window is opened sepa-
rately.
When the button on the roller cover is
pressed, refer to page115, the roller
cover is raised. Before closing the rear window,
press the roller cover downward until it
engages.<
Press the button: the rear window opens
slightly. It can now be swung upwards.
Press the window shut to close it.Make sure that the corners of any pointed
or sharp-edged cargo are padded if they
could bump against the rear window while the
vehicle is in motion; otherwise, the heating ele-
ments of the rear window could be damaged.<
Alarm system*
The concept
The vehicle alarm system responds:
>When a door, the hood or the trunk lid/tail-
gate is opened
>To movements inside the vehicle: Interior
motion sensor, refer to page34
>When the car's inclination changes, for
instance if an attempt is made to jack it up
and steal the wheels or to raise it prior to
towing away
>When there has been an interruption of
power supply from the battery
The alarm system signals unauthorized entry
attempts for a short time by means of:
>An acoustic alarm
>Switching on the hazard warning flashers
>Flashing the high beams
Arming and disarming
When you lock or unlock the vehicle, either with
the remote control or at the door lock, the alarm
system is armed or disarmed at the same time.
You can open the trunk lid/tailgate even when
the alarm system is armed, by pressing the
button on the remote control, refer to
page28. The lid is locked and monitored again
as soon as you close it.
Panic mode*
You can trigger the alarm system if you find
yourself in a dangerous situation:
Press the button for at least three seconds.
To switch off the alarm: press any button.
Page 127 of 286
Driving tips
125Reference
At a glance
Controls
Communications
Navigation
Entertainment
Mobility
Corrosion on brake rotors
When the vehicle is driven only occasionally,
during extended periods when the vehicle is not
used at all, and in operating conditions where
brake applications are less frequent, there is an
increased tendency for corrosion to form on
rotors, while contaminants accumulate on the
brake pads. This occurs because the minimum
pressure which must be exerted by the pads
during brake applications to clean the rotors is
not reached.
Should corrosion form on the brake rotors, the
brakes will tend to respond with a pulsating
effect that even extended application will fail to
cure.
When the vehicle is parked
Condensation forms while the automatic cli-
mate control is in operation, and then exits
under the vehicle. Traces of condensed water
under the vehicle are therefore normal.
Cargo loading
To avoid loading the tires beyond their
approved carrying capacity, never over-
load the vehicle. Overloading can lead to over-
heating and increases the rate at which damage
develops inside the tires. In some situations,
this can result in sudden loss of tire pressure.<
Make sure that no liquids are spilled or
leak from their containers in the cargo
area, as this could result in damage to the vehi-
cle.<
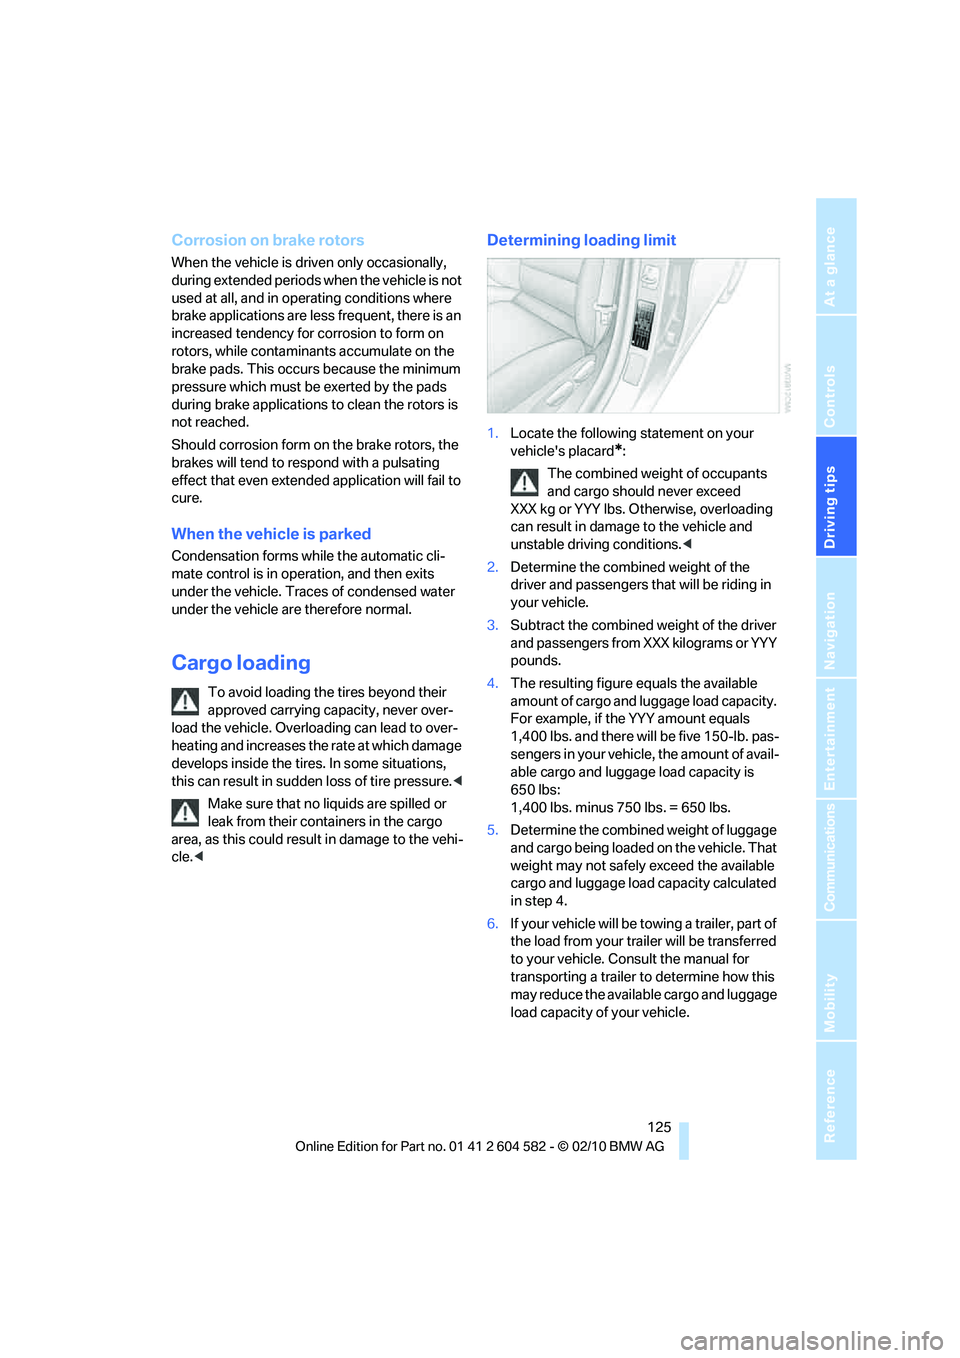
Determining loading limit
1.Locate the following statement on your
vehicle's placard
*:
The combined weight of occupants
and cargo should never exceed
XXX kg or YYY lbs. Otherwise, overloading
can result in damage to the vehicle and
unstable driving conditions.<
2.Determine the combined weight of the
driver and passengers that will be riding in
your vehicle.
3.Subtract the combined weight of the driver
and passengers from XXX kilograms or YYY
pounds.
4.The resulting figure equals the available
amount of cargo and luggage load capacity.
For example, if the YYY amount equals
1,400 lbs. and there will be five 150-lb. pas-
sengers in your vehicle, the amount of avail-
able cargo and luggage load capacity is
650 lbs:
1,400 lbs. minus 750 lbs. = 650 lbs.
5.Determine the combined weight of luggage
and cargo being loaded on the vehicle. That
weight may not safely exceed the available
cargo and luggage load capacity calculated
in step 4.
6.If your vehicle will be towing a trailer, part of
the load from your trailer will be transferred
to your vehicle. Consult the manual for
transporting a trailer to determine how this
may reduce the available cargo and luggage
load capacity of your vehicle.
Page 128 of 286
Things to remember when driving
126
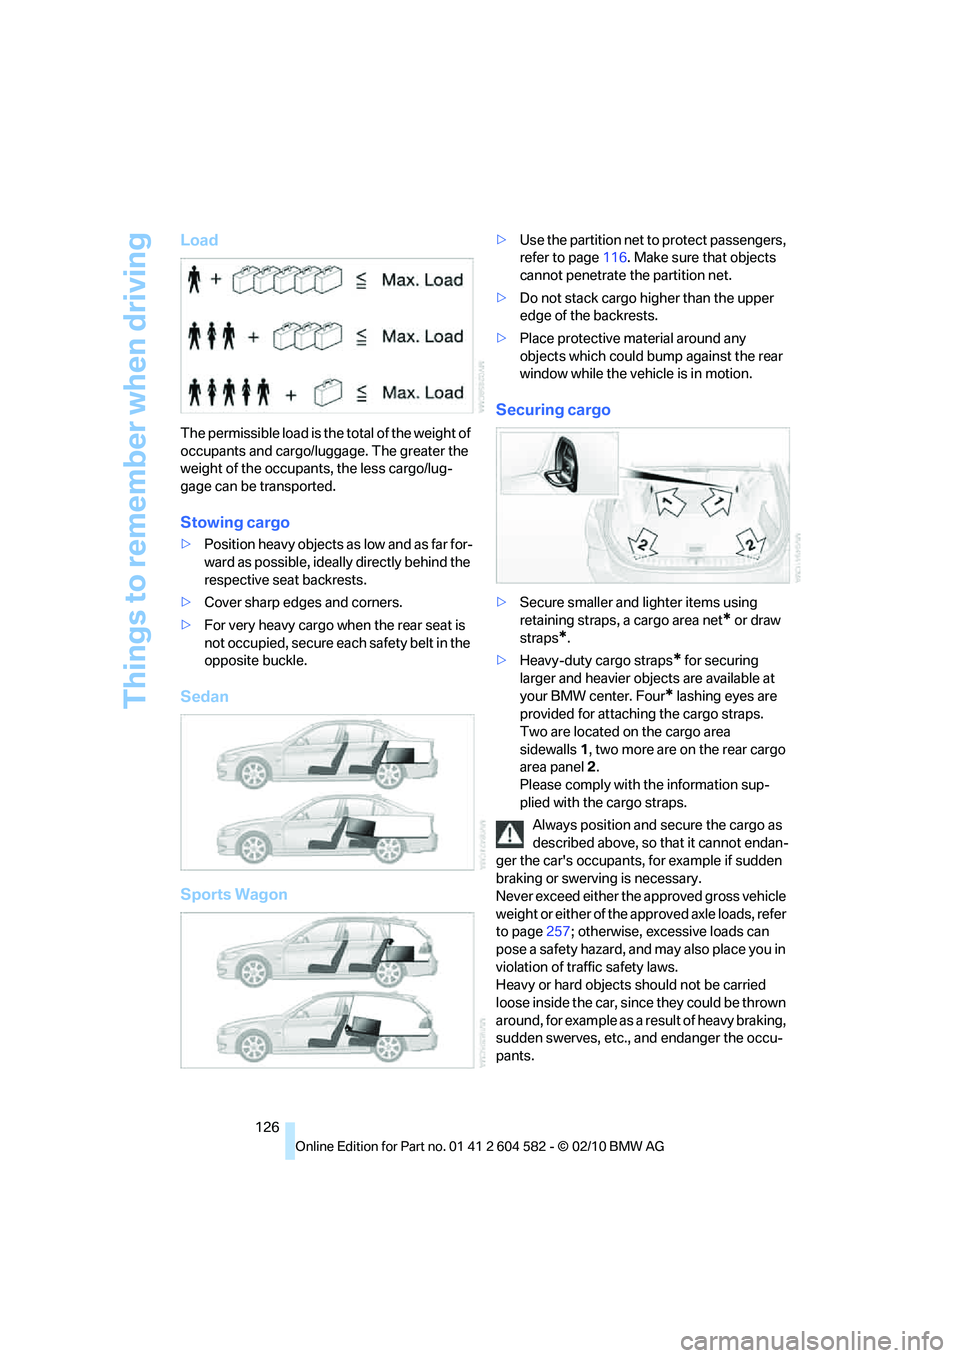
Load
The permissible load is the total of the weight of
occupants and cargo/luggage. The greater the
weight of the occupants, the less cargo/lug-
gage can be transported.
Stowing cargo
>Position heavy objects as low and as far for-
ward as possible, ideally directly behind the
respective seat backrests.
>Cover sharp edges and corners.
>For very heavy cargo when the rear seat is
not occupied, secure each safety belt in the
opposite buckle.
Sedan
Sports Wagon
>Use the partition net to protect passengers,
refer to page116. Make sure that objects
cannot penetrate the partition net.
>Do not stack cargo higher than the upper
edge of the backrests.
>Place protective material around any
objects which could bump against the rear
window while the vehicle is in motion.
Securing cargo
>Secure smaller and lighter items using
retaining straps, a cargo area net
* or draw
straps
*.
>Heavy-duty cargo straps
* for securing
larger and heavier objects are available at
your BMW center. Four
* lashing eyes are
provided for attaching the cargo straps.
Two are located on the cargo area
sidewalls1, two more are on the rear cargo
area panel2.
Please comply with the information sup-
plied with the cargo straps.
Always position and secure the cargo as
described above, so that it cannot endan-
ger the car's occupants, for example if sudden
braking or swerving is necessary.
Never exceed either the approved gross vehicle
weight or either of the approved axle loads, refer
to page257; otherwise, excessive loads can
pose a safety hazard, and may also place you in
violation of traffic safety laws.
Heavy or hard objects should not be carried
loose inside the car, since they could be thrown
around, for example as a result of heavy braking,
sudden swerves, etc., and endanger the occu-
pants.
Page 250 of 286
Giving and receiving assistance
248
Preparation
1.Check whether the battery of the other
vehicle has a voltage of 12 volts and
approximately the same capacitance in Ah.
This information can be found on the bat-
tery.
2.Switch off the engine of the assisting vehi-
cle.
3.Switch off any consumers in both vehicles.
There must not be any contact between
the bodies of the two vehicles; otherwise,
there is a danger of shorting.<
Connecting jumper cables
Connect the jumper cables in the correct
order, so that no sparks which could
cause injury occur.<
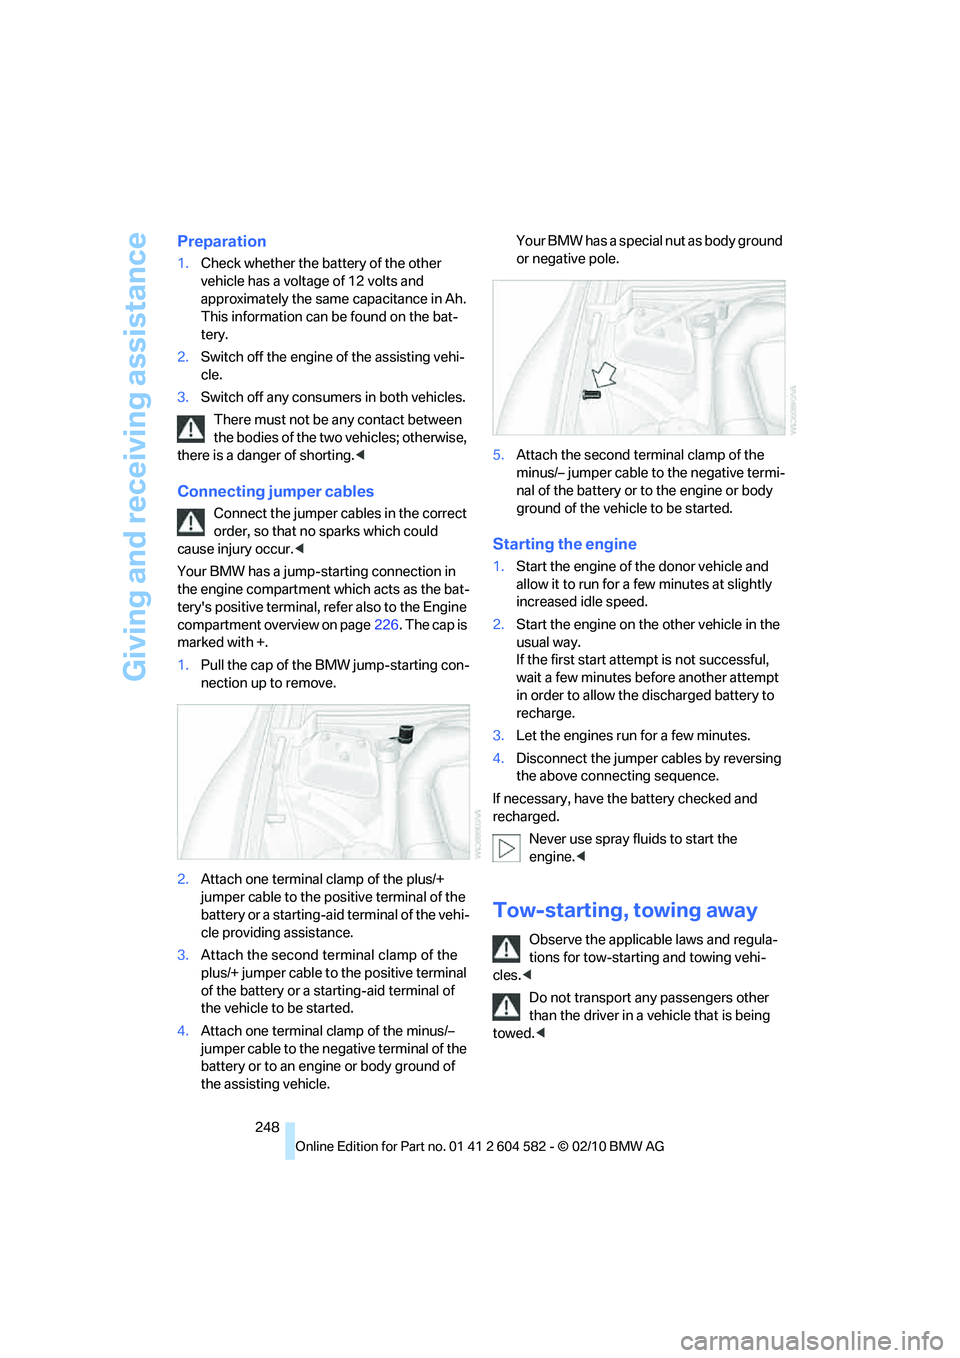
Your BMW has a jump-starting connection in
the engine compartment which acts as the bat-
tery's positive terminal, refer also to the Engine
compartment overview on page226. The cap is
marked with +.
1.Pull the cap of the BMW jump-starting con-
nection up to remove.
2.Attach one terminal clamp of the plus/+
jumper cable to the positive terminal of the
battery or a starting-aid terminal of the vehi-
cle providing assistance.
3.Attach the second terminal clamp of the
plus/+ jumper cable to the positive terminal
of the battery or a starting-aid terminal of
the vehicle to be started.
4.Attach one terminal clamp of the minus/–
jumper cable to the negative terminal of the
battery or to an engine or body ground of
the assisting vehicle. Your BMW has a special nut as body ground
or negative pole.
5.Attach the second terminal clamp of the
minus/– jumper cable to the negative termi-
nal of the battery or to the engine or body
ground of the vehicle to be started.
Starting the engine
1.Start the engine of the donor vehicle and
allow it to run for a few minutes at slightly
increased idle speed.
2.Start the engine on the other vehicle in the
usual way.
If the first start attempt is not successful,
wait a few minutes before another attempt
in order to allow the discharged battery to
recharge.
3.Let the engines run for a few minutes.
4.Disconnect the jumper cables by reversing
the above connecting sequence.
If necessary, have the battery checked and
recharged.
Never use spray fluids to start the
engine.<
Tow-starting, towing away
Observe the applicable laws and regula-
tions for tow-starting and towing vehi-
cles.<
Do not transport any passengers other
than the driver in a vehicle that is being
towed.<
Page 251 of 286
Mobility
249Reference
At a glance
Controls
Driving tips
Communications
Navigation
Entertainment
Using a tow fitting
The screw-in tow fitting must always be carried
in the car. It can be screwed in at the front or
rear of the BMW.
Sedan: it is stored in the onboard vehicle tool kit
underneath the cover on the right-hand side of
the cargo area, refer to page237.
Sports Wagon: it is stored in the onboard vehi-
cle tool kit underneath the cover on the left-
hand side of the cargo area, refer to page237.
Use only the tow fitting provided with the
vehicle and screw it all the way in. Use the
tow fitting for towing on paved roads only. Avoid
lateral loading of the tow fitting, e.g. do not lift
the vehicle by the tow fitting. Otherwise, the
tow fitting and the vehicle could be damaged.<
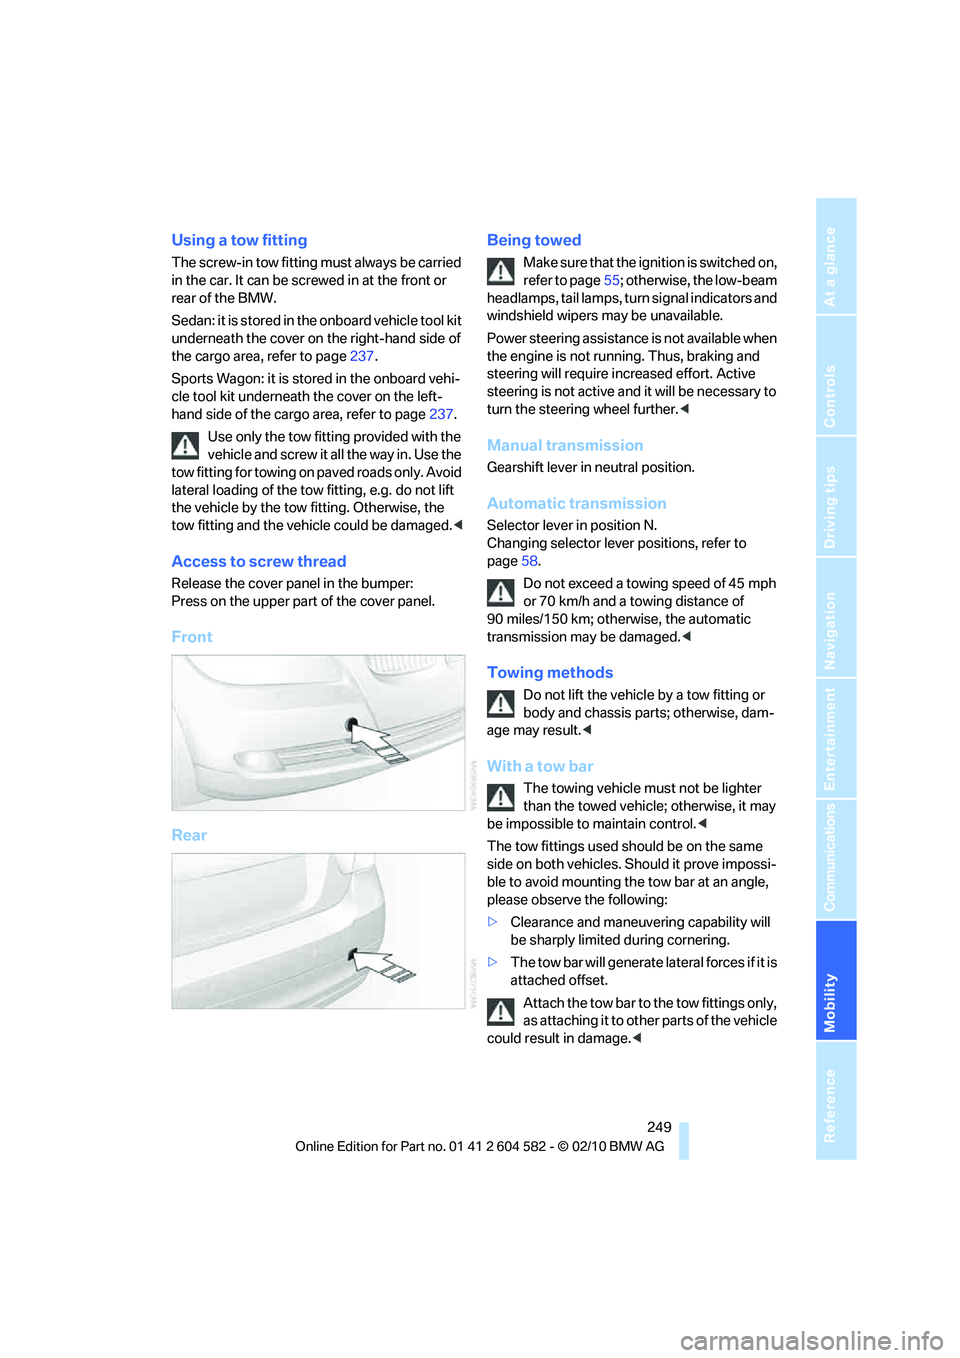
Access to screw thread
Release the cover panel in the bumper:
Press on the upper part of the cover panel.
Front
RearBeing towed
Make sure that the ignition is switched on,
refer to page55; otherwise, the low-beam
headlamps, tail lamps, turn signal indicators and
windshield wipers may be unavailable.
Power steering assistance is not available when
the engine is not running. Thus, braking and
steering will require increased effort. Active
steering is not active and it will be necessary to
turn the steering wheel further.<
Manual transmission
Gearshift lever in neutral position.
Automatic transmission
Selector lever in position N.
Changing selector lever positions, refer to
page58.
Do not exceed a towing speed of 45 mph
or 70 km/h and a towing distance of
90 miles/150 km; otherwise, the automatic
transmission may be damaged.<
Towing methods
Do not lift the vehicle by a tow fitting or
body and chassis parts; otherwise, dam-
age may result.<
With a tow bar
The towing vehicle must not be lighter
than the towed vehicle; otherwise, it may
be impossible to maintain control.<
The tow fittings used should be on the same
side on both vehicles. Should it prove impossi-
ble to avoid mounting the tow bar at an angle,
please observe the following:
>Clearance and maneuvering capability will
be sharply limited during cornering.
>The tow bar will generate lateral forces if it is
attached offset.
Attach the tow bar to the tow fittings only,
as attaching it to other parts of the vehicle
could result in damage.<
Page 252 of 286
Giving and receiving assistance
250
With a tow rope
When starting off in the towing vehicle, make
sure that the tow rope is taut.
To avoid jerking and the associated
stresses on vehicle components when
towing, always use nylon ropes or nylon straps.
Attach the tow rope to the tow fittings only, as
attaching it to other parts of the vehicle could
result in damage.<
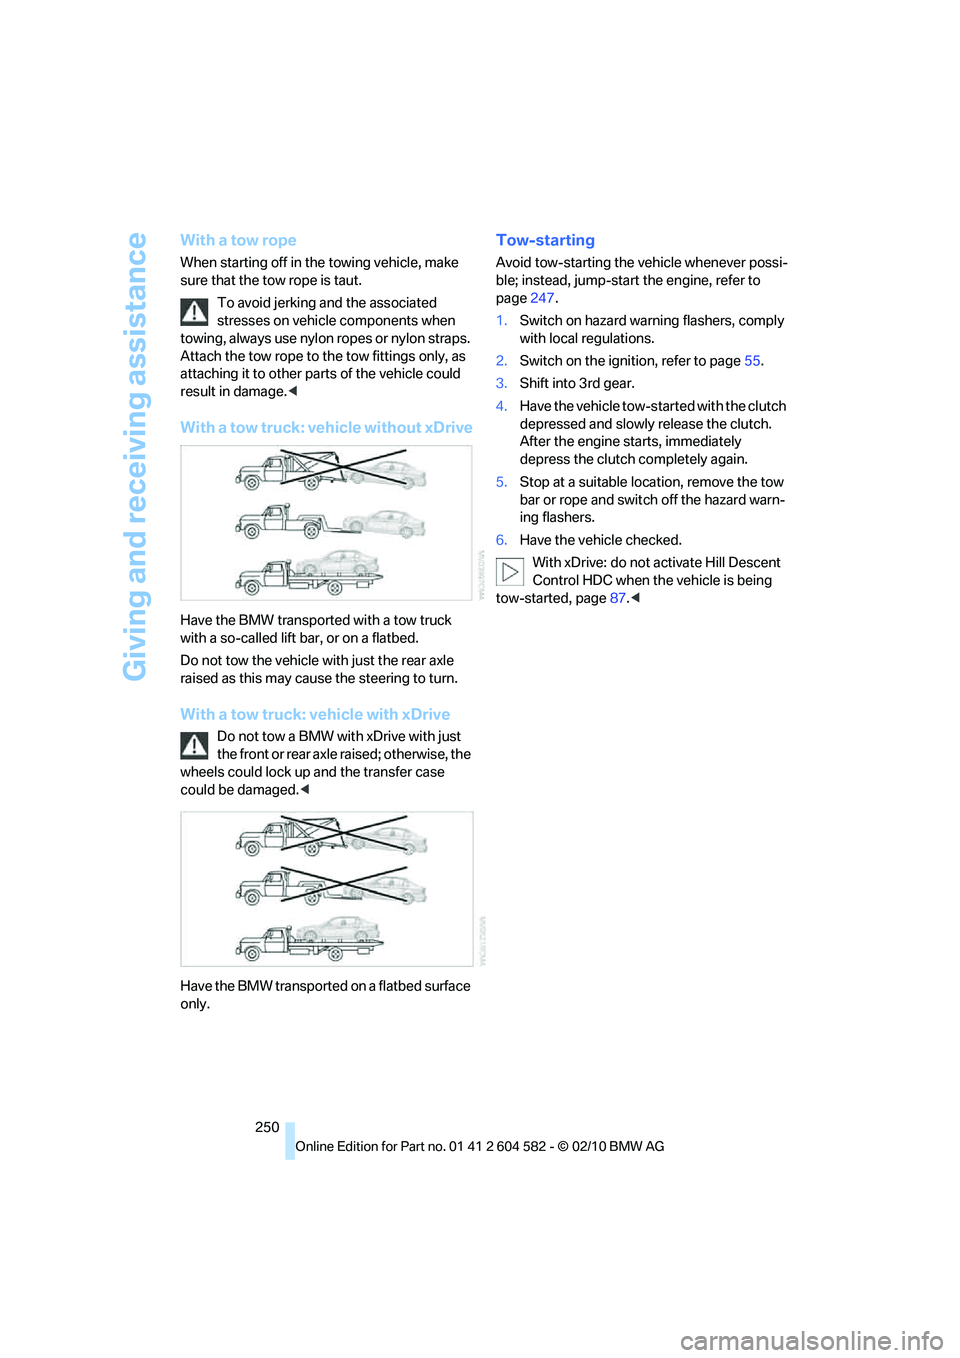
With a tow truck: vehicle without xDrive
Have the BMW transported with a tow truck
with a so-called lift bar, or on a flatbed.
Do not tow the vehicle with just the rear axle
raised as this may cause the steering to turn.
With a tow truck: vehicle with xDrive
Do not tow a BMW with xDrive with just
the front or rear axle raised; otherwise, the
wheels could lock up and the transfer case
could be damaged.<
Have the BMW transported on a flatbed surface
only.
Tow-starting
Avoid tow-starting the vehicle whenever possi-
ble; instead, jump-start the engine, refer to
page247.
1.Switch on hazard warning flashers, comply
with local regulations.
2.Switch on the ignition, refer to page55.
3.Shift into 3rd gear.
4.Have the vehicle tow-started with the clutch
depressed and slowly release the clutch.
After the engine starts, immediately
depress the clutch completely again.
5.Stop at a suitable location, remove the tow
bar or rope and switch off the hazard warn-
ing flashers.
6.Have the vehicle checked.
With xDrive: do not activate Hill Descent
Control HDC when the vehicle is being
tow-started, page87.<
Page 268 of 286
Everything from A to Z
266
Everything from A to Z
Index
A
ABS Antilock Brake
System85
ACC, refer to Active cruise
control64
Accident, refer to Sending an
Emergency Request246
Activated-charcoal filter for
automatic climate
control105
Active Cruise Control
– indicator lamp67
– malfunction68
– selecting distance66
– sensor68
Active cruise control64
Active steering92
Adaptive brake light
– Brake Force Display93
Adaptive light control98
Additives
– coolant230
Address, entering131,137
Address for navigation
– entering131
Adjusting temperature inside
the car, refer to Automatic
climate control103
Adjusting the thigh support43
Airbags94
– indicator/warning lamp96
– sitting safely42
Air conditioning mode
– automatic climate
control103
– ventilation105
Air distribution
– automatic103
Airing, refer to Ventilation105
Air pressure, refer to Tire
inflation pressure208Air recirculation, refer to
Recirculated-air mode104
Air supply
– automatic climate
control103
– ventilation105
Air vents102
Air volume104
AKI, refer to Fuel
specifications203
Alarm system33
– avoiding unintentional
alarms34
– interior motion sensor34
– switching off an alarm34
– tilt alarm sensor34
Albums of music
collection170
ALL program104
All-season tires, refer to
Winter tires224
All-wheel drive, refer to
xDrive86
AM, waveband153
Ambient air, refer to
Recirculated-air mode104
Antenna for mobile phone180
Antifreeze
– coolant230
– washer fluid62
Antilock Brake System
ABS85
Anti-theft alarm system, refer
to Alarm system33
Anti-theft system27
Approved axle loads, refer to
Weights257
Approved gross vehicle
weight, refer to Weights257
Armrest, refer to Center
armrest111
Arrival time, refer to
Computer74Ashtray112
Assist systems, refer to
Driving stability control85
AUC Automatic recirculated-
air control104
Audible instructions, refer to
Spoken instructions142
Audio150
– controls150
– switching on/off150
– tone control150
– volume150
Audio device, external111
Automatic
– air distribution103
– air volume103
– cruise control62,64
– headlamp control97
Automatic car washes233
Automatic climate control102
Automatic curb monitor49
Automatic high beams and
low beams, refer to High-
beam assistant99
Automatic recirculated-air
control AUC104
Automatic Service
Request199
Automatic transmission with
Steptronic57
– interlock58
– overriding selector lever
lock60
– shiftlock, refer to Changing
selector lever position58
– sport program59
– towing248
– tow-starting248
AUTO program for automatic
climate control103
AUX-IN
– port111
AUX-IN port173
Page 269 of 286
Reference 267
At a glance
Controls
Driving tips
Communications
Navigation
Entertainment
Mobility
Available services199
Average fuel consumption73
– setting the units76
Average speed73
Avoid highways in
navigation140
Avoiding unintentional
alarms34
Axle loads, refer to
Weights257
B
Backrest contour, refer to
Lumbar support44
Backrests, refer to Seat
adjustment43
Backrest width adjustment44
Back seats
– refer to Rear seats45
Backup lamps
– replacing bulb242,243
Band-aids, refer to First aid
pouch247
Bar, refer to Towing
methods249
Base plate for telephone or
mobile phone
– refer to Snap-in adapter192
– refer to Snap-in adapter in
the center armrest storage
compartment111
Bass, tone setting150
Battery244
– charging244
– disposal36,244
– jump-starting247
– remote control26
– replacing244
– temporary power failure245
Battery for mobile phone192
Battery renewal
– remote control36
– remote control for vehicle36
Being towed249Belts, refer to Safety belts47
Belt tensioner, refer to Safety
belts47
Beverage holders, refer to
Cupholders112
Black ice, refer to Outside
temperature warning71
Blower, refer to Air
volume104
Bluetooth, activating/
deactivating183
BMW
– car shampoo235
BMW Advanced Diesel204
BMW Assist195
BMW Assist,
activating197,199
BMW Homepage4
BMW Maintenance
System231
BMW Search197
BMW webpage4
Bottle holders, refer to
Cupholders112
Brake Assist, refer to Dynamic
Brake Control DBC85
Brake fluid, refer to Service
requirements76
Brake Force Display93
Brake lamps
– Brake Force Display93
– replacing bulb242,243
Brake pads122
– breaking in122
Brake rotors125
– brakes122
– breaking in122
Brakes
– ABS85
– BMW Maintenance
System231
– Brake Force Display93
– breaking in122
– parking brake57
– service requirements76Brakes, refer to Braking
safely124
Brake system122
– BMW Maintenance
System231
– breaking in122
– disc brakes125
Breakdown services, refer to
Roadside Assistance246
Breaking in the clutch122
Breaking in the differential,
refer to Engine and
differential122
Break-in period122
Brightness of the Control
Display83
Bulb changing, refer to Lamps
and bulbs238
Button for starting the engine,
refer to Start/stop button55
Buttons on the steering
wheel11
C
California Proposition 65
warning6
Call
– accepting184
– ending184
– rejecting184
Calling, refer to Phone
numbers, dialing185
Calling, refer to Telephone
owner's manual
Can holders, refer to
Cupholders112
Capacities258
Capacity of the cargo area257
Car battery, refer to Vehicle
battery244
Car care, refer to Care233