2011 BMW 335I XDRIVE CONVERTIBLE wheel
[x] Cancel search: wheelPage 99 of 278

Controls
97Reference
At a glance
Driving tips
Communications
Navigation
Entertainment
Mobility
In critical situations, the system can make tar-
geted corrections to the steering angle pro-
vided by the driver and thus stabilize the vehicle
before the driver intervenes. This stabilizing
intervention is simultaneously deactivated
when DSC is switched off, refer to page90.
Malfunction
The warning lamps light up and a
message is displayed on the Control
Display. Active steering is malfunc-
tioning or is temporarily deactivated.
At low speeds, greater steering wheel move-
ments are required, whereas at higher speeds
the vehicle reacts more sensitively to steering
wheel movements. The stability-enhancing
feature may also be deactivated. Drive cau-
tiously and think well ahead.
Deactivation
Active steering is deactivated to perform an ini-
tialization. A message indicates that the feature
is deactivated. Initialization may take several
minutes.
If the message does not disappear during the
current trip, have the system checked.
Defect
If there is a defect, a corresponding text mes-
sage appears. Have the system checked.
Servotronic*
The concept
The Servotronic varies the steering force
required to turn the wheels relative to the vehi-
cle speed.
At low speeds, the steering force is strongly
assisted, i.e. less force is needed for steering.
As the vehicle speed increases, the steering
assisting power is reduced.
Malfunction
Malfunctions are displayed via Check Control,
refer to page84.
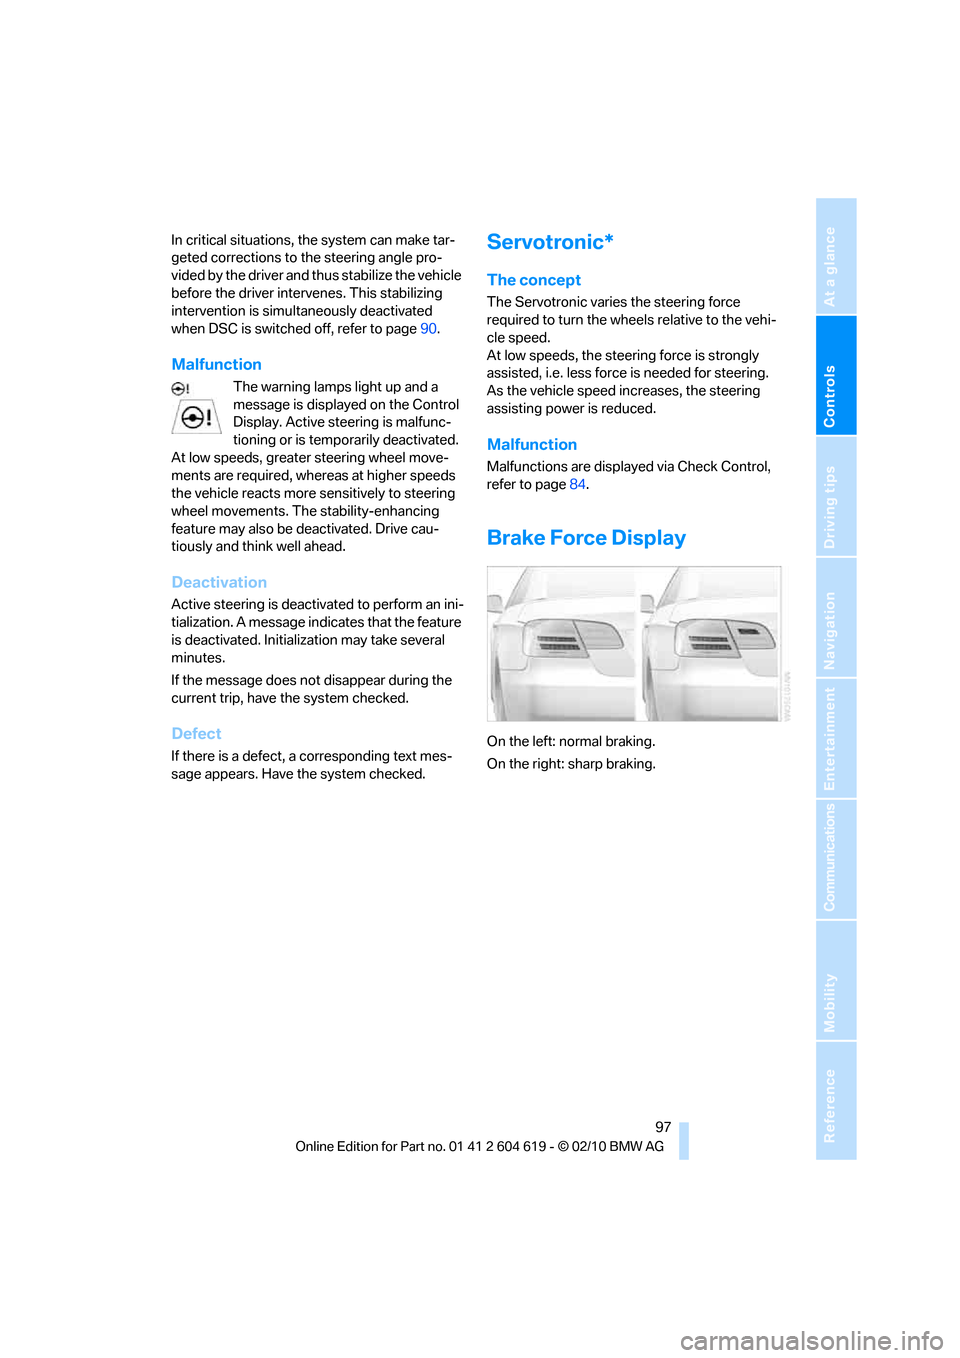
Brake Force Display
On the left: normal braking.
On the right: sharp braking.
Page 100 of 278

Technology for driving comfort and safety
98
Airbags
The following airbags are located under the
marked covers:
1Front airbags
2Coupe: head airbags
3Side airbags in the seat backrests
4Convertible: knee airbags
Protective action
Observe the adjustment instructions on
page42 to ensure the best possible per-
sonal protection.<
The front airbags help protect the driver and
front passenger by responding to frontal
impacts in which safety belts alone cannot pro-
vide adequate restraint. When needed, the
head and side airbags help provide protection in
the event of side impact. The relevant side air-
bag supports the side upper body area. The
head air bag supports the head.
The airbags have been designed to not be trig-
gered in every collision situation, e.g. not in
minor accidents or rear-end collisions.
Do not apply adhesive materials to the
cover panels of the airbags, cover them or
modify them in any other way.
Keep the dashboard and windows on the front
passenger side clear, i.e. do not cover with
adhesive labels or coverings, and do not attach
holders such as for navigation instruments or
mobile phones.
Do not attach seat covers, cushions or other
objects not specifically approved for seats with
integral side airbags to the front seats. Do not
hang items of clothing such as coats or jackets over the backrests. Do not attempt to remove
the airbag retention system from the vehicle.
Do not modify the individual components of the
system or its wiring in any way. This includes
the upholstered covers on the steering wheel,
instrument panel, seats and roof posts, as well
as the sides of the roof lining. Do not attempt
to remove or dismantle the steering wheel.
Do not touch the individual components imme-
diately after the system has been triggered,
because there is a danger of burns.
In the event of malfunctions, deactivation or
triggering of the airbag restraint system, have
the testing, repair, removal and disposal of air-
bag generators executed only by a BMW center
or a workshop that works according to repair
procedures of BMW with correspondingly
trained personnel and that has the required
explosives licenses. Unprofessional attempts
to work on the system could lead to failure in an
emergency or to undesired airbag activation,
either of which could result in personal injury.<
Warning notices and information about the air-
bags can also be found on the sun visors.
Automatic deactivation of the front
passenger airbags
An analysis of the impression in the front pas-
senger seat cushion determines whether and
how the seat is occupied. The front and side air-
bags for the front passenger are activated or
deactivated by the system accordingly.
The indicator lamp above the interior
rearview mirror shows the current status
of the front passenger airbags, deactivated or
Page 104 of 278

Lamps
102 3."Welcome light"
Welcome lamps are activated and are
stored for the remote control currently in use.
Pathway lighting
If you activate the headlamp flasher after
switching off the ignition with the lamps
switched off, the low beams come on and
remain on for a certain time.
Setting the duration or deactivating
1."Settings"
2."Lighting"
3."Pathway light.:"
4.Set a time of duration, or 0 s to deactivate
the function.
The setting is stored for the remote control cur-
rently in use.
Daytime running lights
The daytime running lights light up in switch
position 0, 1 and 3. They are less powerful than
the low beams.
Activating/deactivating daytime
running lights
1."Settings"
2."Lighting"
3."Daytime running lamps"
Daytime running lights are activated and
are stored for the remote control currently in
use.
Adaptive light control*
The concept
Adaptive light control is a variable headlamp
control system that enables better illumination
of the road surface. Depending on the steering
angle and other parameters, the light from the
headlamp follows the course of the road.
In tight curves at speeds up to 40 mph/70 km/h,
e.g. on mountainous roads or when turning, an
additional, corner-illuminating lamp is switched
on that lights up the inside area of the curve.
Activating Adaptive Light Control
With the ignition switched on, turn the light
switch to position 3, refer to page101.
The corner-illuminating lamp is switched on
automatically, depending on the steering wheel
angle or turn signal indicator.
Standstill function
*: to avoid blinding oncoming
traffic, the adaptive light control directs light
towards the front passenger side when the
vehicle is at a standstill.
When you are reversing, only the corner-illumi-
nating lamps are switched on and active on
both sides.
Page 110 of 278

Climate
108
Convertible program
The Convertible program is active when the
hardtop is open and the AUTO program is
switched on. In the Convertible program, the
automatic climate control is optimized for driv-
ing with the hardtop open. In addition, the air
volume is increased as vehicle speed increases.
The effectiveness of the Convertible pro-
gram can be enhanced considerably by
installing the wind deflector.<
Adjusting air volume manually
To be able to manually adjust the air volume,
switch off the AUTO program first.
Press the left side of the button
to reduce the air volume. Press
the right side of the button to
increase it.
The air volume may be reduced or the blower
may be switched off entirely to save on battery
power. The display remains the same.
Automatic recirculated-air control
AUC/Recirculated-air mode
You can respond to unpleasant odors or pollut-
ants in the immediate environment by tempo-
rarily suspending the supply of outside air. The
system then recirculates the air currently within
the vehicle.
Press the button repeatedly to
select an operating mode:
>LED off: outside air flows in continuously.
>Left-hand LED on, AUC mode: a sensor
detects pollutants in the outside air and
controls the shut-off automatically.
>Right-hand LED on, recirculated-air mode:
the supply of outside air is permanently
shut off. If the windows fog over, switch off
recirculated-air mode and increase the air
volume, if necessary. Make sure that air can
flow onto the windshield.
The recirculated-air mode should not be
used over an extended period of time;
otherwise, the air quality inside the car will dete-
riorate continuously.<
Via the button on the steering wheel
You can switch quickly between the recircu-
lated-air mode and the previous mode using a
button
on the steering wheel, refer to page11.
ALL program
Press the button.
The current temperature setting
on the driver's side is transferred to
the front passenger side.
If the temperature setting on the driver's side is
changed, the temperature on the front passen-
ger side is changed as well.
The program is switched off when the setting is
adjusted on the front passenger side or the but-
ton is pressed again.
Defrosting windows and removing
condensation
Press the button.
Quickly removes ice and conden-
sation from the windshield and
front side windows.
For this purpose, also switch on the cooling
function.
Switching cooling function on/off
The passenger compartment can only be
cooled while the engine is running.
Press the button.
The air is cooled and dehumidified
and – depending on the tempera-
ture setting – warmed again.
Depending on the weather, the windshield may
fog up briefly when the engine is started.
Pressing the AUTO button automatically
switches on the cooling function.
Rear window defroster
Press the button.
The defroster is switched off auto-
matically after a certain time.
Depending on your vehicle's equipment, the
upper wires serve as an antenna and are not
part of the rear window defroster.
Page 111 of 278

Controls
109Reference
At a glance
Driving tips
Communications
Navigation
Entertainment
Mobility
Switching the system on/off
Switching off
With the blower at its lowest
setting, press the left side of the
button to switch off the automatic
climate control.
All displays are cleared except for the rear win-
dow defroster if it is switched on.
The outside air supply is blocked when
the automatic climate control is switched
off. If the air quality deteriorates or the window
fogs over, switch the system back on and
increase the air volume.<
Switching on
Press any button except the ALL or the rear
window defroster button to reactivate the
automatic climate control.
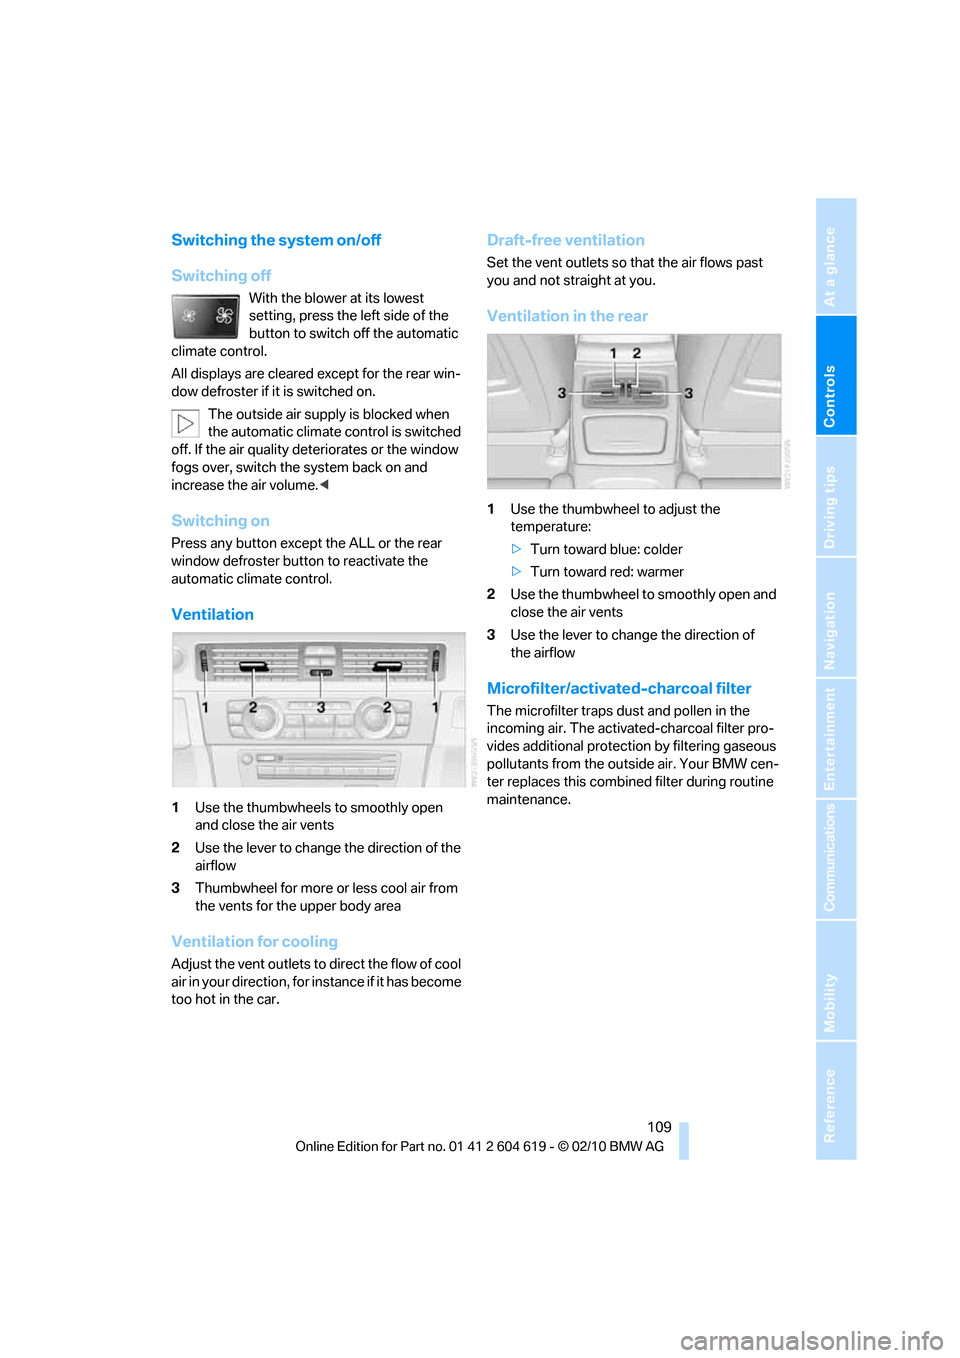
Ventilation
1Use the thumbwheels to smoothly open
and close the air vents
2Use the lever to change the direction of the
airflow
3Thumbwheel for more or less cool air from
the vents for the upper body area
Ventilation for cooling
Adjust the vent outlets to direct the flow of cool
air in your direction, for instance if it has become
too hot in the car.
Draft-free ventilation
Set the vent outlets so that the air flows past
you and not straight at you.
Ventilation in the rear
1Use the thumbwheel to adjust the
temperature:
>Turn toward blue: colder
>Turn toward red: warmer
2Use the thumbwheel to smoothly open and
close the air vents
3Use the lever to change the direction of
the airflow
Microfilter/activated-charcoal filter
The microfilter traps dust and pollen in the
incoming air. The activated-charcoal filter pro-
vides additional protection by filtering gaseous
pollutants from the outside air. Your BMW cen-
ter replaces this combined filter during routine
maintenance.
Page 143 of 278

Navigation
Driving tips
141Reference
At a glance
Controls
Communications
Entertainment
Mobility
Specifying the street
If the system cannot recognize a street, it dis-
plays a street name in the vicinity or the coordi-
nates of the destination.
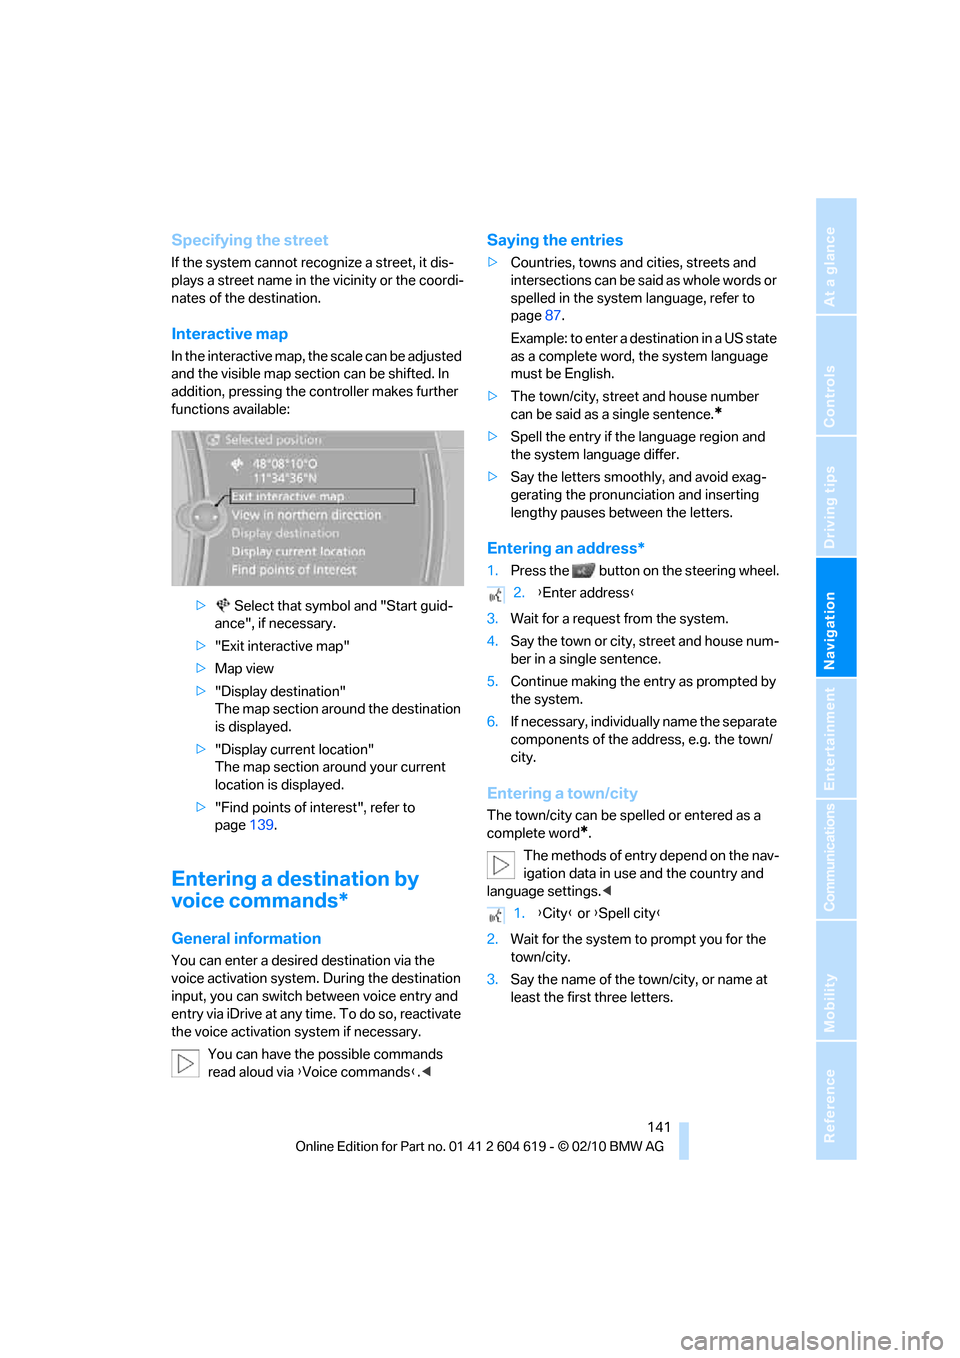
Interactive map
In the interactive map, the scale can be adjusted
and the visible map section can be shifted. In
addition, pressing the controller makes further
functions available:
> Select that symbol and "Start guid-
ance", if necessary.
>"Exit interactive map"
>Map view
>"Display destination"
The map section around the destination
is displayed.
>"Display current location"
The map section around your current
location is displayed.
>"Find points of interest", refer to
page139.
Entering a destination by
voice commands*
General information
You can enter a desired destination via the
voice activation system. During the destination
input, you can switch between voice entry and
entry via iDrive at any time. To do so, reactivate
the voice activation system if necessary.
You can have the possible commands
read aloud via {Voice commands}.<
Saying the entries
>Countries, towns and cities, streets and
intersections can be said as whole words or
spelled in the system language, refer to
page87.
Example: to enter a destination in a US state
as a complete word, the system language
must be English.
>The town/city, street and house number
can be said as a single sentence.
*
>Spell the entry if the language region and
the system language differ.
>Say the letters smoothly, and avoid exag-
gerating the pronunciation and inserting
lengthy pauses between the letters.
Entering an address*
1.Press the button on the steering wheel.
3.Wait for a request from the system.
4.Say the town or city, street and house num-
ber in a single sentence.
5.Continue making the entry as prompted by
the system.
6.If necessary, individually name the separate
components of the address, e.g. the town/
city.
Entering a town/city
The town/city can be spelled or entered as a
complete word
*.
The methods of entry depend on the nav-
igation data in use and the country and
language settings.<
2.Wait for the system to prompt you for the
town/city.
3.Say the name of the town/city, or name at
least the first three letters.
2.{Enter address}
1.{City} or {Spell city}
Page 156 of 278

On/off and tone
154
On/off and tone
The following audio and video sources share
the same control elements and adjustments:
>Radio
>CD/DVD player
>CD changer
*
>Video*
>External devices, e.g. MP3 player
Controls
The audio and video sources can be controlled
using the:
>Buttons near the CD/DVD player
>iDrive
>Buttons on the steering wheel, refer to
page10
>Programmable memory keys, refer to
page20
>Voice activation system
Buttons in the area of the CD/DVD
player
1Sound output for entertainment on/off, vol-
ume
>Press: switch on/off
When you switch on the unit, the last set
radio station or track is played.
>Turn: adjusting the volume
2 Eject the CD/DVD
3CD/DVD drive
*
4FM/AM: change the radio station wave-
band
5MODE: change the audio and video
sources
6 Station scan/track search
>Change the radio station
>Select the track for the CD/DVD player,
CD changer and certain multimedia
devices
Switching on/off
To switch the entertainment audio output on or
off:
Press button1 next to the CD/DVD player.
This symbol on the Control Display indicates
that sound output is switched off.
The sound output is available for approx.
20 minutes after the ignition was switched off.
For sound output, switch the unit back on.
Adjusting volume
Turn button1 next to the CD/DVD player until
the desired volume is obtained.
You can also adjust the volume with buttons on
the steering wheel, refer to page10.
Tone control
You can alter various tone settings, e.g. treble
and bass or the speed-dependent volume
increase.
The tone settings are applied to all audio
sources.
The settings are stored for the remote control
currently in use.
Treble, bass, balance, fader
>"Balance": left/right volume distribution
Page 159 of 278

Navigation
Entertainment
Driving tips
157Reference
At a glance
Controls
Communications
Mobility
Radio
Your radio is designed for reception of the fol-
lowing stations:
>FM and AM
>HD Radio
*
>Satellite radio*
Selecting a station
Press the button if the sound output is switched
off.
1."Radio"
2."FM" or "AM"
3.Select the desired station.The selected station is stored for the remote
control currently in use.
Changing stations
Turn the controller and press it
or
press the button for the corresponding
direction
or
press the buttons on the steering wheel, refer to
page10.
Selecting a station manually
Station selection using the frequency.
1."Radio"
2."FM" or "AM"
3."Manual"
4.Select the frequency: turn the controller.
To store the station: press the controller for an
extended period.
Storing stations
Via iDrive
1."Radio"
2."FM" or "AM"