Page 3 of 278
328i
328i xDrive
335i
335i xDrive
335is
M3Owner's Manual for Vehicle
Congratulations, and thank you for choosing a BMW.
Thorough familiarity with your vehicle will provide you with
enhanced control and security when you drive it. We therefore
have this request:
Please take the time to read this Owner's Manual and familiarize
yourself with the information that we have compiled for you
before starting off in your new vehicle. It contains important data
and instructions intended to assist you in gaining maximum use
and satisfaction from your BMW's unique range of technical
features. The manual also contains information on maintenance
designed to enhance operating safety and contribute to
maintaining the value of your BMW throughout an extended
service life.
This manual is supplemented by a Service and Warranty Informa-
tion Booklet for US models or a Warranty and Service Guide
Booklet for Canadian models.
We wish you an enjoyable driving experience.
BMW Group
Page 5 of 278

Reference
At a glance
Controls
Driving tips
Communications
Navigation
Entertainment
Mobility
Contents
The quickest way to find special topics is to
consult the index, refer to page258.
Using this Owner's Manual
4Notes
7Reporting safety defects
At a glance
10Cockpit
16iDrive
21Letters and numbers
22Voice activation system
Controls
26Opening and closing
42Adjustments
52Transporting children safely
55Driving
75Controls overview
88Technology for driving comfort and
safety
101Lamps
106Climate
111Practical interior accessories
Driving tips
126Things to remember when driving
Navigation
134Navigation system
135Destination entry
144Destination guidance
151What to do if …
Entertainment
154On/off and tone
157Radio
160Satellite radio
165CD/DVD player and CD changer
172Music collection
177External devices
Communications
184Telephone
196Contacts
198BMW Assist
Mobility
206Refueling
208Wheels and tires
222Under the hood
227Maintenance
229Care
233Replacing components
238Giving and receiving assistance
Reference
246Technical data
251Short commands for the voice activation
system
258Everything from A to Z
Page 14 of 278
Cockpit
12
Instrument cluster
1Speedometer
2Indicator lamps for turn signals
3Indicator and warning lamps13
4Displays for active cruise control
*68
5Tachometer75
6Engine oil temperature76
7Display for
>Clock75
>Outside temperature75
>Indicator and warning lamps848Display for
>Position of automatic transmission
*58
>Gear indicator in 7-gear Sports
automatic transmission with
double clutch
*60
>Computer76
>Date of next scheduled service, and
remaining distance to be driven80
>Odometer and trip odometer75
>High-beam assistant
*103
>Checking engine oil level
*223
>Settings and information79
>There is a Check Control
message84
9Fuel gauge76
10Resetting the trip odometer75
Page 17 of 278

At a glance
15Reference
Controls
Driving tips
Communications
Navigation
Entertainment
Mobility
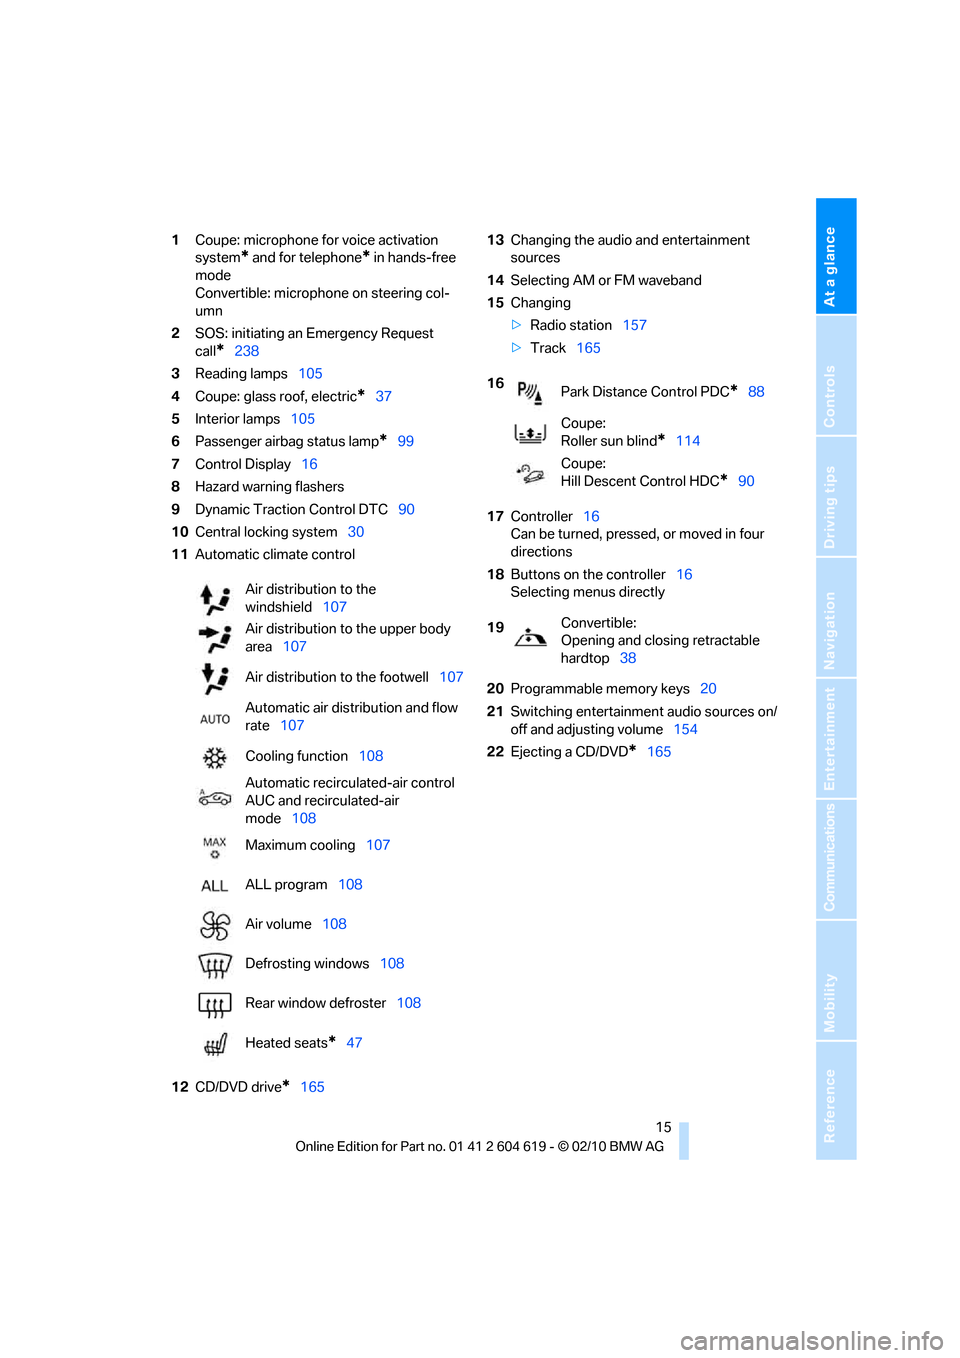
1Coupe: microphone for voice activation
system
* and for telephone* in hands-free
mode
Convertible: microphone on steering col-
umn
2SOS: initiating an Emergency Request
call
*238
3Reading lamps105
4Coupe: glass roof, electric
*37
5Interior lamps105
6Passenger airbag status lamp
*99
7Control Display16
8Hazard warning flashers
9Dynamic Traction Control DTC90
10Central locking system30
11Automatic climate control
12CD/DVD drive
*16513Changing the audio and entertainment
sources
14Selecting AM or FM waveband
15Changing
>Radio station157
>Track165
17Controller16
Can be turned, pressed, or moved in four
directions
18Buttons on the controller16
Selecting menus directly
20Programmable memory keys20
21Switching entertainment audio sources on/
off and adjusting volume154
22Ejecting a CD/DVD
*165 Air distribution to the
windshield107
Air distribution to the upper body
area107
Air distribution to the footwell107
Automatic air distribution and flow
rate107
Cooling function108
Automatic recirculated-air control
AUC and recirculated-air
mode108
Maximum cooling107
ALL program108
Air volume108
Defrosting windows108
Rear window defroster108
Heated seats
*47
16
Park Distance Control PDC*88
Coupe:
Roller sun blind
*114
Coupe:
Hill Descent Control HDC
*90
19Convertible:
Opening and closing retractable
hardtop38
Page 18 of 278
iDrive
16
iDrive
iDrive integrates the functions of a large num-
ber of switches. This allows these functions to
be operated from a single central position. The
following section provides an introduction to basic menu navigation. The control of the indi-
vidual functions is described in connection with
the relevant equipment.
Controls
1Control Display
2Controller with buttons
You can use the buttons to open the menus
directly. The controller can be used to
select the menu items and create settings.
>Move in four directions, arrow3
>Turn, arrow 4
>Push, arrow 5
Operate the controller only when traffic
and road conditions allow this, to avoid
endangering the car's occupants and other
road users by being distracted.<
Page 19 of 278

At a glance
17Reference
Controls
Driving tips
Communications
Navigation
Entertainment
Mobility
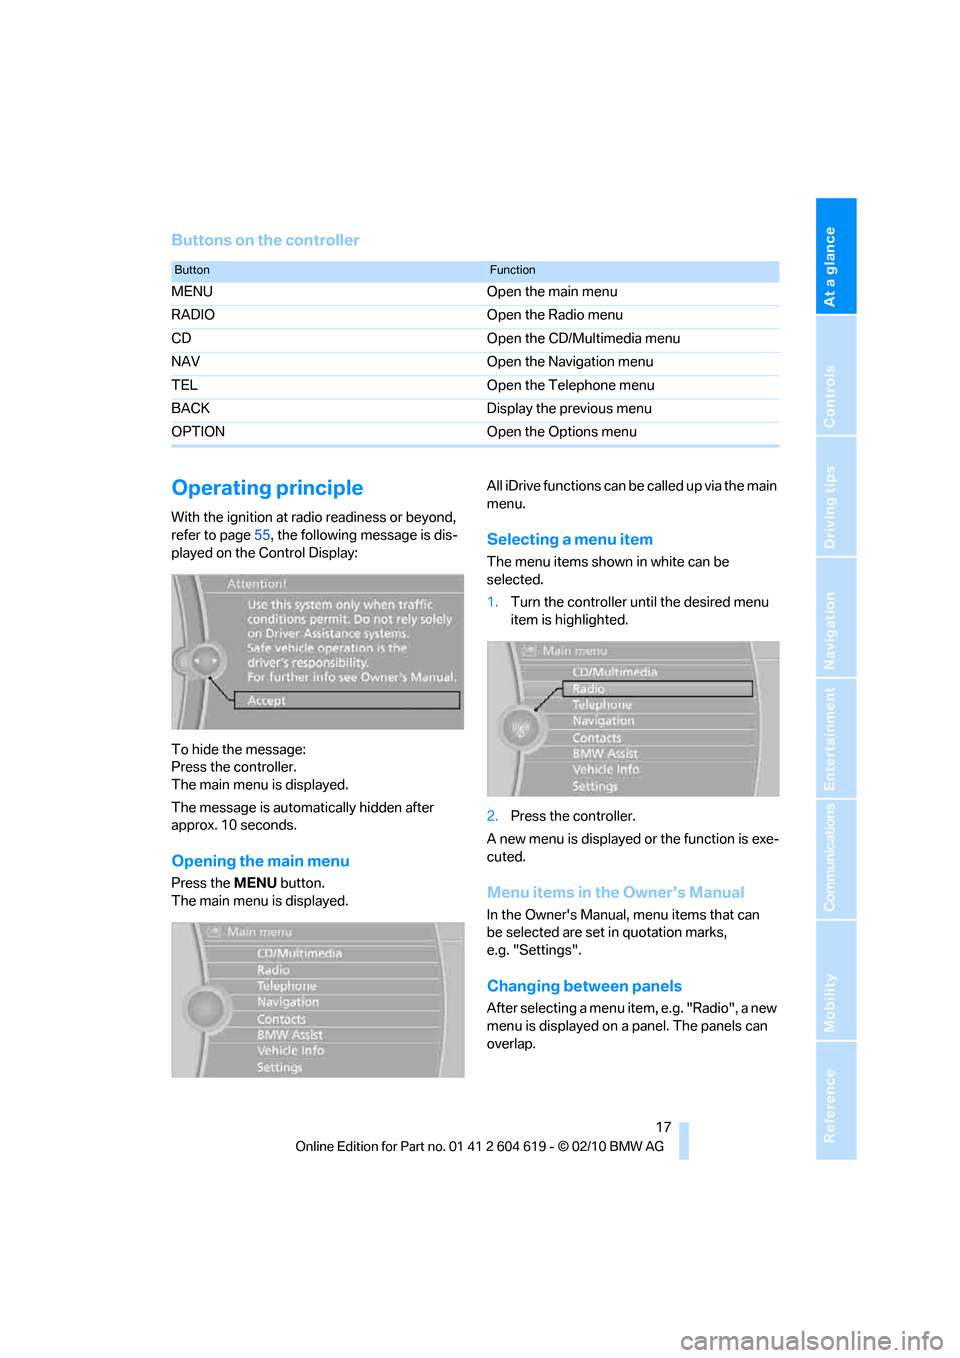
Buttons on the controller
Operating principle
With the ignition at radio readiness or beyond,
refer to page55, the following message is dis-
played on the Control Display:
To hide the message:
Press the controller.
The main menu is displayed.
The message is automatically hidden after
approx. 10 seconds.
Opening the main menu
Press the MENUbutton.
The main menu is displayed.All iDrive functions can be called up via the main
menu.
Selecting a menu item
The menu items shown in white can be
selected.
1.Turn the controller until the desired menu
item is highlighted.
2.Press the controller.
A new menu is displayed or the function is exe-
cuted.
Menu items in the Owner's Manual
In the Owner's Manual, menu items that can
be selected are set in quotation marks,
e.g. "Settings".
Changing between panels
After selecting a menu item, e.g. "Radio", a new
menu is displayed on a panel. The panels can
overlap.
ButtonFunction
MENU Open the main menu
RADIO Open the Radio menu
CD Open the CD/Multimedia menu
NAV Open the Navigation menu
TEL Open the Telephone menu
BACK Display the previous menu
OPTION Open the Options menu
Page 20 of 278

iDrive
18 Move the controller to the left or right to change
between the panels.
White arrows pointing to the left or right indi-
cate that additional panels can be opened.
Open the Options menu
Press the OPTIONbutton.
The "Options" menu is displayed.
Another possibility: move the controller to the
right repeatedly until the "Options" menu
appears.
The "Options" menu contains the following:
>Screen settings, refer to page19.
>Control options for the selected menu.
Adjusting settings
1.Select a field.
2.Turn the controller until the desired setting
is displayed.
3.Press the controller to confirm the setting.
The scroll bar on the right side indicates
whether additional menu items or set-
tings can be selected that are currently not vis-
ible.<
Example: setting the clock
1.Press the MENUbutton.
The main menu is displayed.
2.Turn the controller until "Settings" is high-
lighted, and then press the controller.
3.Turn the controller until "Time/Date" is
highlighted, and then press the controller.
Page 22 of 278

iDrive
20
Selecting the display for the split
screen content
When the split screen is switched on, you can
select the content displayed on the screen.
1.Move the controller to the right repeatedly
until the split screen content is selected.
2.Select the display.
Programmable memory keys
Certain iDrive functions can be stored on the
programmable memory keys and called up
directly, e.g. radio stations, navigation destina-
tions, phone numbers and entry points into the
menu.
Storing functions
1.Highlight the function via the iDrive.
2. ... Press the desired key for
longer than two seconds.
Example for programmable memory
keys
Switch the voice instructions for the navigation
on/off.
1."Navigation"
2."Map"
3.Select the symbol using the controller.
4. ... Press the desired key for
longer than two seconds.
Executing a function
... Press the button.
The function is executed immediately. This
means, for example, that the number is dialed
when a phone number is selected.
Displaying memory key assignments
Touch the button with a finger. Do not wear
gloves or use objects.
Displaying brief information
... Touch the button.
The key assignment is displayed at the top
edge of the screen.
Displaying detailed information
... Touch the button for an
extended period.