2011 BMW 3 SERIES manual transmission
[x] Cancel search: manual transmissionPage 68 of 325

Depress the brake until you start driv‐
ing
To prevent the vehicle from creeping after
you select a driving position, maintain pres‐
sure on the brake pedal until you are ready
to start.◀
Engaging D, R and N
Briefly push the selector lever in the desired di‐
rection, beyond a resistance point if necessary.
After releasing the selector lever, it returns to its
center position.
Press unlock button, in order to:
▷Engage R.
▷Shift out of P.
Engaging P
Press button P.
Sport program DS and manual mode M/
S
Activating sport program DS
Push the selector lever to the left out of trans‐
mission position D.
DS is displayed in the instrument cluster.
The sport program of the transmission is acti‐
vated.
Activating the M/S manual mode
Push the selector lever to the left out of trans‐
mission position D.
Push the selector lever forward or backward.
Manual mode becomes active and the gear is
changed.
The engaged gear is displayed in the instrument
cluster, e.g., M1.
▷To shift down: press the selector lever for‐
ward.
▷To shift up: pull the selector lever rearwards.
Seite 68
ControlsDriving
68Online Edition for Part no. 01 40 2 608 633 - 11 09 490
Page 69 of 325

The vehicle only shifts up or down at appropriate
engine and road speeds, e.g., it does not shift
down if the engine speed is too high.
The selected gear is briefly displayed in the in‐
strument cluster, followed by the current gear.
Manual mode M/S: prevent automatic
upshifting
Once maximum engine speed is attained, M/S
manual mode is automatically upshifted as
needed.
For vehicles with Sport automatic transmis‐
sions, automatic shift operations are not per‐
formed if one of the following conditions is met:
▷DSC deactivated.
▷TRACTION activated.
▷SPORT+ activated.
In addition, the kickdown is deactivated.
Ending the sport program/manual
mode
Push the selector lever to the right.
D is displayed in the instrument cluster.
Shift paddles for Sport automatic
transmission
The shift paddles on the steering wheel allow
you to shift gears quickly while keeping both
hands on the steering wheel.
If the shift paddles on the steering wheel are
used to shift gears in automatic mode, the trans‐
mission temporarily switches to manual mode.
If the shift paddles are not used and the vehicle
is not accelerated for a certain time, the system
switches back into automatic mode if the selec‐
tor lever is in transmission position D.
▷Shift up: pull right shift paddle.
▷Shift down: pull left shift paddle.
The vehicle only shifts up or down at appropriate
engine and road speeds, e.g., it does not shift
down if the engine speed is too high.
The selected gear is briefly displayed in the in‐
strument cluster, followed by the current gear.
Displays in the instrument cluster
The transmission position is dis‐
played, e.g.: P.
Seite 69
DrivingControls
69Online Edition for Part no. 01 40 2 608 633 - 11 09 490
Page 122 of 325

Switching on automatically
Select transmission position R with the engine
running.
Automatic deactivation during forward
travel
The system switches off when a certain driving
distance or speed is exceeded.
Switch the system back on if necessary.
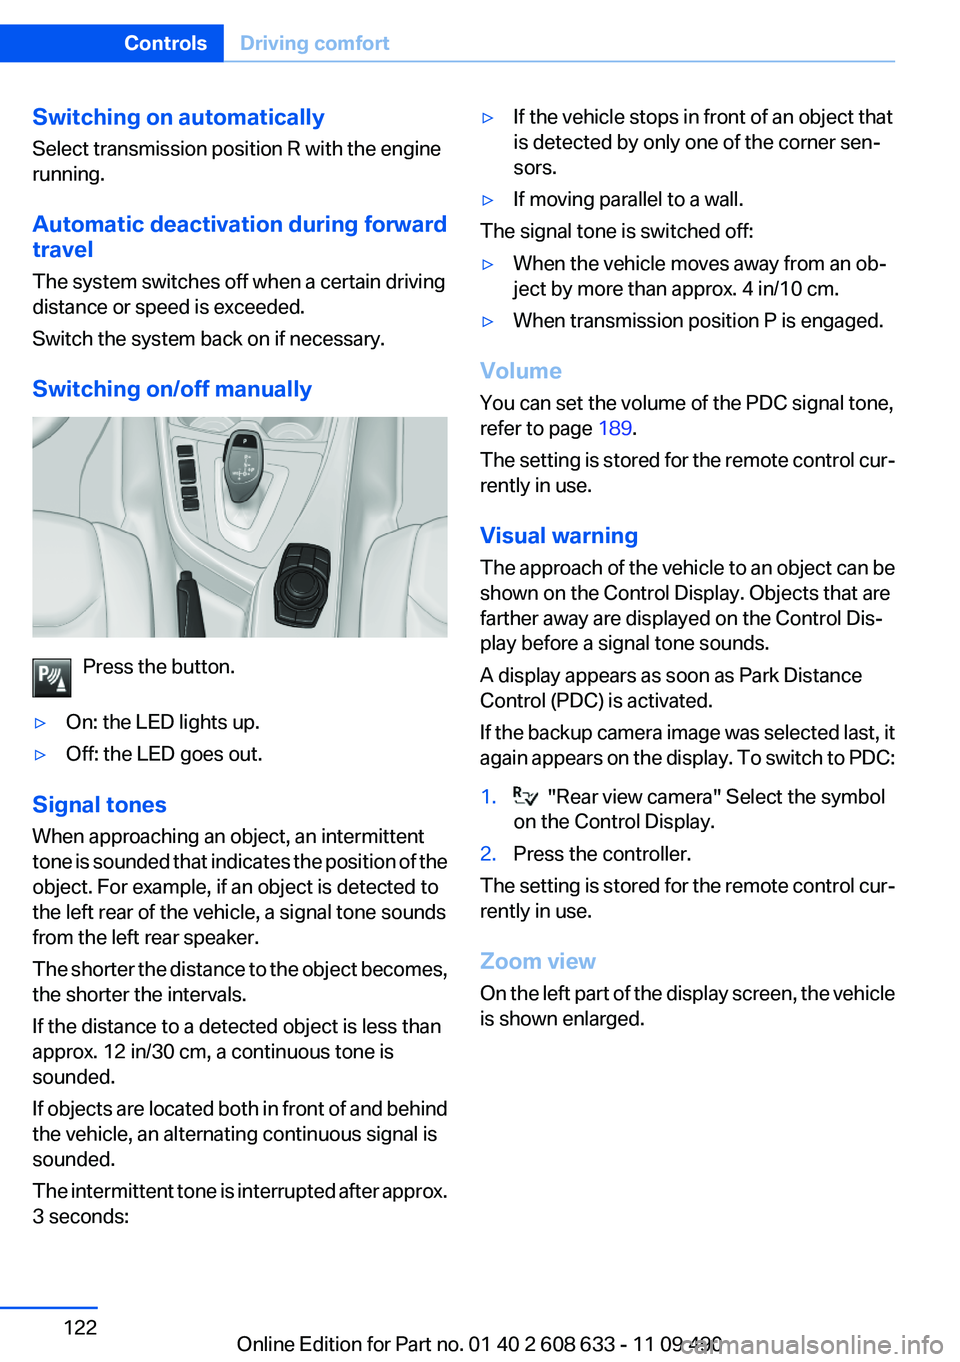
Switching on/off manually
Press the button.
▷On: the LED lights up.
▷Off: the LED goes out.
Signal tones
When approaching an object, an intermittent
tone is sounded that indicates the position of the
object. For example, if an object is detected to
the left rear of the vehicle, a signal tone sounds
from the left rear speaker.
The shorter the distance to the object becomes,
the shorter the intervals.
If the distance to a detected object is less than
approx. 12 in/30 cm, a continuous tone is
sounded.
If objects are located both in front of and behind
the vehicle, an alternating continuous signal is
sounded.
The intermittent tone is interrupted after approx.
3 seconds:
▷If the vehicle stops in front of an object that
is detected by only one of the corner sen‐
sors.
▷If moving parallel to a wall.
The signal tone is switched off:
▷When the vehicle moves away from an ob‐
ject by more than approx. 4 in/10 cm.
▷When transmission position P is engaged.
Volume
You can set the volume of the PDC signal tone,
refer to page 189.
The setting is stored for the remote control cur‐
rently in use.
Visual warning
The approach of the vehicle to an object can be
shown on the Control Display. Objects that are
farther away are displayed on the Control Dis‐
play before a signal tone sounds.
A display appears as soon as Park Distance
Control (PDC) is activated.
If the backup camera image was selected last, it
again appears on the display. To switch to PDC:
1. "Rear view camera" Select the symbol
on the Control Display.
2.Press the controller.
The setting is stored for the remote control cur‐
rently in use.
Zoom view
On the left part of the display screen, the vehicle
is shown enlarged.
Seite 122
ControlsDriving comfort
122Online Edition for Part no. 01 40 2 608 633 - 11 09 490
Page 124 of 325

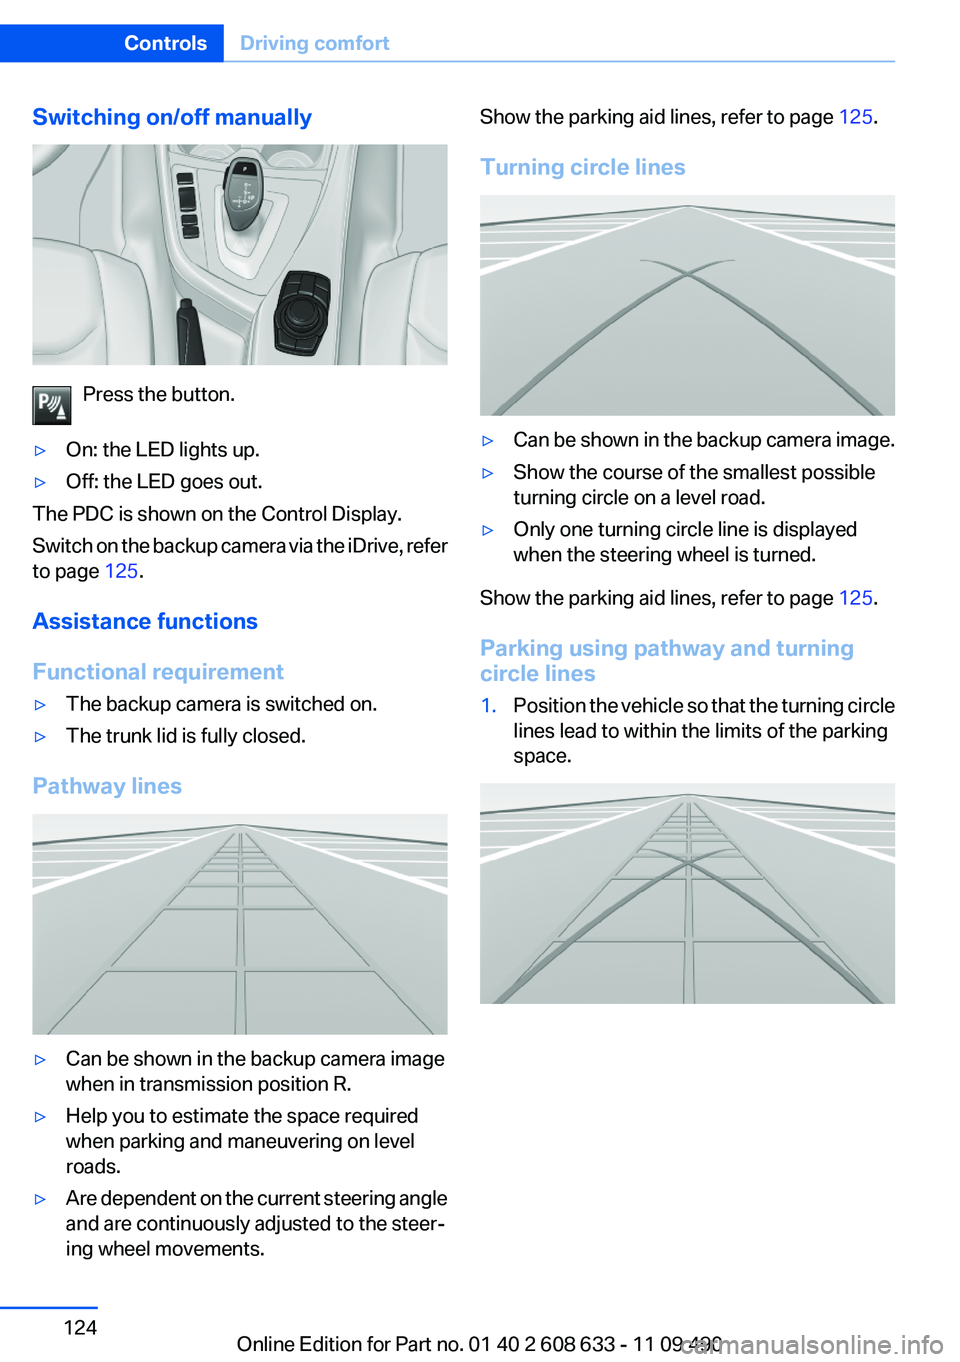
Switching on/off manually
Press the button.
▷On: the LED lights up.
▷Off: the LED goes out.
The PDC is shown on the Control Display.
Switch on the backup camera via the iDrive, refer
to page 125.
Assistance functions
Functional requirement
▷The backup camera is switched on.
▷The trunk lid is fully closed.
Pathway lines
▷Can be shown in the backup camera image
when in transmission position R.
▷Help you to estimate the space required
when parking and maneuvering on level
roads.
▷Are dependent on the current steering angle
and are continuously adjusted to the steer‐
ing wheel movements.
Show the parking aid lines, refer to page 125.
Turning circle lines
▷Can be shown in the backup camera image.
▷Show the course of the smallest possible
turning circle on a level road.
▷Only one turning circle line is displayed
when the steering wheel is turned.
Show the parking aid lines, refer to page 125.
Parking using pathway and turning
circle lines
1.Position the vehicle so that the turning circle
lines lead to within the limits of the parking
space.
Seite 124
ControlsDriving comfort
124Online Edition for Part no. 01 40 2 608 633 - 11 09 490
Page 126 of 325

Top View
The concept
Top View assists you in parking and maneuver‐
ing. The area around the doors and the road area
around the vehicle are shown on the Control
Display for this purpose.
Capturing the image
The image is captured by two cameras
integrated in the exterior mirrors and by the
backup camera.
The range is at least 7 ft/2 m to the side and rear.
In this way, obstacles up to the height of the ex‐
terior mirrors are detected early.
System limits
Top View cannot be used in the following situa‐
tions:
▷With a door open.
▷With the trunk lid open.
▷With an exterior mirror folded in.
▷In poor light.
A Check Control message is displayed in some
of these situations.
Check the traffic situation as well
Check the traffic situation around the ve‐
hicle with your own eyes. Otherwise, an accident
could result from road users or objects located
outside the picture area of the cameras.◀
Switching on automatically
Select transmission position R with the engine
running.
The Top View and PDC images are displayed if
the system is switched on via iDrive.
Automatic deactivation during forward
travel
The system switches off when a certain driving
distance or speed is exceeded.
Switch the system back on if necessary.
Switching on/off manually
Press the button.
▷On: the LED lights up.
▷Off: the LED goes out.
If Top View is displayed, switch on the backup
camera via the iDrive, refer to page 127.
Visual warning
The approach of the vehicle to an object can be
shown on the Control Display.
When the distance to an object is small, a red bar
is shown in front of the vehicle, as it is in the PDC
display.
The display appears as soon as Top View is ac‐
tivated.
If the backup camera image was selected last, it
again appears on the display. To switch to Top
View:
"Rear view camera" Select the symbol on
the Control Display.
Seite 126
ControlsDriving comfort
126Online Edition for Part no. 01 40 2 608 633 - 11 09 490
Page 158 of 325

In this way braking efficiency will be available
when you need it.
Hills
Drive long or steep downhill gradients in the gear
in which the least braking is required. Otherwise,
the brake system may overheat, resulting in a
reduction in the brake system efficiency.
Automatic transmission:
You can increase the engine's braking effect by
shifting down in the manual mode of the auto‐
matic transmission.
Avoid load on the brakes
Avoid placing excessive load on the brake
system. Light but consistent brake pressure can
lead to high temperatures, brake wear and pos‐
sibly even brake failure.◀
Do not drive in neutral
Do not drive in neutral or with the engine
stopped, as doing so disables engine braking. In
addition, steering and brake assist is unavailable
with the engine stopped.◀
Brake disc corrosion
Corrosion on the brake discs and contamination
on the brake pads are furthered by:
▷Low mileage.
▷Extended periods when the vehicle is not
used at all.
▷Infrequent use of the brakes.
Corrosion occurs when the minimum pressure
that must be exerted by the pads during brake
applications to clean the discs is not reached.
Should corrosion form on the brake discs, the
brakes will tend to respond with a pulsating ef‐
fect that generally cannot be corrected.
Condensation under the parked vehicle
When using the automatic climate control, con‐
densation water develops that exits underneath
the vehicle.
Therefore, traces of condensed water under the
vehicle are normal.
Seite 158
Driving tipsThings to remember when driving
158Online Edition for Part no. 01 40 2 608 633 - 11 09 490
Page 164 of 325

The display switches to blue as soon as all con‐
ditions for fuel-economy-optimized driving are
met.
ECO PRO Tip - driving instruction
The arrow indicates that the driv‐
ing style can be adjusted to be
more fuel efficient by backing off
the accelerator.
Additional symbols
Symbol Measure
For efficient driving style, back off the
accelerator.
Reduce speed to the selected ECO
PRO speed.
Automatic transmission: switch from
S to D or avoid manual shift interven‐
tions.
Manual shift transmission: follow
shifting instructions.
Manual shift transmission: engage
neutral for engine stop.
Configuring ECO PRO
1."Settings"
2."Driving mode"
3."Configure ECO PRO"
4.Configure the program.
ECO PRO Tip
▷"ECO PRO limit:":
Set ECO Pro speed at which an ECO PRO
Tip is to be displayed.
▷"ECO PRO speed warning":
A reminder is displayed if the set ECO PRO
speed is exceeded.
ECO PRO climate control
"ECO PRO climate control"
The climate control is adjusted to be fuel-effi‐
cient.
The following settings are optimized:
▷Cooling or heat output of the automatic cli‐
mate control
▷Exterior mirror heating
▷Seat heating
ECO PRO Potential
The percentage of potential savings that can be
achieved with the current configuration is dis‐
played.
Indications on the Control Display
EfficientDynamics
Information on fuel consumption and technol‐
ogy can be displayed during driving.
1."Vehicle Info"
2."EfficientDynamics"
Displaying fuel consumption history
The average fuel consumption can be displayed
within an adjustable time frame.
"Consumption history"
Adjusting fuel consumption history
time frame
Select the symbol.
Seite 164
Driving tipsSaving fuel
164Online Edition for Part no. 01 40 2 608 633 - 11 09 490
Page 274 of 325

Engine oil
Vehicle equipment
All standard, country-specific and optional
equipment that is offered in the model series is
described in this chapter. Therefore, equipment
is also described that is not available in a vehicle,
e. g., because of the selected optional equip‐
ment or country variant. This also applies for
safety-related functions and systems.
General information
The engine oil consumption is dependent on the
driving style and driving conditions.
Therefore, regularly check the engine oil level
after refueling.
Check oil level
The concept
The oil level is monitored electronically during
driving and shown on the Control Display.
If the oil level reaches the minimum level, a
check control message is displayed.
Displaying the oil level
1."Vehicle Info"
2."Vehicle status"
3. "Engine oil level"
Possible messages
▷"Engine oil level OK"
▷"Engine oil at minimum. Add 1 quart of
engine oil!"
Within the next 125 miles/200 km, a maxi‐
mum of 1 US quart/liter oil.
▷"Engine oil level below minimum. Add 1
quart!"
Immediately add 1 US quart/liter of oil.
Detailed measurement
Requirements:
▷Vehicle is on a level road and the engine is
running at operating temperature.
▷Manual transmission: Shift lever in neutral
position clutch and gas pedal not de‐
pressed.
▷Automatic transmission: Selector lever in
transmission position N or P and gas pedal
not depressed.
In order to perform a detailed measurement of
the engine oil level:
1."Vehicle Info"
2."Vehicle status"
3. "Measure engine oil level"
4."Start measurement"
The oil level is checked and displayed via a scale.
During the detailed measurement, the idle
speed is increased somewhat.
Duration: approx. 1 minute.
Adding engine oil
Filler neck
When the indicator lights up in the instrument
cluster, add 1 US quart/liter of engine oil within
the next 125 miles/200 km.
Seite 274
MobilityEngine oil
274Online Edition for Part no. 01 40 2 608 633 - 11 09 490