2011 BMW 1 SERIES turn signal
[x] Cancel search: turn signalPage 143 of 256

Navigation
Entertainment
Driving tips
141Reference
At a glance
Controls
Communications
Mobility
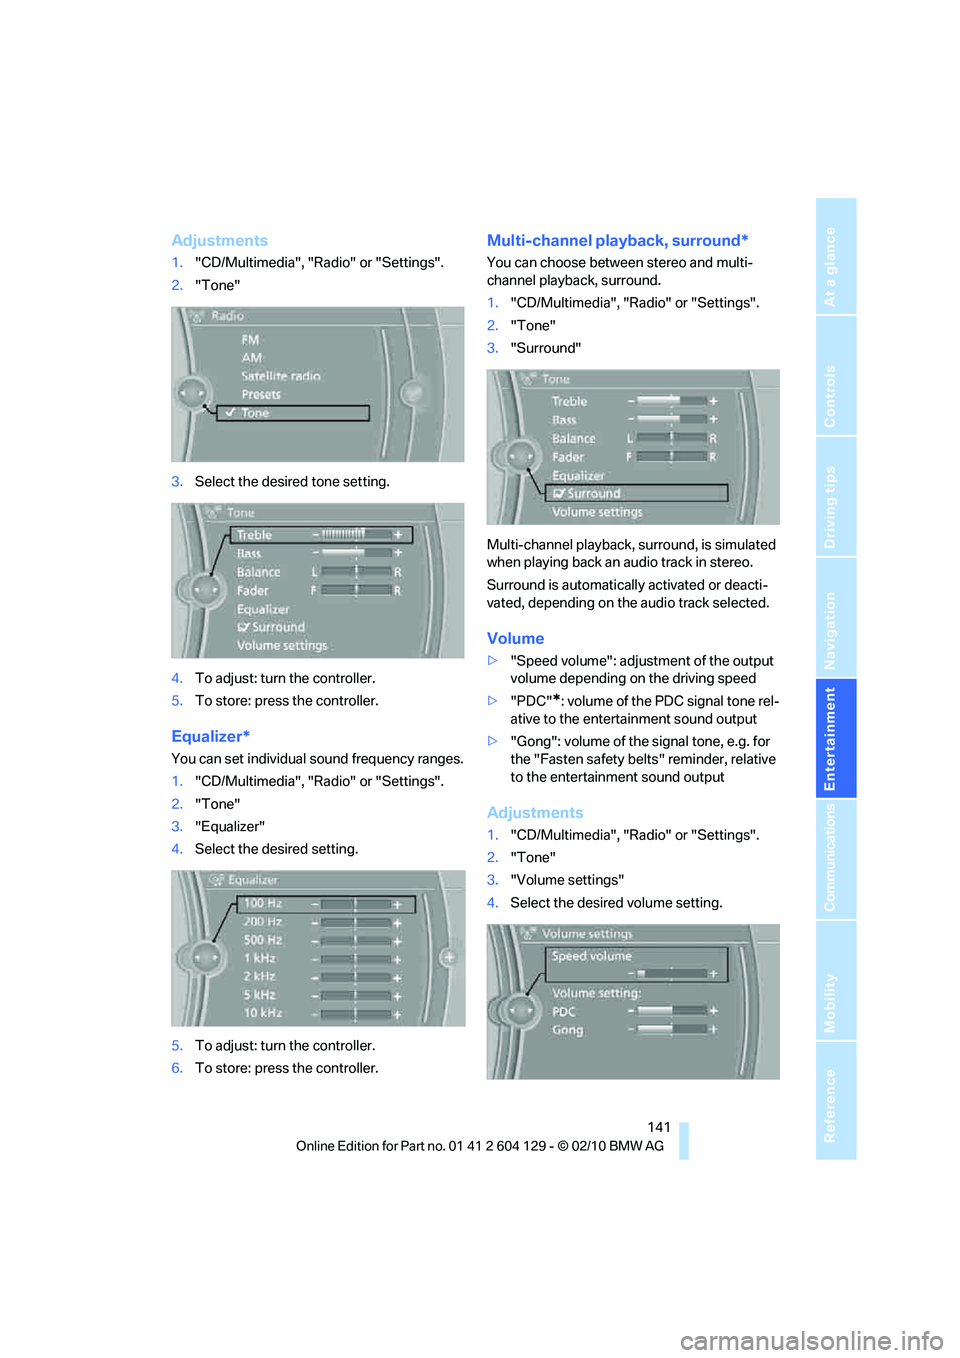
Adjustments
1."CD/Multimedia", "Radio" or "Settings".
2."Tone"
3.Select the desired tone setting.
4.To adjust: turn the controller.
5.To store: press the controller.
Equalizer*
You can set individual sound frequency ranges.
1."CD/Multimedia", "Radio" or "Settings".
2."Tone"
3."Equalizer"
4.Select the desired setting.
5.To adjust: turn the controller.
6.To store: press the controller.
Multi-channel playback, surround*
You can choose between stereo and multi-
channel playback, surround.
1."CD/Multimedia", "Radio" or "Settings".
2."Tone"
3."Surround"
Multi-channel playback, surround, is simulated
when playing back an audio track in stereo.
Surround is automatically activated or deacti-
vated, depending on the audio track selected.
Volume
>"Speed volume": adjustment of the output
volume depending on the driving speed
>"PDC"
*: volume of the PDC signal tone rel-
ative to the entertainment sound output
>"Gong": volume of the signal tone, e.g. for
the "Fasten safety belts" reminder, relative
to the entertainment sound output
Adjustments
1."CD/Multimedia", "Radio" or "Settings".
2."Tone"
3."Volume settings"
4.Select the desired volume setting.
Page 180 of 256

Telephone
178
Requirements
The same prerequisites apply as for operation
via iDrive, refer to page173.
Saying commands
Activating voice activation system
1.Briefly press the button on the steering
wheel.
A sound signal indicates that you can say
commands.
2.Say the command.
Ending/canceling operation by voice
commands
Briefly press the button on the steering
wheel
orIn dialogs not involving voice commands, i.e.
when you are speaking only text, e.g. a name,
canceling is possible only via the button on the
steering wheel.
Having the possible commands read
aloud
The system recognizes specific commands
that must be pronounced exactly word for word.
You can have the possible commands for any
function read aloud to you:
Digits from zero to nine are recognized.
You can say each digit individually or group
them into a sequence to accelerate the input.
Using alternative commands
Often there is more than a single command to
run a function, e.g.:
Example: dialing phone numbers
To start the dialog:
Press the button on the steering wheel.
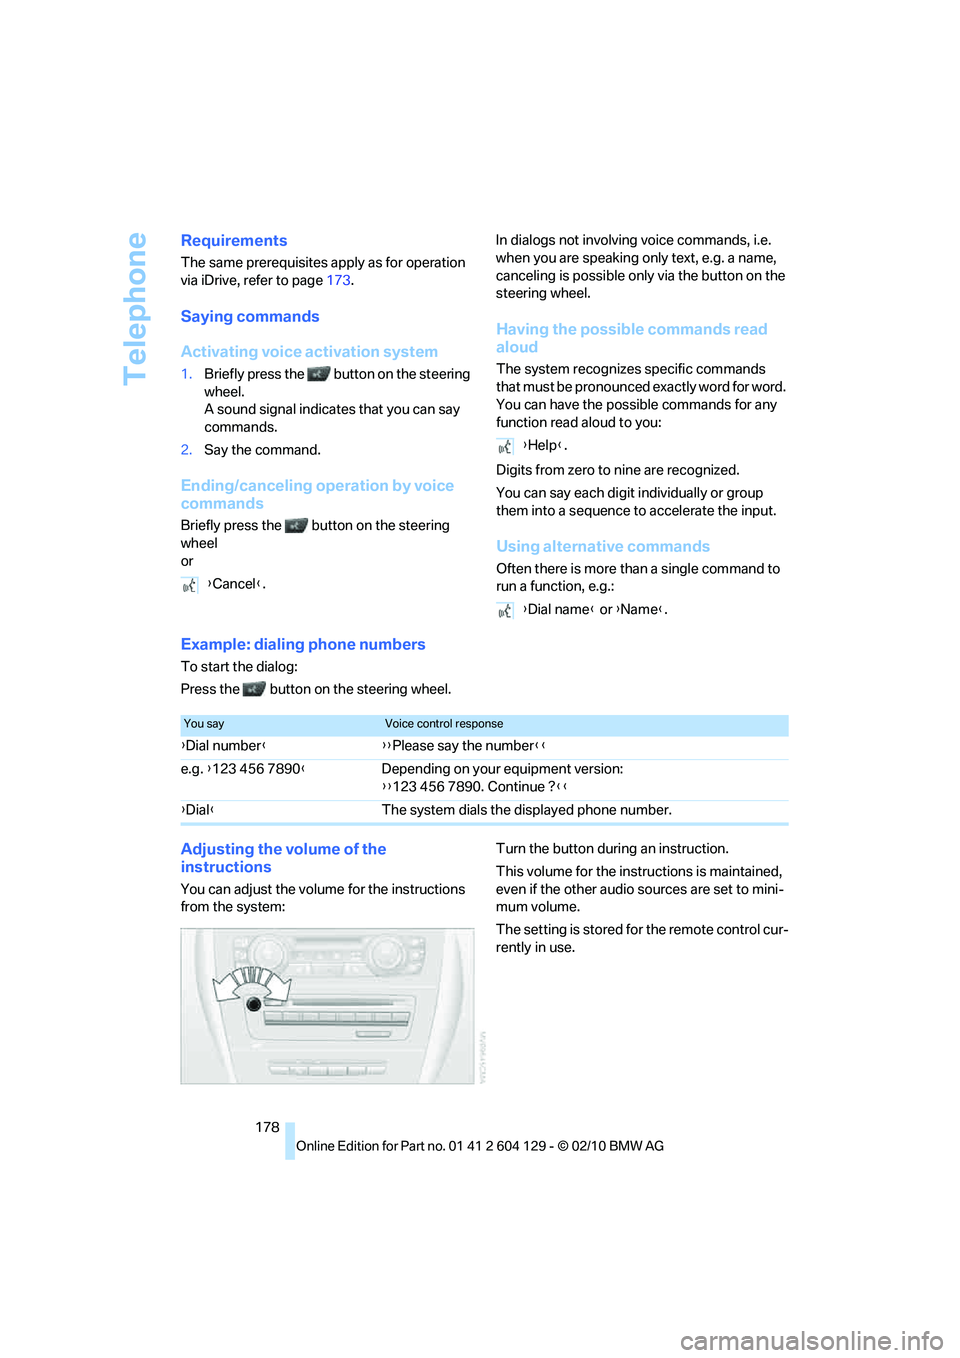
Adjusting the volume of the
instructions
You can adjust the volume for the instructions
from the system:Turn the button during an instruction.
This volume for the instructions is maintained,
even if the other audio sources are set to mini-
mum volume.
The setting is stored for the remote control cur-
rently in use. {Cancel}.
{Help}.
{Dial name} or {Name}.
You sayVoice control response
{Dial number}{{Please say the number}}
e.g. {123 456 7890}Depending on your equipment version:
{{123 456 7890. Continue ?}}
{Dial}The system dials the displayed phone number.
Page 217 of 256

Mobility
215Reference
At a glance
Controls
Driving tips
Communications
Navigation
Entertainment
Xenon headlamps
Parking lamps, roadside parking
lamps, daytime running lights
H8 bulb, 35 watts
The figure shows the right-hand headlamp.
1.Remove the headlamp cover.
2.Turn the bulb, see arrow, and remove it.
3.Pull off the connector and replace the bulb.
4.Attach the connector, insert the bulb and
turn it all the way in the opposite direction.
5.Attach the headlamp cover.
Corner-illuminating lamps
H3 bulb, 55 watts
The figure shows the right-hand headlamp.
1.Remove the top headlamp cover, using the
screwdriver to push the detents to one side.
2.Turn the bulb holder, see arrow, and
remove it.3.Slide the bulb out of the holder and pull off
the connector.
4.Replace the bulb and attach the connector.
5.Insert the bulb holder and turn it all the way
in the opposite direction.
6.Attach the headlamp cover.
Turn signals, front
PY21W bulb, 21 watts
The turn signal bulb can be changed via a cover
in the wheel arch.
1.Turn the respective wheel inwards.
2.Using a coin, turn both locks of the cover all
the way to the left, arrows 1, and remove the
cover.
3.Turn the bulb holder to the left and remove
it, arrow2.
4.Apply gentle pressure to the bulb while
turning it to the right for removal and
replacement.
5.Insert the bulb holder and lock it by turning
it to the right.
6.Attach the cover by positioning the bottom
edge first and then turning both locks all the
way to the right.
Page 218 of 256

Replacing components
216
Side turn signals
W5W bulb, 5 watts
1.Press the rear edge of the lamp toward the
front with your fingertip, arrow1 and pivot it
out, arrow2.
2.While simultaneously lifting the retaining
tab, rotate bulb holder to the left and
remove.
3.Remove lamp and replace it.
To install, insert front end of the lamp and press
into place at the back.
Tail lamps
>Turn signal:
PY21W bulb, 21 watts
>Backup lamp:
W16W bulb, 16 watts
>Brake lamps:
P21W bulb, 21 watts
>Brake Force Display lamp:
H21W bulb, 21 watts
1Inner brake lamp
2Outer brake lamp
3Lateral reflector
4Roadside parking lamp and tail lamp LED
5Reflector6Turn signal
7Backup lamp
8Brake Force Display lamp
Replacing tail lamps
Outer brake lamp
The outer brake lamp can be accessed through
a single socket.
The figure shows the right side of the vehicle.
1.Remove the cover from the panel of the
cargo area.
2.Turn the bulb holder to the left, see arrow,
and remove it.
3.Apply gentle pressure to the bulb while
turning it to the left for removal and replace-
ment.
4.Attach the bulb holder and turn it all the way
in the opposite direction.
5.Reattach the cover.
The roadside parking lamp/tail lamp uses
LED design. After replacing the bulb,
ensure that the bulb holder is properly seated;
otherwise, the roadside parking lamp/tail lamp
may not work.<
Page 219 of 256

Mobility
217Reference
At a glance
Controls
Driving tips
Communications
Navigation
Entertainment
Inner brake lamp, turn signal, backup
lamp and Brake Force Display lamp
The bulbs are integrated in a single bulb holder.
1.Remove the cover from the panel of the
cargo area.
2.Detach the bulb holder by pressing
together the clips, see arrows, and remove
it.
3.Brake lamps and turn signal: apply gentle
pressure to the bulb while turning it to the
left for removal and replacement.
4.Backup lamp: pull the bulb out of the socket
and replace it.
5.Attach the bulb holder and let it snap into
place.
6.Reattach the cover.
License plate lamps and center brake
lamp
These lamps use LED technology for operation.
In the event of a malfunction, please contact
your BMW center or a workshop that works
according to BMW repair procedures with cor-
respondingly trained personnel.
Changing wheels
Your BMW comes with run-flat tires as standard
equipment. This eliminates the need to change
a wheel immediately in the event of a puncture.
For information on continuing to drive with a
damaged tire, refer to Indication of a flat tire on
page83.
The symbol identifying run-flat tires is a circle
with the letters RSC on the sidewall, refer to
Run-flat tires, page200.When mounting new tires or changing over
from summer to winter tires and vice versa,
mount run-flat tires for your own safety. In the
event of a flat, no spare wheel is available. Your
BMW center will be glad to advise you. Refer
also to New wheels and tires, page200.
The tools for changing wheels are avail-
able as optional accessories from your
BMW center.<
Jack mounting points
The jacking points are at the positions shown in
the illustration.
Vehicle battery
Battery care
The battery is 100 % maintenance-free, the
electrolyte will last for the life of the battery
when the vehicle is operated in a temperate cli-
mate. Your BMW center will be glad to advise in
all matters concerning the battery.
Replacing the battery
Use only vehicle battery types that are
approved by the manufacturer of your
vehicle; otherwise, the vehicle may be damaged
or some functions may become partly or com-
pletely unavailable.<
After replacing the battery, have it paired with
the vehicle at your BMW center so that all con-
venience functions are completely available.
Page 224 of 256

Giving and receiving assistance
222
Being towed
Make sure that the ignition is switched on,
refer to page55; otherwise, the low-beam
headlamps, tail lamps, turn signal indicators and
windshield wipers may be unavailable. Power
steering assistance is not available when the
engine is not running. Thus, braking and steer-
ing will require increased effort. Active steering
is not active and it will be necessary to turn the
steering wheel further.<
Manual transmission
Gearshift lever in neutral position.
Automatic transmission
Selector lever in position N.
Changing selector lever position, refer to
page58.
Do not exceed a towing speed of 45 mph/
70 km/h and a towing distance of
90 miles/150 km; otherwise, the automatic
transmission may be damaged.<
Sports automatic transmission with
double clutch
Make sure that the parking lock P is not
engaged; otherwise, the rear wheels are
immobilized.
When using the car wash function, refer to
page210, make sure that after approx.
30 minutes, the parking lock P is automatically
engaged and thus immobilizes the rear wheels.
In the event of an electrical malfunction or if the
vehicle must be towed for more than approx.
20 minutes, unlock the parking lock manually,
refer to page63.<
When towing, do not exceed a maximum
speed of 30 mph or 50 km/h and a maxi-
mum distance traveled of 30 miles/50 km; oth-
erwise, the transmission may be damaged.<
BMW recommends transporting the vehicle on
a tow truck with a flatbed or towing with the rear
axle raised.
Towing methods
Do not lift the vehicle by a tow fitting or
body and chassis parts; otherwise, dam-
age may result.<
With a tow bar
The towing vehicle must not be lighter
than the towed vehicle; otherwise, it may
be impossible to maintain control.<
The tow fittings used should be on the same
side on both vehicles. Should it prove impossi-
ble to avoid mounting the tow bar at an angle,
please observe the following:
>Clearance and maneuvering capability will
be sharply limited during cornering.
>The tow bar will generate lateral forces if it is
attached offset.
Attach the tow bar to the tow fittings only,
as attaching it to other parts of the vehicle
could result in damage.<
With a tow rope
When starting off in the towing vehicle, make
sure that the tow rope is taut.
To avoid jerking and the associated
stresses on vehicle components when
towing, always use nylon ropes or nylon straps.
Attach the tow rope to the tow fittings only, as
attaching it to other parts of the vehicle could
result in damage.<
With a tow truck
Manual transmission and automatic transmis-
sion:
Page 243 of 256

Reference 241
At a glance
Controls
Driving tips
Communications
Navigation
Entertainment
Mobility
Corner-illuminating lamps,
refer to Adaptive light
control92
Cornering lamps, refer to
Adaptive light control92
Country codes DVD153
Courtesy lamps95
Criteria for route130
Cross-hairs in navigation126
Cruise control66
Cruising range70
Cupholders105
Curb weight, refer to
Weights229
Current fuel consumption70
Current playback
– external devices165
– of music collection160
Customer Relations187
D
Dashboard, refer to
Dashboard10
Dashboard lighting, refer to
Instrument lighting95
Data, technical226
– capacities230
– dimensions227
– engine226
– sizes227
– weights229
Data memory208
Data transfer188
Date
– setting75
– setting format76
Daytime running lights, switch
positions92
DBC Dynamic Brake
Control81
Deactivating front passenger
airbags88
Deadlocking, refer to
Locking28
Defect
– door lock30
– fuel filler flap192
– glass roof37Defogging windows98
Defrosting the windows98
Defrosting windows and
removing condensation98
Defrosting windshield, refer to
Defrosting windows98
Defrost position, refer to
Defrosting windows98
Destination, entering by town/
city name121
Destination address
– entering121,127
Destination entry via BMW
Assist125
Destination for navigation
– entering by voice127
– entering via map126
– entry121
– home address124
– manual entry121
Destination guidance130
– bypassing a route
section131
– changing specified
route130
– continuing130
– starting130
– voice instructions132
– volume of voice
instructions132
Differential, breaking in112
Digital clock68,
74
Digital compass103
Digital radio, refer to HD
Radio144
Dimensions227
Directional indicators, refer to
Turn signals64
Direction instructions, refer to
Voice instructions132
Directory for navigation, refer
to Address book123
Displacement, refer to Engine
data226
Display, refer to Control
Display16
Display lighting, refer to
Instrument lighting95Displays, refer to Instrument
cluster12
Displays and controls10
Disposal
– of coolant205
– remote control battery35
– vehicle battery218
Distance, refer to
Computer70
Distance remaining to service,
refer to Service
requirements72
Distance to destination, refer
to Computer70
Distance warning, refer to
Park Distance Control
PDC80
Door key, refer to Integrated
key/remote control26
Door lock29
Door lock, confirmation
signals28
Doors, emergency
operation30
DOT Quality Grades198
Draft-free ventilation99
Drinks holders, refer to
Cupholders105
Drive mode61
Drive-off assistance, refer to
DSC81
Drive-off assistant82
Driving dynamics control62
Driving lamps, refer to Parking
lamps/low beams91
Driving notes112
Driving off on hills, refer to
Drive-off assistant82
Driving stability control
systems81
Driving through water114
Driving tips, refer to Driving
notes112
Dry air, refer to Cooling
function98
DSC Dynamic Stability
Control81
Page 247 of 256

Reference 245
At a glance
Controls
Driving tips
Communications
Navigation
Entertainment
Mobility
Lower back support, refer to
Lumbar support45
Luggage compartment, refer
to Cargo area
Luggage rack, refer to Roof-
mounted luggage rack116
Lumbar support45
M
M+S tires, refer to Winter
tires201
Maintenance, refer to
– BMW Maintenance
System207
– Service booklet
Maintenance system207
Malfunction warnings, refer to
Check Control76
Manual car wash210
Manually unlocking parking
lock63
Manual operation
– door lock30
– fuel filler flap192
– glass roof37
– parking lock63
– transmission lock, automatic
transmission59
Manual operation with
automatic transmission59
Manual transmission57
Map for navigation
– changing scale133
– entering destination126
Map view132
Maximum cooling97
Maximum speed
– for winter tires201
Menus, refer to iDrive16
Messages176
Messages from the concierge
service177
Microfilter/activated-charcoal
filter for automatic climate
control99
Microphone for telephone14
Mirror dimming feature51Mirrors49
– automatic curb monitor50
– exterior mirrors49
– heating50
– interior rearview mirror50
Mobile phone
– adjusting volume173
– connecting, refer to Mobile
phone, pairing170
– operation via iDrive173
– pairing170
Mobile phone, installation
location, refer to Center
armrest105
Mobile phone, refer to
Telephone170
Mobile phone, refer to the
separate Owner's Manual
Modifications, technical, refer
to For your own safety5
Monitor, refer to iDrive16
Monitoring system for tire
pressures, refer to Flat Tire
Monitor82
MP3 player, connecting, refer
to AUX-IN port163
MP3 player, connecting, refer
to USB audio interface163
Multi-channel playback141
Multifunctional steering
wheel, refer to Buttons on
the steering wheel11
Multifunction switch
– refer to Turn signals/
headlamp flasher64
– refer to Wiper system65
Music, managing161
Music collection158
– backup162
– deleting162
– random sequence161
– restoring162
Music player, connecting,
refer to AUX-IN port163
Music player, connecting,
refer to USB audio
interface163
Music search159
My Info177
N
Navigation
– starting destination
guidance after entering a
destination123
– storing current position123
– voice activation127
Navigation announcements,
refer to Switching voice
instructions on/off132
Navigation data120
Navigation system120
– address book123
– bypassing a route
section131
– continuing destination
guidance130
– destination entry121
– dynamic destination
guidance131
– entering a destination by
voice127
– entering a destination
manually121
– frequently asked
questions137
– gas station
recommendations131
– planning a trip128
– route list131
– selecting destination via
map126
– selecting route criteria130
– special destinations124
– starting destination
guidance130
– terminating destination
guidance130
– traffic bulletins133
– voice instructions132
– volume adjustment132
Neck support, refer to Head
restraints46
Nets, refer to Storage
compartments105
New tires200