2011 BMW 1 SERIES rear entertainment
[x] Cancel search: rear entertainmentPage 95 of 256

Controls
93Reference
At a glance
Driving tips
Communications
Navigation
Entertainment
Mobility
Malfunction
The LED next to the symbol for automatic head-
lamp control flashes. Adaptive light control is
malfunctioning or has failed. Have the system
checked as soon as possible.
High beams/roadside parking
lamps*
1High beams
2Headlamp flasher
3Roadside parking lamps
*
Roadside parking lamps, left or right*
There is an additional option of switching on the
lamps on the side of the car facing the road
when parked.
Switching on
After parking the vehicle, press the lever up or
down beyond the pressure point for approx.
1 second, arrow 3.
The roadside parking lamps drain the bat-
tery. Therefore, do not leave them on for
unduly long periods of time; otherwise, the bat-
tery might not have enough power to start the
engine.<
Switching off
Press the lever in the opposite direction to the
pressure point, arrow 3.
High-beam assistant*
The concept
This system automatically switches the high
beams on and off. The procedure is controlled
by a sensor on the front of the interior rearview
mirror. The assistant ensures that the high
beams are switched on whenever the traffic sit-
uation allows. It handles this task for you and
gives you the benefit of the best possible view.
You can intervene at any time and switch the
high beams on and off as usual.
Activating the system
1.Turn the light switch to position3, refer to
page91.
2.With the low beams switched on, briefly
push the turn signal/high beam lever in the
direction of the high beam.
The indicator lamp in the instrument
cluster lights up when the high beams
are activated. The system automati-
cally switches from high beams to low beams
and vice versa in response to oncoming traffic,
traffic ahead of you, and adequate ambient
lighting, e.g. on city streets.
Switching the high beams on and off
manually
Whenever you wish, or when the situation
requires, you can intervene:
>If the high-beam assistant switches on the
high beams, but you would like to drive with
the low beams, simply switch off the high
beams using the turn signal/high beam
lever. This deactivates the high-beam
assistant.
To reactivate the system, briefly push the
turn signal/high beam lever toward the high
beams again.
>If the high-beam assistant switches on the
low beams, but you would like to drive with
the high beams, switch on the high beams
as usual. This deactivates the system and
the high beams need to be switched off
manually, if necessary.
Page 97 of 256
Controls
95Reference
At a glance
Driving tips
Communications
Navigation
Entertainment
Mobility
Instrument lighting
You can adjust the brightness of the instrument
lighting only when the parking lamps or the low
beams are switched on.
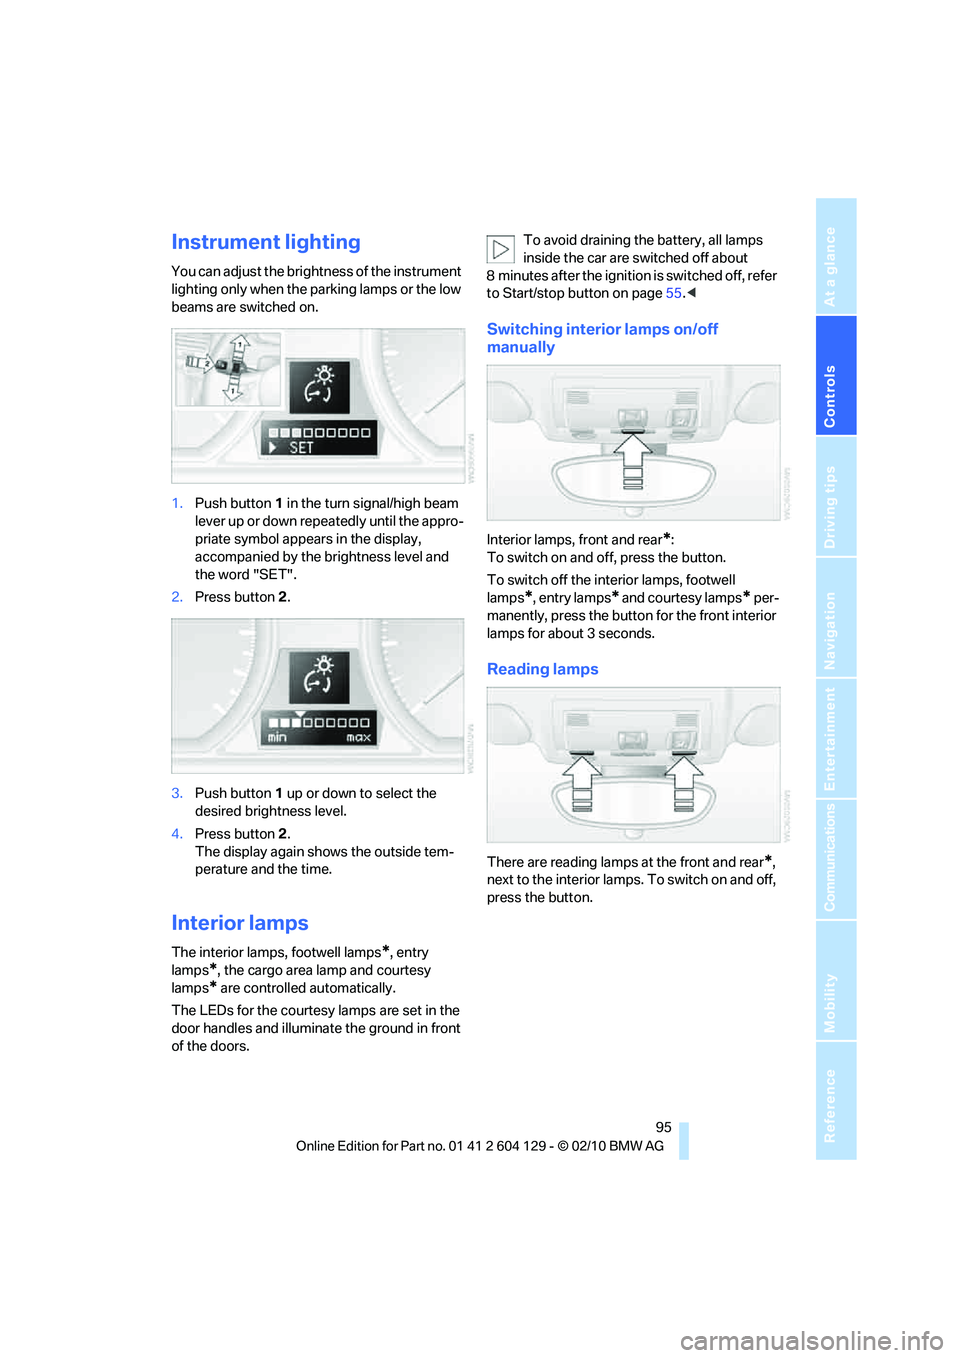
1.Push button1 in the turn signal/high beam
lever up or down repeatedly until the appro-
priate symbol appears in the display,
accompanied by the brightness level and
the word "SET".
2.Press button2.
3.Push button 1 up or down to select the
desired brightness level.
4.Press button2.
The display again shows the outside tem-
perature and the time.
Interior lamps
The interior lamps, footwell lamps*, entry
lamps
*, the cargo area lamp and courtesy
lamps
* are controlled automatically.
The LEDs for the courtesy lamps
are set in the
door handles and illuminate the ground in front
of the doors.To avoid draining the battery, all lamps
inside the car are switched off about
8 minutes after the ignition is switched off, refer
to Start/stop button on page55.<
Switching interior lamps on/off
manually
Interior lamps, front and rear*:
To switch on and off, press the button.
To switch off the interior lamps, footwell
lamps
*, entry lamps* and courtesy lamps* per-
manently, press the button for the front interior
lamps for about 3 seconds.
Reading lamps
There are reading lamps at the front and rear*,
next to the interior lamps. To switch on and off,
press the button.
Page 101 of 256
Controls
99Reference
At a glance
Driving tips
Communications
Navigation
Entertainment
Mobility
Switching the system on/off
Switching off
With the blower at its lowest set-
ting, press the left side of the but-
ton to switch off the automatic cli-
mate control.
All displays are cleared except for the rear win-
dow defroster if it is switched on.
The outside air supply is blocked when
the automatic climate control is switched
off. If the air quality deteriorates or the window
fogs over, switch the system back on and
increase the air volume.<
Switching on
Press any button except the ALL or the rear
window defroster button to reactivate the auto-
matic climate control.
Ventilation
1Use the thumbwheels to smoothly open
and close the air vents
2Use the lever to change the direction of the
airflow
Ventilation for cooling
Adjust the vent outlets to direct the flow of cool
air in your direction, for instance if it has become
too hot in the car.
Draft-free ventilation
Set the vent outlets so that the air flows past
you and not straight at you.
Microfilter/activated-charcoal filter
The microfilter traps dust and pollen in the
incoming air. The activated-charcoal filter pro-
vides additional protection by filtering gaseous
pollutants from the outside air. Your BMW cen-
ter replaces this combined filter during routine
maintenance.
Parked car ventilation*
The concept
The parked car ventilation provides ventilation
to the passenger compartment and lowers its
temperature, if necessary.
The parked car ventilation system is operated
via iDrive, refer to page16. Two different
switch-on times can be preselected.
The parked car ventilation remains switched on
for approx. 30 minutes. The system can also be
switched on and off directly. Due to its high
power consumption, it should not be switched
on twice in a row without driving in between to
allow the battery to recharge.
The parked car ventilation system comes on if
the outside temperature is above 597/156
when the switch-on time was preselected, but
is ready for use at any temperature when the
system is switched on directly.
The air emerges from the air vents for the upper
body area in the instrument panel. The air vents
must therefore be open.
Switching on and off directly
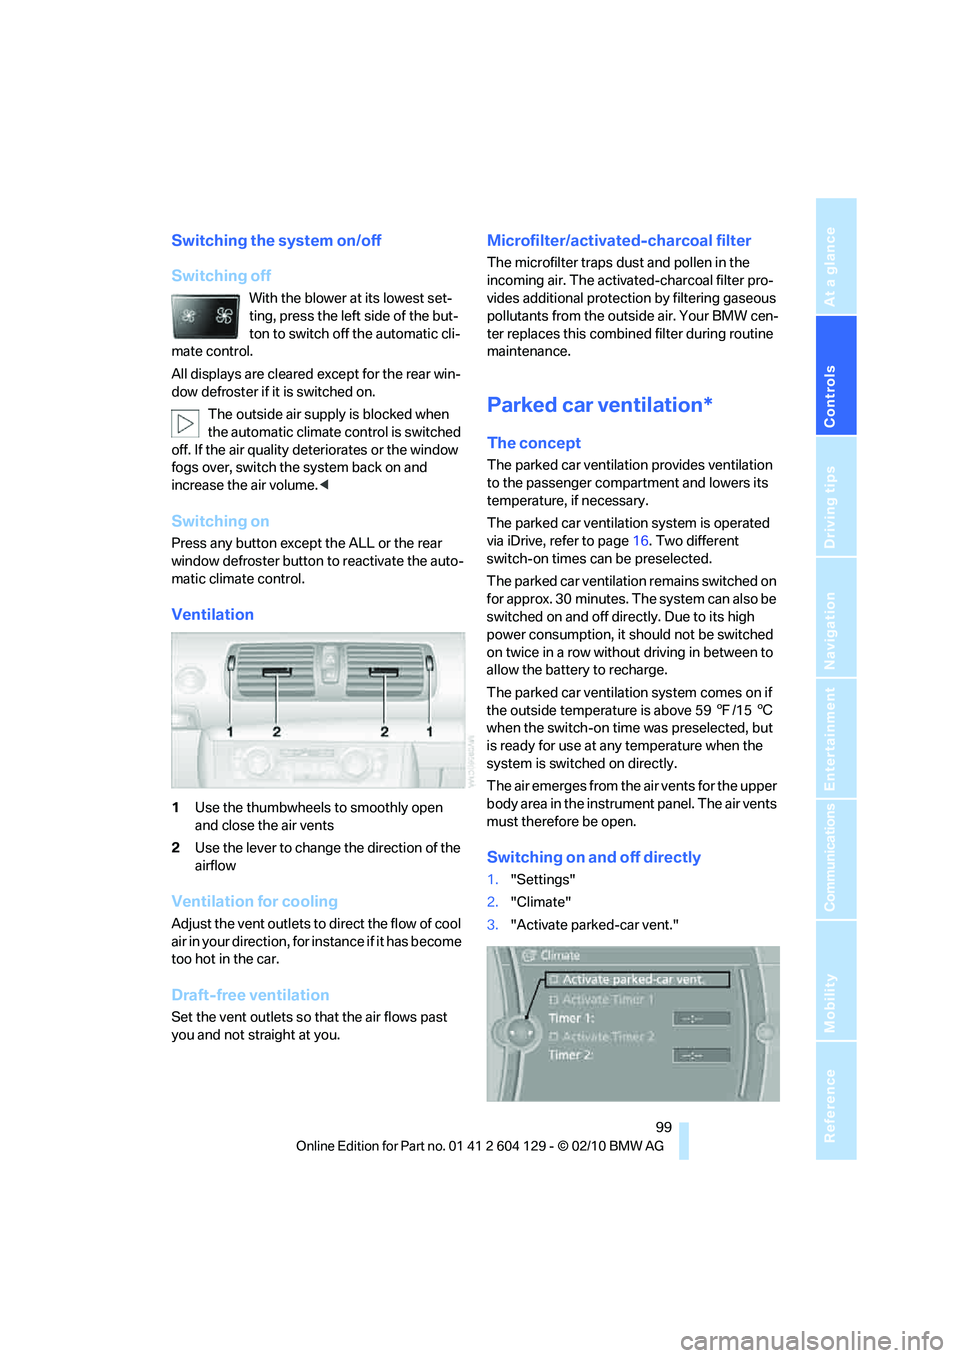
1."Settings"
2."Climate"
3."Activate parked-car vent."
Page 107 of 256
Controls
105Reference
At a glance
Driving tips
Communications
Navigation
Entertainment
Mobility
>Do not connect USB hard drives.
>Do not use the USB interface to recharge
external devices.
Center armrest
Storage compartment
The center armrest between the front seats
contains a credit card holder and, depending on
the equipment version, a compartment or a
snap-in adapter
*.
Opening
Press the button, see arrow.
Connection for external audio device
You can connect an external audio device such
as a CD or MP3 player and play audio tracks
over the car's loudspeaker system:
>AUX-IN port, refer to page163
>USB audio interface
*/additional connection
of the music player in the mobile phone
*,
refer to page163
Storage compartments inside
the vehicle
Compartments are located next to the steering
column
*, on the doors and in the center con-
sole.
There are nets
* on the front-seat backrests.
Coupe: clothes hooks
There are clothes hooks in the rear.
Items of clothing hung from the hooks
must not obstruct the driver's view. Do
not hang heavy objects from the hooks; other-
wise, they could endanger the car's occupants,
e.g. in case of heavy braking or sudden swerv-
ing.<
Cupholders
Use lightweight and shatterproof contain-
ers and do not transport hot beverages;
otherwise, there is an increased risk of injury in
the event of the accident. Do not force contain-
ers that are too large into the cupholders; other-
wise, damage could result.<
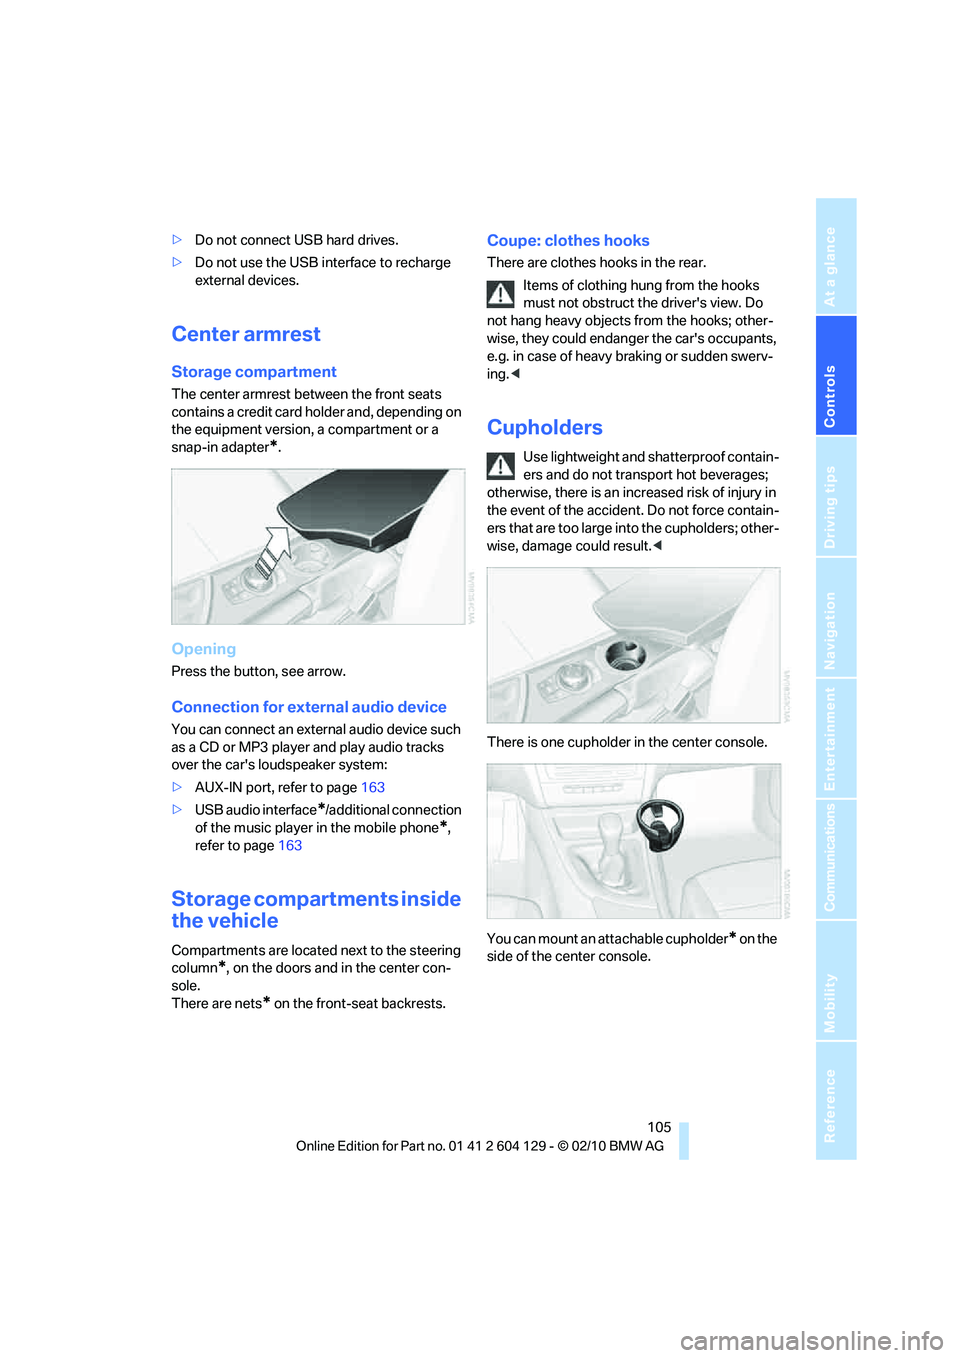
There is one cupholder in the center console.
You can mount an attachable cupholder
* on the
side of the center console.
Page 109 of 256
Controls
107Reference
At a glance
Driving tips
Communications
Navigation
Entertainment
Mobility
Closing
Return the rear seat backrest to the upright
seating position and engage it.
When returning the backrest into the
seating position, make sure that the
seat's locking mechanism is properly engaged.
Otherwise, cargo could be thrown around and
endanger the occupants in the event of sharp
braking or swerving.<
The lashing eyes in the cargo area provide you
with a way to attach cargo area nets
* or draw
straps for securing suitcases and luggage, refer
to page114.
Convertible: cargo loading
Enlarging the cargo area
When the convertible top is closed you can
enlarge the cargo area:
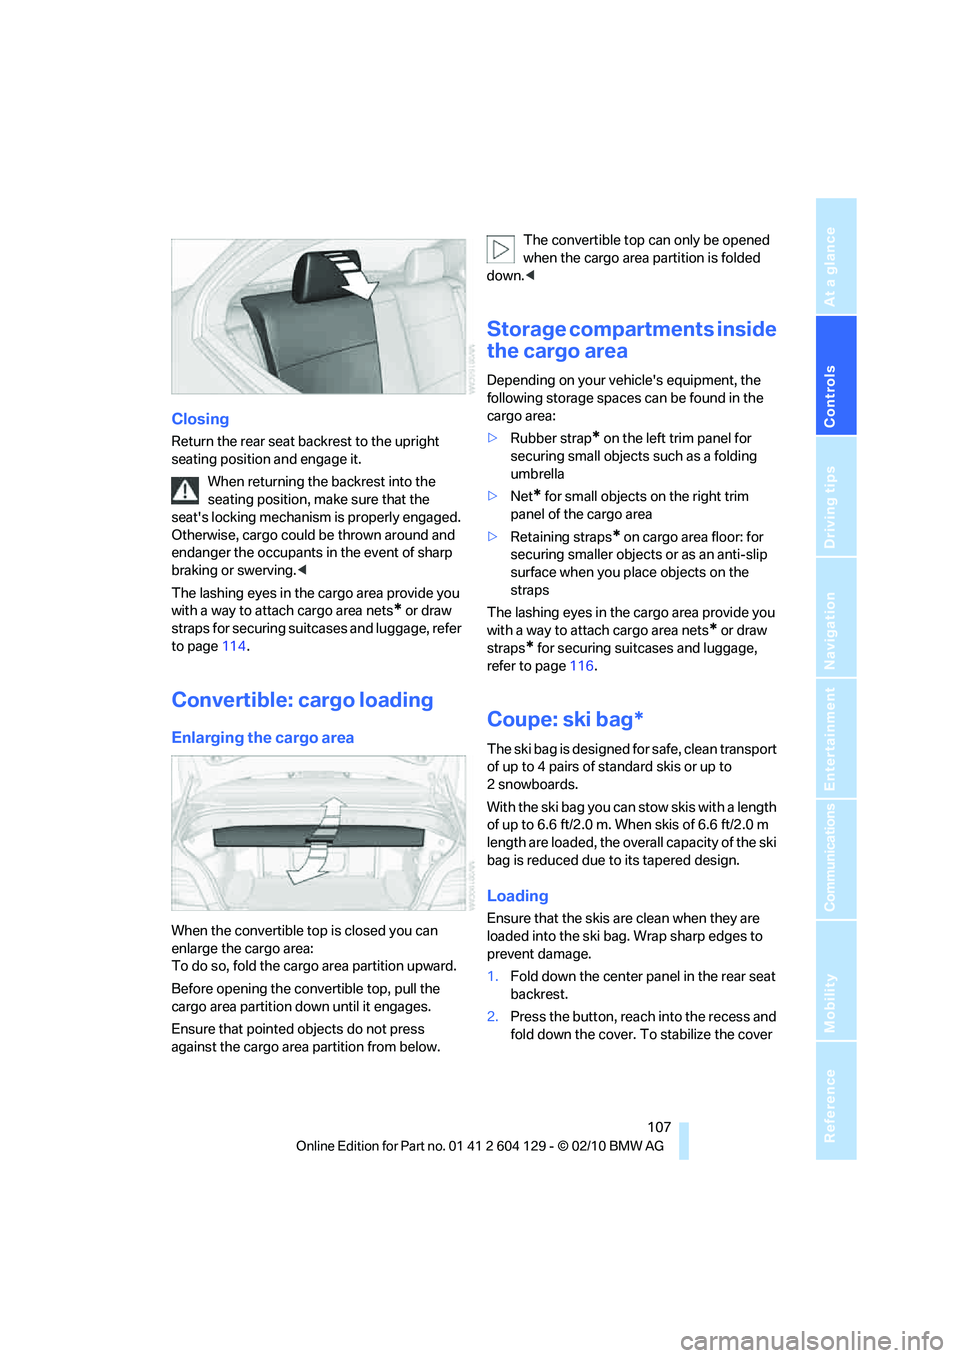
To do so, fold the cargo area partition upward.
Before opening the convertible top, pull the
cargo area partition down until it engages.
Ensure that pointed objects do not press
against the cargo area partition from below.The convertible top can only be opened
when the cargo area partition is folded
down.<
Storage compartments inside
the cargo area
Depending on your vehicle's equipment, the
following storage spaces can be found in the
cargo area:
>Rubber strap
* on the left trim panel for
securing small objects such as a folding
umbrella
>Net
* for small objects on the right trim
panel of the cargo area
>Retaining straps* on cargo area floor: for
securing smaller objects or as an anti-slip
surface when you place objects on the
straps
The lashing eyes in the cargo area provide you
with a way to attach cargo area nets
* or draw
straps
* for securing suitcases and luggage,
refer to page116.
Coupe: ski bag*
The ski bag is designed for safe, clean transport
of up to 4 pairs of standard skis or up to
2snowboards.
With the ski bag you can stow skis with a length
of up to 6.6ft/2.0m. When skis of 6.6ft/2.0m
length are loaded, the overall capacity of the ski
bag is reduced due to its tapered design.
Loading
Ensure that the skis are clean when they are
loaded into the ski bag. Wrap sharp edges to
prevent damage.
1.Fold down the center panel in the rear seat
backrest.
2.Press the button, reach into the recess and
fold down the cover. To stabilize the cover
Page 111 of 256
Controls
109Reference
At a glance
Driving tips
Communications
Navigation
Entertainment
Mobility
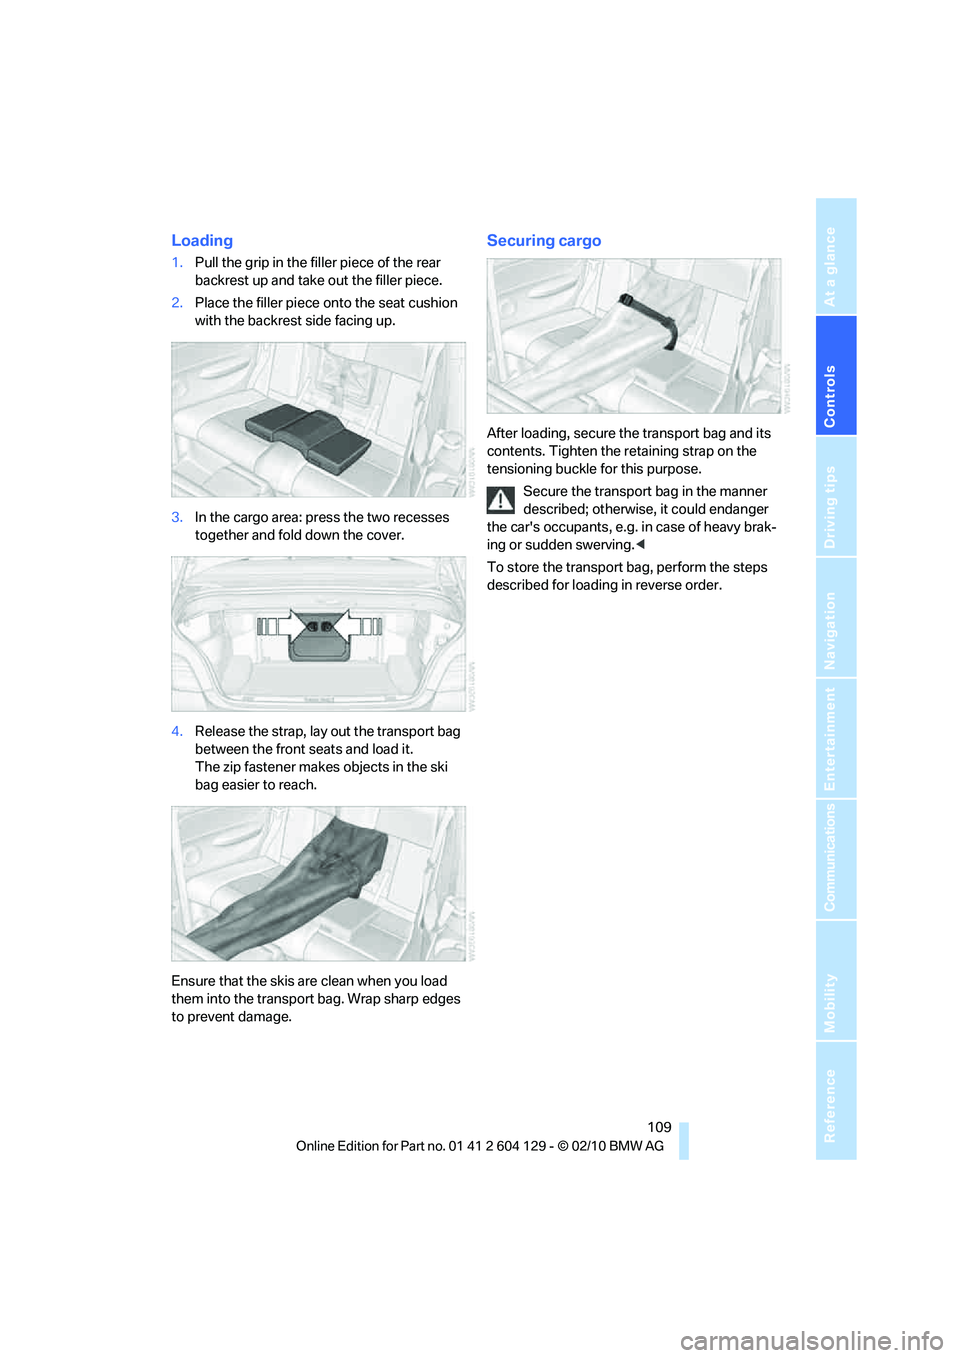
Loading
1.Pull the grip in the filler piece of the rear
backrest up and take out the filler piece.
2.Place the filler piece onto the seat cushion
with the backrest side facing up.
3.In the cargo area: press the two recesses
together and fold down the cover.
4.Release the strap, lay out the transport bag
between the front seats and load it.
The zip fastener makes objects in the ski
bag easier to reach.
Ensure that the skis are clean when you load
them into the transport bag. Wrap sharp edges
to prevent damage.
Securing cargo
After loading, secure the transport bag and its
contents. Tighten the retaining strap on the
tensioning buckle for this purpose.
Secure the transport bag in the manner
described; otherwise, it could endanger
the car's occupants, e.g. in case of heavy brak-
ing or sudden swerving.<
To store the transport bag, perform the steps
described for loading in reverse order.
Page 115 of 256

Driving tips
113Reference
At a glance
Controls
Communications
Navigation
Entertainment
Mobility
Drive defensively
Avoid unnecessary acceleration and braking
maneuvers. To do so, keep an adequate dis-
tance between you and the vehicle in front of
you. A defensive and smooth driving style
keeps fuel consumption down.
Avoid high engine speeds
Only use first gear when setting off. In second
and higher gears, accelerate without hesitation
or pauses. When accelerating, shift up before
reaching high engine speeds.
When you reach the desired speed, shift into
the highest applicable gear and drive with the
engine speed as low as possible and at a con-
stant speed.
As a rule: driving at low engine speeds lowers
fuel consumption and reduces wear.
Coasting
When approaching a red light, take your foot off
the accelerator and coast to a stop in the high-
est applicable gear.
O n a d o w n h il l s lo p e , t a k e y o u r f o o t o f f t h e a c c el -
erator and coast in a suitable gear.
The fuel supply is interrupted when coasting.
Switch off the engine during lengthy
stops
Switch off the engine when stopping for lengthy
periods, e.g. at traffic lights, railroad crossings
or in traffic congestions. You achieve fuel sav-
ings even if standing time is as short as approx.
4 seconds.
Switch off functions you do not need at
the moment
Functions such as the air conditioner, seat
heating or rear window defroster draw large
amounts of power and consume additional fuel.
Especially in city traffic and in stop-and-go driv-
ing they have a considerable impact. Therefore,
switch these functions off when they are not
really needed.
Have the vehicle serviced
Have the vehicle serviced regularly to achieve
good economy and a long vehicle life. BMW
recommends having the vehicle serviced at a
BMW center. Also note the BMW service sys-
tem, refer to page207.
General driving notes
Close the trunk lid
Operate the vehicle only when the trunk
lid is closed. Otherwise, exhaust fumes
could enter the interior of the vehicle.<
If the vehicle must be driven with the trunk lid
open:
1.Close all windows and the glass roof.
2.Greatly increase the air volume of the auto-
matic climate control system, refer to
page98.
Hot exhaust system
In all vehicles, extremely high tempera-
tures are generated in the exhaust sys-
tem. Do not remove the heat shields installed in
its vicinity, and never apply undercoating to
them. When driving, standing at idle and while
parking, take care to avoid possible contact
between the hot exhaust system and any highly
flammable materials such as hay, leaves, grass,
etc. Such contact could lead to a fire, with the
risk of serious personal injuries and property
damage. Do not touch hot exhaust tail pipes.
Otherwise, there is a risk of burns.<
Hydroplaning
When driving on wet or slushy roads,
reduce road speed. If you do not, a wedge
of water can form between tires and road sur-
face. This situation, known as hydroplaning,
means that the tire can completely lose contact
with the road surface, so that neither the car can
be steered nor the brake be properly applied.<
The risk of hydroplaning increases with declin-
ing tread depth on the tires, refer also to Mini-
mum tread depth on page199.
Page 131 of 256
Navigation
Driving tips
129Reference
At a glance
Controls
Communications
Entertainment
Mobility
The trip is stored in the trip list under the
entered name.
Starting a stored trip
1."Navigation"
2."Stored trips"
3.Select the desired trip.
4."Start guidance"
Trips, changing
Changing the trip direction
Intermediate destinations can be displayed in
reverse order after destination guidance is
started.
1."Map"
2."Guidance"
3.Open "Options".
4."Reverse order of trip dest."
Rearranging the intermediate
destinations
1."Map"
2."Guidance"
3."Display all trip destinations"
4.Select an intermediate destination.
5."Reposition dest. in the trip"
Deleting an intermediate destination
1."Map"
2."Guidance"
3."Display all trip destinations"
4.Select an intermediate destination.
5."Delete dest. in the trip"
Deleting a trip
1."Navigation"
2."Stored trips"
3.Select the desired trip.
4.Open "Options".
5."Delete all trips" or "Delete trip".
Word-matching principle
The system's word-matching principle makes it
easier for you to enter the names of towns or
streets. The system runs ongoing checks, com-
paring your destination entries with the data
stored in the vehicle as the basis for instant
response. The benefits for you include:
>Names of towns entered may differ from the
official versions if you are using a spelling
that is customary in another country.
Example:
Instead of the German spelling "München"
you can also enter the English spelling
"Munich" or the Italian spelling "Monaco".
>When you are entering the names of towns
and streets the system will complete them
automatically as soon as enough letters are
available to ensure unambiguous identifica-
tion.
>The system offers only those letters for
selection of name entries that are stored in
the vehicle. Thus, entry of erroneous or
unregistered names is impossible.