Page 18 of 176

Navigation System17
Getting Started
System Start-up
When you turn the ignition to ON (II), it
takes several seconds for the navigation
system to boot up.
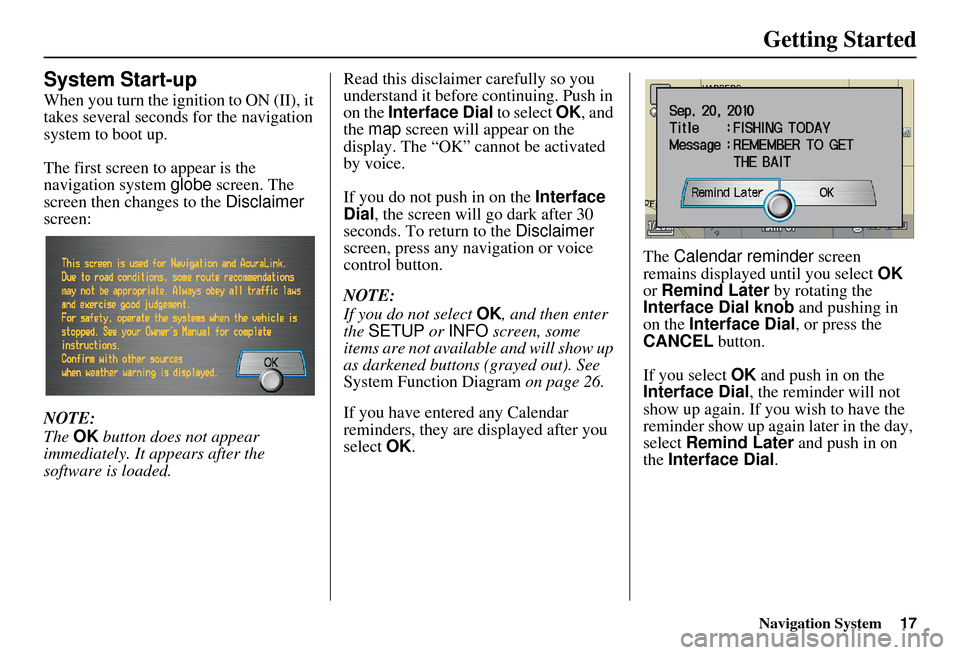
The first screen to appear is the
navigation system globe screen. The
screen then changes to the Disclaimer
screen:
NOTE:
The OK button does not appear
immediately. It appears after the
software is loaded. Read this disclaimer carefully so you
understand it before continuing. Push in
on the Interface Dial
to select OK, and
the map screen will appear on the
display. The “OK” cannot be activated
by voice.
If you do not push in on the Interface
Dial , the screen will go dark after 30
seconds. To return to the Disclaimer
screen, press any navigation or voice
control button.
NOTE:
If you do not select OK, and then enter
the SETUP or INFO screen, some
items are not available and will show up
as darkened buttons (grayed out). See
System Function Diagram on page 26.
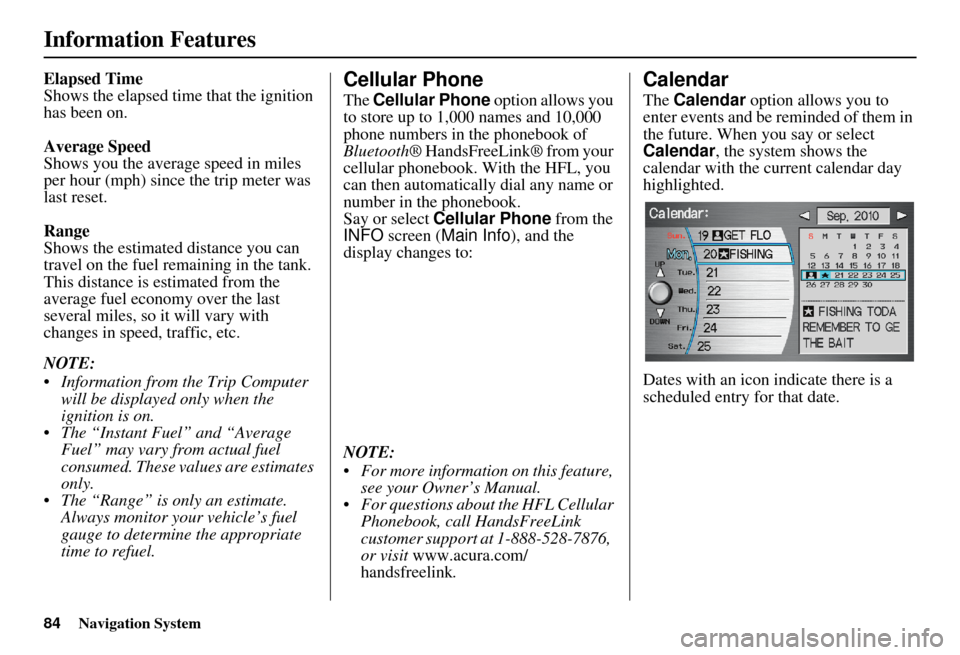
If you have entered any Calendar
reminders, they are displayed after you
select OK. The
Calendar reminder screen
remains displayed until you select OK
or Remind Later by rotating the
Interface Dial knob and pushing in
on the Interface Dial , or press the
CANCEL button.
If you select OK and push in on the
Interface Dial , the reminder will not
show up again. If you wish to have the
reminder show up agai n later in the day,
select Remind Later and push in on
the Interface Dial .
Page 85 of 176

84Navigation System
Information Features
Elapsed Time
Shows the elapsed time that the ignition
has been on.
Average Speed
Shows you the average speed in miles
per hour (mph) since the trip meter was
last reset.
Range
Shows the estimated distance you can
travel on the fuel remaining in the tank.
This distance is estimated from the
average fuel economy over the last
several miles, so it will vary with
changes in speed, traffic, etc.
NOTE:
Information from the Trip Computer will be displayed only when the
ignition is on.
The “Instant Fuel” and “Average Fuel” may vary from actual fuel
consumed. These values are estimates
only.
The “Range” is only an estimate. Always monitor your vehicle’s fuel
gauge to determine the appropriate
time to refuel.Cellular Phone
The Cellular Phone option allows you
to store up to 1,000 names and 10,000
phone numbers in the phonebook of
Bluetooth ® HandsFreeLink® from your
cellular phonebook. With the HFL, you
can then automatically dial any name or
number in the phonebook.
Say or select Cellular Phone from the
INFO screen ( Main Info ), and the
display changes to:
NOTE:
For more information on this feature, see your Owner’s Manual.
For questions about the HFL Cellular Phonebook, call HandsFreeLink
customer support at 1-888-528-7876,
or visit www.acura.com/
handsfreelink .
Calendar
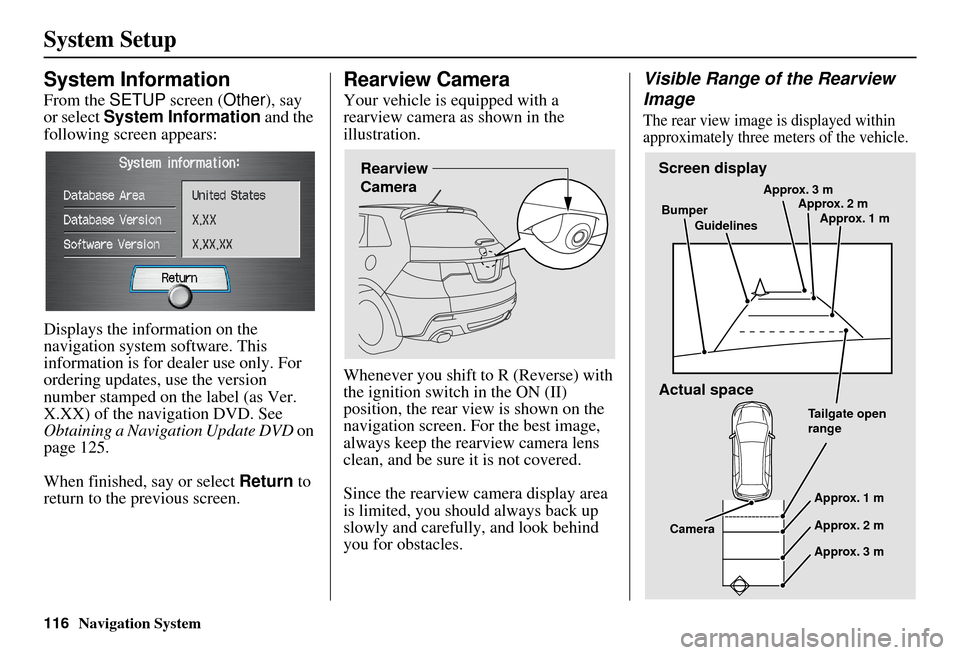
The Calendar option allows you to
enter events and be reminded of them in
the future. When you say or select
Calendar , the system shows the
calendar with the current calendar day
highlighted.
Dates with an icon indicate there is a
scheduled entry for that date.
Page 117 of 176

116Navigation System
System Setup
System Information
From the SETUP screen ( Other), say
or select System Information and the
following screen appears:
Displays the information on the
navigation system software. This
information is for de aler use only. For
ordering updates, use the version
number stamped on the label (as Ver.
X.XX) of the navigation DVD. See
Obtaining a Navigation Update DVD on
page 125.
When finished, say or select Return to
return to the previous screen.
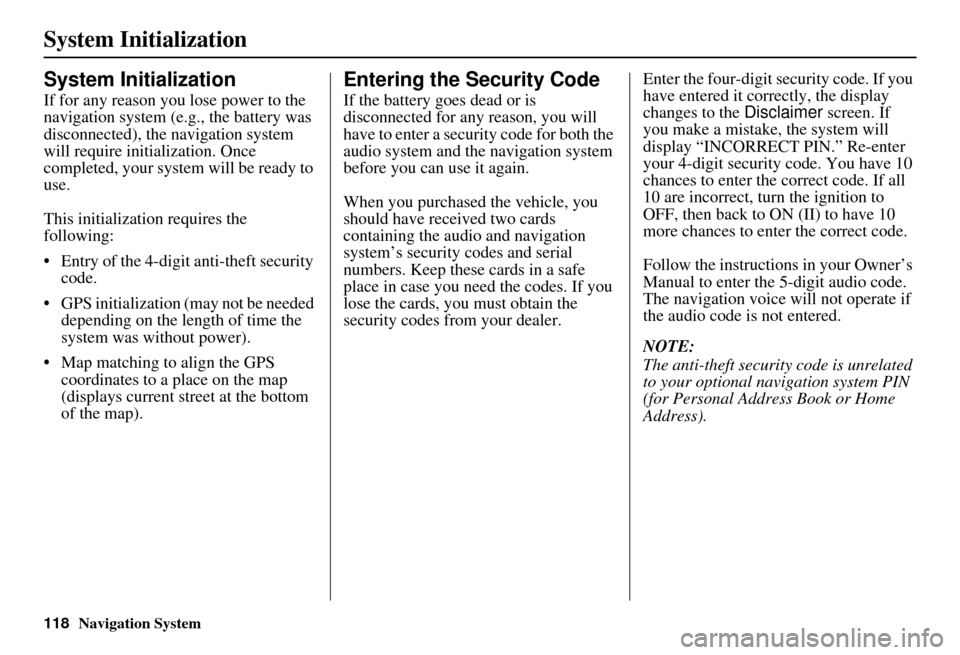
Rearview Camera
Your vehicle is equipped with a
rearview camera as shown in the
illustration.
Whenever you shift to R (Reverse) with
the ignition switch in the ON (II)
position, the rear view is shown on the
navigation screen. For the best image,
always keep the rearview camera lens
clean, and be sure it is not covered.
Since the rearview camera display area
is limited, you should always back up
slowly and carefully, and look behind
you for obstacles.
Visible Range of the Rearview
Image
The rear view image is displayed within
approximately three meters of the vehicle.
Rearview
CameraScreen display
Actual space
Bumper
Guidelines Approx. 3 m
Approx. 2 m
Approx. 1 m
Tailgate open
range Approx. 1 m
Approx. 2 m
Approx. 3 m
Camera
Page 119 of 176

118Navigation System
System Initialization
System Initialization
If for any reason you lose power to the
navigation system (e.g., the battery was
disconnected), the navigation system
will require initialization. Once
completed, your system will be ready to
use.
This initialization requires the
following:
• Entry of the 4-digit anti-theft security code.
• GPS initialization (may not be needed depending on the le ngth of time the
system was without power).
• Map matching to align the GPS coordinates to a place on the map
(displays current street at the bottom
of the map).
Entering the Security Code
If the battery goes dead or is
disconnected for any reason, you will
have to enter a secur ity code for both the
audio system and the navigation system
before you can use it again.
When you purchased the vehicle, you
should have received two cards
containing the audio and navigation
system’s security codes and serial
numbers. Keep these cards in a safe
place in case you need the codes. If you
lose the cards, you must obtain the
security codes from your dealer. Enter the four-digit s
ecurity code. If you
have entered it corr ectly, the display
changes to the Disclaimer screen. If
you make a mistake, the system will
display “INCORRECT PIN.” Re-enter
your 4-digit security code. You have 10
chances to enter the correct code. If all
10 are incorrect, tu rn the ignition to
OFF, then back to ON (II) to have 10
more chances to enter the correct code.
Follow the instructions in your Owner’s
Manual to enter the 5-digit audio code.
The navigation voice will not operate if
the audio code is not entered.
NOTE:
The anti-theft security code is unrelated
to your optional navigation system PIN
(for Personal Address Book or Home
Address).
Page 127 of 176
126Navigation System
Client Assistance
Changing the DVD
NOTE:
The system’s database is stored on a
removable DVD. The system will not
work without the DVD. Ensure the door
remains closed at all times.
1. Locate the control unit. Open the cover located below the transmission
shift lever on the passenger’s side.
2. Remove the DVD wh ile the ignition
switch is in the ACCESSORY (I)
position or in the ON (II) position. 3. Push the OPEN
button. An error
message will be displayed on the
screen. This is normal.
4. Push the Eject button. The DVD will
automatically come out. 5. Pull the DVD straight out. Hold the
DVD by the edges. Fingerprints,
scratches, or other contamination on
the playing surface can make the
DVD unreadable.
To install the DVD, make sure the white
label is facing up. Slide the DVD into
the slot. The DVD is automatically
pulled into the control unit. Make sure
you close the door.