2011.5 Peugeot 207 CC check engine
[x] Cancel search: check enginePage 122 of 224
8CHECKS
120
CHECKING LEVELS
Check all of these levels regularly and
top them up if necessary, unless other-
wise indicated.
If a level drops signifi cantly, have the
corresponding system checked by a
PEUGEOT dealer or a qualifi ed work-
shop.
Take care when working under the bon-
net, as some parts of the engine can be
extremely hot (risk of burns).
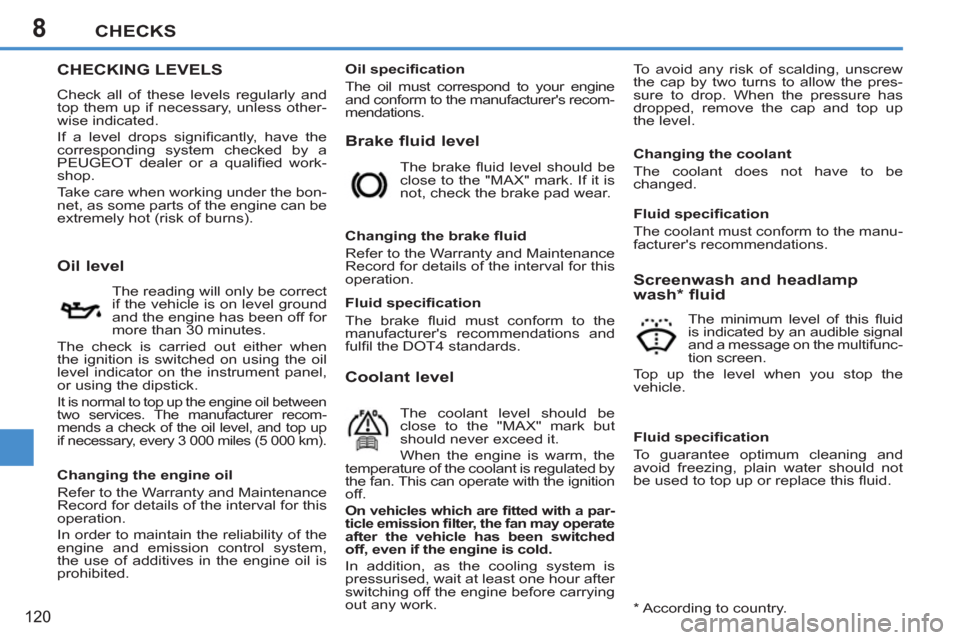
Brake fluid level
To avoid any risk of scalding, unscrew
the cap by two turns to allow the pres-
sure to drop. When the pressure has
dropped, remove the cap and top up
the level.
Oil level
The reading will only be correct
if the vehicle is on level ground
and the engine has been off for
more than 30 minutes.
The check is carried out either when
the ignition is switched on using the oil
level indicator on the instrument panel,
or using the dipstick.
It is normal to top up the engine oil between
two services. The manufacturer recom-
mends a check of the oil level, and top up
if necessary, every 3 000 miles (5 000 km).
The brake fl uid level should be
close to the "MAX" mark. If it is
not, check the brake pad wear.
Changing the brake fl uid
Refer to the Warranty and Maintenance
Record for details of the interval for this
operation.
Coolant level
The coolant level should be
close to the "MAX" mark but
should never exceed it.
When the engine is warm, the
temperature of the coolant is regulated by
the fan. This can operate with the ignition
off.
On vehicles which are fi tted with a par-
ticle emission fi lter, the fan may operate
after the vehicle has been switched
off, even if the engine is cold.
In addition, as the cooling system is
pressurised, wait at least one hour after
switching off the engine before carrying
out any work.
Screenwash and headlamp
wash * fluid
The minimum level of this fl uid
is indicated by an audible signal
and a message on the multifunc-
tion screen.
Top up the level when you stop the
vehicle.
* According to country.
Changing the engine oil
Refer to the Warranty and Maintenance
Record for details of the interval for this
operation.
In order to maintain the reliability of the
engine and emission control system,
the use of additives in the engine oil is
prohibited.
Oil specifi cation
The oil must correspond to your engine
and conform to the manufacturer's recom-
mendations.
Fluid specifi cation
The brake fl uid must conform to the
manufacturer's recommendations and
fulfi l the DOT4 standards.
Changing the coolant
The coolant does not have to be
changed.
Fluid specifi cation
The coolant must conform to the manu-
facturer's recommendations.
Fluid specifi cation
To guarantee optimum cleaning and
avoid freezing, plain water should not
be used to top up or replace this fl uid.
Page 123 of 224

8
!
i
CHECKS
121
Avoid any prolonged contact of
used oil or fl uids with the skin.
Most of these fl uids are harmful to
health or indeed very corrosive.
Do not discard used oil or fl uids
into sewers or onto the ground.
Take used oil to a PEUGEOT dealer
or a qualifi ed workshop (France) or
an authorised waste disposal site.
Diesel additive level (Diesel with
particle emission filter)
The minimum level of this additive is in-
dicated by lighting of the service warning
lamp, accompanied by an audible signal
and a message on the multifunction
screen.
Used products
Unless otherwise indicated, check
these components in accordance with
the servicing booklet and in relation to
your engine.
Otherwise, have them checked by a
PEUGEOT dealer or a qualifi ed workshop.
Battery
The battery does not require
any maintenance.
However, check that the ter-
minals are clean and correctly
tightened, particularly in sum-
mer and winter.
When carrying out work on the battery,
refer to the "Practical information" sec-
tion for details of the precautions to be
taken before disconnecting the battery
and following its reconnection.
Air filter and passenger compartment filter
Refer to the servicing booklet
for details of the replacement
intervals for these compo-
nents.
Depending on the environ-
ment (dusty atmosphere...) and the use
of the vehicle (city driving...), replace
them twice as often if necessary
.
A clogged passenger compartment fi lter
may have an adverse effect on the per-
formance of the air conditioning system
and generate undesirable odours.
Particle emission filter (Diesel)
Illumination of the service warning lamp togeth-
er with a related message indicates the start of
saturation of the particle emissions fi lter.
Oil filter
Replace the oil fi lter each time
the engine oil is changed.
Refer to the servicing booklet
for details of the replacement
interval for this component. As soon as the driving conditions
permit, regenerate the fi lter by driv-
ing at a speed of at least 35 mph
(60 km/h) until the service warning
lamp goes off.
Maintenance of the particle emis-
sion fi lter must be carried out by
a PEUGEOT dealer or a qualifi ed
workshop.
Following prolonged operation of
the vehicle at very low speed or at
idle, you may, exceptionally, notice
the emission of water vapour at the
exhaust on acceleration. This does
not have any adverse effect on the
performance of the vehicle or on
the environment.
Topping up
This additive must be topped up by a
PEUGEOT dealer or a qualifi ed work-
shop without delay.
Page 124 of 224

8
!
CHECKS
122
Only use products recommended
by PEUGEOT or products of equiv-
alent quality and specifi cations.
In order to optimise the operation
of units as important as the braking
system, PEUGEOT selects and of-
fers very specifi c products.
To avoid damaging the electrical
units, the use of a high pressure
washer in the engine compartment
is strictly prohibited
.
Automatic gearbox
The gearbox does not re-
quire any maintenance (no oil
change).
Refer to the servicing booklet
for details of the checking in-
tervals for this component.
Brake disc and drum wear
For any information relating
to checking of the brake disc
and/or drum wear, contact a
PEUGEOT dealer or a quali-
fi ed workshop.
Manual gearbox
The gearbox does not re-
quire any maintenance (no oil
change).
Refer to the servicing booklet
for details of the level checking
intervals for this component.
Brake pads
Brake wear depends on the
style of driving, particularly in
the case of vehicles used in
town, over short distances. It
may be necessary to have the
condition of the brakes checked, even
between vehicle services.
Unless there is a leak on the circuit, a
drop in the brake fl uid level indicates
that the brake pads are worn.
Parking brake
If the parking brake travel is
too long or if you notice a loss
of effectiveness of this sys-
tem, the parking brake must
be adjusted, even between
two services.
This system must be checked by a PEUGEOT
dealer or a qualifi ed workshop.
Page 129 of 224
9
!
PRACTICAL INFORMATION
127
Beware of discharges of fl uid.
The expiry date of the fl uid is indi-
cated on the cartridge.
The sealant cartridge is designed
for single use; even if only partly
used, it must be replaced.
After use, do not discard the car-
tridge into the environment, take
it to an authorised waste disposal
site or a PEUGEOT dealer.
Do not forget to obtain a new sealant
cartridge, available from PEUGEOT
dealers or from a qualifi ed workshop.
Removing the cartridge
�)
Stow the black pipe.
�)
Detach the angled base from the
white pipe.
�)
Support the compressor vertically.
�)
Unscrew the cartridge from the bottom.
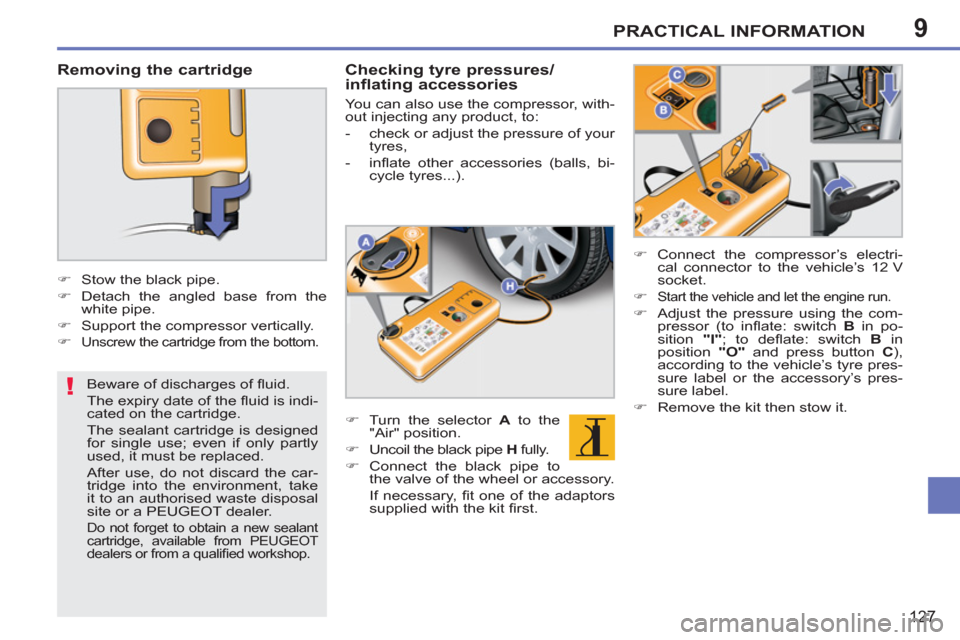
Checking tyre pressures/inflating accessories
You can also use the compressor, with-
out injecting any product, to:
- check or adjust the pressure of your
tyres,
- infl ate other accessories (balls, bi-
cycle tyres...).
�)
Turn the selector A
to the
"Air" position.
�)
Uncoil the black pipe H
fully.
�)
Connect the black pipe to
the valve of the wheel or accessory.
If necessary, fi t one of the adaptors
supplied with the kit fi rst.
�)
Connect the compressor’s electri-
cal connector to the vehicle’s 12 V
socket.
�)
Start the vehicle and let the engine run.
�)
Adjust the pressure using the com-
pressor (to infl ate: switch B
in po-
sition "I"
; to defl ate: switch B
in
position "O"
and press button C
),
according to the vehicle’s tyre pres-
sure label or the accessory’s pres-
sure label.
�)
Remove the kit then stow it.
Page 144 of 224
9
!
i
PRACTICAL INFORMATION
142
Do not charge the batteries without
disconnecting the terminals fi rst.
Do not disconnect the terminals
while the engine is running.
The batteries contain harmful sub-
stances such as sulphuric acid and
lead. They must be disposed of in
accordance with regulations and
must not, in any circumstances, be
discarded with household waste.
Take used remote control batteries
and vehicle batteries to a special
collection point.
Charging the battery using a
battery charger
�)
Disconnect the battery from the ve-
hicle.
�)
Follow the instructions for use pro-
vided by the manufacturer of the
charger.
�)
Reconnect starting with the nega-
tive terminal (-).
�)
Check that the terminals and connec-
tors are clean. If they are covered with
sulphate (whitish or greenish deposit),
remove them and clean them.
It is advisable to disconnect the
battery if the vehicle is to be left un-
used for more than one month.
Before disconnecting the
battery
Wait 2 minutes after switching off
the ignition before disconnecting
the battery.
Close the windows and the doors
before disconnecting the battery.
Following reconnection of the
battery
Following reconnection of the bat-
tery, switch on the ignition and wait
1 minute before starting to permit ini-
tialisation of the electronic systems.
However, if slight diffi culties are en-
countered following this operation,
contact a PEUGEOT dealer or a
qualifi ed workshop.
Referring to the corresponding sec-
tion, you must yourself reinitialise:
- the remote control key,
- the one-touch electric windows,
- the GPS satellite navigation
system.
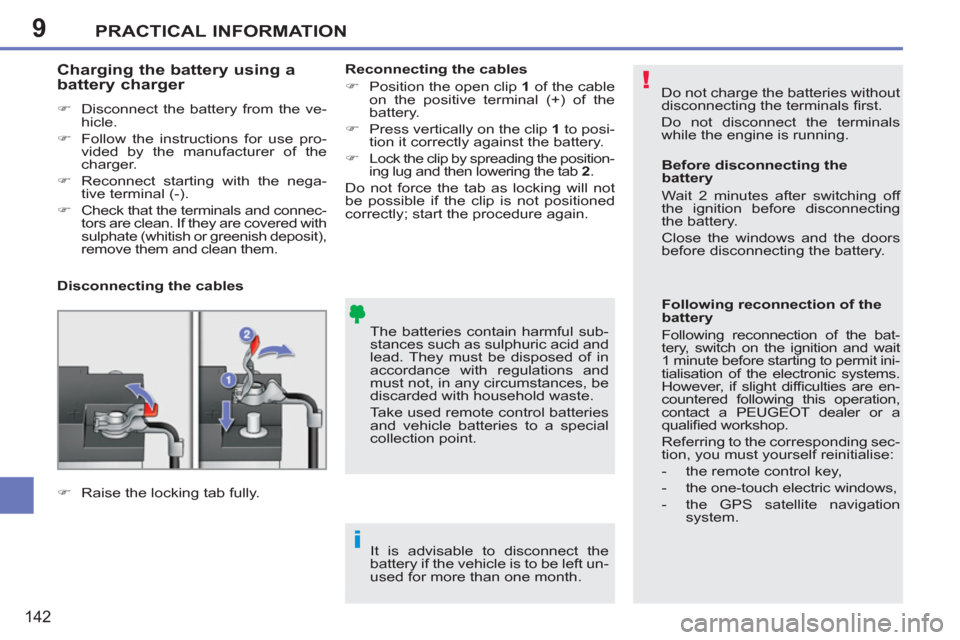
Disconnecting the cables
Reconnecting the cables
�)
Position the open clip 1
of the cable
on the positive terminal (+) of the
battery.
�)
Press vertically on the clip 1
to posi-
tion it correctly against the battery.
�)
Lock the clip by spreading the position-
ing lug and then lowering the tab 2
.
Do not force the tab as locking will not
be possible if the clip is not positioned
correctly; start the procedure again.
�)
Raise the locking tab fully.
Page 145 of 224

9
!
i
PRACTICAL INFORMATION
143
A fl at battery prevents the engine
from starting (refer to the corre-
sponding paragraph). If a roof operation is in progress,
it will be completed, but no further
operation is possible.
ENERGY ECONOMY MODE
System which manages the duration of
use of certain functions to conserve a
suffi cient level of charge in the battery.
After the engine has stopped, you can
still use functions such as the audio
equipment, windscreen wipers, dipped
beam headlamps, courtesy lamp, etc.
for a maximum combined duration of
thirty minutes.
Exiting economy mode
These functions are reactivated auto-
matically next time the vehicle is driven.
�)
In order to resume the use of these
functions immediately, start the
engine and let it run for a few minutes.
The time available to you will then be
double the duration for which the engine
is left running. However, this period will al-
ways be between fi ve and thirty minutes.
Switching to economy mode
Once the thirty minutes are over, a
message appears on the multifunction
screen indicating that the vehicle has
switched to economy mode and the ac-
tive functions are put on standby.
CHANGING A WIPER BLADE
Procedure for replacing a worn wiper
blade with a new one without the use
of tools.
Removing a front wiper blade
�)
Raise the corresponding wiper arm.
�)
Unclip the wiper blade and remove it.
Fitting a front wiper blade
�)
Check the size of the wiper blade
as the shorter blade is fi tted on the
right-hand side of the vehicle.
�)
Put the corresponding new wiper
blade in place and clip it.
�)
Fold down the wiper arm carefully.
LOAD REDUCTION MODE
System which manages the use of cer-
tain functions according to the level of
charge remaining in the battery.
When the vehicle is being driven, the load
reduction function temporarily deactivates
certain functions, such as the air condi-
tioning, the heated rear screen...
The deactivated functions are reactivated
automatically as soon as conditions permit.
Page 148 of 224
9
i
!
PRACTICAL INFORMATION
146
The maximum towed load on a long in-
cline depends on the gradient and the
ambient temperature.
�)
If the warning lamp and the
STOP
warning lamp come
on, stop the vehicle and
switch off the engine as
soon as possible.
Braking
Towing a trailer increases the braking
distance.
To avoid overheating of the brakes on a
long mountain type of descent, the use
of engine braking is recommended.
Tyres
�)
Check the tyre pressures of the towing
vehicle and of the trailer, observing the
recommended pressures.
The rear parking sensors will be de-
activated automatically if a genuine
PEUGEOT towbar is used.
In all cases, keep a check on the cool-
ant temperature.
Lighting
�)
Check the electrical lighting and
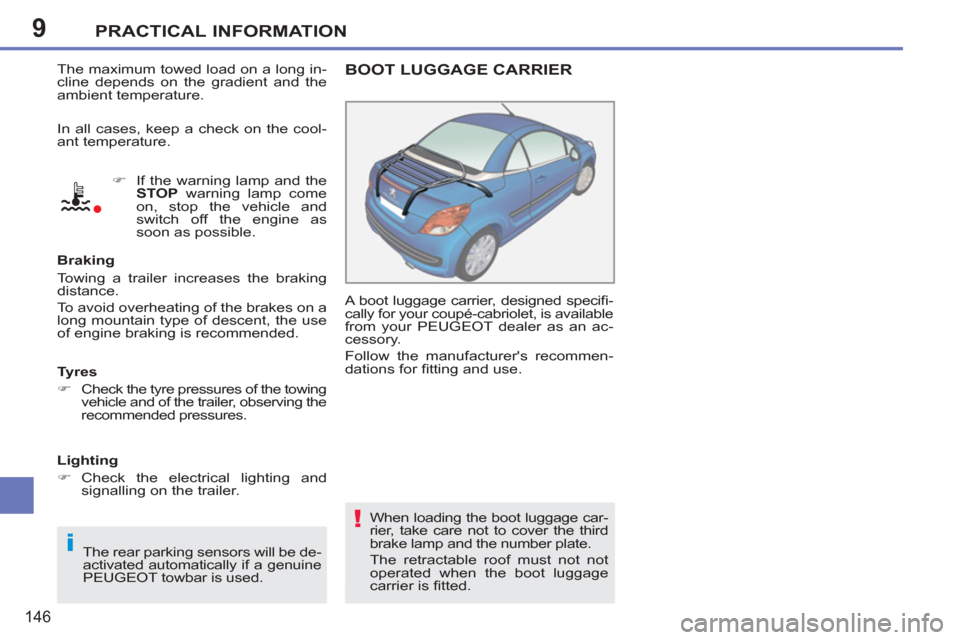
signalling on the trailer. BOOT LUGGAGE CARRIER
A boot luggage carrier, designed specifi -
cally for your coupé-cabriolet, is available
from your PEUGEOT dealer as an ac-
cessory.
Follow the manufacturer's recommen-
dations for fi tting and use.
When loading the boot luggage car-
rier, take care not to cover the third
brake lamp and the number plate.
The retractable roof must not not
operated when the boot luggage
carrier is fi tted.
Page 188 of 224
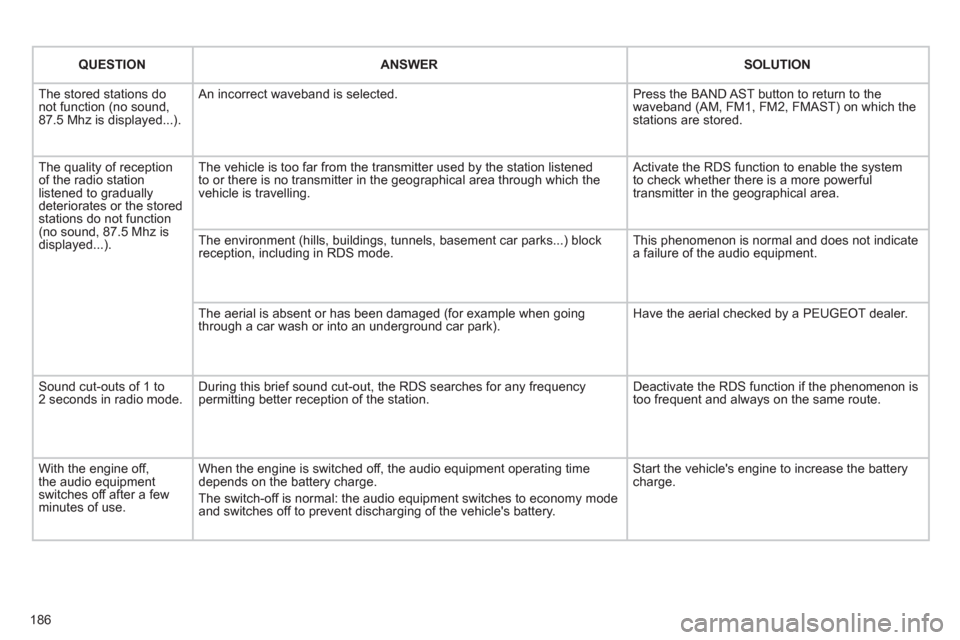
186
QUESTIONANSWERSOLUTION
The stored stations donot function (no sound, 87.5 Mhz is displayed...).
An incorrect waveband is selected.
Press the BAND AST button to return to the waveband (AM, FM1, FM2, FMAST) on which thestations are stored.
The quality of receptionof the radio station listened to graduallydeteriorates or the stored stations do not function(no sound, 87.5 Mhz is displayed...).
The vehicle is too far from the transmitter used by the station listenedto or there is no transmitter in the geographical area through which the vehicle is travelling.
Activate the RDS function to enable the system to check whether there is a more powerful transmitter in the geographical area.
The environment (hills, buildings, tunnels, basement car parks...) block reception, including in RDS mode.
This phenomenon is normal and does not indicate a failure of the audio equipment.
The aerial is absent or has been damaged (for example when goingthrough a car wash or into an underground car park).
Have the aerial checked by a PEUGEOT dealer.
Sound cut-outs of 1 to2 seconds in radio mode.During this brief sound cut-out, the RDS searches for any frequency permitting better reception of the station.
Deactivate the RDS function if the phenomenon is too frequent and always on the same route.
With the engine off, the audio equipment switches off after a few minutes of use.
When the engine is switched off, the audio equipment operating timedepends on the battery charge.
The switch-off is normal: the audio equipment switches to economy mode and switches off to prevent discharging of the vehicle's battery.
Start the vehicle's engine to increase the batterycharge.