Page 22 of 128

MONITORING and DISPLAY SCREENS
20 -
1.
Seat belt not fastened warning
lamp
2.
Passenger's airbag deactivated
warning lamp
3.
Front and lateral airbags warning
lamp
4.
Front foglamps warning lamp
5.
Anti-lock braking system (ABS)
warning lamp
6.
Rear foglamp warning lamp
7.
Diesel pre-heater warning lamp
8.
Left hand direction indicator
9.
Total distance recorder, service
indicator and engine oil level
indicator
10.
Right hand direction indicator
11 .
Emission control system warning
lamp
12.
Main beam headlamps warning
lamp
13.
Parking brake, low brake fl uid
level and electronic brake force
distribution fault warning lamp
14.
Dipped beam headlamps
warning lamp
15.
Battery charge warning lamp
16.
Engine oil pressure and
temperature warning lamp
17.
Water in Diesel fi lter warning
lamp
18.
Low coolant level warning lamp
19.
Coolant temperature indicator
20.
Total distance recorder button
21.
Central (STOP) warning lamp
22.
Speedometer *
23.
Rev counter
24.
Lighting dimmer button
25.
Fuel gauge
26.
Low fuel level warning lamp
27.
Speed limiter/cruise control
screen
INSTRUMENT PANEL: PETROL - DIESEL
*
Version indicating in miles or kilo-
metres according to country of sale.
Page 56 of 128

VISIBILITY
54 -
Dipped/Main beam change
Pull the stalk towards you.
Note:
with the ignition off, when the
driver's door is opened, a buzzer
sounds if you have left your lights on.
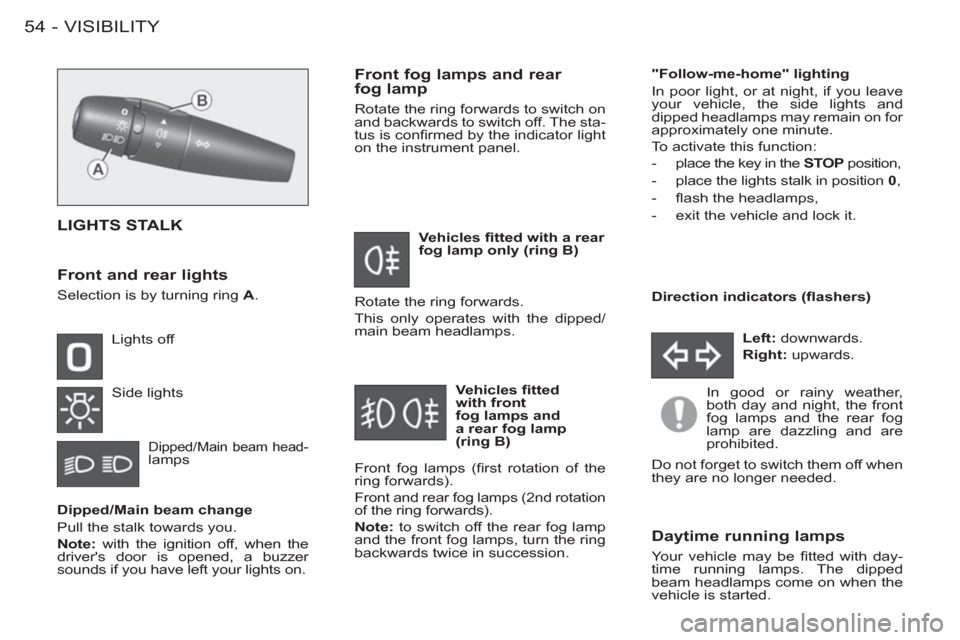
LIGHTS STALK
Lights off
Side lights
Dipped/Main beam head-lamps
Front fog lamps and rear
fog lamp
Rotate the ring forwards to switch on
and backwards to switch off. The sta-
tus is confi rmed by the indicator light
on the instrument panel.
"Follow-me-home" lighting
In poor light, or at night, if you leave
your vehicle, the side lights and
dipped headlamps may remain on for
approximately one minute.
To activate this function:
- place the key in the STOP
position,
- place the lights stalk in position 0
,
- fl ash the headlamps,
- exit the vehicle and lock it.
In good or rainy weather,
both day and night, the front
fog lamps and the rear fog
lamp are dazzling and are
prohibited.
Do not forget to switch them off when
they are no longer needed.
Left: downwards.
Right: upwards.
Direction indicators (fl ashers)
Vehicles fi tted with a rear
fog lamp only (ring B)
Vehicles fi tted
with front
fog lamps and
a rear fog lamp
(ring B)
Front fog lamps (fi rst rotation of the
ring forwards).
Front and rear fog lamps (2nd rotation
of the ring forwards).
Note:
to switch off the rear fog lamp
and the front fog lamps, turn the ring
backwards twice in succession.
Front and rear lights
Selection is by turning ring A.
Rotate the ring forwards.
This only operates with the dipped/
main beam headlamps.
Daytime running lamps
Your vehicle may be fi tted with day-
time running lamps. The dipped
beam headlamps come on when the
vehicle is started.
Page 62 of 128
LIFE ON BOARD
60 -
STEERING WHEEL
ADJUSTMENT HEADLAMPADJUSTMENTHORN
HAZARD WARNING LIGHT
S
Press the button, the direction indicators
fl ash.
They can operate with the ignition off. Press one of the spokes or
the centre of the steering
wheel.
0 -
With no load.
1 -
With partial load.
2 -
With average load.
3 -
With maximum authorised load.
0 - 1 or 2 people in the front
seats.
- - 3 people.
1 - 4 or 5 people.
2 -
4 or 5 people + maximum
authorised load.
3 -
Driver + maximum authorised
load.
Initial setting is position 0.
Depending on the load in your vehi-
cle, it is recommended that the head-
lamp beam is adjusted. When stationary, lower the handle
to release the steering wheel adjust-
ment mechanism.
Adjust it to the desired height, then lift
the handle to lock the steering wheel
adjustment mechanism.
Page 86 of 128
PRACTICAL INFORMATION
84 -
Dipped/Main beam headlamps
(H4-60/55W)
After following the procedure for re-
moval of the headlamp:
- Turn and remove the protector ( 6
),
- Disconnect the connector ( C
),
- Unclip the spring ( D
),
- Remove and replace the
bulb ( 3
).