Page 78 of 150

7-15
7To climb a hill, you need traction, momentum, and
steady throttle. Travel fast enough to maintain mo-
mentum, but not so fast that you cannot react to
changes in the terrain as you climb.
It is important when climbing a hill to make sure
that your weight is transferred forward on the ATV.
This can be accomplished by leaning forward and,
on steeper inclines, standing on the footboards
and leaning forward over the handlebars. Whenev-
er possible, ride straight up hills.Slow down when you reach the crest of the hill if
you cannot see clearly what is on the other side –
there could be another person, an obstacle, or a
sharp drop-off. Use common sense and remember
that some hills are too steep for you to climb or de-
scend.
If you are climbing a hill and you find that you have
not properly judged your ability to make it to the
top, you should turn the ATV around while you still
have forward motion (provided you have the room
to do so) and go down the hill.
If your ATV has stalled or stopped and you believe
you can continue up the hill, restart carefully to
make sure you do not lift the front wheels which
could cause you to lose control. If you are unable
to continue up the hill, dismount the ATV on the up-
hill side. Physically turn the ATV around and then
descend the hill.
If you start to roll backwards, DO NOT apply the
rear brake, and apply the front brake gradually.
The ATV could easily tip over backwards. When
fully stopped, apply the rear brake as well, and
then lock the parking brake. Dismount the ATV im-
mediately on the uphill side or to a side if pointed
straight uphill. Turn the ATV around and remount,
following the procedure described in the Owner’s
U1AS60E0.book Page 15 Friday, February 6, 2009 1:27 PM
Page 79 of 150
7-16
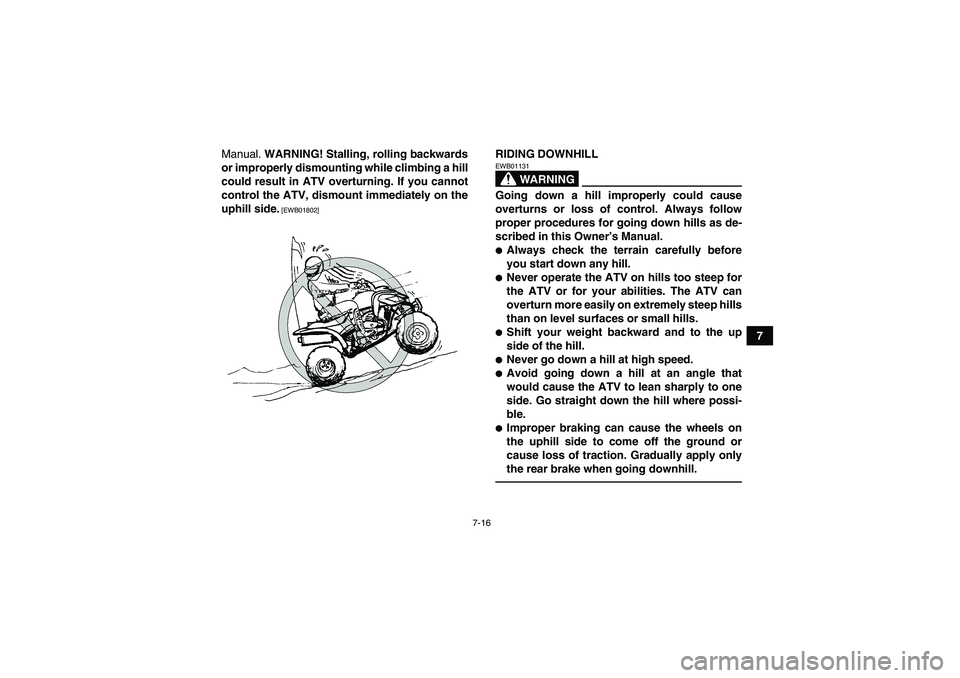
7 Manual. WARNING! Stalling, rolling backwards
or improperly dismounting while climbing a hill
could result in ATV overturning. If you cannot
control the ATV, dismount immediately on the
uphill side.
[EWB01802]
RIDING DOWNHILL
WARNING
EWB01131Going down a hill improperly could cause
overturns or loss of control. Always follow
proper procedures for going down hills as de-
scribed in this Owner’s Manual.�Always check the terrain carefully before
you start down any hill.�Never operate the ATV on hills too steep for
the ATV or for your abilities. The ATV can
overturn more easily on extremely steep hills
than on level surfaces or small hills.�Shift your weight backward and to the up
side of the hill.�Never go down a hill at high speed.�Avoid going down a hill at an angle that
would cause the ATV to lean sharply to one
side. Go straight down the hill where possi-
ble.�Improper braking can cause the wheels on
the uphill side to come off the ground or
cause loss of traction. Gradually apply only
the rear brake when going downhill.
U1AS60E0.book Page 16 Friday, February 6, 2009 1:27 PM
Page 80 of 150

7-17
7When riding your ATV downhill, shift your weight
as far to the rear and uphill side of the ATV as pos-
sible. Move back on the seat and sit with your arms
straight. Choose a low gear which will allow the en-
gine compression to do most of the braking for you.
Use caution while descending a hill with loose or
slippery surfaces. Braking ability and traction may
be adversely affected by these surfaces. Improper
braking may also cause a loss of traction. Gradual-
ly apply only the rear brake.
Whenever possible, ride your ATV straight down-
hill. Avoid sharp angles which could allow the ATV
to tip or roll over. Carefully choose your path and
ride no faster than you will be able to react to ob-
stacles which may appear.
CROSSING A SLOPE
WARNING
EWB01632Improperly crossing hills or turning on hills
could cause loss of control or cause the ATV to
overturn.�Always follow proper procedures as de-
scribed in the Owner’s Manual.�Avoid hills with excessively slippery or loose
surfaces.
U1AS60E0.book Page 17 Friday, February 6, 2009 1:27 PM
Page 81 of 150

7-18
7
�Avoid crossing the side of a steep hill.�Shift your weight to the uphill side of the
ATV.�Never attempt to turn the ATV around on any
hill until you have mastered the turning tech-
nique as described in the Owner’s Manual on
level ground. Be very careful when turning
on any hill.Traversing a sloping surface on your ATV requires
you to properly position your weight to maintain
proper balance. Be sure that you have learned the
basic riding skills on flat ground before attempting
to cross a sloping surface. Avoid slopes with slip-
pery surfaces or rough terrain that may upset your
balance.
As you travel across a slope, lean your body in the
uphill direction. It may be necessary to correct the
steering when riding on loose surfaces by pointing
the front wheels slightly uphill. When riding on
slopes, be sure not to make sharp turns either up
or down hill.
If your ATV does begin to tip over, gradually steer
in the downhill direction if there are no obstacles in
your path. As you regain proper balance, gradually
steer again in the direction you wish to travel.CROSSING THROUGH SHALLOW WATER
WARNING
EWB01641Operating this vehicle through deep or fast-
flowing water can lead to loss of control or an
overturn. To reduce your risk of drowning or
other injuries, use care when crossing through
water. Never operate this ATV water deeper
U1AS60E0.book Page 18 Friday, February 6, 2009 1:27 PM
Page 84 of 150
7-21
7To reduce the tendency for the front wheels to slide
in loose or slippery conditions, positioning your
weight over the front wheels will sometimes help.
If the rear wheels of your ATV start to slide side-
ways, control can usually be regained (if there is
room to do so) by steering in the direction of the
slide. Applying the brakes or accelerating is not
recommended until you have corrected the slide.With practice, over a period of time, skill at con-
trolled sliding can be developed. The terrain
should be chosen carefully before attempting such
maneuvers, since both stability and control are re-
duced. Bear in mind that sliding maneuvers should
always be avoided on extremely slippery surfaces
such as ice, since all control may be lost.
WHAT TO DO IF...
This section is designed to be a reference guide
only. Be sure to read each section on riding tech-
niques completely.
U1AS60E0.book Page 21 Friday, February 6, 2009 1:27 PM
Page 85 of 150

7-22
7 WHAT TO DO...
�If your ATV doesn’t turn when you want it to:
Bring the ATV to a stop and practice the turning
maneuvers again. Be sure you are putting your
weight on the footboard to the outside of the
turn. Position your weight over the front wheels
for better control. (See page 7-12.)�If your ATV begins to tip while turning:
Lean more into the turn to regain balance. If nec-
essary, gradually let off the throttle and/or steer
to the outside of the turn. (See page 7-12.)�If your ATV starts to slide sideways:
Steer in the direction of the slide if you have the
room. Applying the brakes or accelerating is not
recommended until you have corrected the
slide. (See page 7-20.)�If your ATV can’t make it up a hill you are trying
to climb:
Turn the ATV around if you still have forward
speed. If not, stop, dismount on the uphill side of
the ATV and physically turn the ATV around. If
the ATV starts to slip backwards, DO NOT USE
THE REAR BRAKE – the ATV may tip over on
top of you. Dismount the ATV on the uphill side.
(See page 7-14.)
�If your ATV is traversing a sloping surface:
Be sure to ride with your weight positioned to-
wards the uphill side of the ATV to maintain
proper balance. If the ATV starts to tip, steer
down the hill (if there are no obstacles in your
way) to regain balance. If you discover that the
ATV is going to tip over, dismount on the uphill
side. (See page 7-17.)�If your ATV encounters shallow water:
Ride slowly and carefully through slow moving
water, watching for obstacles. Be sure to let wa-
ter drain from the ATV and CHECK YOUR
BRAKES FOR PROPER OPERATION when
you come out of the water. Do not continue to
ride your ATV until you have regained adequate
braking ability. (See page 7-18.)
U1AS60E0.book Page 22 Friday, February 6, 2009 1:27 PM
Page 120 of 150
8-35
88. Tighten the locknut at the crankcase and the
clutch lever.
TIPIf the specified free play cannot be obtained as de-
scribed above or if the clutch does not operate cor-
rectly, have a Yamaha dealer check the internal
clutch mechanism.EBU26864Drive chain slack The drive chain slack should be checked before
each ride and adjusted if necessary.To check the drive chain slack
1. Place the ATV on a level surface.
TIPWhen checking and adjusting the drive chain
slack, there should be no weight on the ATV and
all tires must be touching the ground.2. Move the ATV back and forth to locate the
tightest portion of the drive chain, and then
measure the drive chain slack as shown.
1. Clutch lever free play adjusting nut (crankcase)
2. Locknut
1 2
(a)
(b)
Drive chain slack:
25.0–35.0 mm (0.98–1.38 in)1. Drive chain slack
1
U1AS60E0.book Page 35 Friday, February 6, 2009 1:27 PM
Page 140 of 150
10-1
10
EBU25960
SPECIFICATIONS
Dimensions:Overall length:
1845 mm (72.6 in)
Overall width:
1170 mm (46.1 in)
Overall height:
1130 mm (44.5 in)
Seat height:
815 mm (32.1 in)
Wheelbase:
1280 mm (50.4 in)
Ground clearance:
240 mm (9.4 in)
Minimum turning radius:
3500 mm (138 in)Weight:With oil and fuel:
192.0 kg (423 lb)Noise and vibration level:Noise level (77/311/EEC):
87.4 dB(A) (EUR)
Vibration on seat (EN1032, ISO5008):
Will not exceed 0.5 m/s² (EUR)
Vibration on handlebar (EN1032, ISO5008):
Will not exceed 2.5 m/s² (EUR)Engine:Engine type:
Liquid cooled 4-stroke, SOHCCylinder arrangement:
Forward-inclined single cylinder
Displacement:
686 cm³
Bore × stroke:
102.0 × 84.0 mm (4.02 × 3.31 in)
Compression ratio:
9.20 :1
Starting system:
Electric starter
Lubrication system:
Dry sump
Engine oil:Recommended brand:
YAMALUBE
U1AS60E0.book Page 1 Friday, February 6, 2009 1:27 PM


