2010 VOLKSWAGEN TRANSPORTER warning light
[x] Cancel search: warning lightPage 62 of 486
A WARNING (Continued)
• Only adjust the height and tilt of the seat or move lt forwards and backwards when the area around the seat is clear.
• There should be no objects in the adjust-ment area of the front seats.
• Make sure that there is no dirt in the areas within which the front seats can be adjusted (and locked In place).
A WARNING
Cigarette lighters in the vehicle could be damaged or accidentally lit. This could lead to serious burns and other Injuries.
• Before adjusting the seats always make sure that there is no lighter on or near the moveable parts of the seat.
• Before closing stowage areas or compart-ments always ensure that there Is no lighter in the way.
• Never stow lighters in stowage areas or compartments or on other surfaces In the ve-hicle. Cigarette lighters may self-Ignite on high-temperature surfaces, especially In sum-
The dangers of assuming an incorrect sitting position
.....-m First read and observe the Introductory L-.bU information and safety warnings & on page 61.
If the seat belts are not worn or are worn incorrect-ly, the risk of severe or fatal injuries increases. Seat belts can only provide optimal protection if the seat belt routing is correct. Assuming an incorrect sitting position considerably impairs the level of protection provided by a seat belt. This could lead to severe or even fatal injuries. The risk of severe or fatal injuries is especially increased when a de-ploying airbag strikes a vehicle occupant who has assumed an incorrect sitting position. The driver is responsible for all occupants transported in the ve-hicle, especially children.
The following list contains examples of sitting posi-tions that can be dangerous for all vehicle occu-pants.
Whenever the vehicle is in motion:
• Never stand in the vehicle.
• Never stand on the seats.
• Never kneel on the seats.
• Never tilt the backrest too far to the rear.
• Never lean against the dash panel.
• Never lie on the seats in the passenger com-partment.
• Never sit on the front edge of a seat.
• Never sit sideways.
Before the journey
• Never lean out of a window .
• Never put your feet out of a window.
• Never put your feet on the dash panel.
• Never place your feet on the seat cushion or seat backrest.
• Never travel in a footwell.
• Never sit on the armrest.
• Never travel on a seat without wearing the seat belt.
• Never use the bed.
• Never travel in the luggage compartment or on the load surface.
A WARNING
Every Incorrect sitting position In the vehicle Increases the risk of severe or fatal Injuries In the event of an accident or sudden driving or braking manoeuvre.
• All vehicle occupants must maintain a cor-rect sitting position and wear their seat belt properly while the vehicle Is In motion.
• Sitting In an incorrect position, not fasten-ing the seat belt, or too short a distance to the alrbag exposes the occupants to critical or fatal injuries, especially if the alrbags de-ploy and strike an occupant who has as-sumed an Incorrect sitting position.
Page 63 of 486
Correct sitting position
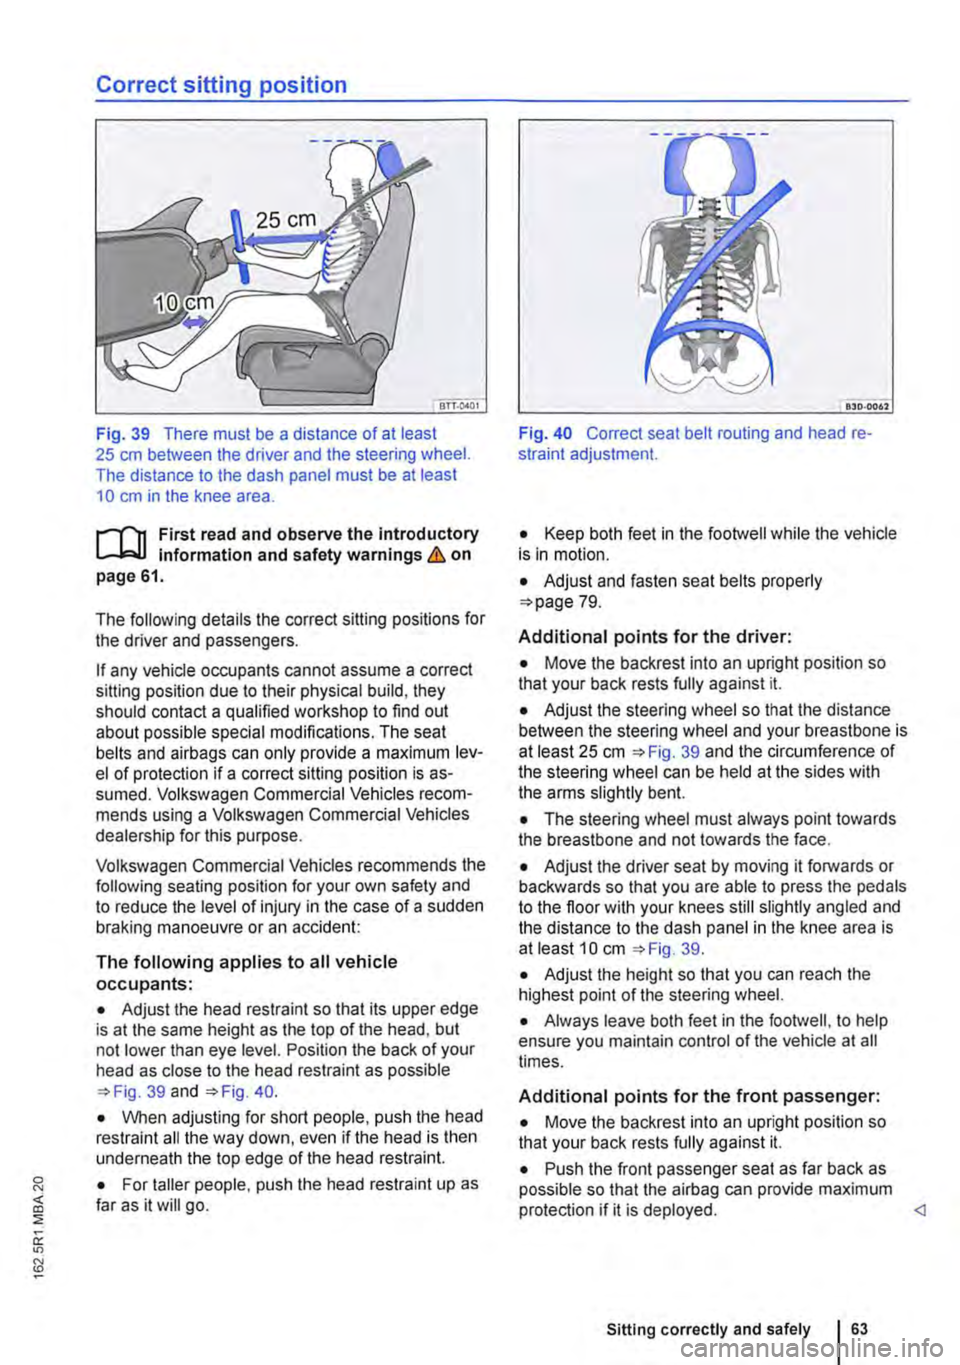
Fig. 39 There must be a distance of at least 25 cm between the driver and the steering wheel. The distance to the dash panel must be at least 10 cm in the knee area.
f"'"""('n First read and observe the introductory L-Jc..l.l Information and safety warnings & on page 61.
The following details the correct sitting positions for the driver and passengers.
If any vehicle occupants cannot assume a correct sitting position due to their physical build, they should contact a qualified workshop to find out about possible special modifications. The seat belts and airbags can only provide a maximum lev-el of protection if a correct sitting position is as-sumed. Volkswagen Commercial Vehicles recom-mends using a Volkswagen Commercial Vehicles dealership for this purpose.
Volkswagen Commercial Vehicles recommends the following seating position for your own safety and to reduce the level of injury in the case of a sudden braking manoeuvre or an accident:
The following applies to all vehicle occupants:
• Adjust the head restraint so that its upper edge is at the same height as the top of the head, but not lower than eye level. Position the back of your head as close to the head restraint as possible 39 and 40.
• When adjusting for short people, push the head restraint all the way down, even if the head is then underneath the top edge of the head restraint.
• For taller people, push the head restraint up as far as it will go.
Fig. 40 Correct seat belt routing and head re-straint adjustment.
• Keep both feet in the footwell while the vehicle is in motion.
• Adjust and fasten seat belts properly 79.
Additional points for the driver:
• Move the backrest into an upright position so that your back rests fully against it.
• Adjust the steering wheel so that the distance between the steering wheel and your breastbone is at least 25 cm 39 and the circumference of the steering wheel can be held at the sides with the arms slightly bent.
• The steering wheel must always point towards the breastbone and not towards the face.
• Adjust the driver seat by moving it forwards or backwards so that you are able to press the pedals to the floor with your knees still slightly angled and the distance to the dash panel in the knee area is at least 10 cm 39.
• Adjust the height so that you can reach the highest point of the steering wheel.
• Always leave both feet in the footwell, to help ensure you maintain control of the vehicle at all times.
Additional points for the front passenger:
• Move the backrest into an upright position so that your back rests fully against it.
• Push the front passenger seat as far back as possible so that the airbag can provide maximum protection if it is deployed.
Page 68 of 486

A WARNING
Driving without head restraints or with Incor-rectly adjusted head restraints Increases the risk of severe or fatal injuries In the event of an accident or sudden' driving or braking ma-noeuvre.
• If a seat is occupied, the head restraint for that seat must be fitted and adjusted correct-ly.
• Each vehicle occupant must adjust the head restraint to suit their body size, to help reduce the risk of neck injuries in an acci-dent. As far as possible, the upper edge of
Adjusting the steering wheel position
an-0211
Fig. 46 Below the steering wheel: lever for me-chanical adjustment in the steering column trim.
r--f'n First read and observe the introductory L-W.I information and safety warnings & on page 61.
Adjust the steering wheel position before setting off and only when the vehicle is stationary.
• Push down the lever 46 Q).
• Adjust the steering wheel so that you can hold it on the outside of the ring (at the 9 o'clock and 3 o'clock positions =:o Fig. 47) with both hands and slightly bent arms.
• Push the lever up firmly until it lines up with the steering column =:o &.
Before the journey
A WARNING (Continued)
the head restraint must be level with the top of the head, but not lower than eye level. Po-sition the back of your head in the middle and as close to the head restraint as possible.
• Never adjust, fit or remove the head re-straint while the vehicle is in motion.
• Head restraints that have been removed should be fitted as soon as possible so that passengers have correct protection.
CD
When removing or fitting head restraints, make sure that they do not hit the roof, the front seat back rest or other parts of the vehicle. This will prevent damage from occurring.
A WARNING
Incorrect use of the steering column position adjustment and Incorrect adjustment of the steering wheel can cause serious or fatal In-juries.
• After adjusting the steering column, al-ways move lever =:oFig. 46 CD up so that it en-gages securely. This prevents the steering column from moving spontaneously while the vehicle Is In motion.
• Never adjust the steering wheel when the vehicle Is In motion. If you determine that a readjustment Is necessary, stop the vehicle safely and adjust the steering wheel to the correct position. .,.
Page 70 of 486
• The seat cushion is damp or wet.
• The interior or exterior temperature is above 2s•c (7rF).
Function
Switching on
Adjusting the heating output
Switching off
Action 49
Press the 0 or (9 button. The seat heating is switched on at the highest setting. All indicator lamps light up.
Press the 0 or (9 button repeat-edly until the required heat level is set.
Press the button 0 or (9 until the indicator lamps in the button go out 49.
A WARNING
Anyone experiencing reduced sensitivity to pain or temperature due to medication, para-lysis or chronic illness (e.g. diabetes) could sustain burns on the back, buttocks and legs when using the seat heating. These burns may take a long time to heal or may never heal fully. Please consult a doctor to deter-mine your own level of health.
Memory seats
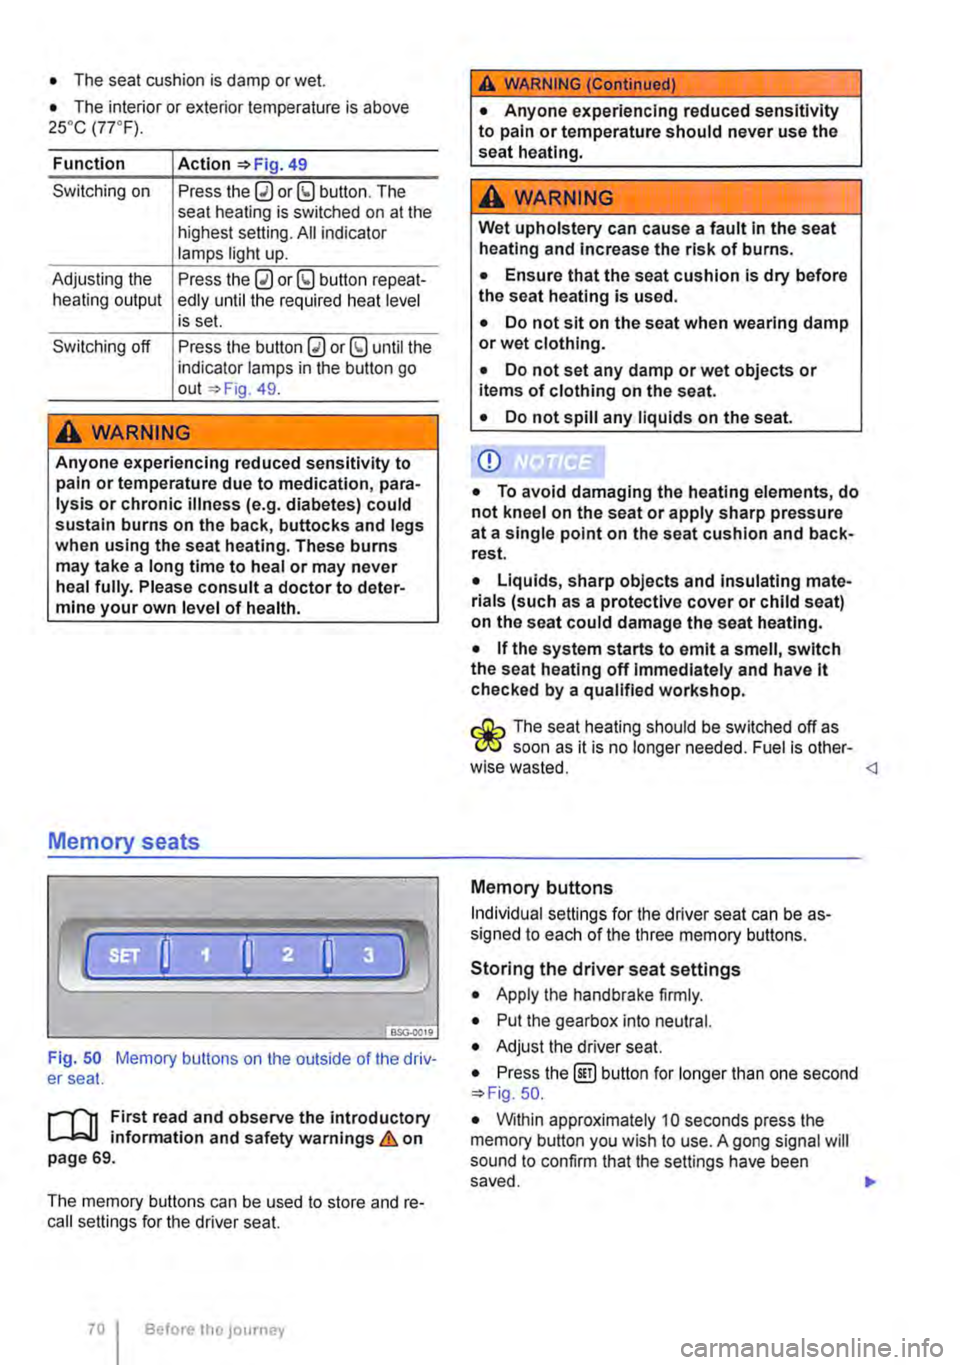
Fig. 50 Memory buttons on the outside of the driv-er seat.
r"''l1 First read and observe the introductory L-JcJ.I information and safety warnings & on page 69.
The memory buttons can be used to store and re-call settings for the driver seat.
Before the JOurney
A WARNING (Continued)
• Anyone experiencing reduced sensitivity to pain or temperature should never use the seat heating.
A wARNING
Wet upholstery can cause a fault In the seat heating and Increase the risk of burns.
• Ensure that the seat cushion is dry before the seat heating is used.
• Do not sit on the seat when wearing damp or wet clothing.
• Do not set any damp or wet objects or items of clothing on the seat.
• Do not spill any liquids on the seat.
Q)
• To avoid damaging the heating elements, do not kneel on the seat or apply sharp pressure at a single point on the seat cushion and back-rest.
• Liquids, sharp objects and Insulating mate-rials (such as a protective cover or child seat) on the seat could damage the seat heating.
• If the system starts to emit a smell, switch the seat heating off Immediately and have lt checked by a qualified workshop.
r:O:-, The seat heating should be switched off as C!JtJ soon as it is no longer needed. Fuel is other-wise wasted.
Individual settings for the driver seat can be as-signed to each of the three memory buttons.
Storing the driver seat settings
• Apply the handbrake firmly.
• Put the gearbox into neutral.
• Adjust the driver seat.
• Press the @] button for longer than one second 50.
• Within approximately 10 seconds press the memory button you wish to use. A gong signal will sound to confirm that the settings have been saved. .,..
Page 80 of 486
A WARNING (Continued)
• If the belt webbing or any other part of the seat belt becomes damaged, the seat belt may tear during an accident or sudden brak-Ing manoeuvre.
• Damaged seat belts must be replaced Im-mediately with new seat belts approved by Volkswagen Commercial Vehicles for your ve-hicle type. Seat belts subjected to stress and stretched d urlng an accident must be re-placed by a qualified workshop. Renewal may
Warning lamp
sn-0110
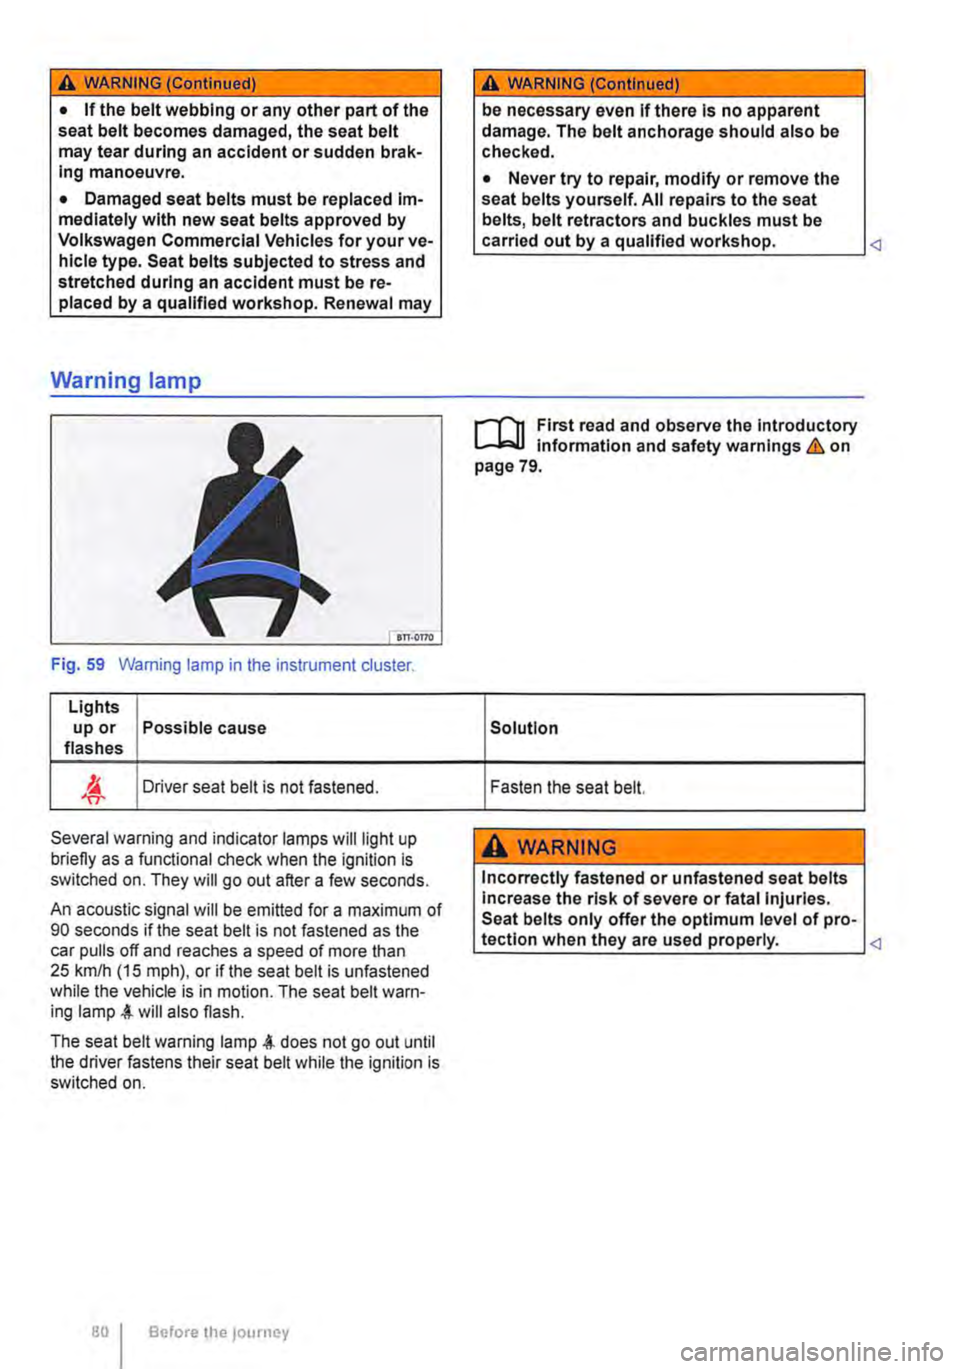
Fig. 59 Warning lamp in the instrument cluster.
Lights up or Possible cause flashes
'IT-Driver seat belt is not fastened.
Several warning and indicator lamps will light up briefly as a functional check when the ignition is switched on. They will go out after a few seconds.
An acoustic signal will be emitted for a maximum of 90 seconds if the seat belt is not fastened as the car pulls off and reaches a speed of more than 25 km/h (15 m ph), or if the seat belt is unfastened while the vehicle is in motion. The seat belt warn-ing will also flash.
The seat belt warning lamp does not go out until the driver fastens their seat belt while the ignition is switched on.
Before the journey
A WARNING (Continued)
be necessary even If there Is no apparent damage. The belt anchorage should also be checked.
• Never try to repair, modify or remove the seat belts yourself. All repairs to the seat belts, belt retractors and buckles must be carried out by a qualified workshop.
r-Y'n First read and observe the Introductory information and safety warnings & on page 79.
Solution
Fasten the seat belt.
A WARNING
Incorrectly fastened or unfastened seat belts Increase the risk of severe or fatal Injuries. Seat belts only offer the optimum level of pro-tection when they are used properly.
Page 90 of 486
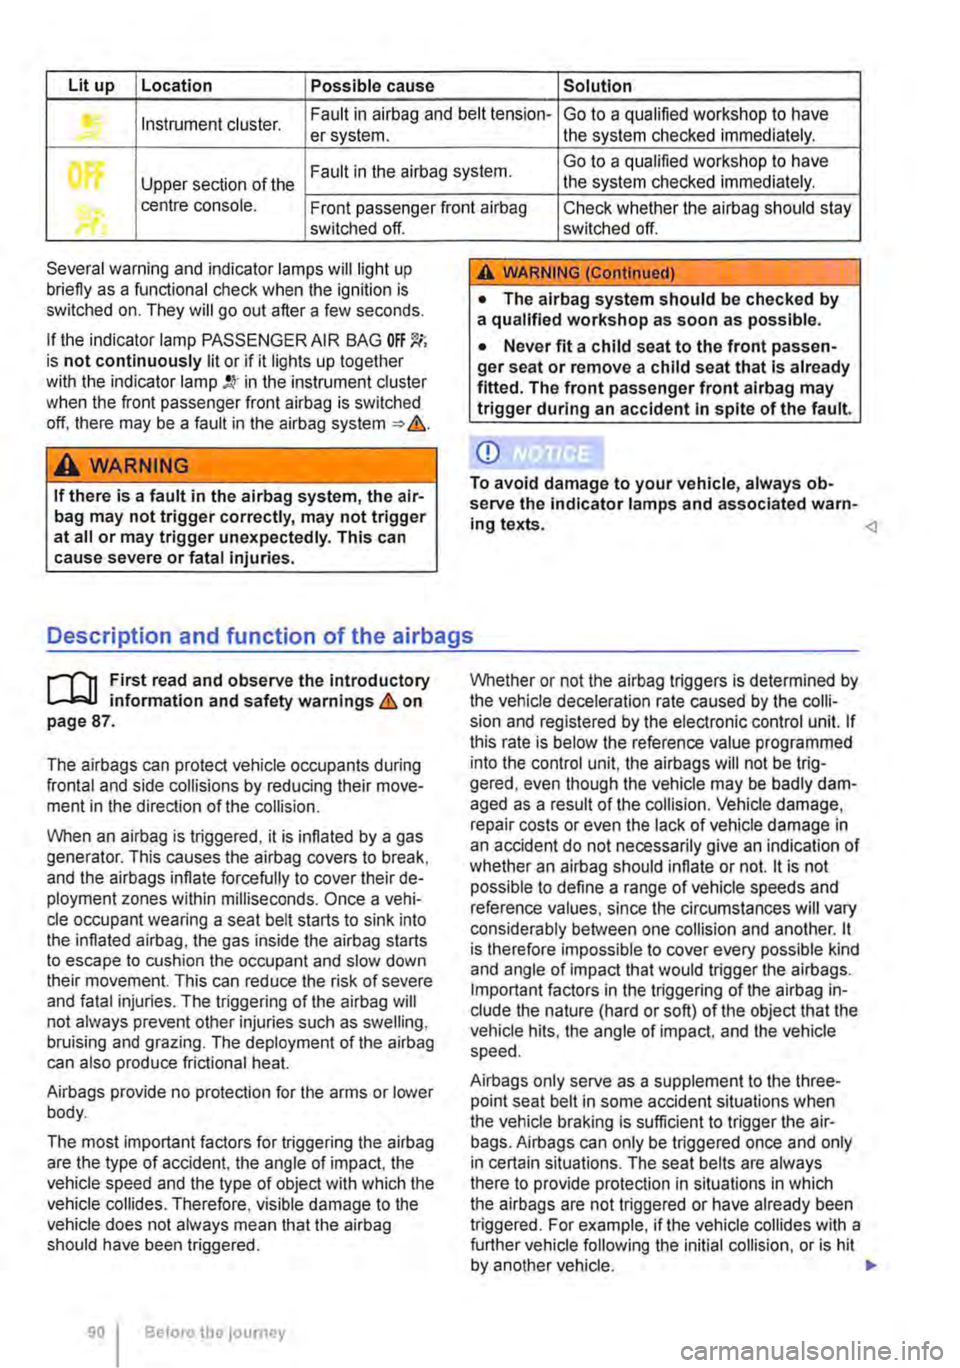
Lit up Location Possible cause Solution
Instrument cluster. Fault in airbag and belt tension-Go to a qualified workshop to have er system. the system checked immediately.
Fault in the airbag system. Go to a qualified workshop to have
Upper section of the the system checked immediately.
• centre console. Front passenger front airbag Check whether the airbag should stay switched off.
Several warning and indicator lamps will light up briefly as a functional check when the ignition is switched on. They will go out after a few seconds.
If the indicator lamp PASSENGER AIR BAG OFF 'J(; is not continuously lit or if it lights up together with the indicator lamp !Q' in the instrument cluster when the front passenger front airbag is switched off. there may be a fault in the airbag system => &.
A WARNING
If there is a fault in the airbag system, the air-bag may not trigger correctly, may not trigger at all or may trigger unexpectedly. This can cause severe or fatal injuries.
switched off.
A WARNING (Continued)
• The alrbag system should be checked by a qualified workshop as soon as possible.
• Never fit a child seat to the front passen-ger seat or remove a child seat that Is already fitted. The front passenger front alrbag may trigger during an accident In spite of the fault.
CD
To avoid damage to your vehicle, always ob-serve the indicator lamps and associated warn-ing texts. <1
Description and function of the airbags
r-('n First read and observe the introductory l..-lc:.l.l information and safety warnings & on page 87.
The airbags can protect vehicle occupants during frontal and side collisions by reducing their move-ment in the direction of the collision.
When an airbag is triggered, it is inflated by a gas generator. This causes the airbag covers to break, and the airbags inflate forcefully to cover their de-ployment zones within milliseconds. Once a vehi-cle occupant wearing a seat belt starts to sink into the inflated airbag, the gas inside the airbag starts to escape to cushion the occupant and slow down their movement. This can reduce the risk of severe and fatal injuries. The triggering of the airbag will not always prevent other injuries such as swelling, bruising and grazing. The deployment of the airbag can also produce frictional heat.
Airbags provide no protection for the arms or lower body.
The most important factors for triggering the airbag are the type of accident, the angle of impact, the vehicle speed and the type of object with which the vehicle collides. Therefore, visible damage to the vehicle does not always mean that the airbag should have been triggered.
90 Before the journey
Whether or not the airbag triggers is determined by the vehicle deceleration rate caused by the colli-sion and registered by the electronic control unit. If this rate is below the reference value programmed into the control unit, the airbags will not be trig-gered, even though the vehicle may be badly dam-aged as a result of the collision. Vehicle damage, repair costs or even the Jack of vehicle damage in an accident do not necessarily give an indication of whether an airbag should inflate or not. it is not possible to define a range of vehicle speeds and reference values, since the circumstances will vary considerably between one collision and another. it is therefore impossible to cover every possible kind and angle of impact that would trigger the airbags. Important factors in the triggering of the airbag in-clude the nature (hard or soft) of the object that the vehicle hits, the angle of impact, and the vehicle speed.
Airbags only serve as a supplement to the three-point seat belt in some accident situations when the vehicle braking is sufficient to trigger the air-bags. Airbags can only be triggered once and only in certain situations. The seat belts are always there to provide protection in situations in which the airbags are not triggered or have already been triggered. For example, if the vehicle collides with a further vehicle following the initial collision, or is hit by another vehicle. .,.
Page 93 of 486
A DANGE;R (Continued) --
• No other people, animals or objects may be carried between the occupants of the front seats and the alrbag deployment zone. Make sure that children and passengers also keep to this rule.
• Do not attach any objects, e.g. mobile nav-igation devices, to the windscreen above the front alrbag on the front passenger side.
• Do not cover or stick anything on the steering wheel hub or the soft plastic surface of the alrbag unit In the dash panel on the front passenger side, and do not modify them In any way.
A WARNING
The front alrbags are deployed In front of the steering wheel "*Fig. 71 and dash panel '*Fig. 72.
• When driving, always hold the steering wheel with both hands on the outside of the ring at the 9 o'clock and 3 o'clock positions.
• Adjust the driver seat so that there is at least 25 cm between your breastbone and the hub of the steering wheel. Contact a qualified workshop if your physical build makes this Impracticable.
• Adjust the front passenger seat so that the distance between the passenger and the
__ ____
Switching the front passenger front airbag on and off manually using the
key-operated switch
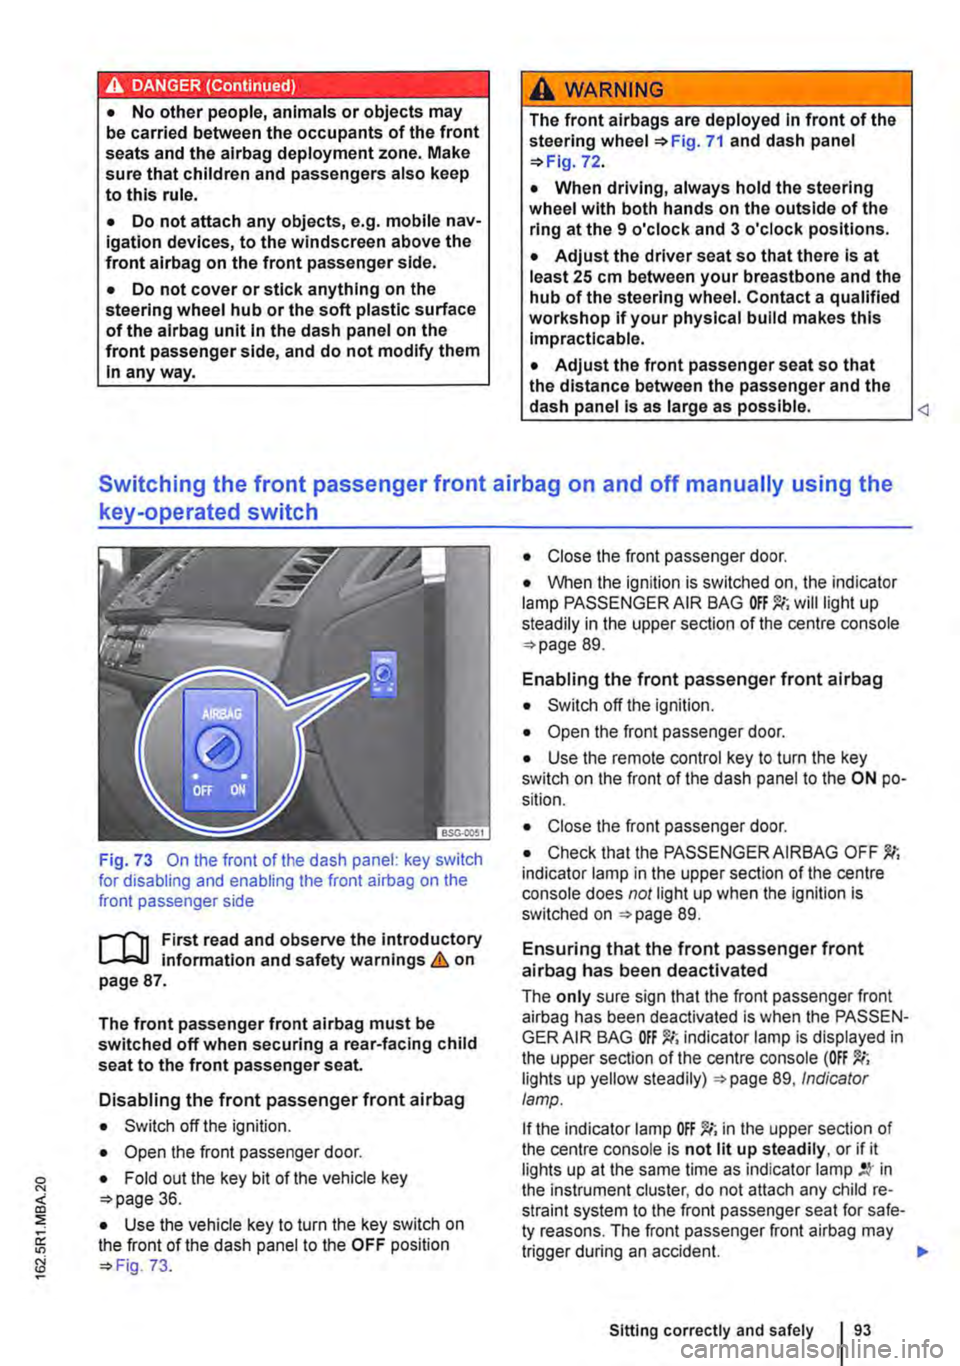
Fig. 73 On the front of the dash panel: key switch for disabling and enabling the front airbag on the front passenger side
l""'rn First read and observe the introductory L-J,::.U information and safety warnings&. on page 87.
The front passenger front airbag must be switched off when securing a rear-facing child seat to the front passenger seat.
Disabling the front passenger front airbag
• Switch off the ignition.
• Open the front passenger door.
• Fold out the key bit of the vehicle key o>page 36.
• Use the vehicle key to turn the key switch on the front of the dash panel to the OFF position o> Fig. 73.
• Close the front passenger door.
• When the ignition is switched on, the indicator lamp PASSENGER AIR BAG will light up steadily in the upper section of the centre console o> page 89.
Enabling the front passenger front airbag
• Switch off the ignition.
• Open the front passenger door.
• Use the remote control key to turn the key switch on the front of the dash panel to the ON po-sition.
• Close the front passenger door.
• Check that the PASSENGER AIRBAG OFF indicator lamp in the upper section of the centre console does not light up when the Ignition is switched on =>page 89.
Ensuring that the front passenger front airbag has been deactivated
The only sure sign that the front passenger front airbag has been deactivated is when the PASSEN-GER AIR BAG indicator lamp is displayed in the upper section of the centre console (OFF lights up yellow steadily) =>page 89, Indicator lamp.
If the indicator lamp OFF )!(; in the upper section of the centre console is not lit up steadily, or if it lights up at the same time as indicator lamp in the instrument cluster, do not attach any child re-straint system to the front passenger seat for safe-ty reasons. The front passenger front airbag may trigger during an accident.
Sitting correctly and safely
Page 94 of 486
A WARNING
The front passenger front airbag should only be switched off in exceptional circumstances.
• To prevent damage to the airbag system, only switch the front passenger front airbag on and off when the ignition is switched off.
• lt is the driver's responsibility to ensure that the key-operated switch is set to the cor-rect position.
Combined curtain and side airbags
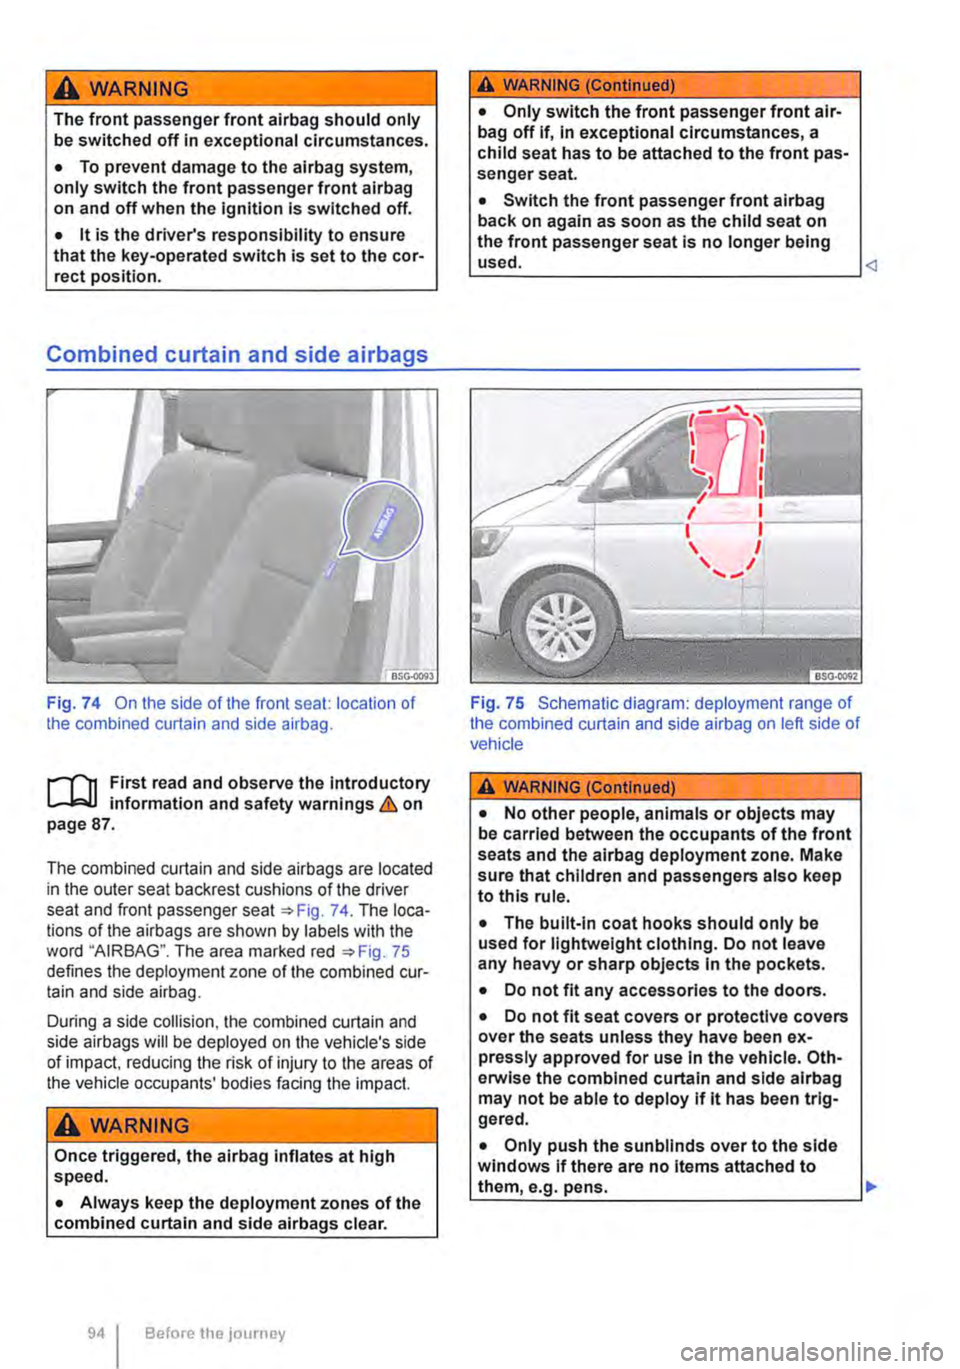
Fig. 74 On the side of the front seat: location of the combined curtain and side airbag.
l""'"'fl1 and observe the introductory L-.lr:J.J mformat1on and safety warnings & on page 87.
The combined curtain and side airbags are located in the outer seat backrest cushions of the driver seat and front passenger seat =:oFig. 74. The loca-tions of the airbags are shown by labels with the word "AIRBAG". The area marked red =:oFig. 75 defines the deployment zone of the combined cur-tain and side airbag.
During a side collision, the combined curtain and side airbags will be deployed on the vehicle's side of impact, reducing the risk of injury to the areas of the vehicle occupants' bodies facing the impact.
A WARNING
Once triggered, the airbag inflates at high speed.
• Always keep the deployment zones of the combined curtain and side airbags clear.
94 Before the journey
A WARNING (Continued)
• Only switch the front passenger front air-bag off if, In exceptional circumstances, a child seat has to be attached to the front pas-senger seat.
• Switch the front passenger front alrbag back on again as soon as the child seat on the front passenger seat is no longer being used.
Fig. 75 Schematic diagram: deployment range of the combined curtain and side airbag on left side of vehicle
A WARNING (Continued)
• No other people, animals or objects may be carried between the occupants of the front seats and the airbag deployment zone. Make sure that children and passengers also keep to this rule.
• The built-in coat hooks should only be used for lightweight clothing. Do not leave any heavy or sharp objects In the pockets.
• Do not fit any accessories to the doors.
• Do not fit seat covers or protective covers over the seats unless they have been ex-pressly approved for use In the vehicle. Oth-erwise the combined curtain and side alrbag may not be able to deploy If lt has been trig-gered.
• Only push the sunblinds over to the side windows if there are no Items attached to them, e.g. pens. .,..