2010 VOLKSWAGEN GOLF instrument panel
[x] Cancel search: instrument panelPage 102 of 516
4
. . . . . . 6
- Front view . . . . . . . . . . . . . . . . . . . .
- Center console overview . . . . . . . . . . . . . . 12
- Fron t pa sse nger side overvi ew . . . . . . . .
14
- Symbo ls o n the roo f console . . . . . . . . . . 14
Instrument cluster and instrument panel
- Warning and indica tor
lights . . . . . . . . . . 15
-cluster . . . . . . . . . . . . . . . . . . . 18
-Volk swage n Information System . . .
basics
- Driv ing check lists and warnings .
....... 31
- Techn ical data . . . . . . . . . . . . . . . . . . . . . . . 34
and closing
- Vehic le key set . . . . . . . . . . . . . . . . . . . . . . . 36
-locking and closing system . . . . . 4 1
- Doo rs . . . . . . . . . . . . . . . . . . . . . . . . . . . . . . . 47
- Rear hatch . . . . . . . . . . . . . . . . . . . . . . . . . 49
-. . . 53
-s lidin g and sunroof . . . . . . . 56
properly and safely
- Adjusting the sea ting position . . . . . . .
. . 58
-functions . . . . . . . . . . . . . . . . . . . . . . 67
- Safety . . . . . . . . . . . . . . . . . . . . . . . . . . 69
- Airbag system . . . . . . . . . . . . . . . . . . . . . . . 82
-Child sa fety and child restraints ........ 1
Lights and vision
- Lights ............................... 122
-protectio n ....................... 128
-Windshield wipers and washer ......... 129
-Mir ro rs .............................. 134
Transporting
- Driving tips
.......................... 137
-Luggage compa rtment ................ 141
of contents
- Roof rack . . . . . . . . . . . . . . . . . . . . . . . . . 146
- Trailer towing ...... ............•. .... 149
1 5 7
- Cup holders
......................... 161
- 12
sockets . . . . . . . . . . . . . . . . . . . . . 163
shifting, park ing
- Sta rting and stoppin g
the engin e ....... 165
- Shifting ................... .......... 171
- Brak ing , stop ping , and park ing
......... 179
- Sav ing
fuel a nd helping the environm ent 189
-Steering ............................. 192
Driver assistance systems
- Starting assistance systems
........... 195
-Cruise Control System ......... 19 7
-
nre Mo nitori ng System .............................
control
- Healing and air cond itioning
At the gas station
- Refueling
........................ .... 214
-Fuel ...........................•.... 2 19
Care , maintenance .... 222
fo r work ing in the engin e
compartment
................... ..... 222
- Engine oil ........................... 227
- Engine coolant ....................... 233
-Vehicle battery ....................... 238
Vehicle care and maintenance
- Exteri or
care and cleaning ............ 243
-care and cleaning ............. 251
-
accesso ries, repa irs and
modi fications ........................ 283
- Consumer information ................ 291
- Declaration
of Complia nce,
T elecomm unicat ions and Electro nic
Systems
............................ 293
- Report ing Safe ty Defects ............. 294
- Engin e con trol and emission control
system .............................. 295
Page 113 of 516
Front passenger side overview
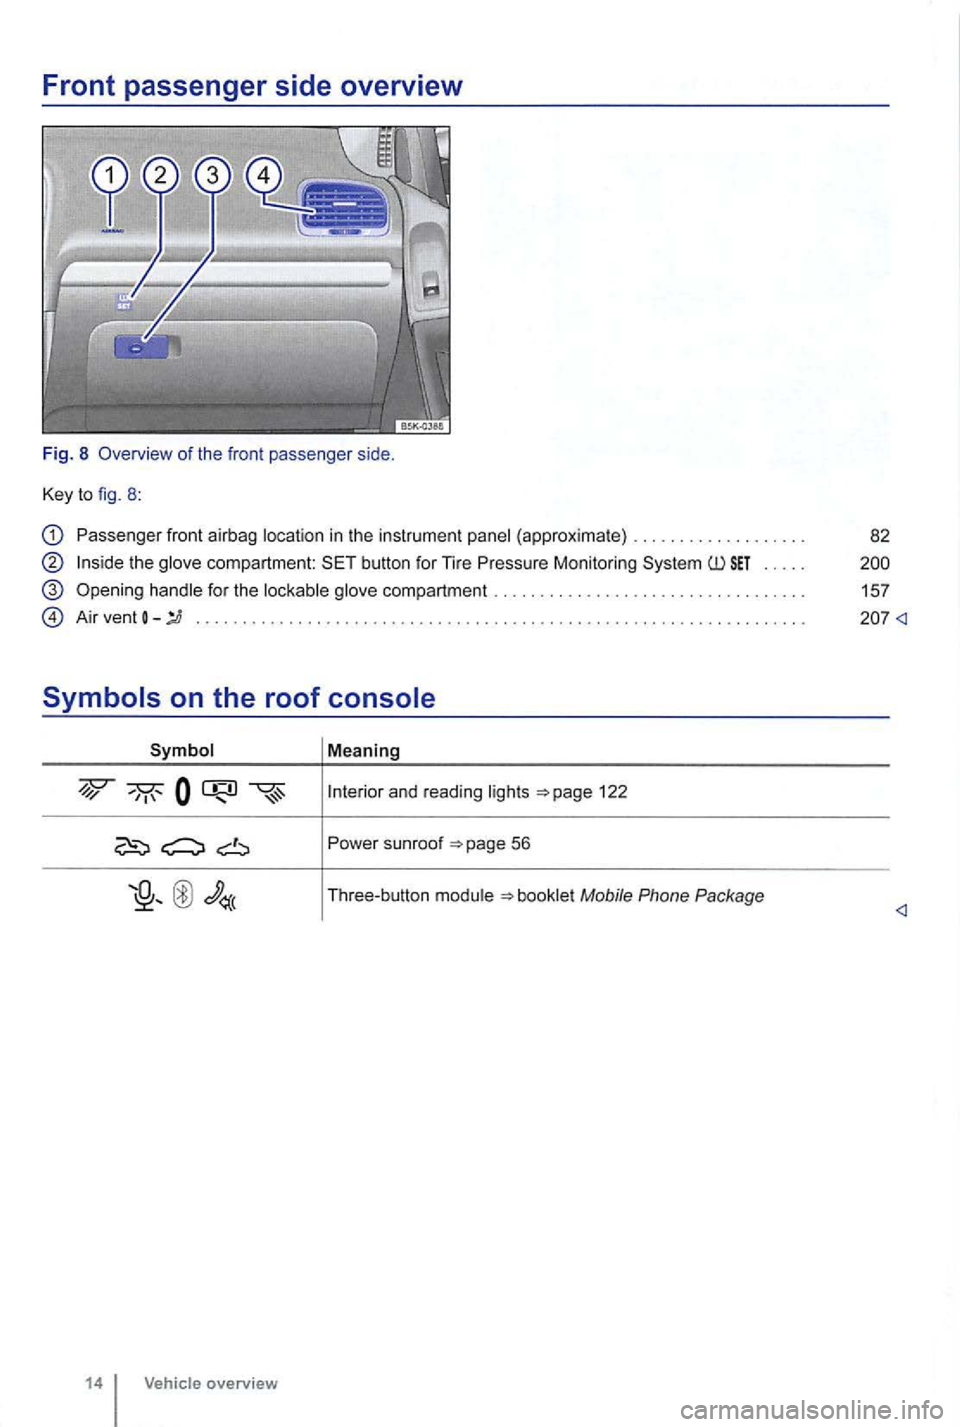
Fig. 8 Overview of the fron t passenger side.
Key to fig. 8 :
Passenger front airbag location in the instrument panel (approxima te) .... .............. .
the glove compartment: button for Tire Pressure Monitoring .....
handle for the lockable glove compartment .
A ir vent
Symbol Mea ning
and read ing lights 122
Po wer sunroof
Page 114 of 516
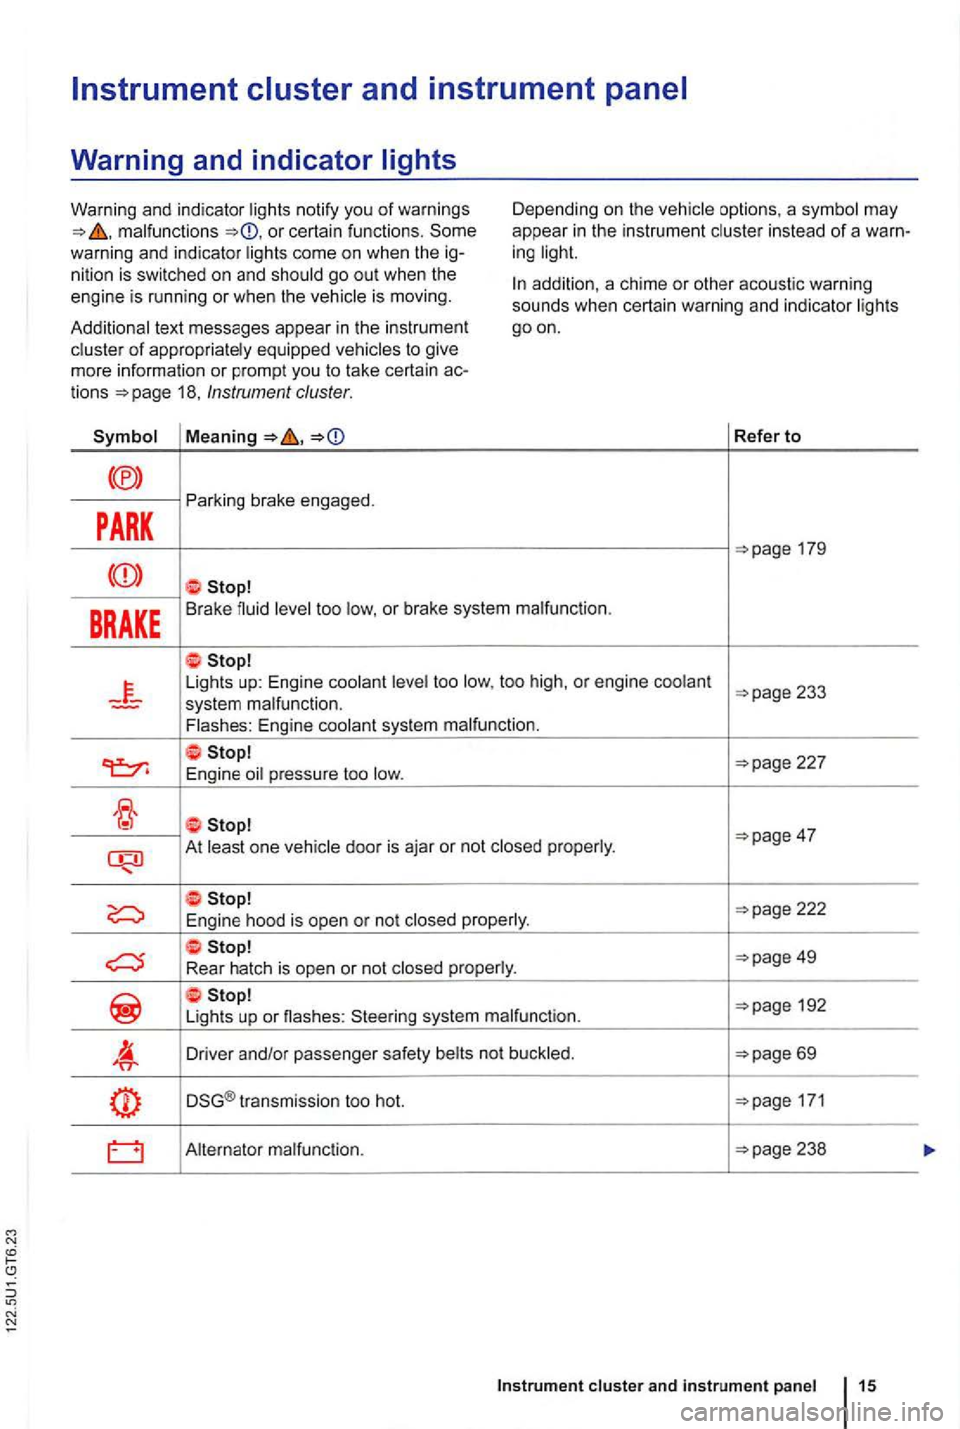
malfunctions or certain functions . Some
warning and indicator ligh ts come on when the ig
nition is swi tched on and shou ld go out when the
engine is running or when the vehicle is moving. D
epending on the vehicle options, a symbol may
appea r
in the instrum en t cluster in stead of a warn
ing light.
Additional text messages appear in th e instrumen t
cluster
of appropriately equipped vehicles to give
mo re information or prompt you to take certain actions 18, Instrument cluster.
addition, a chime or other acoustic warning
sounds when certain warning and indicator lights
goon.
Refer to
PARK
Parking brake engaged.
BRAKE Brake fluid level too low, o r brake system malfunction .
Lights up: Engine coolant level too low, too high , or engine coolant
227
E ngine oil pressure too low.
At least one vehicle door is aja r or not closed properly .
192
Li gh ts up or nashes : Steering system malfunction.
Driver and/or passenger safety belts not buckled .
DSG® transmission too hot. 171
Alternator malfunction.
cluster and instrument panel 15
Page 120 of 516
Park the
etc.
Roads and bridges may be dangerously icy
even if the outside air temperature is above freezing .
you use the outside temperature
remember : even
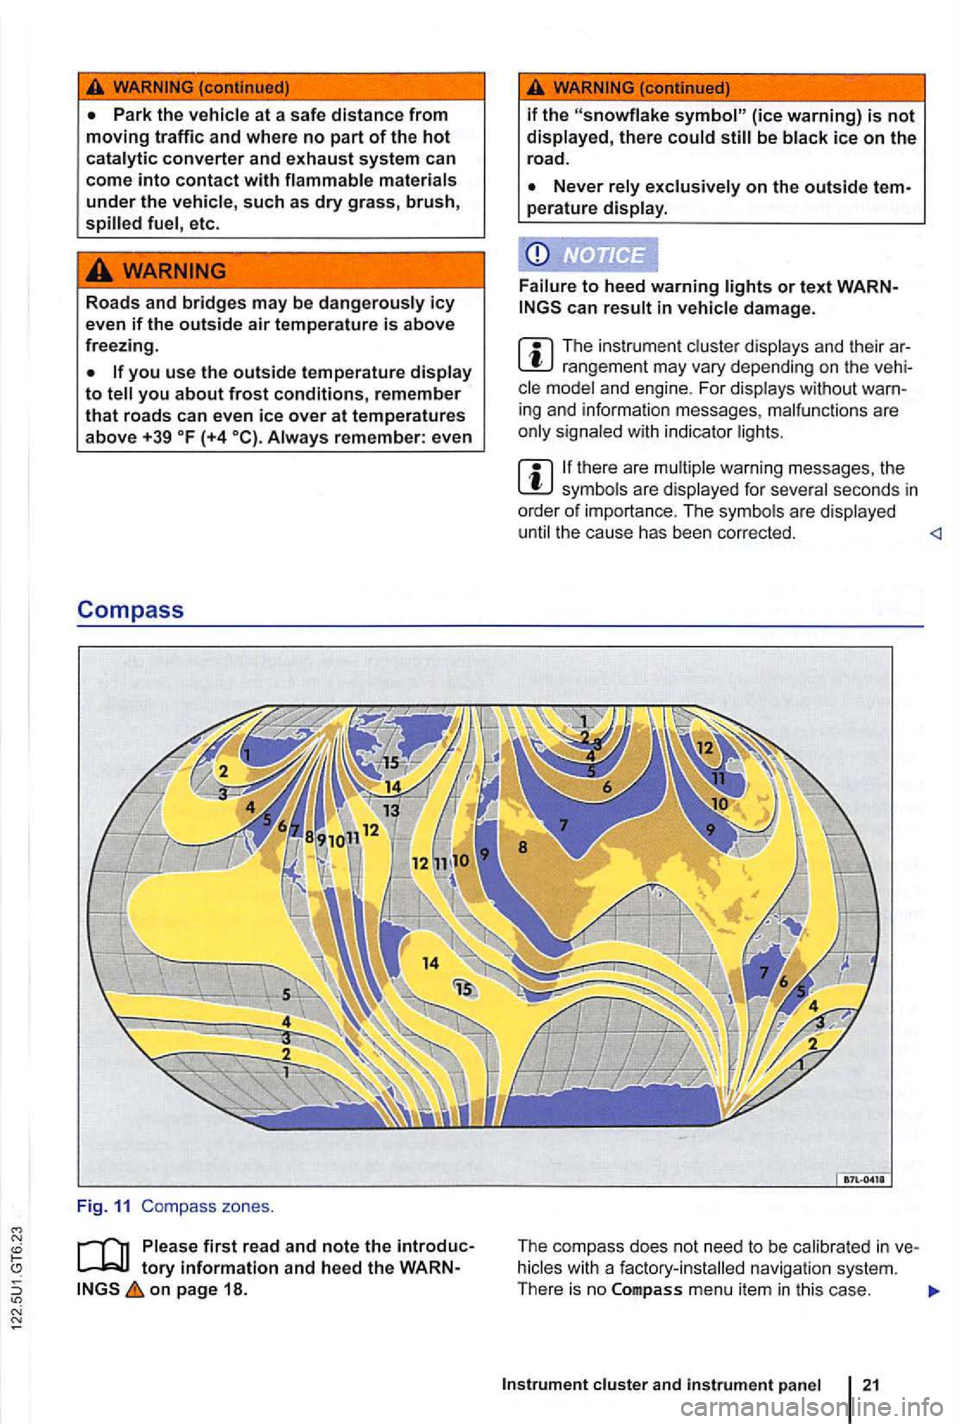
Compass
Fig . 11 Compass zones .
on page 18.
if the be
perature display .
to heed warning or text can in damage .
The ins trum ent rangeme nt may vary depending on the and engine . F or displays without
ther e are warning messages , th e are displayed for
the ca use ha s bee n co rrected.
T he re is no
Instrument cluster and instrument panel 21
Page 157 of 516
Adjusting the seating position
Introduction
this section find inf ormation about:
Examp les
of improper seat ing pos itions . . . 59
Pr ope r seating position . . . . . . . . . . . . .
Manual contr ols on the driver and passe nger
seat . . . . . . . . . . . . . . . . . . . . . . . . . . . . . . . . . . . 61 Ele ctrica l co ntr ols o n the driver and front
passenger seats . . . . . . . . . . . . . . . . . . . . . . . . 62
Adj ustin g
the head restra ints . . . . . . . . . . . . . 63
R emoving and re in stalling head restraints . . . 64
Adj usting the stee
ring whee l position . . . . . . . 65
Cen te r armrest . . . . . . . . . . . . . . . . . . . . . . . . . . 66
Number of seats
Th e vehicle
has a t otal of 5 seat ing posit ions: 2 in front and 3 in the rea r. Eac h seating pos ition has a
safety belt.
More information:
funct ions 67
page 69
Ai r ba g syste m 82
safety and child restraints
WARNING
Improper seat ing pos itions increase the risk of severe or fatal injuries in a crash or other accidents,
times .
Never
Always secure children in the vehicle with a n approved and suitable restraint system appropriate for their age, weight, and height 82 .
Always keep your feet on the in front of the seat. Never rest them on the seat,
Always adjust seat , safety belts, and head straints properly before driving and make sure that
inches (25 em) betw een the front pa ssenger' s breastbone and the in strument panel.
ches (25 em) between your breastbone and the steering wheel.
Adjust the driver's seat so that you can push the pedals while keeping your knee(s) slightly bent. The
di stance to the instrument panel in the knee
a rea must be at least 4 inche s
these requirements cannot be met for physical reason s, contact an authorized
Volk swagen dealer or an auth orized gen Facility to see whether adaptive equipment is avai la bl e.
Always hold the steering wheel on the side of the steering wheel rim with your hands at the 9 o'clock and 3 o'clock positions to help reduce the risk of personal injury if the driver's airbag inflates .
Never hold the steering whee l a t the
12 o'clock position or with your hands at e r places inside the steering whee l rim or on the steering wheel hub. Holding the steering wheel the wrong way can cause serious rie s to the hand s, arm s, and head if the
Pointing the steer ing whe el t oward your face dec reases the of the driver's bag to h elp protect you in a
Never drive with backrest s reclined or ed back farthe r than necessary to drive
Page 225 of 516
Adaptive Front Lighting
The Adaptive Front Lighting works only
with the low beams switched on and only at
speeds above about 6 mph
improve road
vehicles equipped with the Adaptive Front
Lighting the feature is switched on and off
via the Assistant menu
the roadway. Th e headlights re
t urn to their original position after a delay , depend
in g on the speed of the
Crashes and other accidents can happen when you cannot see the road ahead and when you cannot be seen by other motorists.
not be able to see
f a r enough ahead for safety, especially at dusk or when it is dark . Always switch on the low-beam headlights at dusk or when it is dark.
The taillights do not come on when the daytime running lights are switched on. Avehicle without
cool or hum id weather, th e insides of th e headlights , th e rea r li ghts, and turn signals
can temporarily fog up. This is normal and does
not affect the service life
of the vehic le's lightin g
system.
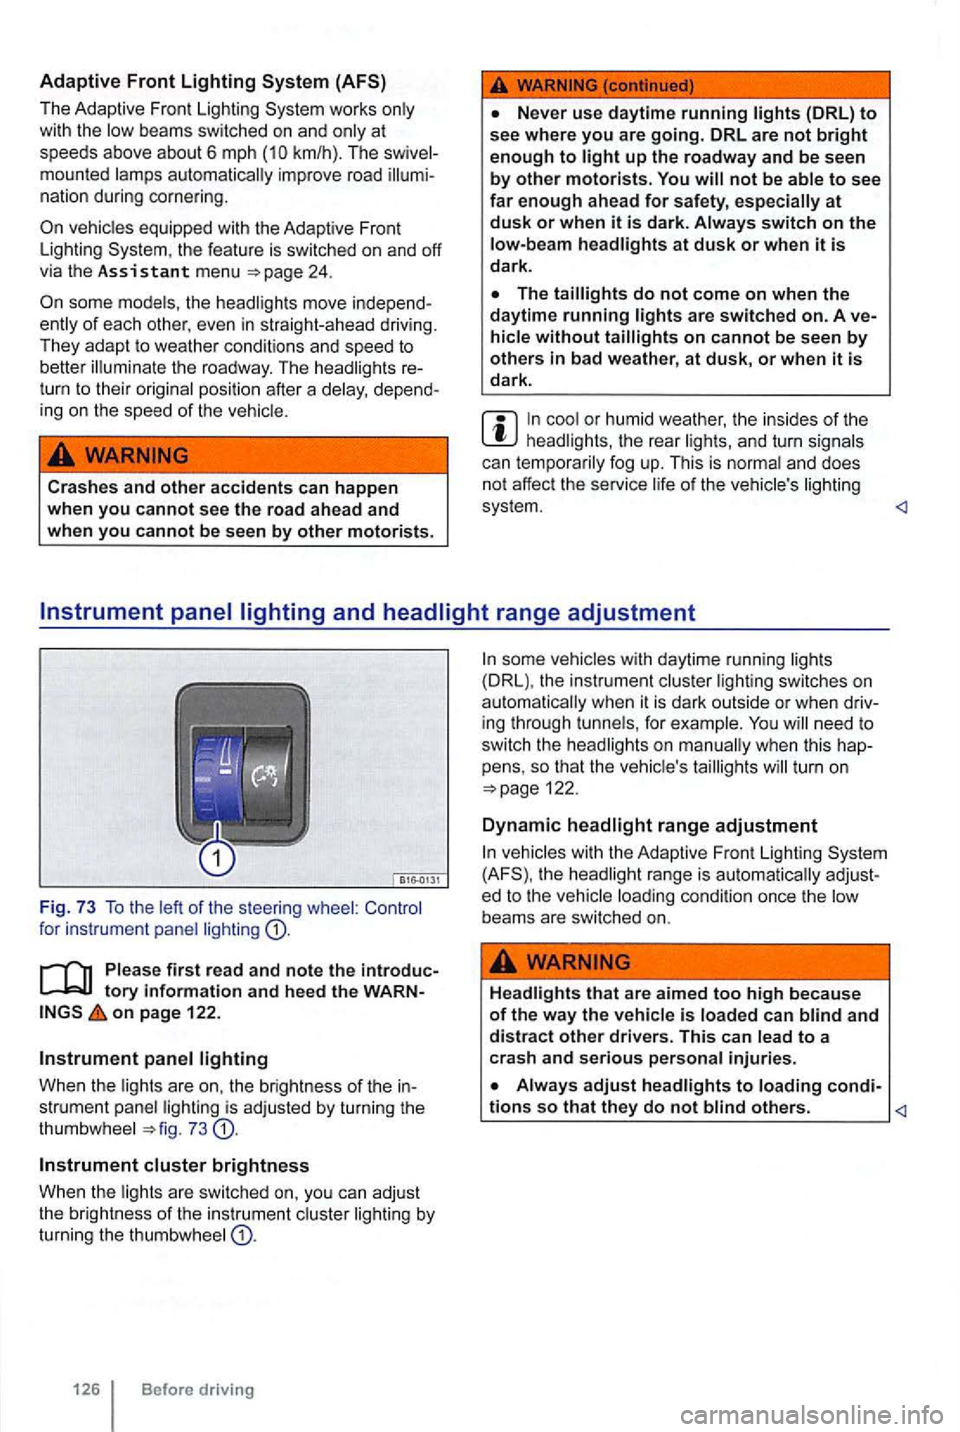
Instrument panel lighting
Whe n the lights are on, the brightness of the in
strument panel lighting is ad justed by turning the
thumbwhee l
Instrument cluster brightness
Whe n t he lights are sw itched on, you can adjust
the brightness of the in strument cluster li ghting by turning the thumbw hee l
Before driving
some vehicles with daytime running lights
(DRL), the instrument lighting switches on
need to
switch the head lights on
turn on
the headlight range is
Headlights that are aimed to o high because of the way the vehicle is loaded can blind and distract other drivers. This can lead to a
crash and serious per sonal injuries.
Always adjust headlights to loading condi-tions so that they do not blind others.
Page 309 of 516
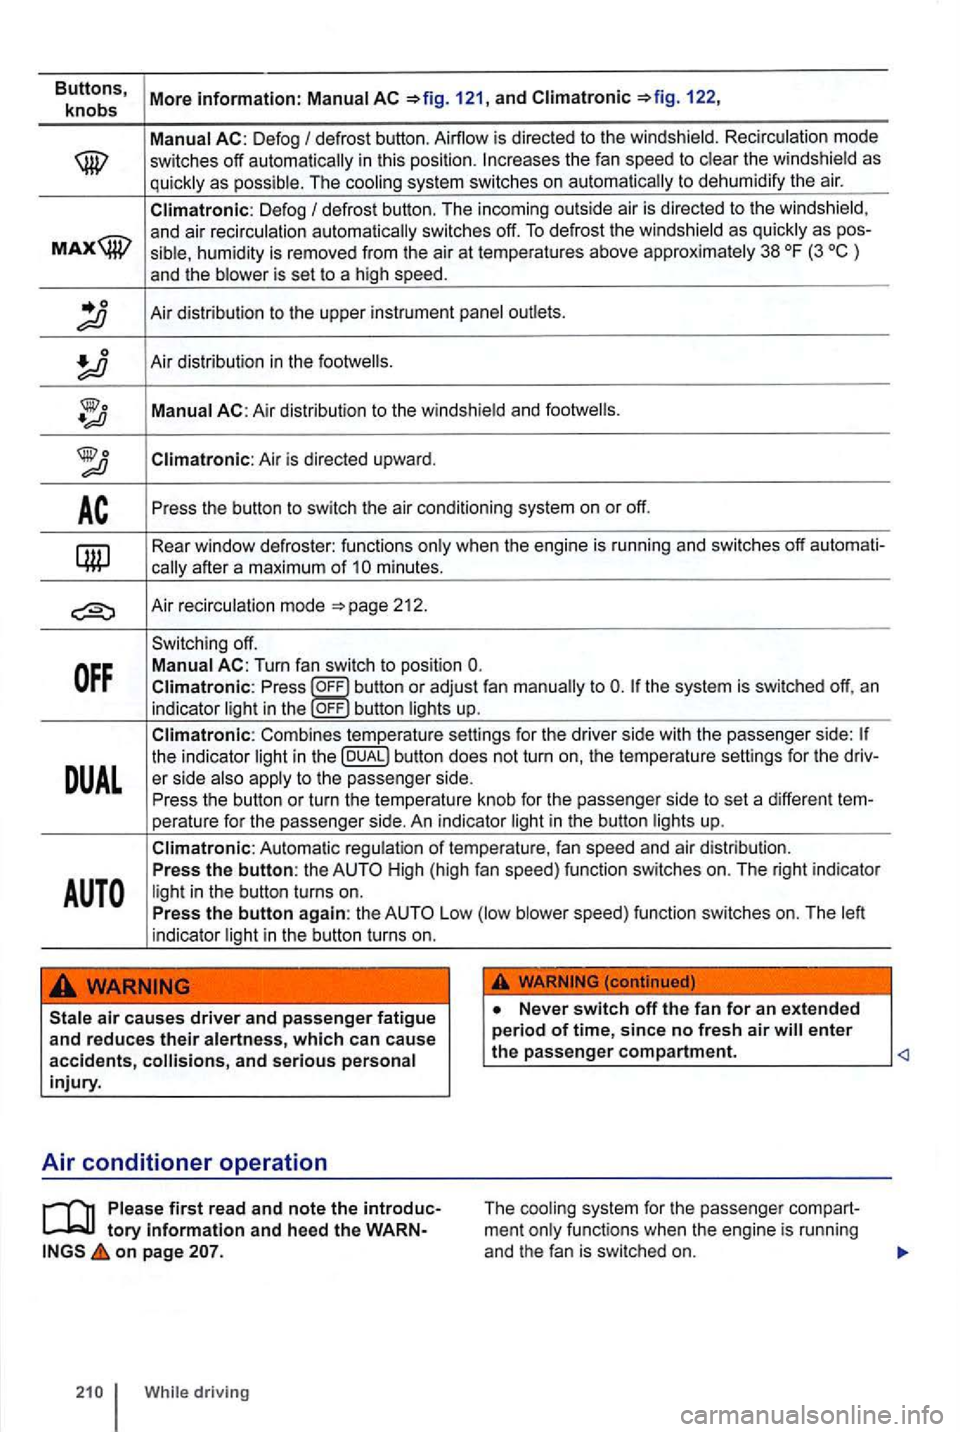
Buttons, More information: AC 121, and 122,
knobs
defrost button. Airflow is direc ted to the windshield. Recirc u lation mode switches off autom atically in thi s position. th e w indshie ld as q u ick ly as possib le. The coolin g sys te m sw itc hes on automat ica lly to dehu mid ify th e a ir.
Climatronic: D efog de frost button. The incom ing outside air i s d irected to th e w inds hie ld, a nd a ir rec irc ulatio n aut omat ically switches off. To defrost th e winds hie ld as quickly as pos -humi dity is removed from the air at temperatu res above approximately 38 °F (3 is set to a hig h speed .
Air dist ribution to th e upper instrument panel outlets.
Air di strib ution in th e
Climatronic: Air is d irected upward.
Press the bu tton to switch the air conditioni ng system on or off.
Rea r wi ndow defroster: fu nc tions
A ir reci rculat io n m od e 212.
Sw it c hing off.
Climatronic: Pr ess to bu tton lights up.
Combines te mperat ure settings for the driver side with the passenger side:
DUAL
th e in di cato r
High (h igh fan speed) fu nc tion switches on. The right indicator
ligh t in th e button turns on.
Pre ss the button again: the Low blower speed) fu nction switches on. The
Ne ver switch off the fa n for an extended period of time, since no fres h a ir ente r
__
Air conditioner operation
Please first read and note the introduc tory information and heed the WARNon page
While d rivi ng T
h e coo ling system for the passenger compart
ment
Page 417 of 516
Fuses in the vehicle
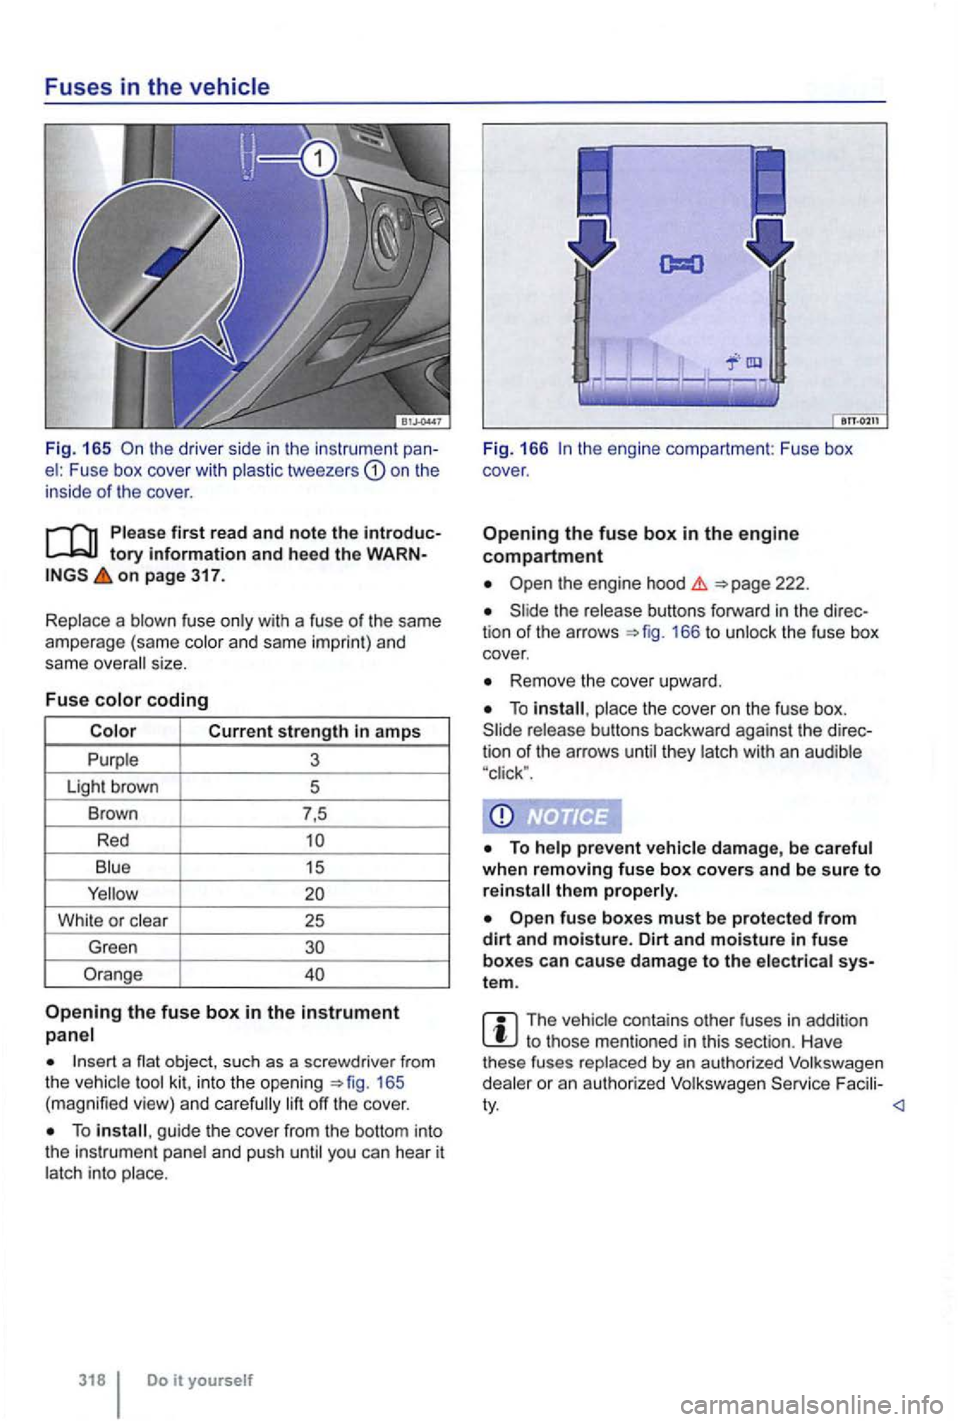
Fig. 165 th e drive r side in the instrument el : Fuse box cove r with plastic tweeze rs on the
inside of t he cover .
on page 317.
Replace a blown fuse only with a fuse
of the same
ampe rage (same color and same impri nt) and
same overa ll size .
Fu
se colo r coding
Blu e
15
Whi te or c lear
25
Green
Orange
Opening the fuse box in t h e instrument
panel
1 65
( m agnified view) and care fully lift off the cover .
To guide the cover from the bottom into
the instrument panel and push until you can hear it
latch int o place .
318 Do it you rself Fi
g. 166
the release buttons forward in the 166 to unlock the fuse box
cover.
Remove the cover upward.
To place the cover on the fuse box.
th em p rope rly.
fuse boxes must be protecte d from dirt an d moisture. Dirt an d moisture in fu se
boxes can cause damage to the elect rica l tem .
The vehic le con tai ns other fu ses in add it ion to those mentioned in this section . H av e
these fuses replaced by an autho rized Volkswage n
dealer or an autho rized Volkswagen Facili -