2010 VOLKSWAGEN GOLF headlight bulb
[x] Cancel search: headlight bulbPage 221 of 516
Lights and vision
Lights
lights . . . . . . . . . . . . . . . . . . . . . . . . . . 122
Turn signal lever and high beam switch . . . . . 123
Switching li ghts on and off . . . . . . . . . . . . . . . . 124
lights and Vision functions . . . . . . . . . . . . . . . . 125
and reading lights . . . . . . . . . . . . . . . . . 127
A lways obey loca l ve
hicle lighting laws.
The drive r is always responsible for the correct
headlight settings.
More information:
Exterior views
Volkswagen
Changing a light bulb
Headlights that are aimed too high and
an d distract other drive rs. This can lea d to a crash and serious personal injuri es .
Always make sure that are properly adjusted .
or distrac t other drive rs .
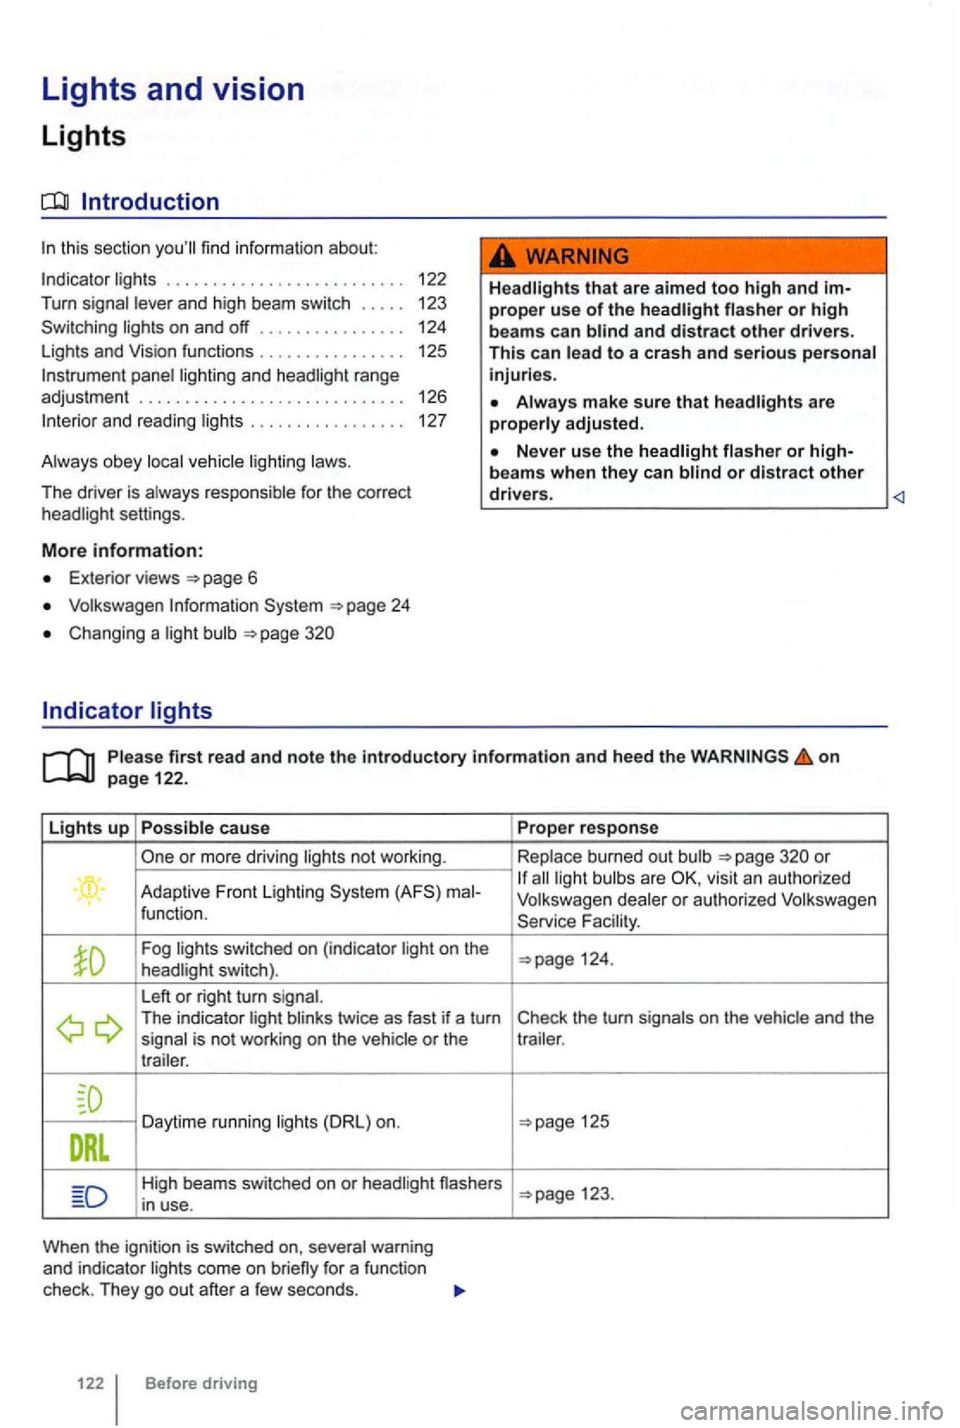
Lights up Possible cause
or more driving lights not wor king .
. Adaptive Front lighting ma l-
function.
Fog lig hts switched on (ind icator light on the
headlight switch).
L eft
or right turn signal. The indicator light blinks twice as fast if a turn
signal is not working on the vehicle or the
t r a iler .
Daytime running lights
High beams switched on or headl ight nashers
i n u se.
When the ignit io n is sw itched on, several warning
and indicator lights come on
122 Before driving Prope
r response
Replace burn ed out bulb
all light bulb s are
Fa cility .
125
123.
Page 222 of 516
sion and serious personal injury.
on emergency flashers and set up a warning
can result in vehicle damage.
Discharge head lig ht s provide bright, uniform lightin g to help you
see and be seen. The light comes from an electric
arc between 2 electrodes in the gas-filled bulb.
lamp's
contro l un it then inc reases th e vo ltage to keep th e
arc 's bright ness consta nt. However , the commo nly
called bulb s will also ultimately burn out. Before they burn o ut, lamps can flicker . A
message will then appear in the MFD. This is your
r emi nder to see an aut ho rized Volkswagen dealer or an authorized Volkswage n
Turn
tory information and heed the on page 122.
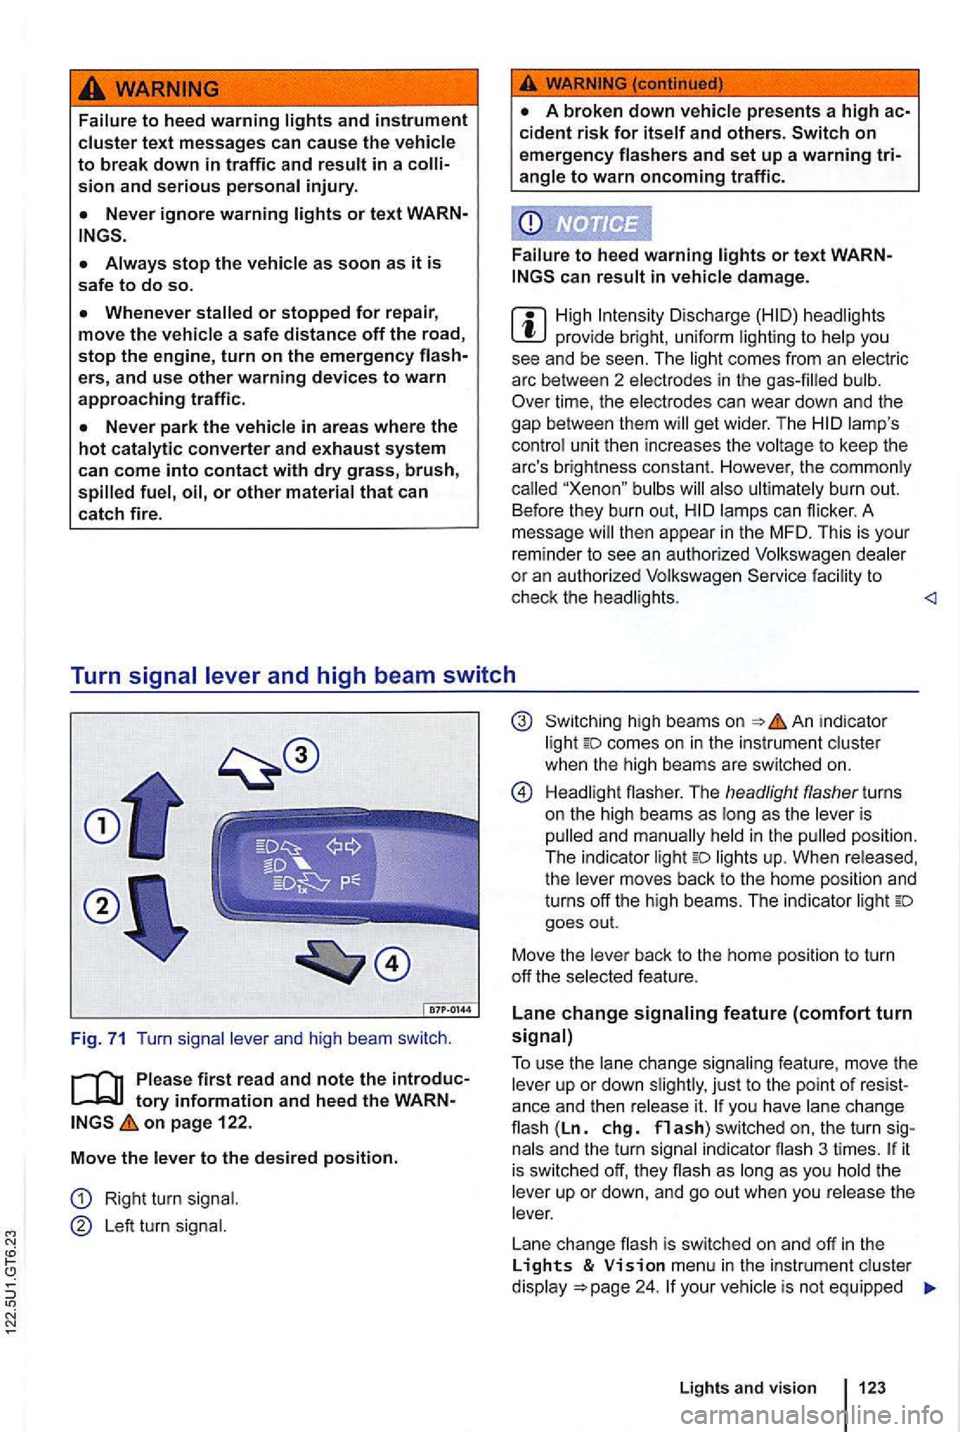
Move
the l ever to the des ired position.
Right turn signal .
Le ft turn signal.
high bea ms on in dicator
light comes on in the instrument cluster
when the hig h beams are switc hed on.
H ead li gh t flasher. The headlight flasher turns
on the high beams as long as the leve r is
p ulled and man ually held
in the pulled position .
The indica tor light lights up. When released,
the lever moves back to the home position and
turns off the high beams. The indic ator light goes out.
Move the lever back to t
he home posit io n to turn
off th e se lected feature.
Lane change signaling feature (comfort turn signal)
T o use
the lane change sig n aling feature , move the
lever up or down slightly , just to th e point of you have lane cha n ge flash (Ln. chg. flash) switched on, the turn si gnals and the turn sign al in dicator flash 3 ti mes . it is sw itched off, they flash as long as you hold th e
leve r up or down, and go out when you release the
lever.
L ane change flash is switched on and off
in the Lights & menu in the instr ument cluster
d isplay your vehic le is not equipped
Lights and vision 123
Page 223 of 516
with the Lights & Vision menu, the feature can
be deactivated by an authorized Volkswagen deal
er or authorized Volkswagen Service Facility.
use of high beams can distract and blind others, causing accidents and serious injuries.
299.
Switching
The indicator twice as fast if a turn signa l bulb is burned out.
High beams can only be switched on when low beams are on.
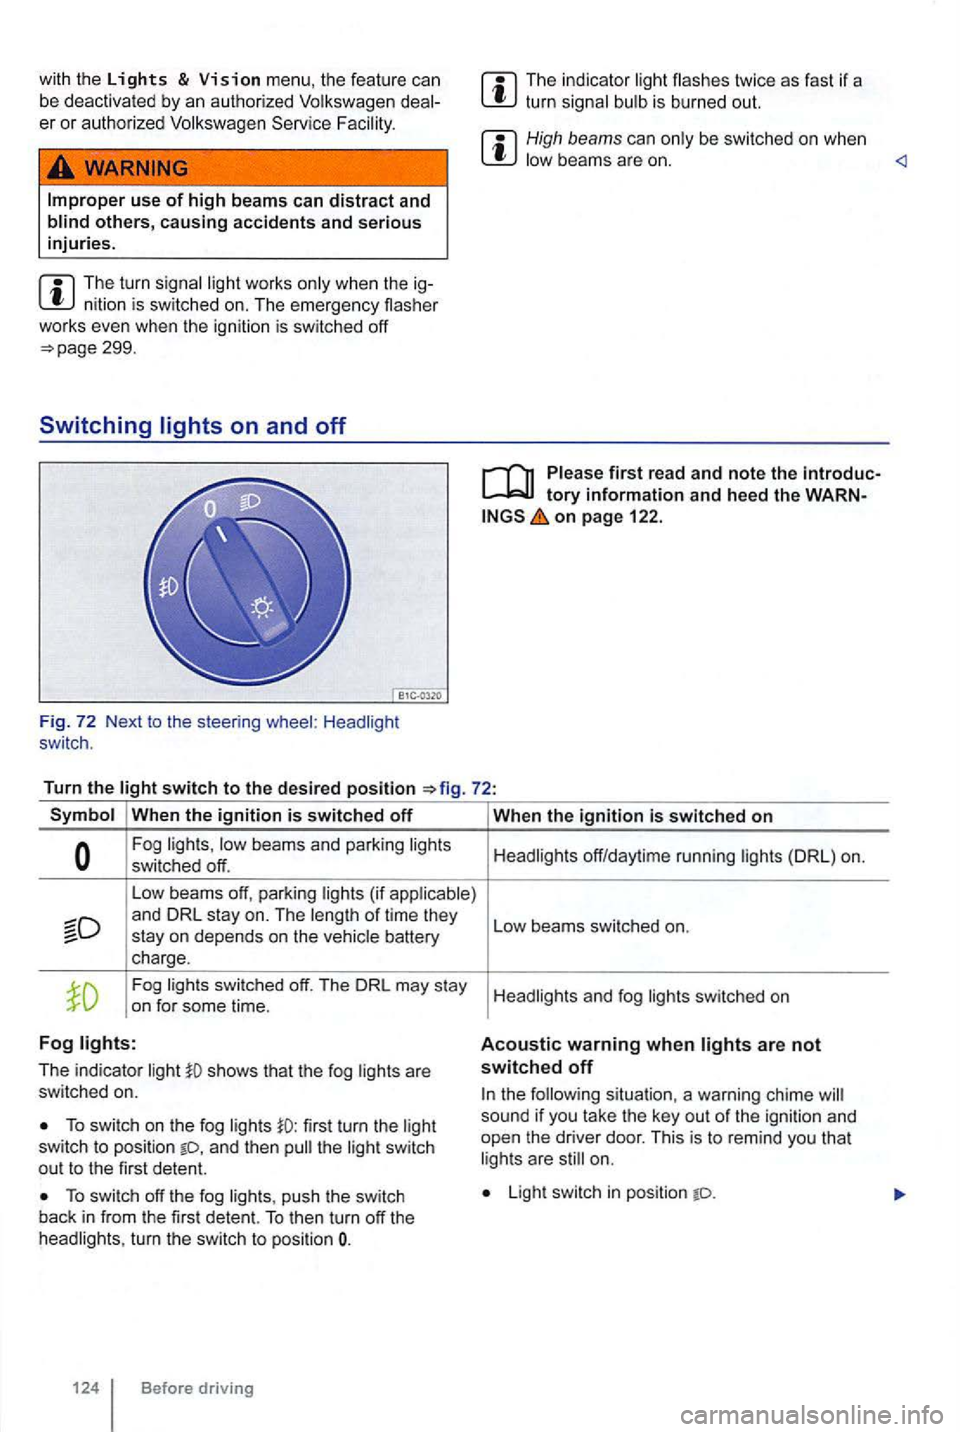
Turn
the switch to the desired position
Symbol When the ignition is switched off
Fog lights, low beams and parking lights
switched off.
Low beams off, parking lights (if applicable)
Fog lights switched off. The DRL may stay
on for some time.
Fog lights:
The indicator li ght shows that the fog lights are
switched on.
To switch on the fog lights first turn the light
switch to posi tion and then the li ght switch
out to the first detent.
To switch off the fog lights , push the switch
back in from the first detent. To then turn off the
headlights , turn the switch to position
124 Before driving When
the ig
nition is switched on
Headlights off/daytime running lights (DRL) on.
L
ow beams switched on.
H eadlights and fog
switched on
Acoustic warning when lights are not switched off
the following situation, a warning chime sound if yo u tak e th e ke y out of the ignition and
open the driver door. This is to remind you that
l ig hts are still on.
Light switch in position
Page 419 of 516
Changing
Introduction
this sec tion
bulbs in th e body of th e vehic le . . . . . . . . . . . . . . . . . . . . . . . . . . . . . . . . 325
C hangi ng t he lice nse plate
lig ht bulb . . . . . . . . 32 6
C hang ing a light bulb
requ ir es a certa in am ount of
sh ould a lwa ys kee p a box in the ve h icle with th e rep lace ment bulbs require d f or traffic safety .
R ep lacemen t bulbs are ava ilab le from you r autho r
i z ed
Additional
E xte rior views
Lig hts a nd 122
P repa ra tions for workin g in the eng ine compart
m en t
too l kit
F uses
Stop Always read and heed the before doing any work in the engine
c ompartment
Always let a burned out
of the necessary procedures. particular, never remove a headlight unless you know how to carry out the job and have the correct tools and bulbs.
you are uncertain about what to do,
have the work performed by an authorized
Volkswagen dealer, an authorized
and H7 bulbs replaced by a qualified
technic ian .
Page 420 of 516
N
After replacing a headlight bulb or other light bulb, always make sure that the rubber covers or plastic caps have been properly and secure-
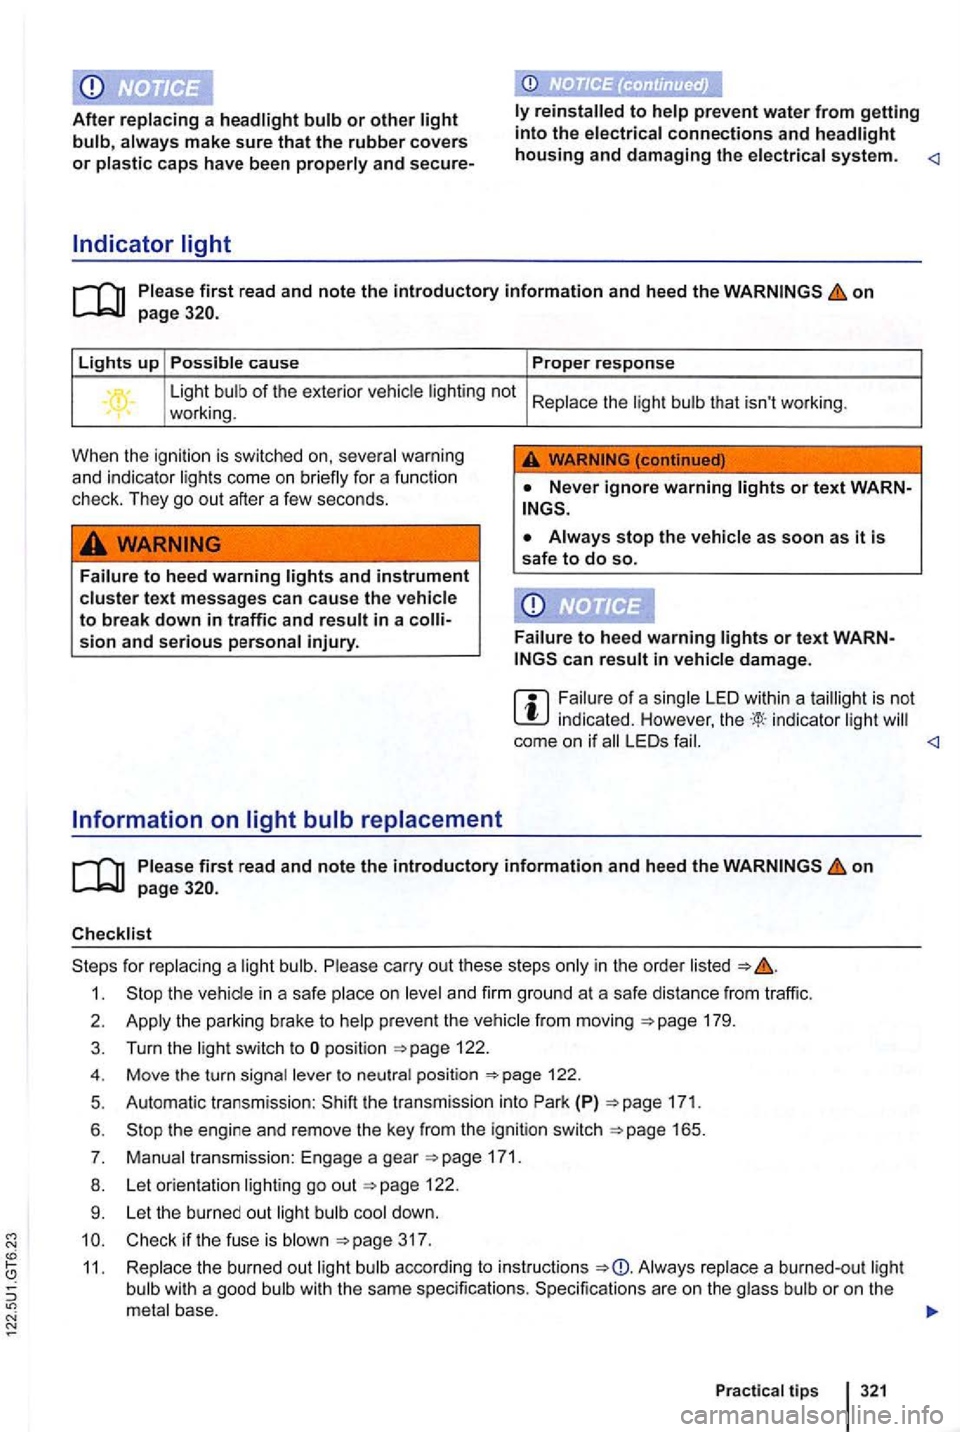
Indicator light
to help prevent water from getting into the electrical connections and headlight housing and damaging the electrical system.
on
Lights up Possible cause Proper response
Light bulb of the exterior vehicle lighting not Replace the light bulb that isn't working .
working .
When the ignition is switched on, several warning
and indicator lights come on briefly for a function
check . They go
out after a few seconds.
WARNING
Failure to heed warning lights and instrument cluster text messages can cause the vehicle to break down in traffic and result in a
can result in vehicle damage.
indicated. However, indicator light come on if LEO s fail.
on
Checklist
for replacing a light bulb. Please carry out these steps only in the order listed
1.
179.
3.
4.
5.
6 .
7.
8.
9 .
position
122 .
Automatic transmission :
the transmission into Park (P) 171.
the engine and remove the key from the ignition switch 165.
Manual transmission: Engage a gear
122.
Let the burned
out light cool down.
Check
if the fuse is blown 317 .
Replace the burned
out light according to
Practical tips 321
Page 421 of 516
Checklist (continued)
12. Never touch the glass
of the light bulb with your bare hands. Fingerprints can cloud the out er surface of the light bulb when heated , affecting the lighting power, clouding the reflector, and reduc ing
the bright ness .
1 3 . Always make sure tha t the new bulb works .
cor
rectly ; the connection plug may not be complete ly seated ; the corresponding fuse may be burned
out ; or the bulb may be bad .
14. Always have the headlights adjusted by an authorized Volkswage n dealer or an author ized Vol ks
wagen Facility after a headlight bulb has been replaced.
Disregarding the safety-related checklist may
lead to accidents and serious personal injuries.
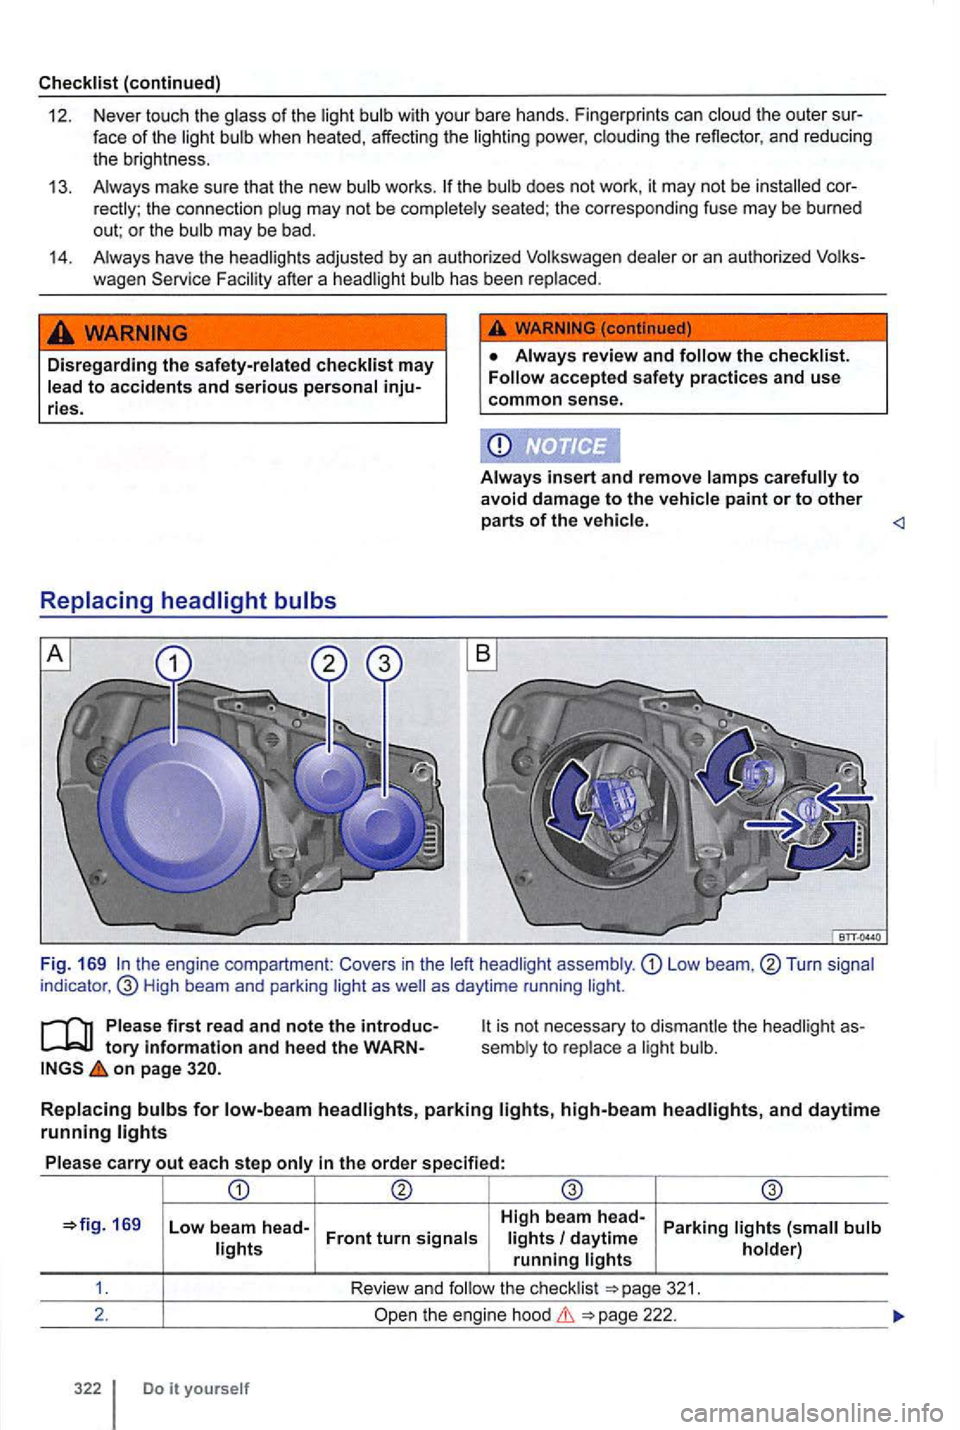
Replacing headlight bulbs
the checklist. Follow accepted safety practices and use common sense .
Always insert and remove lamps carefully to avoid damage to the vehicle paint or to other parts of the vehicle.
on page
169 Low be am head- High
beam head-
Parking
321.
2 .
the engine hood
Do
Page 423 of 516
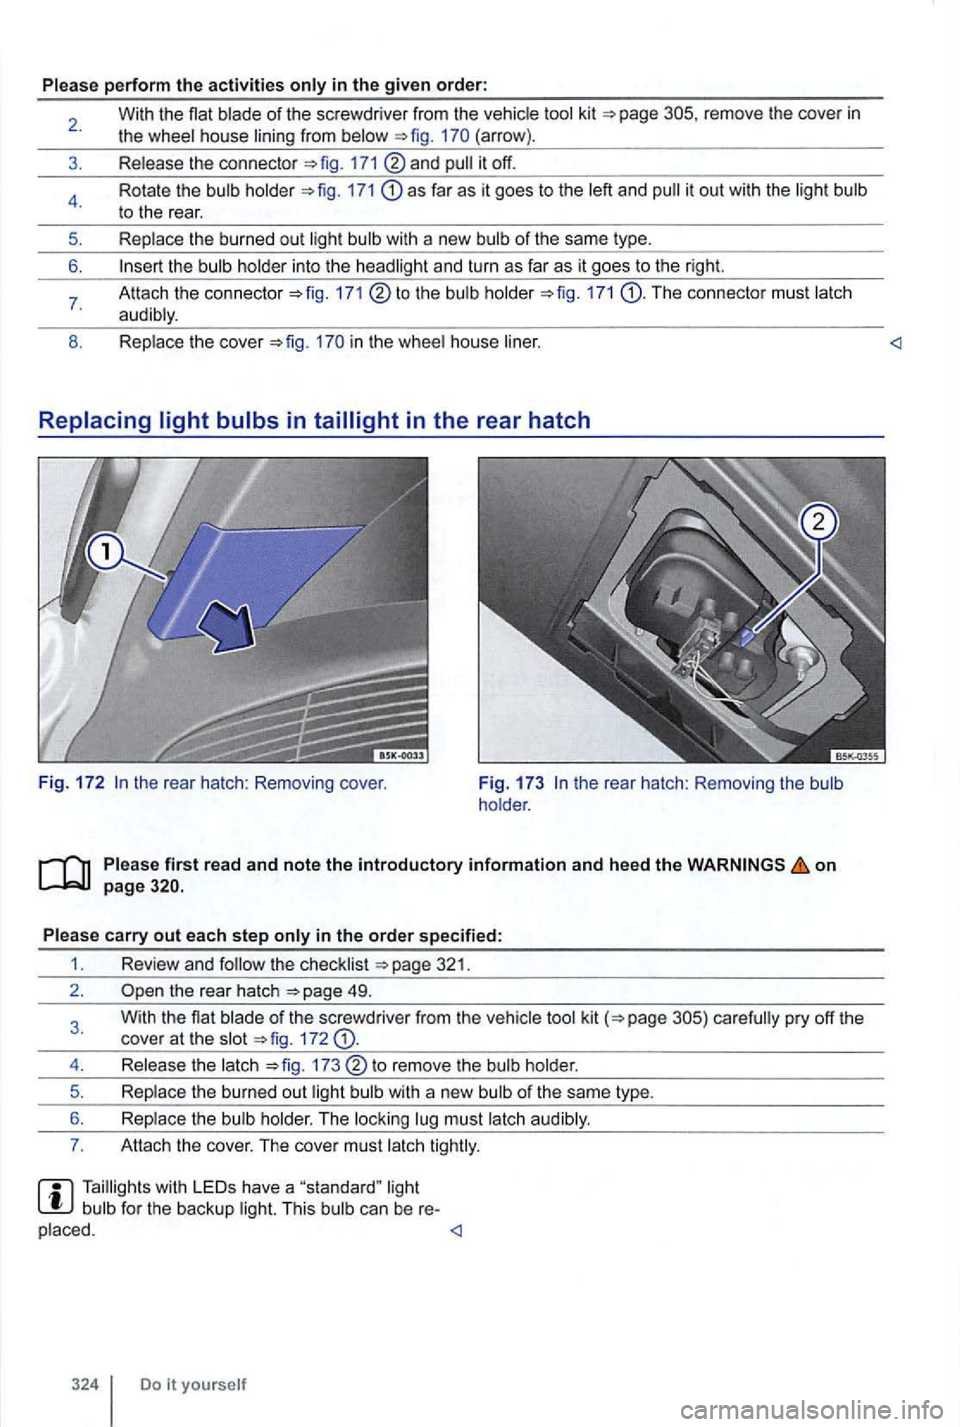
Please perform the activities
remove the cove r in the wheel house lining from (arrow) .
Release the connecto r
and
171 as far as it goes to the left and
the bulb holder into the headlight and turn as far as it goes to the right.
Attach the connector to the bulb holder The connecto r mus t latch
audibly .
Replace
the cover in the whee l house
F ig. 172 the rear hatch : Removing the bulb
ho lder.
Please first read and note the introductory information and heed the on page
in the order specified:
1 . Review and
the rear hatch
of the screwdriver from the vehicle tool kit 172
Release the latch to remove the bulb holder.
Replace the burned out light bulb with a new bulb
of the same type.
Replace the
bulb holder . The locking lug must latch audib ly .
Attach th e cover . The cover must latch
Do it yourself
Page 437 of 516
Shifting . . . . . . . . . . . . . . . . . . . . . . . . . . . 175
Towing . . . . . . . . . . . . . . . . . . . . . . . 331 Vehicle key safety in terlock . . . . . . . . . . . 166
B
Background . . . . . . . . . . . . . . . . 127
Brak ing assistance systems . . . . . . . 185
Battery Rep laceme nt in rem ote cont rol vehicle key 39
Before taking the vehicle in to the shop . . 297
Belt pretensioners
D isposal . . . . . . . . . . . . . . . . . . . . . . . . . . .
Belt warning . . . . . . . . . . . . . . . . . . . . .
Bottle holder . . . . . . . . . . . . . . . . . . . . 161
Brake
Brake booster . . . . . . . . . . . . . . . . . . . . . . 184
Brake nuid . . . . . . . . . . . . . . . . . . . . . . . . 187
Brake nuid level . . . . . . . . . . . . . . . . . . . . 187
Brak e pads . . . . . . . . . . . . . . . . . . . . . . . . 183
Braking assistance systems . . . . . . . . . . . 185
Bre aking
in the brake pads . . . . . . . . . . . 183
Chang ing brake nuid . . . . . . . . . . . . . . . . 188
brake . . . . . . . . . . . . . . . . . . . . . . 18 2
Warning l igh t . . . . . . . . . . . . . . . . . . . . . .
Brake Assist (BAS) . . . . . . . . . . . . . . . . . . . 185
Brake booster . . . . . . . . . . . . . . . . . . . 184 , 185
Brake fluid . . . . . . . . . . . . . . . . . . . . . . . . . . 187
Spec ificati ons . . . . . . . . . . . . . . . . . . . . . . 187
Brake
system . . . . . . . . . . . . . . . . . . . . . . . . 185
Malfunction . . . . . . . . . . . . . . . . . . . . . . . 184
Braking . . . . . . . . . . . . . . . . . . . . . . . . . . . . . 179
Braking assistance systems . . . . . . . . . . . 18 5
Break-in period
E ngine .
.......................... 283
The fir st few miles (k ilometers ) . . . . . . . . 283 . . . . . . . . . . . . . . . . . . . . . . . . . . . . . 263
Breakdown the vehicle . . . . . . . . . . . . . . . . 299
Breaking in
B rake pads . . . . . . . . . . . . . . . . . . . . .
. . 183
Breaking in the brake pads
Care
. . . . . . . 136
Catalytic
converter . . . . . . . . . . . . . . . . . . . 296
I ndicator light . . . . . . . . . . . . . . .
. . . . 157
. . . . 288
Center
armrest . . . . . . . . . . . . . . . . . . . . . . . . 66
Center
console . . . . . . . . . . . . . . . . . . . . 12, 13
Changing a
light bulb Indicator light . . . . . . . . . . . . . . . . . . . . . . 321
Changing a wheel . . . . . . . . . . . . . . . . . . . .
. . . . . . . . 313
Wheel bolls 311 Wheel change . . . . . . . . . . . . . . . . . . . . . 315
Chang i
ng bulbs changing light bulbs . . . . . . . . . . . . .
Changing light bulbs . . . . . . . . . . . . . . . . . . fr on t bumper . . . . . . . . . . . . . . . . . . . . . 323 . . . . . . . . . . . 325 th e headlight . . . . . . . . . . . . . . . . . . . . 322 the rear hatch . . . . . . . . . . . . . . . . . . . . 324 License plate ligh t . . . . . . . . . . . . . . . 326 . . . . . . . . . . . . . . . . . . 324, 325
Characteristics Rad io reception . . . . . . . . . . . . . . . . . . . . 292
Checking
leve l . . . . . . . . . . .
. . . . . . . . . . . . 31 Gelling ready . . . . . . . . . . . . . . . . . . . . . . . 31 an eme rgen cy . . . . . . . . . . . . . . . . . 299
Lifting veh icle with jack . . . . . . . . . . . . . . 313
Light bulb replacement . . . . . . . . . . . .
. . 321 for changing a wheel 311 Safety belts . . . . . . . . . . . . . . . . . . . . . . . . 73
U phol stery . . . . . . . . . . . . . . . . . . . . . . . 252
Checks
while refueling . . . . . . . . . . . . . . 217
Child res
traint and fron t airbag . . . . . . . . . . . . . . . . . . . .
Child safety lock . . . . . . . . . . . . . . . . . . . . . . 48