2010 VOLKSWAGEN BEETLE ESP
[x] Cancel search: ESPPage 50 of 138
Downloaded from www.Manualslib.com manuals search engine Electrical controls on the front seats ~~~~~~~~~~~~-----------------------
®
651<-()590
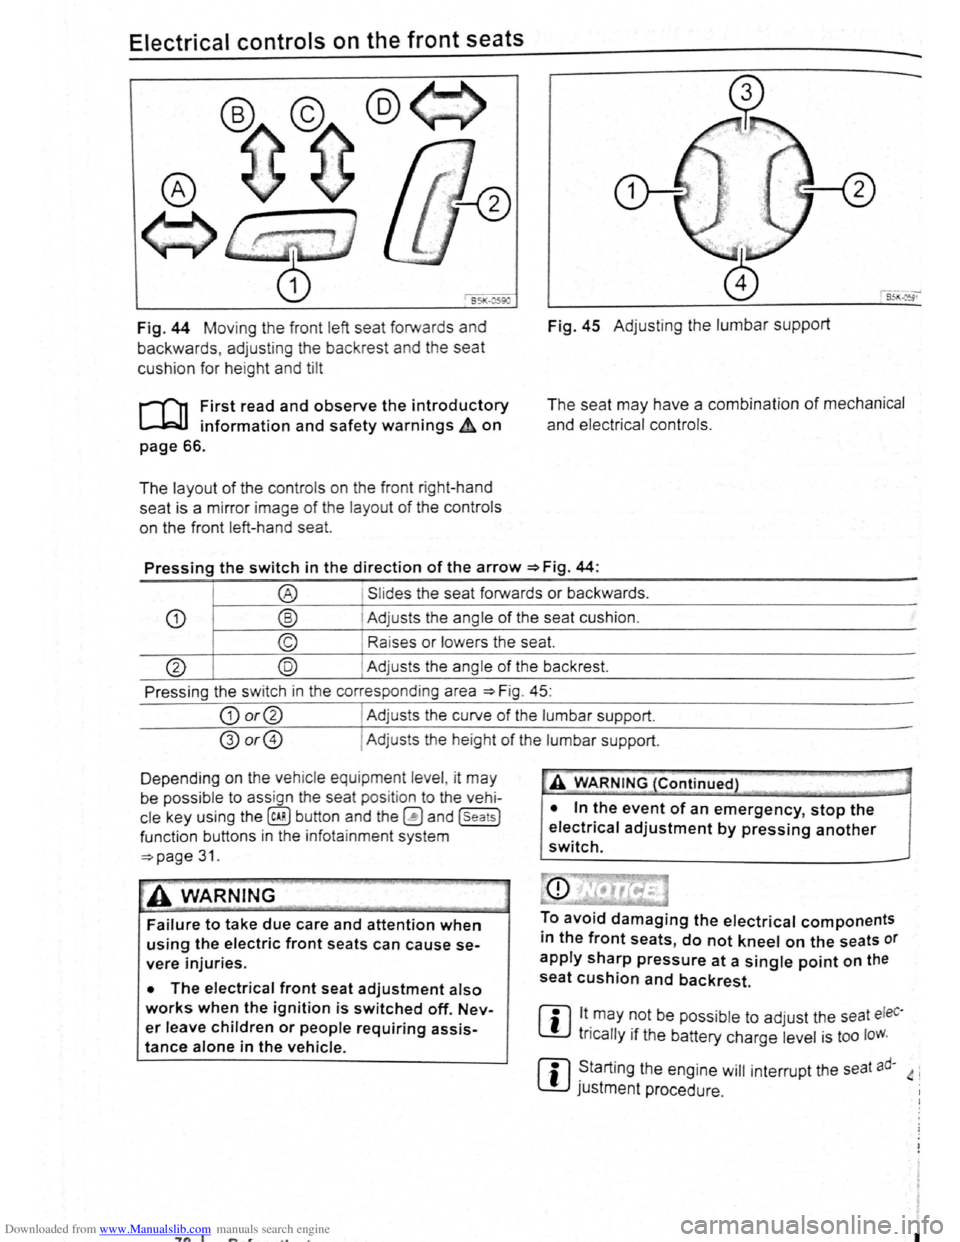
Fig. 44 Moving th e front left seat forwards and
backwards , ad j
usting the backrest and the seat
cushion for hei
ght and tilt
r-('n First read and observe the introductory
L-.lc:J.I information and safety warnings~ on
page 66.
The layout of the contro ls on the front r ight-hand
seat is a m irror image
of the layout of th e contro ls
on the front left-hand sea
t.
Fig. 45 Adju stin g the lumbar support
The seat may have a combination of mechanical
and electrical controls.
Pressing the switch in the direction of the arrow ~Fig. 44:
® Slides the seat forwards or backwards .
CD ® Adjusts the ang le of the seat cushion.
© Raises or lower s the seat.
@ @ Adjust s th e angle of the backrest.
Press ing the s witch in th e corresponding area
~Fig. 45:
CD or@ I Adjusts the curv e of the lumbar support.
@or@ I Ad justs the he ight of the lumbar support .
D epending on the veh ic le equ ipment leve l, it
may
be possib le to ass ign the seat pos it ion to the vehi
cle key using the @ill button and the~ and (seats]
funct ion buttons in the info ta inment system
~page 31.
~A WARNING
Failure to take due care and attention when
using the electric front seats can cause se
vere injuries.
• The electrical front seat adjustment also
works when the ignition is switched off. Nev
er leave children or people requiring assis
tance alone in the vehicle.
~"'A WARNING (Continued} --~ ~ -·-
• In the event of an emergency, stop the
electrical adjustment by pressing another
switch.
To avoid damaging the electrical components
in the front seats, do not kneel on the seats or
apply sharp pressure at a single point on the
seat cushion and backrest.
m lt.may ~Ot be poss ib le to adjust the seat eleC·
W tncally 1f the battery charge level is too loW.
m ~tarting the engine will interrupt the seat ad· 4 i
W JUStment procedure .
"7n I I
Page 52 of 138
Downloaded from www.Manualslib.com manuals search engine ~emoving and fitting head restraints
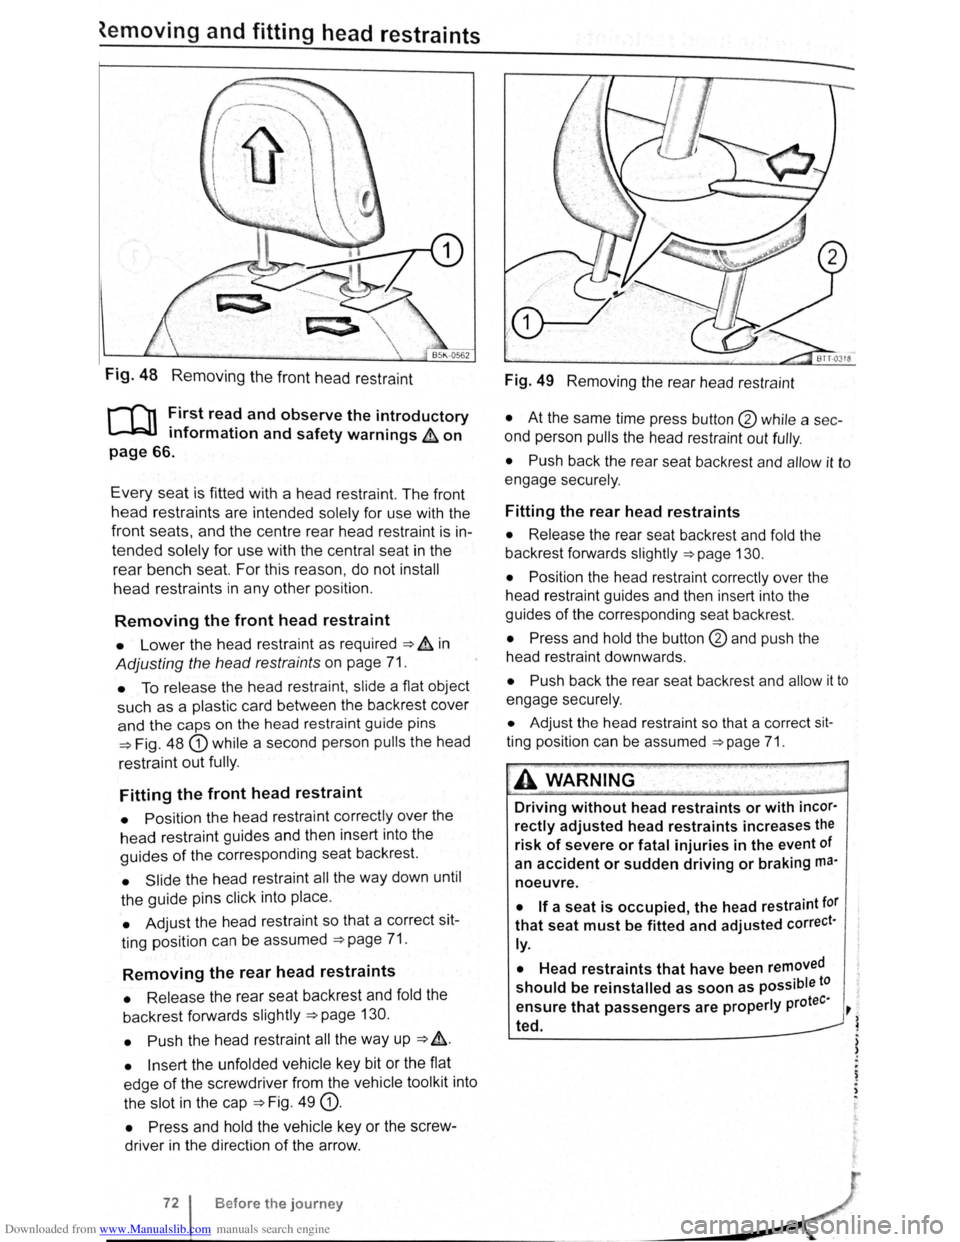
Fig. 48 Removing the front head restraint
r-f'n First read and observe the introductory
L-lcJJ information and safety warnings & on
page 66.
Every seat is fitted with a head restraint. The front
head restraints are intended solely for use with the
front seats, and the centre rear head restra int is in
tended solely for use with the central seat in the
rear bench seat. For this reason , do not install
head restraints in any other position.
Removing the front head restraint
• Lower the head restraint as required ===> & in
Adjusting the head restraints on page 71.
• To release the head restraint , slide a flat object
such as a plas tic card between the backrest cover
and the caps on the head restraint guide pins
===>Fig. 48 G) while a second person pulls the head
restraint
out fully .
Fitting the front head restraint
• Position the head restraint correctly over the
head restraint guides and then insert into the
guides of the corresponding seat backrest.
• Slide the head restraint all the way down until
the guide pins click into place .
• Adjust the head restraint so that a correct sit
ting position can be assumed
===>page 71.
Removing the rear head restraints
• Release the rear seat backrest and fold the
backrest forwards slightly
===>page 130.
• Push
the head restraint all the way up ===> &.
• Insert the unfolded vehicle key bit or the flat
edge
of the screwdriver from the vehicle tool kit into
the slot in the cap
===>Fig. 49 G).
• Press and hold the vehicle key or the screw
driver in the direction
of the arrow .
Before the journey
Fig. 49 Removing the rear head restraint
• At the same time press button @ while a sec
ond person
pulls the head restraint out fully .
• Push back the rear seat backrest and allow it to
engage securely .
Fitting the rear head restraints
• Release the rear seat backrest and fold the
backrest forwards slightly
===>page 130.
• Position
the head restraint correctly over the
head restraint guides and then insert into the
guides
of the corresponding seat backrest.
• Press and hold the button @and push the
head restraint downwards .
• Push back the rear seat backrest and allow it to
engage securely.
• Adjust the head restraint so that a correct sit
ting position can be assumed ===>page 71.
A WARNING .
Driving without head restraints or with incor·
rectly adjusted head restraints increases the
risk of severe or fatal injuries in the event of
an
accident or sudden driving or braking ma·
noeuvre.
• If a seat is occupied, the head restraint tor
that seat must be fitted and adjusted correct·
ly.
•
Head restraints that have been removed
should be reinstalled as soon as possible to
tee· ensure that passengers are properly pro ~
~ ted.
) )
.
~ . ,
Page 57 of 138
Downloaded from www.Manualslib.com manuals search engine Lights and vision
Lights
Introduction
Th1s ·hapt r c nt 1n inf rm lion on th e f llowing
utject :
lnd1 ator lamps . . <>-~ • .. .. .. .. .. • .. .. ~ • .. • .. • • .. •
Turn s1gnal and main beam lever ..•.......
Svvitching lights on and off .............. .
Lights
and v1sion -functions ............ .
~1ain beam ass1st . . . . . . . . . . . . . . . . ... .
Ma king or sv itching over headlights for
dnving abroad (travel mode) . . . . ........ .
Commg Home and Leaving Home functions
(onentation
lighting) . . . . . . . ............ .
Headl i
ght range control, instrument and
s~ itch lighting . . . . . . . . . . . . . . . ....
Interior and reading hght s ...............•.
105
106
107
108
110
111
111
112
113
Observe any country-spec•fic regu lations when us
ing veh1c le lighting.
The driver 1s responsib le for the correct headlight
pos1t1on and the correct headlight settm g.
Addit ional information and warnings:
• Exterior views ~page 6
• lnfotamment system ~page 31
• Changing bulbs ~page 362
Indicator lamps
A WARNING
Accidents and serious injuries can occur if
roads are not sufficiently illuminated and oth
er r oad users have d ifficulty seeing the vehi
cle, or cannot see it at all.
• Always switch the dipped beam head
lights on if it is dark, raining or visibility is
poor.
A WARNING
Setting headlights too high, and the incorrect
use of the main beam, could d istract and daz
zle other road users. This can lead to acci
dents and serious injuries.
• Always ensure that the headlights are ad
justed correctly.
• Never use the main beam or the headlight
flasher if other road users could be dazzled.
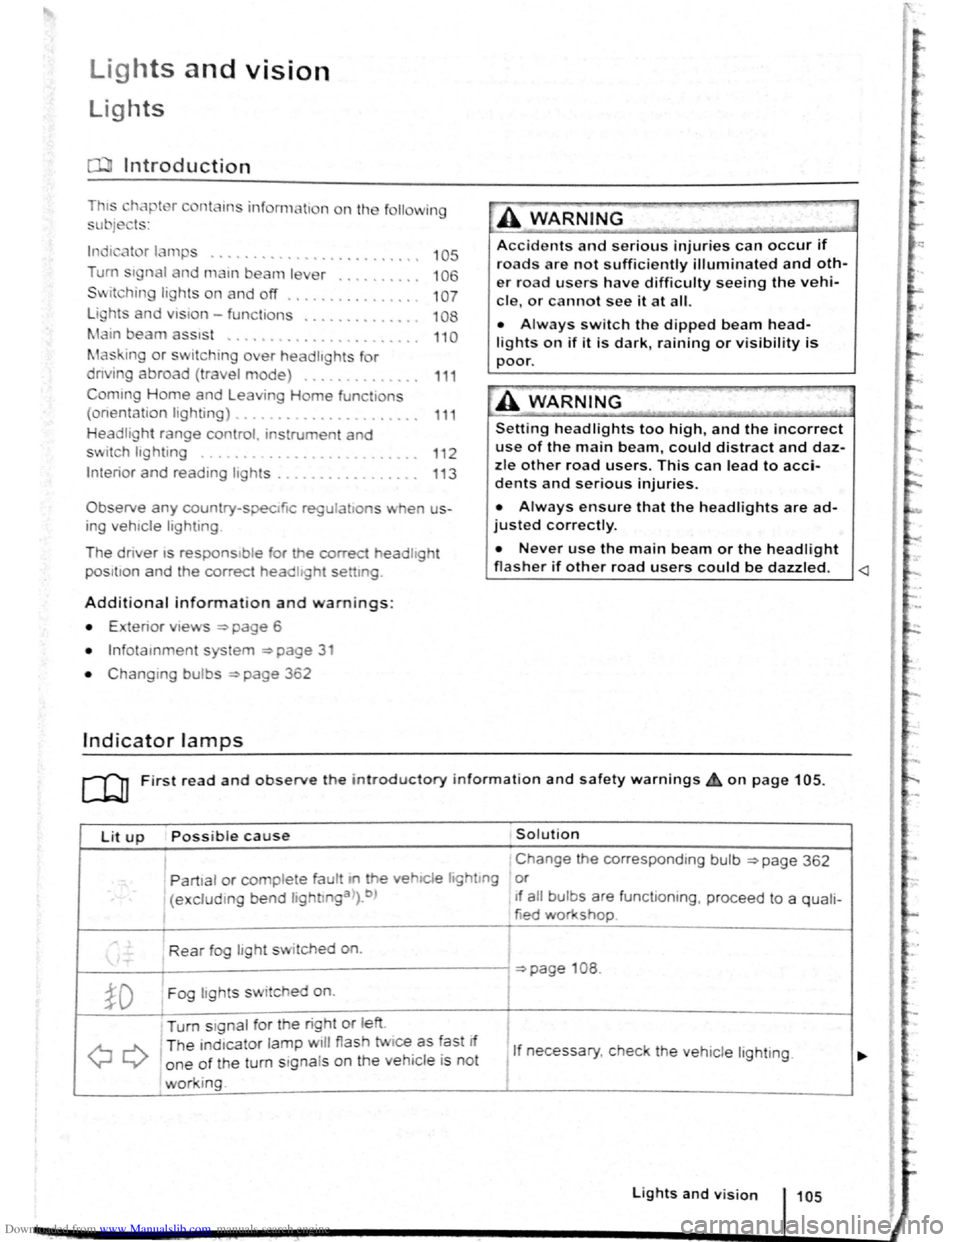
Lit up Possi ble cause Solution
I Change the corresponding bulb ~page 362
' Partial or complete fau tt m he vehiCle hghtmg or
(excluding bend lightlnga>).b ) If a ll bulbs are functioning , proceed to a quali-
tied workshop
Rear fog light switched on.
~page 108 .
~D Fog lights sw itched on. I
Turn stgnal for the right or left i
I
QQ
T he ind1cator lamp will flash twice as fast If
1 If necessary, c heck the vehicle lighting. o ne of the turn signals on the vehicl e is not
working. I
Lights and v is ion 105
Page 62 of 138
Downloaded from www.Manualslib.com manuals search engine f!l In cool or damp wea her, the mtenor of the
L!J headltgh s. rear lights and turn stgnals may
m1st up bm.:fly Thts 1s normal and does not affect
the serv•ce life of the hghts on your vehicle
l'('n First read and observo the Introductory
L-..kJ.J Information and safety warnings.&. on
page 105 .
Main beam assist (Light Assist)
W•thtn the limit s of th e sy s te m , th e main b eam as
sis t au t
omatically swi tc h es the main bea m on at
speeds o f o ve r approxim ate ly 60 km/h (3 7 m ph) ,
depending on environm ent al a nd traffic condttions,
and swi tc hes it off again at spee ds und er appr oxi
mately 30 km /h (18 mph) ~&.The fun ction is
controlled by a came ra lo ca te d nea r the int erior
mirro r.
Main beam ass is t n ormall y recog nises illumin ate d
areas such as to wn s and deac tivates
the main
beam while driving throug h th em .
Automatic main beam assist (Dynamic Light
Assist)
W ithin the limits of the sys tem , the aut omatic main
beam assist (Dynamic Light A ssist) ca n minimi se
or even prevent dazzling of other road use rs ~ &.
The system detects other road users and their dis
tan ce from your vehic le and covers part o f th e
he adlights appropriately .
If dazz ling other road u
so rs canno t be
pre vented , th e ligh t dtstnbution rs
automa ticall y se t to d1pped beam headlights . The
func tion is controlled by a camera located on the
in side of th e wind screen above the mterior m~rror
The automatic m am beam assist automati cally
s w it c hes the main beam on at speeds
of more than
approximately 60 km /h (37 m ph) and off again at
speeds under approxima te ly 30 km /h (18 mph ) de
pending on whether there a re vehicles ahead.
wh eth er t here is oncoming traffic, and also on
oth
e r g eneral factors and traffic conditions .
Th e
automat1c main beam assist does no t work
w hen
travel mode is ac tt v ated ~page 111.
If the dynamt c bend llgh ttng is deac tivate d
~page 109 , or t he headltgh t switc h -ove r is acti va
t ed
~page 111, the f ull beam lights are only
s w it ched on and off automa ttcall y. This occurs i n
r esponse to
the v ehtcles ahead, oncoming traffic
a nd
the road lighting
Aut oma t
1c main beam assist normally dete cts illu
min ate d areas such as to wns and deac tiv a tes the
mai n beam wh ile dnving throug h them .
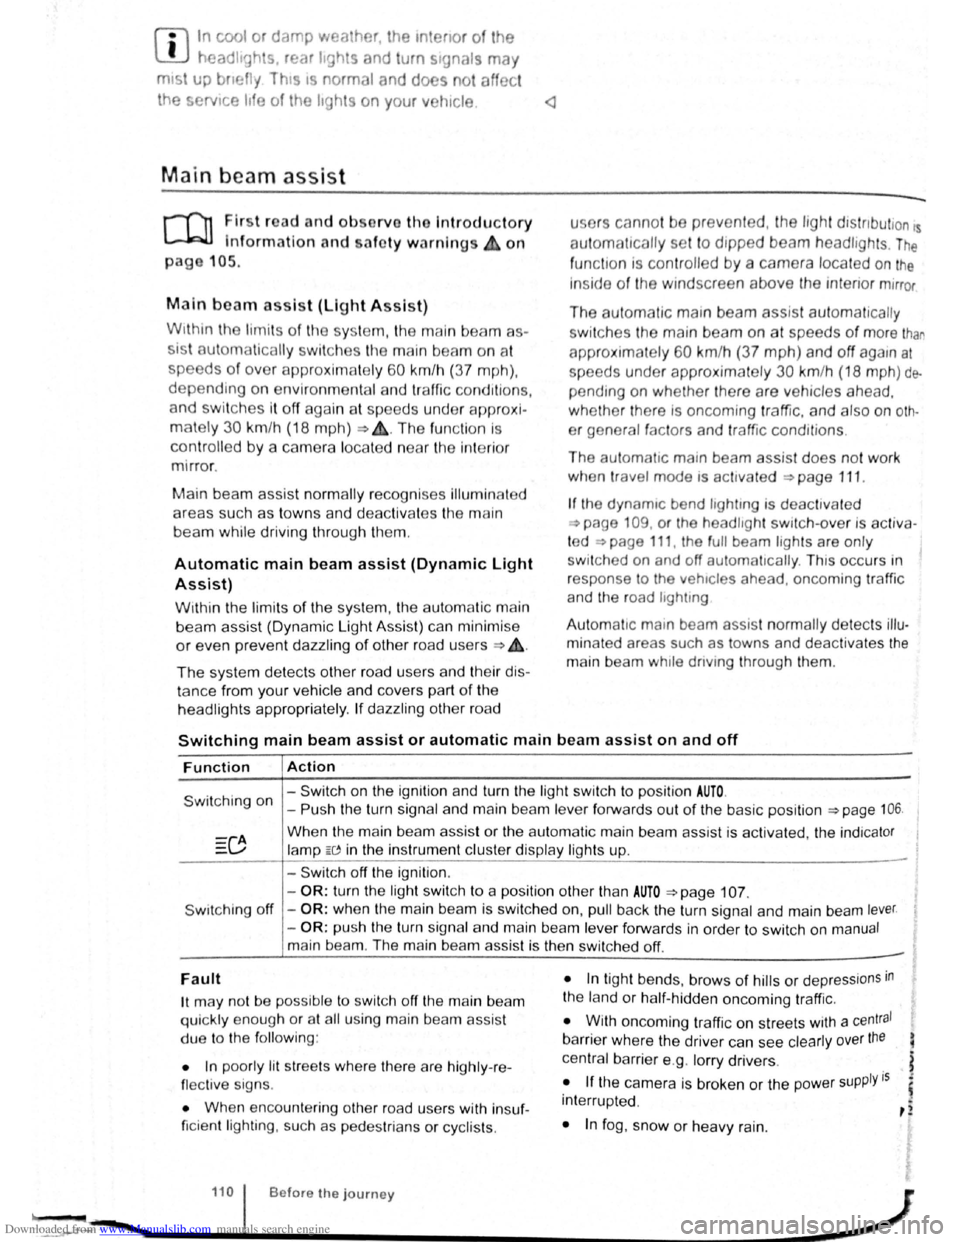
Switching main beam assist or automatic main beam assist on and off
Function Action
- Switch on the ignition and turn the light switch to positio n AUTO.
Switching on -Push the turn signal and main be am le ve r forwards out of the basic position ~page 106.
Wh en the m ain beam assis t or the au tom atic main beam assist is activ ated, the indica tor
la mp W in the instrument clu ste r display ligh ts up .
- Swi tc h off
the ignition .
-
OR : turn the light swit ch to a position other than AUTO ~page 107.
S wit ching off -OR : when the main bea m is swi tc h ed on, pull back the turn signal a nd main beam lever.
- OR : push the turn signa l and main beam le ver forwards in order to switch on manual
main bea m. The main beam assist is then switched off. -
Fault
1t may not be pos sibl e to switch off the main beam
qui ckly e nou gh or at all using main bea m assist
due to
the follo win g:
• In poo rly lit
str ee ts whe re the re are highly -re
flec tiv e sig ns.
• Wh en enco unt ering other road u sers with insuf
ficie nt lighting , su ch as p ed es trian s or cyc lis ts .
• In tigh t bends, brows of hills or dep ressions in
the land or h alf-h idde n oncomi ng traffic.
• W ith oncoming traff ic on str eets with a central
barrier where the driver can see clearly over the
central barrier e .g . lo rry drivers .
• If the came ra is broken or the pow er supply is
interrupt ed .
• In fog , sno w or hea vy rain.
... ~.==~~~~~~------1•1•0.i .. B .. ef•o •re .. th •e• j•o •u •rn•e•y._ .................. __________________ .............. ~ -.,
Page 69 of 138

Downloaded from www.Manualslib.com manuals search engine -~
....,
m
.u \ 1n j w v ip r 1 switched on auto
.1t1 ',111 if the front -.. ind creen wipers are
<::' t ' ' r ~ rse gear i eng ged.
m The automatic switch-on function when in. re
W verse gear can be switched on and off us1ng
the@] button and the G and (Mirror and wipers ) func
tion buttons in the infotainment system ~page 31.
ro Fi tread and observe the introductory information and safety warnings & on page 117.
iper response in various situat ions:
\.._e t e e d~ sat na•y
Healed a her jet
Headlight
hen sw1tched on , the wipers will temporarily be switched to the
ext setting down.
T e C hmatromc w1ll sw1tch to air recirculation mode for approxits ru -n a e l 30 seconds to prevent the smell of the windscreen wash-
a s t
er utd from entering the vehicle interior.
T e
rper in tervals are adjusted depending on the vehicle
speed. The faster the vehicle is travelling, the shorter the inter
a!
nses on
ward s the steering wheel when the dipped beam
headlights or main beam are switched on. Clean
off stubborn dirt (msects, etc.) from the headl ights
at regular intervals, for instance when filling the
tank .
In winter, you should remove any snow from the
headligh t w as her nozzles in the
bumper to keep
the headligh t washer system in work ing order. Re
move any ice with a de-icer spray.
r:l The w1per will try to wipe away any obstacles
L!J that are on the wind screen . The w 1per will
sop moving 1f the obstacle blocks its path . Re-
mo e the obstacle and swttch the wiper back on
agam
Service position for the front windscreen wipers
F ig . 88
2 -!.
r-T'n ~lr t rea~ and observe the introductory
L-Jr:J.J mformat1on and safety warnings on
page 117 .
Tt>e .vtndscreen Wlper arms can be h fted off the
ndsaeen when 10 the serv1ce pos1t1on ~ Ftg. 88.
Carry out e followtng s eps to move the w rnd
screen w1pers
t o the servtce pos1t1on
• The bonnet must be closed ~page 277.
• Swrtch the 1gntlton on and then off aga
1n
•
B ne y press down the wtndsc reen w1per le er
~F1g. 86 @.
Lights and vision 119
I 3£
Page 76 of 138
Downloaded from www.Manualslib.com manuals search engine Sele1:• r
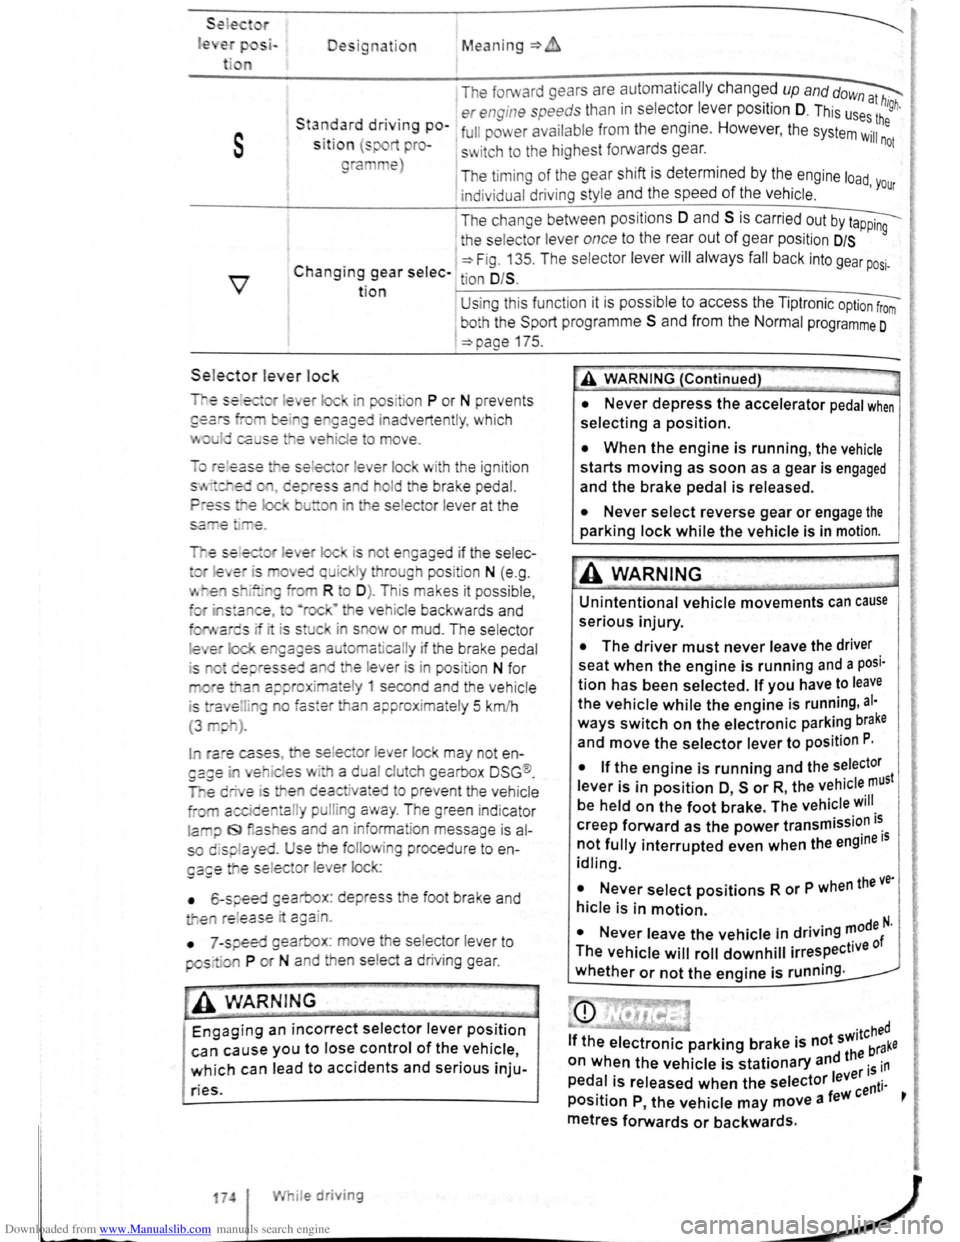
le Designation Mean ing=>
1 The forward gears are automa tic ally changed up and dow~
. . er engine speeds than in s electo: leve r position D. This us~:! high.
s
Sta~~ard dnvtng po-1 full pm er ava ilabl e from the eng1ne. However , the system Wil:he
S lt lo n (s pro-s~ itch to the highest forwards gear. not
ra e)
The timi ng of the gear shift is determined by the engine load
indivi dual driving style and the speed of the vehicle . 'Your
I T he change between positions 0 and S is carried out by t~
1 the selecto r lever once to the rear out of gear pos it ion D/S 9
C . 1 ~Fig. 13 5. T he se lec tor lever will alwa ys fall back into gear po .
h angtng gear selec- tion O/S . SI·
t ion U sing thi s funct ion it is possible to access the Tipt ronic option from
I
bo h the Spo rt programm e S and from the Normal programme 0
=>page 175.
Sele.ctor le ver lock
is ot e gaged if the selec-
I ra e cases , e se lec or lever lock may not en
es · a d al clu eh gearbox DSG ®.
e deactiva•ed to preve nt the vehicle
a l pulli g a ay . The green ind icator
la iJ f9 as es a d an inform ation message is al
so displa yed. Use the folio ing procedu re to en
ga£e e se lec or l e er lock:
• 6-speed gearbox: depress the foot brake and
e re l
ease · c:gain.
•
7 -speed gearbox : move he se lector lever to
pos· ·a P or N and en se lect a driv ing gear .
-• ·----
A WARNIN G
Engaging an incorrect selector lever position
can cause you to lose control of the vehicle,
which can lead to accidents and serious inju-
ries.
174 I While driving
A WARNING (Continued)
• Never depress the accelerator pedal when
selecting a position.
• When the engine is running, the vehicle
starts moving as soon as a gear is engaged
and the brake pedal is released.
• Never select reverse gear or engage the
parking lock while the vehicle is in motion.
A WARNING
Unintentional vehicle movements can cause
serious injury.
• The driver must never leave the driver
seat when the engine is running and a posi·
tion has been selected. If you have to leave
the vehicle while the engine is running , al·
ways switch on the electronic parking brake
and move the selector lever to position P.
I
• If the engine is running and the selector
lever is in position O, s or R, the vehicle must
be held on the foot brake. The vehicle will
creep forward as the power transmission i~
not fully interrupted even when the engine IS
idling.
• Never select positions R or P when the ve·
hicle is in motion.
N I . . d . . ..,0de N. • ever eave the vehicle m nv.ng '" f
The vehicle will roll downhill irrespective 0
whether or not the engine is running .
Page 79 of 138

Downloaded from www.Manualslib.com manuals search engine • Please note that the driven wheels can
\start to spin and the vehicle can skid If the
lCS i w1tched off, especially If the road Is
slippery.
•
Switch the TCS back on after acceleration.
attempt to stop it from rolling back by depress·
lng the accelerator while a position is still se
lected. The automatic gearbox could overheat
and be damage d .
• Never allow the vehicle to roll In posi tion N ,
particularly If the Ignition is s w itched off. The
automatic gearbox w ill not be lubricated and
could be damaged .
r-'('n F irst read and observe the introductory
L-Wl Information and safety warnings .&. on
page 169 .
Emergency programme
There is a fault in the system if all the displays on
the mstrument clu ste r for the se lector le ve r posi
tions have a light background. The automatic gear
box is running in an emergency programme. The
vehicle can still be driven in the eme rg ency pro
gramme, but only at reduced speed and not in all
gear s.
In vehicles with a dual clutch gearbox DSG®, y o u
may
no longer be able to select reverse gear.
In all cases the automatic gearbox should be
checke d
by a qualified workshop immediately.
Overheating of the dual clutch gearbox
DSG®
The dual clutch gearbox can overheat when th e
vehicle pulls off re
gularly, travels at a crawl for long
penods, or in s
top and go traffic . Gearbox over- .
heating
is i ndi cate d by the w arning lamp 0 and tn
some cases by a text m essage in the instrument
cluste r d1splay . An acoustic warni ng may also be
heard . Stop the ve hi cle and allow th e gea rbox to
cool down
~CD.
The vehicle will not move forwards or
backwards even though a gear has been
selected
If the veh1cle w11l not move in the requi red direc
tio n, the system may have selected the pos1tion m
correctly Depress the bra e pedal and reselect the
pOSitiOn
If th e vehicle st1ll does not move tn the requ1red di
re ction , th ere IS a system fault. Seek expert assis
tance and have the system checked
• If the display indicates that the gearbox is
overheating for the first time, the vehicle will
have to be parked safely or driven faster than
20 km/h (12 mph) .
• If the text message and acoustic warning
are repeated approximately every 10 seconds,
the vehicle must be parked safely immediately
and the engine switched off. Allow the gearbox
to cool down.
•
In order to prevent damage to the gearbox,
you should not drive on unti l the acousti c
warning stops. You should not pull away or
drive the vehicle at very low speeds while the
gearbox is overheated.
' 177
~
l
I
i
t
Page 80 of 138
Downloaded from www.Manualslib.com manuals search engine Gear-change indicator
B~K-O~Y8
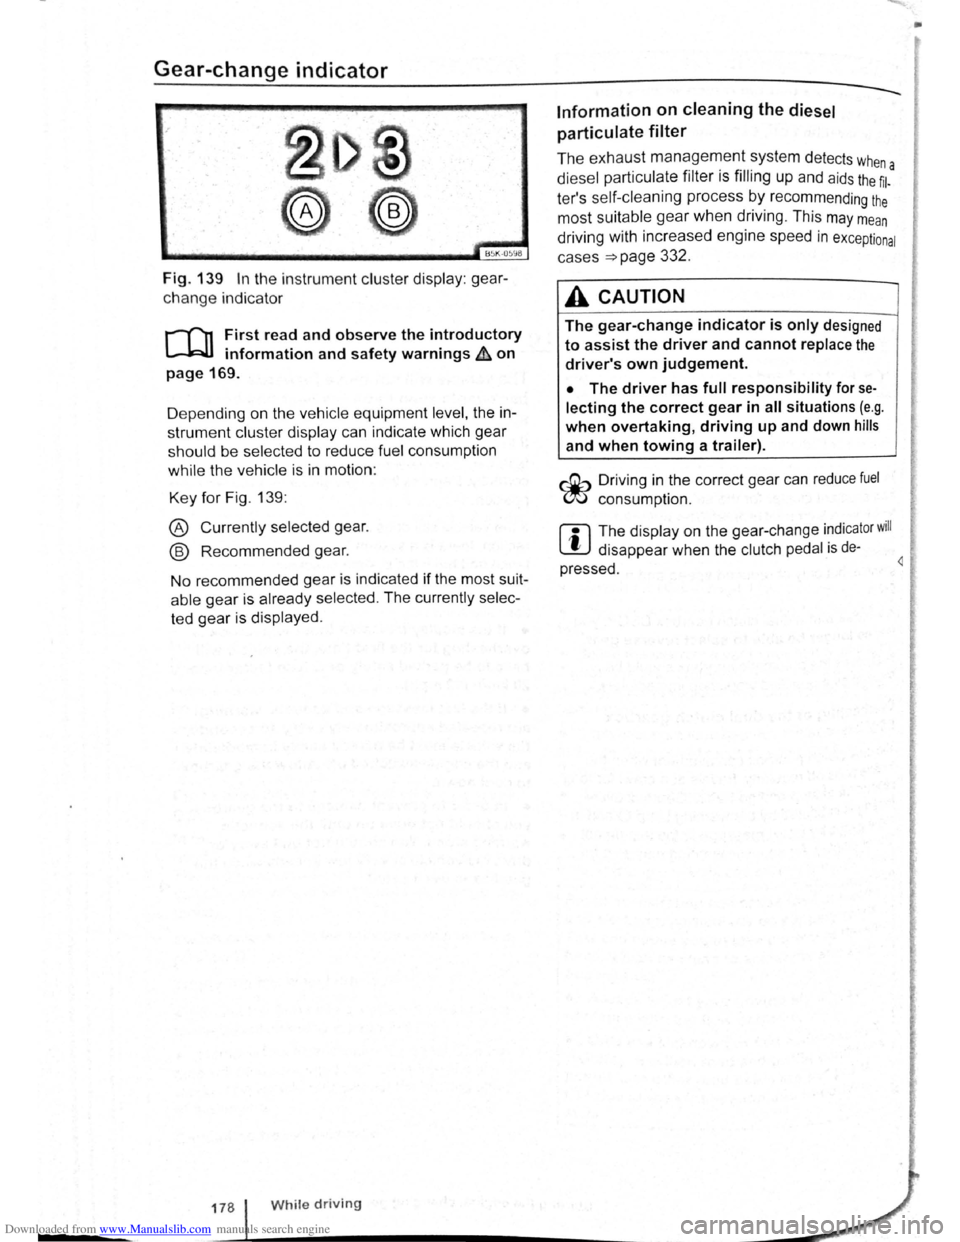
Fig. 139 In the instrument cluster display: gear
change indicator
r-T'n First read and observe the introductory
L-.WI information and safety warnings ~ on
page 169.
D epending on the vehicle equipment
level, the in
strument cluster display can indicate which gear
should be selected to reduce fuel consumption
while the vehicle is in motion :
Key for Fig. 139:
® Currently selected gear.
@ Recommended gear.
No recommended gear is indicated if the most suit
able gear is already selected . The currently selec
ted gear is displayed .
178 While driving
Information on cleaning the diesel
particulate
filter
The exhaust management system detects whe
diesel particulate filter is filling up and aids the ~l-a
ter's self-cleaning process by recommending the
most suitable gear when driving . This may mean
driving with increased engine speed in exceptional
cases
=>page 332 .
A CAUTION
The gear-change indicator is only designed
to assist the driver and cannot replace the
driver's own judgement.
• The driver has full responsibility for se
lecting the correct gear in all situations (e.g .
when overtaking, driving up and down hills
and when towing a trailer).
r::Gb Driv ing in the correct gear can reduce fuel
W consumpt ion.
m The display on the gear-change indicator will
W disappear when the clutch pedal is de·
pressed . 4
•